• Sign Up! To view all forums and unlock additional cool features

    Welcome to the #1 Fiesta ST Forum and Fiesta ST community dedicated to Fiesta ST owners and enthusiasts. Register for an account, it's free and it's easy, so don't hesitate to join the Fiesta ST Forum today!


WestcoaST Performance blue build

westcoaST

1000 Post Club
Messages
1,157
Likes
290
Location
Corona
#1
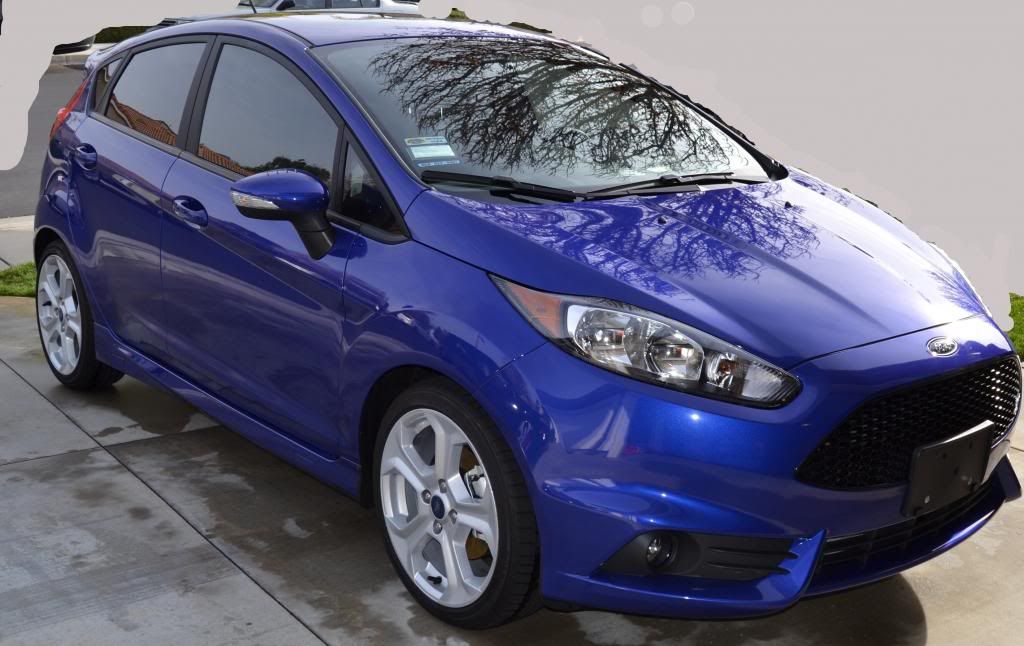
I purchased my performance blue Fiesta ST in February 2014. This is my daily driver, so I need to keep the mods simple in the beginning. I have a 2011 Mustang (3.7 supercharged) that is my race car build, so most of my money is going there. But modding is my favorite hobby, so until my Mustang is done, major mods on the fiesta will be only stage 3 power nods.

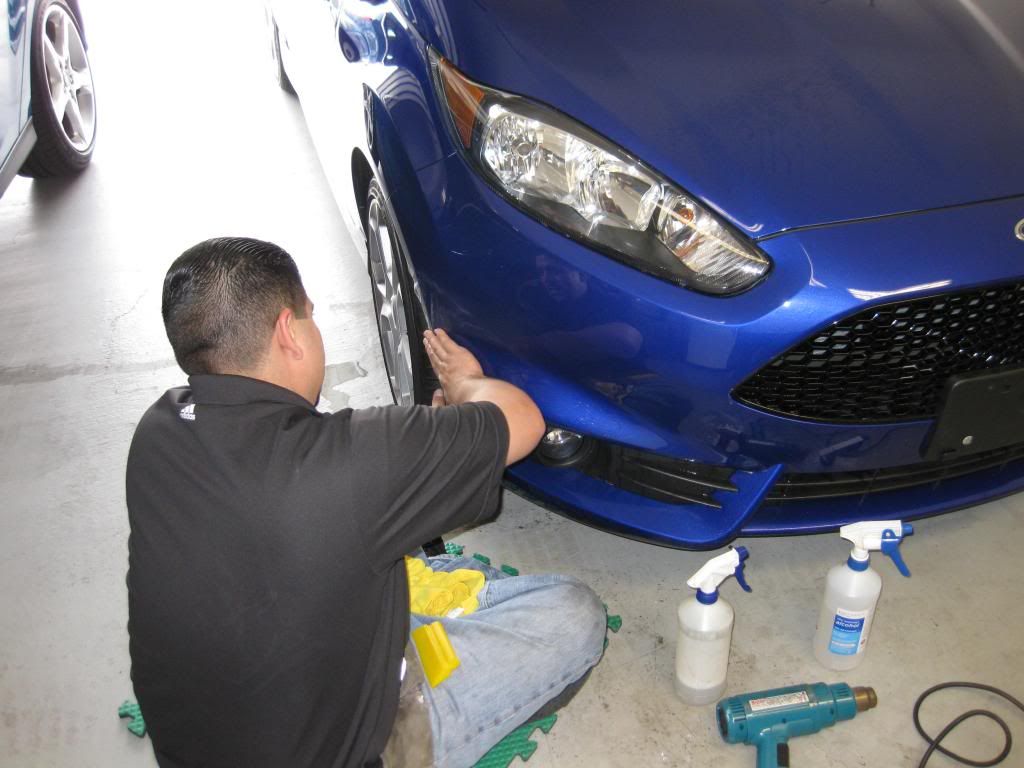
I live in So Cal (Riverside) and drive 70 miles per day so exterior mods were my first mods. I had my front end covered in 3M clear bra and my windows tinted, also 3M ceramic.

Ended up having to remove and replace the film once.


Legal tint (sorta)
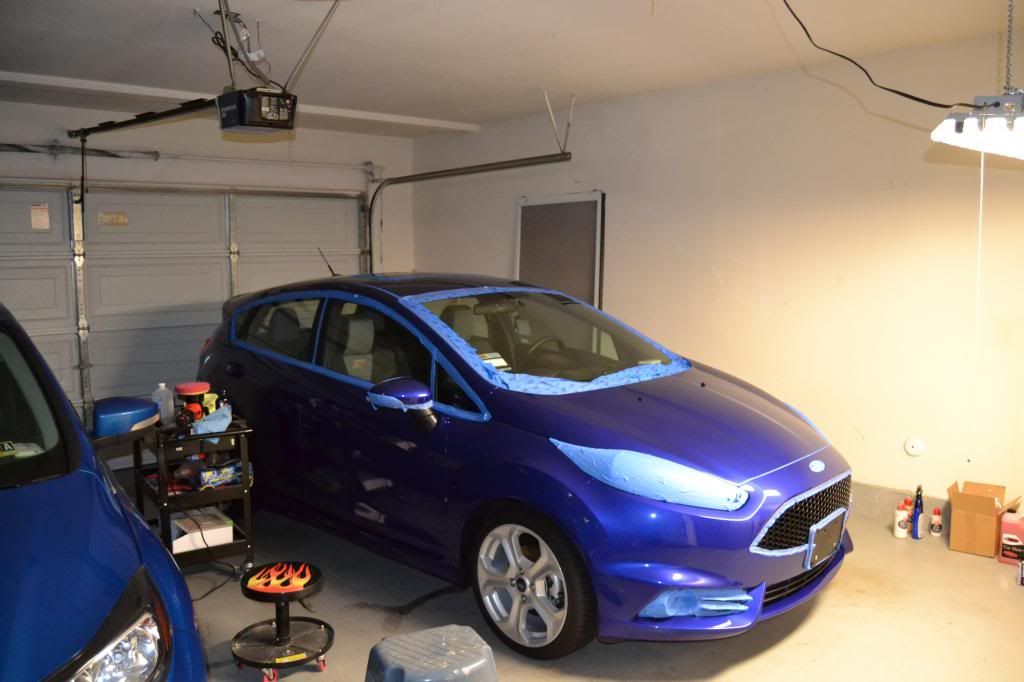
Next steps were to remove all of the scratches everone, including the dealer, added to the FiST. So I did a complete detail, washed and de-ironed the paint, used a clay bar, then taping everything off, and using wolfgang swirl remover, menzerna powerlock, and then sealing off the paint with Sonax polymer netshield. I used a Girots garage 6" buffer with lakeside pads.


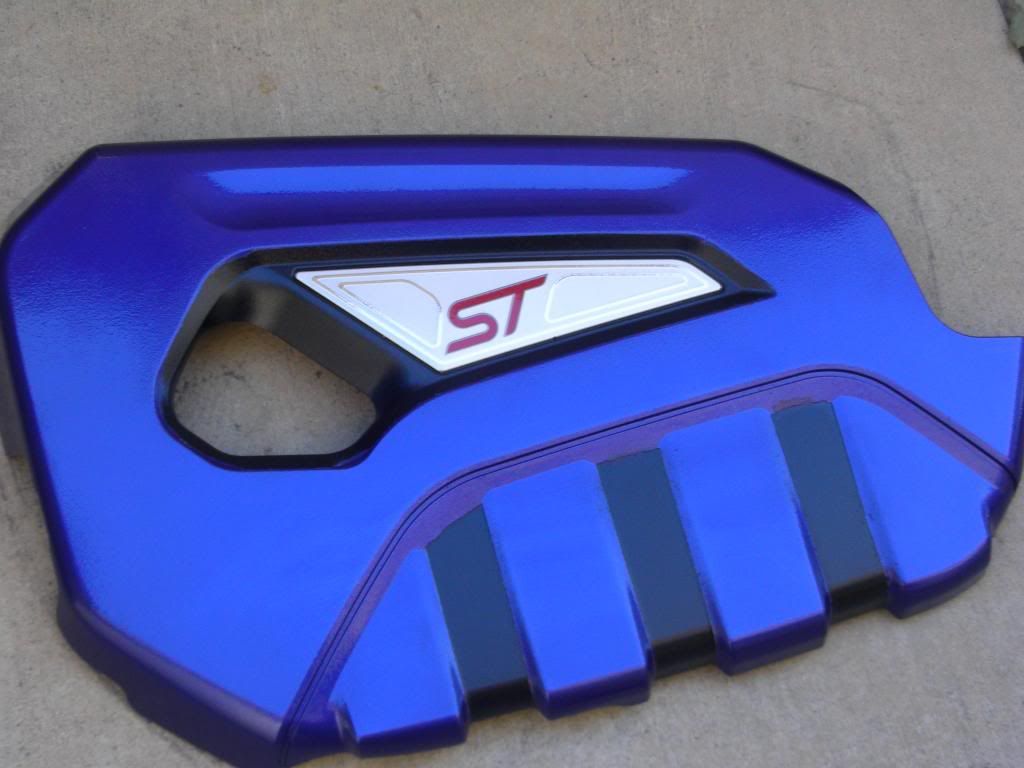
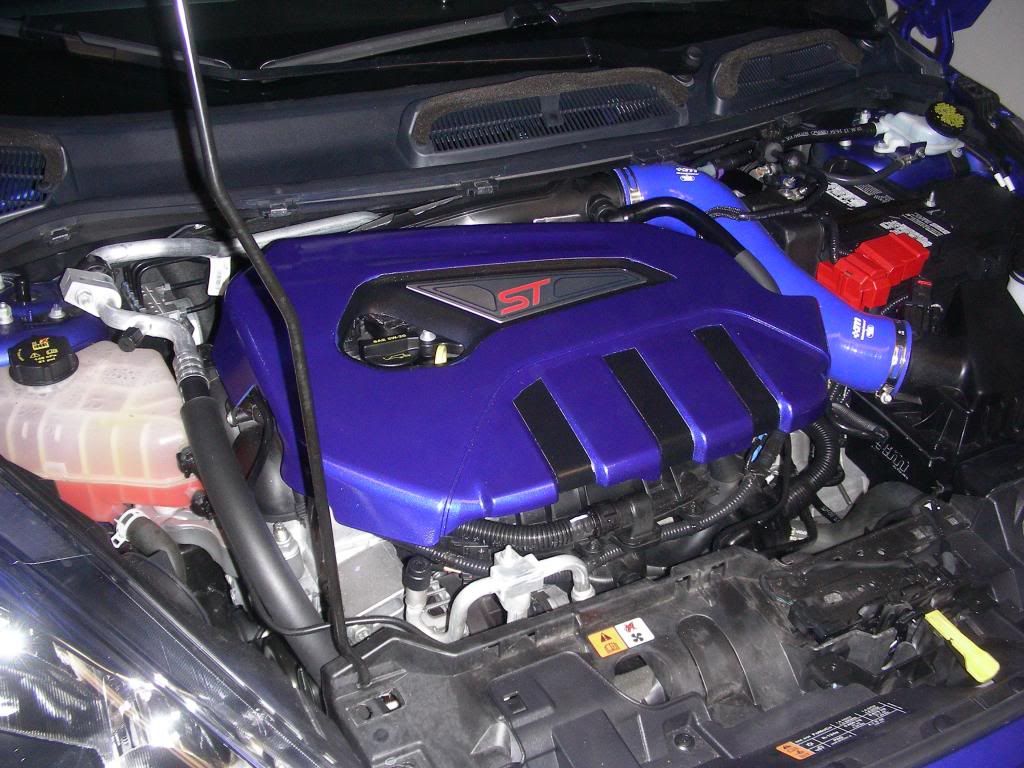
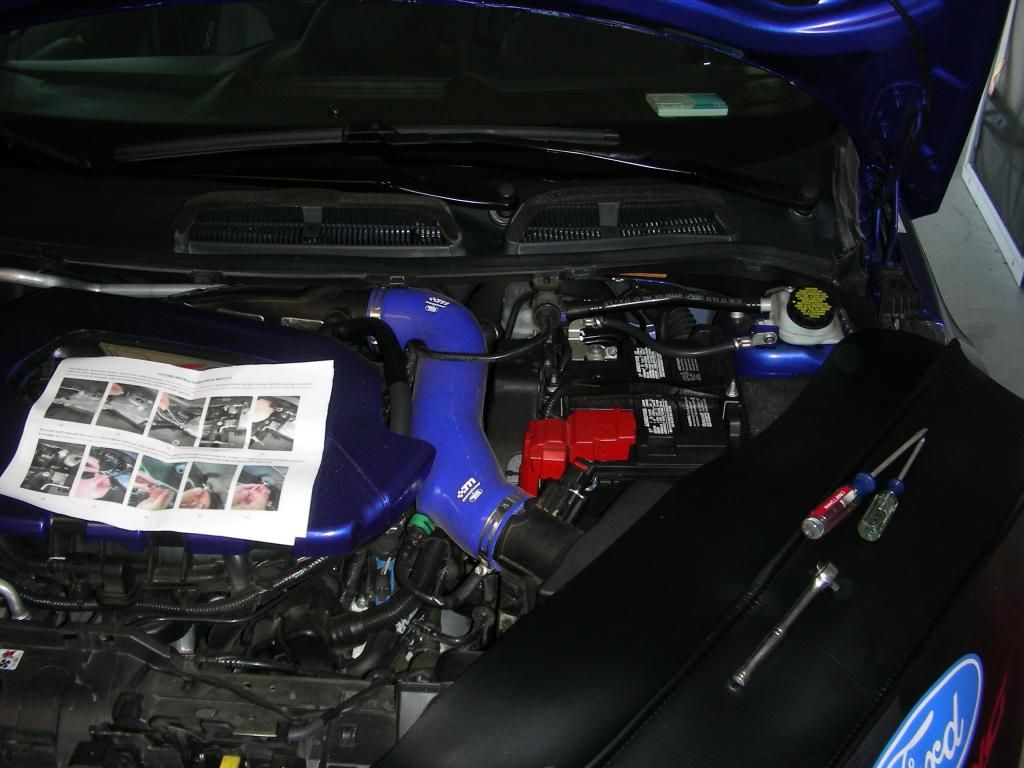
Next up was a mountune intake and a painted engine cover.


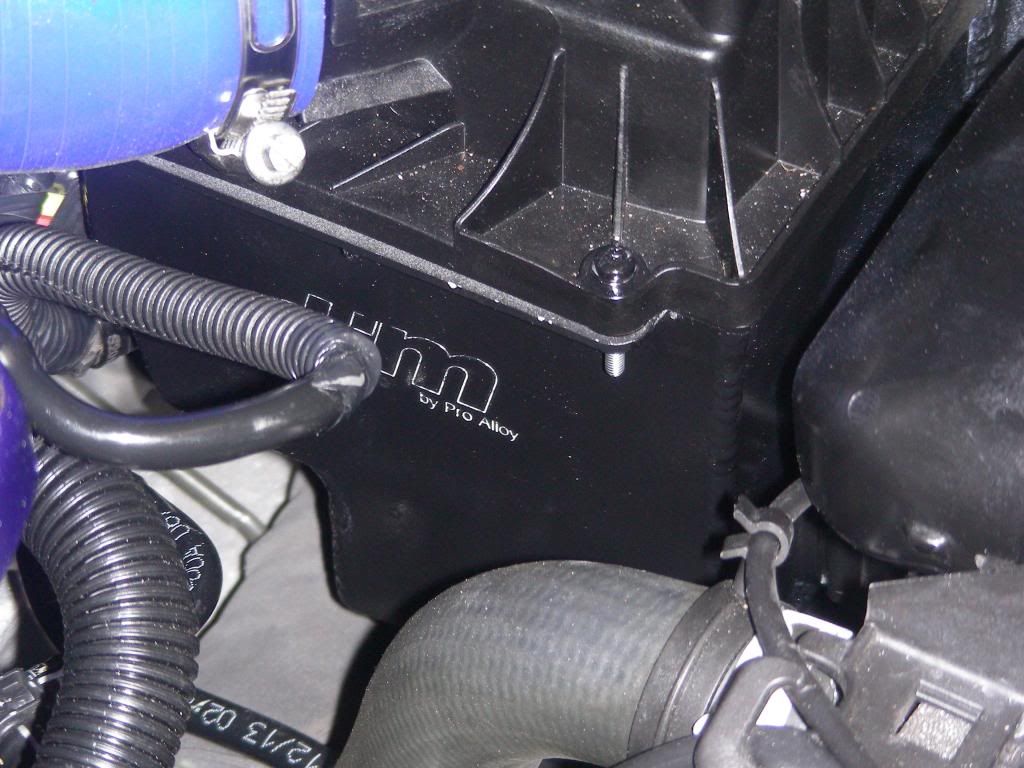
I also added a mountune air box. I painted it black and painted the screws black to match the OEM air box.

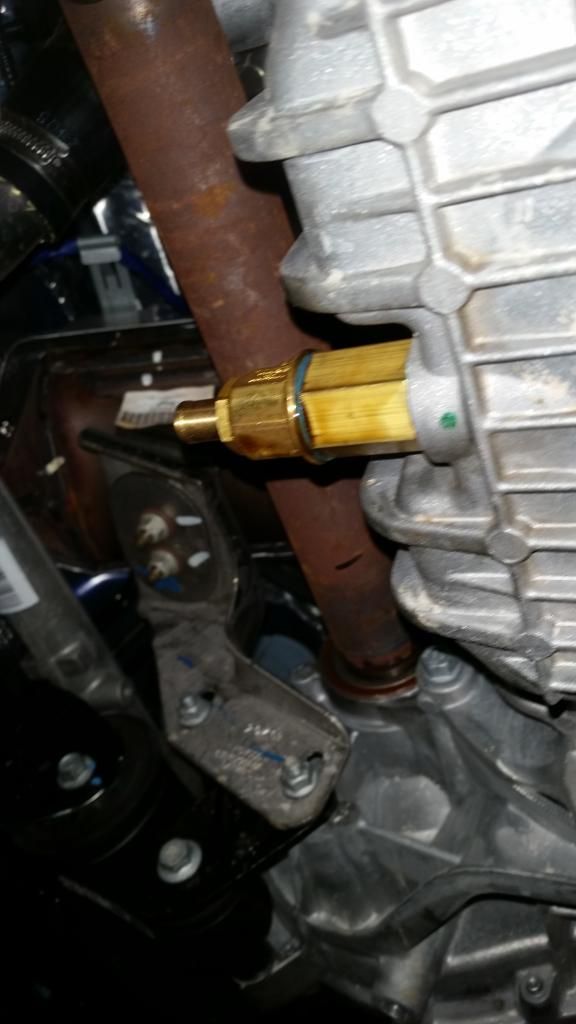
Next up was an oil change qt 1000 miles. That oil filter was welded on. I also replaced the oil change plug with a fumoto valve. F106N is the correct part number.


Once I had another 5000 miles, I changed the oil (Motorcraft semisynth and motorcraft oil filter) and sent some oil to Blackstone labs for an oil analysis.

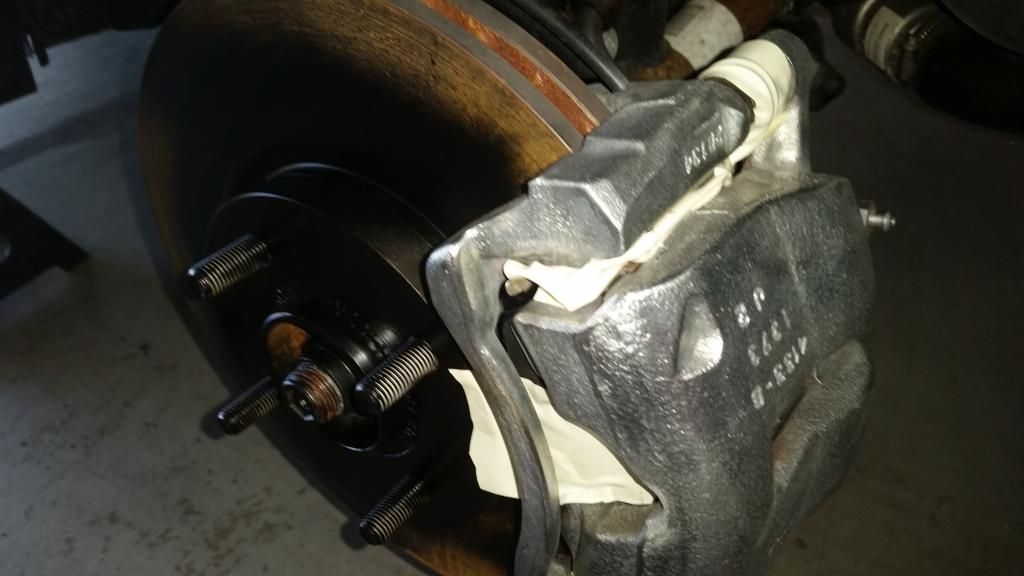
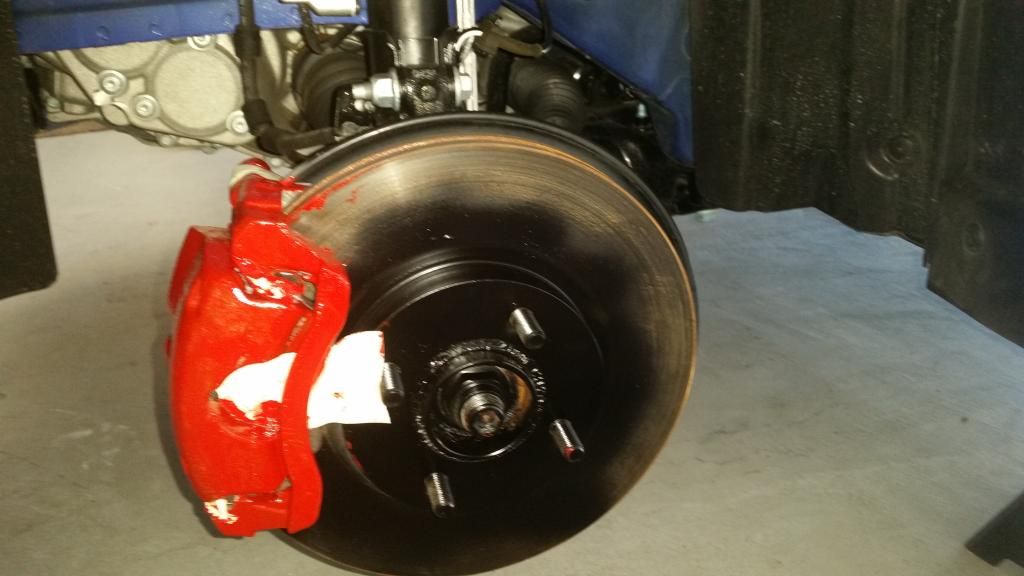
My next mods were painting the brake calipers and disc rotors.


Then I added a mountune short shift kit.


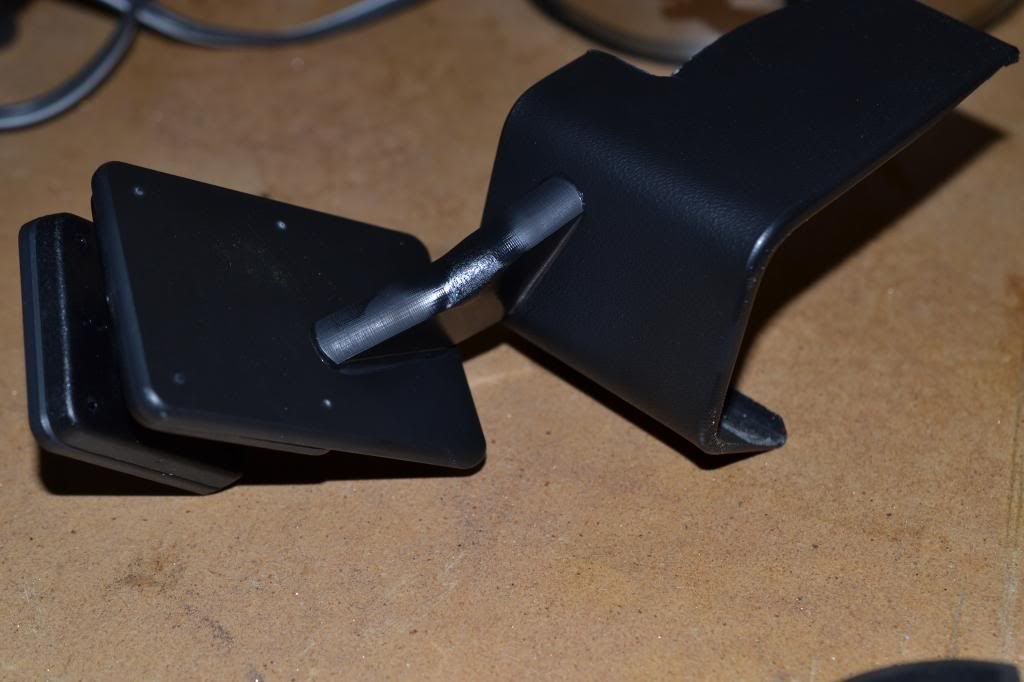
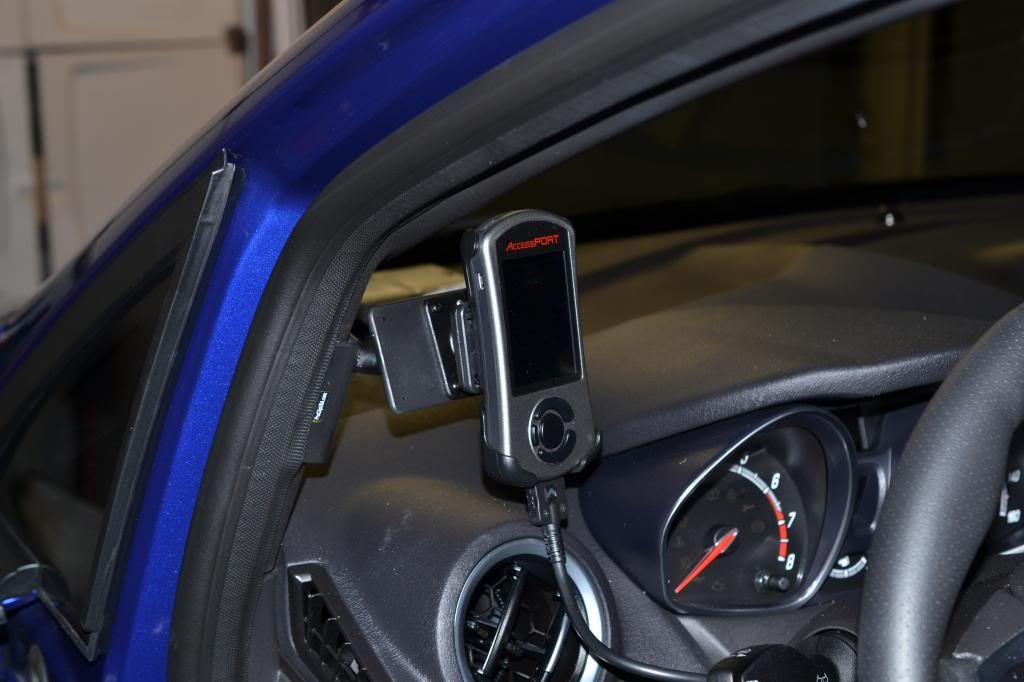
I purchased a Cobb AP so I decided to mod the interior to mod a mount to locate the Cobb AP. I trimmed the mount to move it up on the mini window, then hit it with a butane torch to further bend it up. I also added a OBDII entension cable and hid everything under the dash.


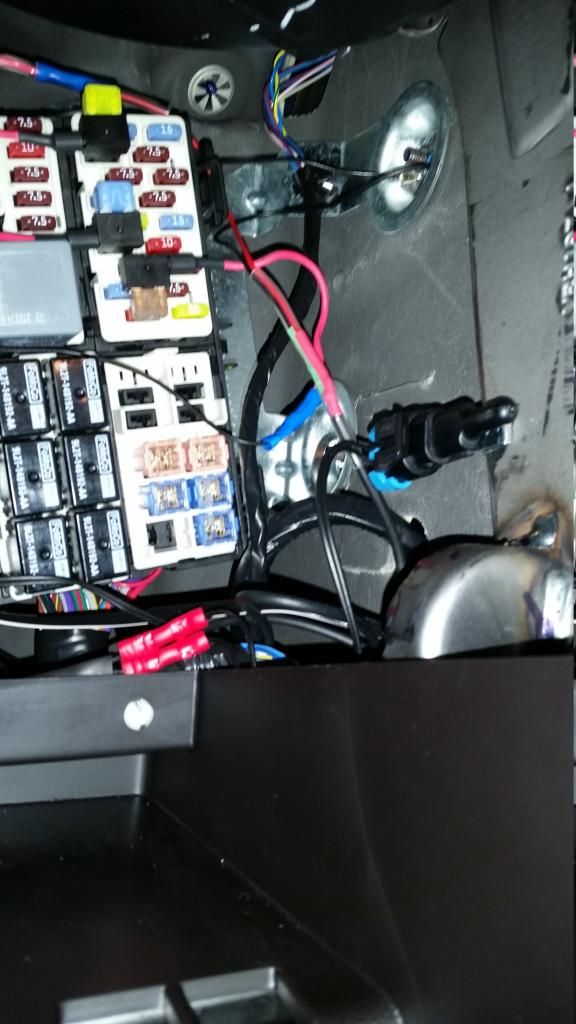
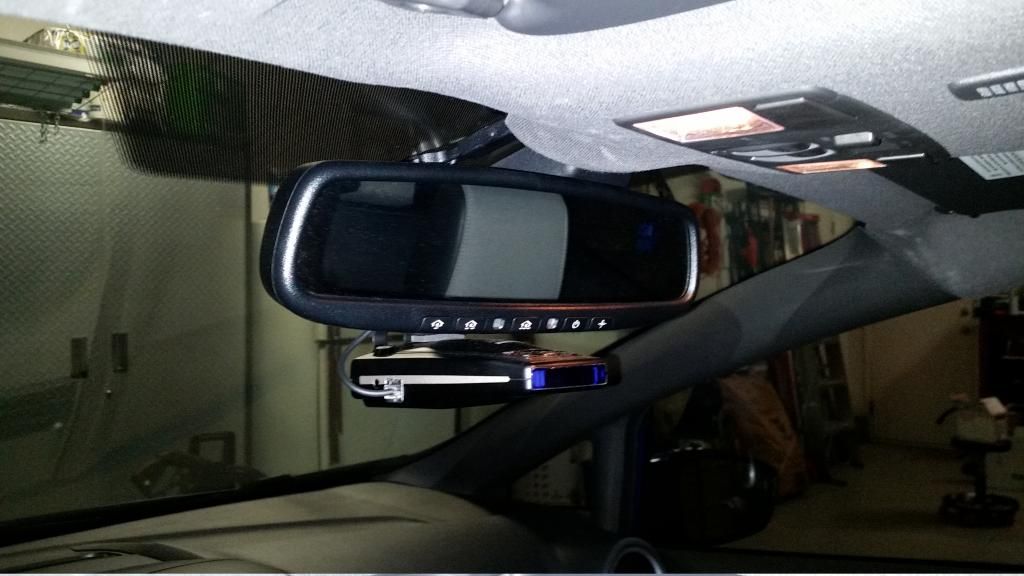
I added a Ford mirror with auto dimming, compass, temperature, and homelink. I also added a blend mount to attach my Escort 9500ix radar detector. I purchased a direct wire kit for the escort from ebay and wired it to the fuse block.


I added dmbgraphics gel labels (red and black) to the steering wheel, front and back hoods. I added an ebay mondeo blue ST badge to the right side


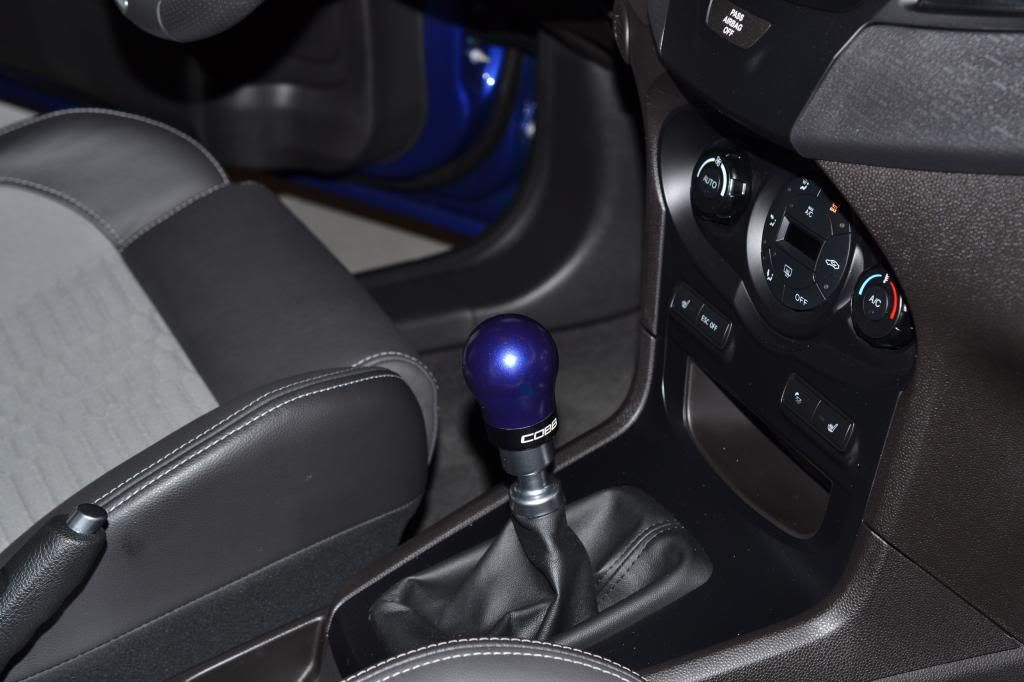
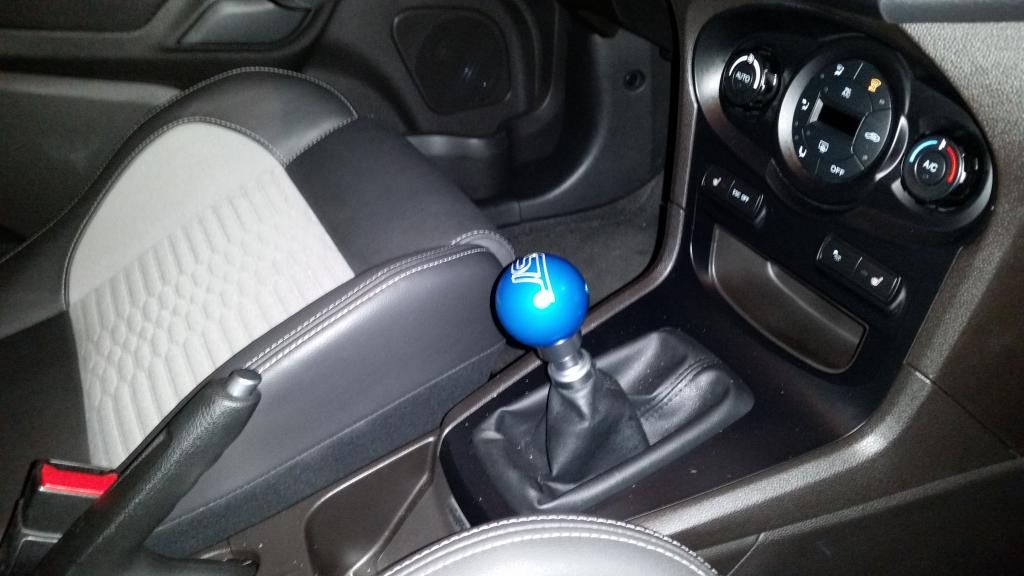
I added two shifter bars, one a Cobb knob that I painted blue. It felt too light, so I went with a Breedt blue ST ball


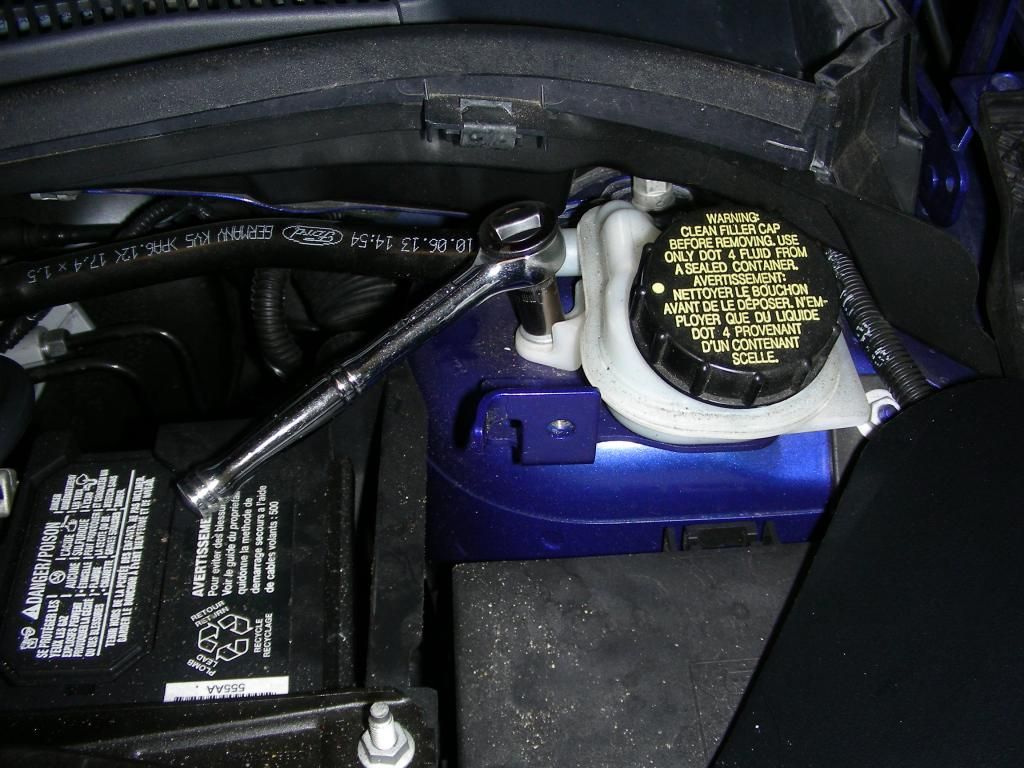
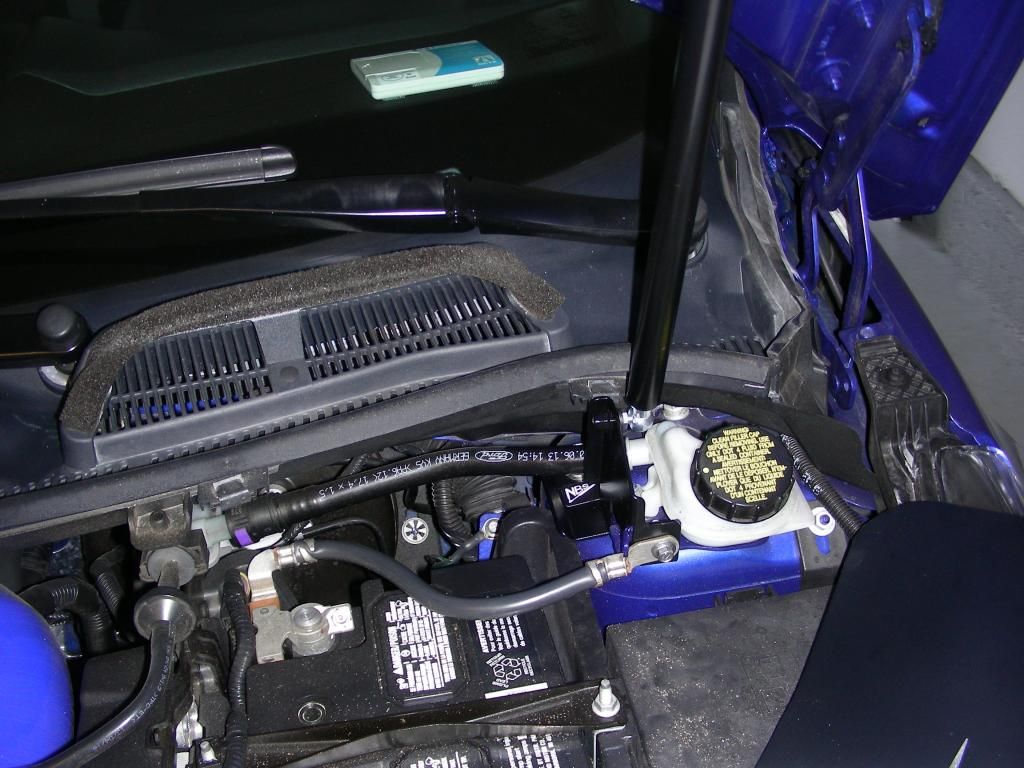
Then I added a hood strut kit today. This was purxhased from SiCo development in UK for $120.00. Its a little pricy, but it works well, and is well made. Instructions have tiny pics, and you need to loosen the remote brake fluid reservoir to get the bracket in, but that is the only additional srep required. Tuck the negative battery cable away until you need to put it back on to prevent sparks.

Ready to install


Remove this bolt to make it easier to install the bracket.


Bottom bracket installed


Installing the clip on the lower part of the gas shock.
[


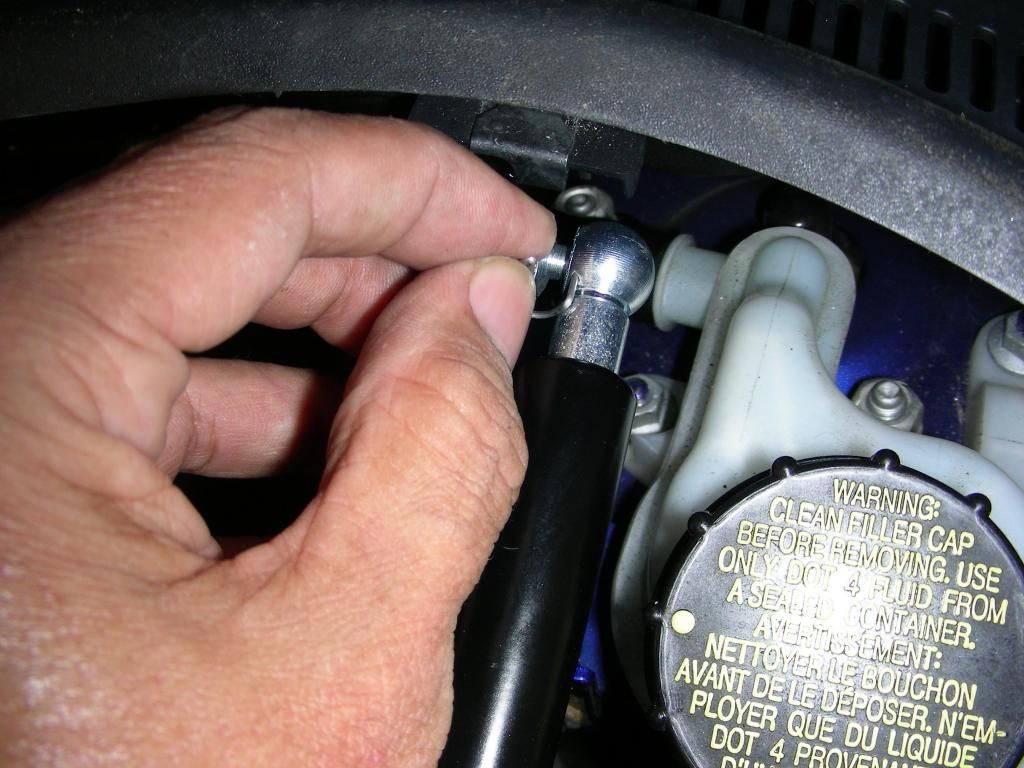
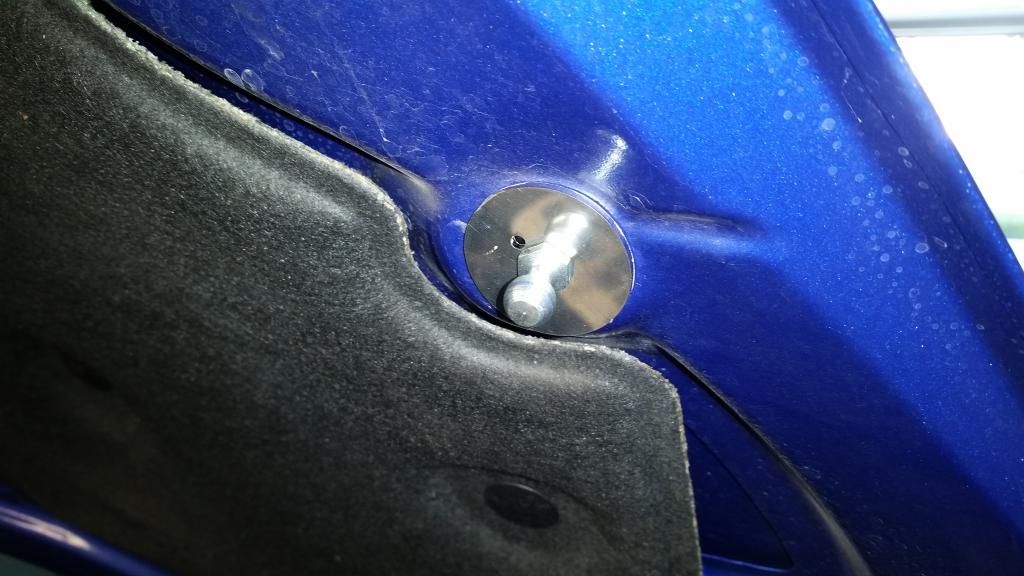
Top mounting point on hood. Uses a split c washer/

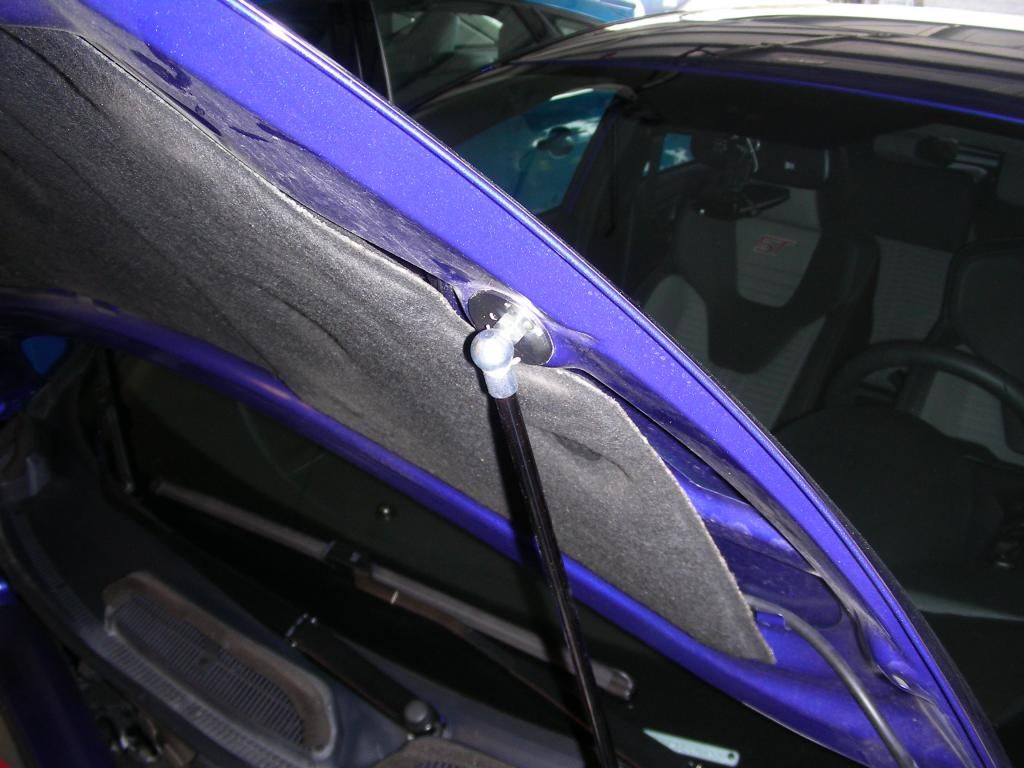
Gas strut installed on top ball.


All done


Next up, Mishimoto catch can with OEM hoses, a Levels intercooler, and either the Cobb exhaust or the Mountune exhaust. Once they're done, I'll add my HID projector headlight homage to the concept Fiesta ST.


OP
W

westcoaST

1000 Post Club
Messages
1,157
Likes
290
Location
Corona
Thread Starter #2
I got the Levels intercooler last night. I decided to paint it black, just in case I want to modify the grille. Here is what the Levels FMIC looks like out of the box.


I decided to use VHT black brake caliper paint to help adhesion and toughness of the paint against chipping.

Here is the IC with a bit of paint on it. I plan on finishing it up tonight.


After getting the Mishimoto oil catch can, I realized that this is about as close to plug and play as possible, without having the kit put together for you.

Here is what I've put together so far:

Mishimoto catch can - This can has all metric fittings, including a 12mm x 1.75 magnetic drain plug.


What this can needs is a real drain plug. Since it is the same size as our oil pan drain plug, I purchased a Fumoto F106N valve.


I also purchased two PCV hoses from Rockauto,


The Mishimoto can comes with a bracket that has a short and long side. If you mount it so that the can is attached to the long side of the bracket, there is a 6mm stud that sticks out of the strut tower that appears to be a perfect fit.


I also got a couple of Oetiker clamps for the ends of the OEM hoses that attach to the catch can nipples.


As luck would have it, I purchased my first can from ebay. It arrived with the sight tube broken on the top. I returned it, and picked up another one from Amazon.


I'll post pics of the assembly and installation sometime this week.

Here are some pics of the oil catch can with the Fumoto valve, and mocked up in the engine. I had to drill another hole in the strut tower. I used a center punch to mark the location for the hole, then a step drill to drill the hole, and then a sheet metal screw to finish out the drilled hole. Paint and installation of the hoses to follow. It looks like I'll need a 5/8 hose-hose barb, since the existing OEM hose is too small for my location, so it looks like I'll have another OEM hose left over.

Pic of Oil Catch can with oil drain valve.


Pic of the oil catch can mocked up in the engine bay.


Pic of the FMIC all painted up, ready for this weekend.


OP
W

westcoaST

1000 Post Club
Messages
1,157
Likes
290
Location
Corona
Thread Starter #3
HID Headlight update

Got some news today on my FMIC. I was missing the joiners, but Levels is sending them on their way. I also got news on my HID retrofit. I posted this separately, but I think it should also go into my build. These are HID projectors being retrofitted by SickHIDS.com.

This is what the headlights look like so far.


Messages
42
Likes
0
Location
Geelong
#4
Geez.. I feel so mechanically under educated lol!

Looks good mate.. I'll be following intently!


OP
W

westcoaST

1000 Post Club
Messages
1,157
Likes
290
Location
Corona
Thread Starter #5
No worries. We all gotta start somewhere. I hope seeing what I've done gives you the confidence to try your hand at modding your FiST. Anything I can do to help, just ask.


Messages
62
Likes
13
Location
Irvine
#7
You didn't mask off the wheel studs when painting? And you got some on the braking surface?

Hmm...


OP
W

westcoaST

1000 Post Club
Messages
1,157
Likes
290
Location
Corona
Thread Starter #11
I've also updated my catch can mod with a sketch showing my latest idea for a mod to the Mishimoto catch can. Here it is.


OP
W

westcoaST

1000 Post Club
Messages
1,157
Likes
290
Location
Corona
Thread Starter #12
I got some of my turbo clamps for my FMIC today, along with the Mountune hose kit. I'm waiting on the rest of the clamps from McKinney.

This is what the turbo clamp looks like next to a T-Bolt clamp


Getting ready to install


What the Mountune hoses look like.


Harvick

1000 Post Club
Messages
1,144
Likes
107
#13
Those hoses are going to look great. Did you ever find out all the t-bolt sizes?


OP
W

westcoaST

1000 Post Club
Messages
1,157
Likes
290
Location
Corona
Thread Starter #14
Those hoses are going to look great. Did you ever find out all the t-bolt sizes?
Yes, I got the info from Randy at mountune. Here are the sizes needed. I also included the O'Reilly part numbers for those that want to order from there.


Actually, the note at the bottom of the list is wrong, you need 4 ADDITIONAL of the 2-1/2" clamps if you have the Levels FMIC. The list is correct, if you buy the Mountune. The Levels FMIC comes with 4 T-Bolt clamps, but I decided to get the Murray constant tension clamps, even though they are more expensive. I found a place called Mckinnycorp.com where all of the smaller hose clamps can be had for reasonable prices. Their website is a little wonky, so you will probably want to call them after you order, to make sure they got your order. I have previously used the T-bolt clamps with the spring in my mustang sc build. They work better than the worm gear OEM clamps, but I decided to go with the Murray clamps because I like the tensioner design. It looks like I'll get even pressure on the hose circumference VS the eliptical shape of a T-Bolt when tightened. These Murray clamps are very pricey, but I figure if I'm paying $400.00 for hoses, I need to protect them from cuts when the clamps relax and then cut into the hoses as i retighten them up to hold boost.

I'm doing this in case I decide to go the stealth turbo route of raamaudio and company. I'm waiting for a Mountune exhaust, but not much longer before I go with Cobb.

I also made a stencil yesterday, using Visio, to use on my Levels FMIC, I'll take pics once its sprayed on the fins.


Harvick

1000 Post Club
Messages
1,144
Likes
107
#15
Thanks for the size and part number. I plan to go with the constant tension ones too since its a pain to access the intercooler hoses if they were to pop off.


OP
W

westcoaST

1000 Post Club
Messages
1,157
Likes
290
Location
Corona
Thread Starter #16
I'm getting all of the rest of the Murray clamps tonight so I can install the FMIC and all of the charge hoses this weekend. In the meantime, I decided to create an ST stencil, so my black Levels intercooler wouldnt look so drab. Here is what I came up with. I took a picture of my rear ST badge. This is a Mondeo ST badge from the UK which is blue instead of red. I imported the photo into Visio, which is a vector graphics program,and traced the badge. Then I printed the stencil out on a sheet of label paper. It has sticky adhesive on the back side. I took an exacto blade and cut out the stencil, then applied it to the intercooler and sprayed white paint. Here are the results.


OP
W

westcoaST

1000 Post Club
Messages
1,157
Likes
290
Location
Corona
Thread Starter #18
I finally got all of the constant tension Murray clamps I needed for my weekend build. I already had the Mountune hoses and the Levels FMIC. I also got a set of yellow H11 lights for my fogs, and a Mondeo blue ST badge for the front clip. Here are my build notes and pics. I used a Rallysport disassembly how-to for a Mountune FMIC. Taking the front clip off and woking underneath, required two jack stands behind the front wheels.


I decided to take the front wheels off so I could get to the clips easier, and later, touch up the red calipers, and do a real good cleaning job on my front wheels.


Getting all of the fasreners off was pretty straightforward. You need a universal joint to take two of the three bolts that hold the front clip to the body.


Once you have the front clip off, the OEM FMIC comes off with a few fasteners, some hose clamps, and lots of tugging. I found that inserting a small phillips head screwdriver between the hose and the ends of the intercooler breaks the seal, and makes everything off easier.


Here is what the OEM FMIC looks like compared to the Levels intercooler.


Next up was removing all of the boost hoses, so I can replace them with the Mountune hoses and Murray clamps.

Turbo side hoses.


Intake side hoses.


The OEM hose that goes up to the intake and the sound symposer needed a long nosed vise grip pliers to lock the clamps in the open condition.


Getting the Mountune IC to intake hoses back in was alot harder than getting the OEMs off. I figured out that in order to get the Mountune hose that fits on the throttle body, to actually fit, I needed to pull the oil filter.


After that, the TB hose and the symposer hoses slipped on much easier.


This is the rest of the hoses that go from the IC to the throttle body.


The hoses from the turbo to the fmic were alot easier, so I did these last.


In order to get the IC to fit flush, I had to push the smaller hose end into the hard line, so that the IC sits flush on the body.


Test fitting the front clip, I noticed that the outside ribs on the IC opening needed to be cut, because the Levels IC didn't fit flush. So I cut them off, the ground them, then painted them. Here is what the ends look like.


What the front clip looks like, installed.


After the front grille is installed.


I topped up the oil, then touched up the calipers with Duplicolor caliper paint, and added yellow H11 lamps for my fogs. I removed the red ST badge, and replaced it with a Blue ST badge, to match the rear. I did a really good cleaning job on the front wheels and then sprayed them with Outlast wheel spray.


Next up, either a Cobb or Mountune exhaust.


OP
W

westcoaST

1000 Post Club
Messages
1,157
Likes
290
Location
Corona
Thread Starter #19
Saved for Accessport logs of before and after FMIC install


Similar threads


Top