• Sign Up! To view all forums and unlock additional cool features

    Welcome to the #1 Fiesta ST Forum and Fiesta ST community dedicated to Fiesta ST owners and enthusiasts. Register for an account, it's free and it's easy, so don't hesitate to join the Fiesta ST Forum today!
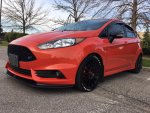
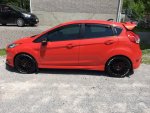
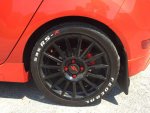

CG's daily fun ride

OP
CanadianGuy

CanadianGuy

4000 Post Club
Messages
4,097
Likes
942
Location
Southern Ontario
Thread Starter #285
June 11th 2017 Hot day meant staying in the shade Tire Lettering

They are not perfect. Will require a few more coats to make it even but I and happy with how they turned out. Used Sharpie oil pen, cleaned the area well with a rubber safe degreaser and alcohol, applied light coats and used a heat gun in between coats.

Monday 19059229_1221197261340212_7492841758885951363_n.jpg
Monday 19113622_1220629694730302_4511181436162334515_n.jpg
Monday 19113651_1220629708063634_2563528275084717897_n.jpg


Messages
289
Likes
123
Location
Calgary
Damn that looks good! Hate to say it but I'm gonna have to steal this idea. The sharpie you used, fine or medium tip? Did you find that the paint bleeds at all?


OP
CanadianGuy

CanadianGuy

4000 Post Club
Messages
4,097
Likes
942
Location
Southern Ontario
Thread Starter #287
Damn that looks good! Hate to say it but I'm gonna have to steal this idea. The sharpie you used, fine or medium tip? Did you find that the paint bleeds at all?
Medium tip. Fine could be used if you want small lines instead of filling an area. Make sure to prime pen on a peice or cardboard or rag not on the tyre. Also for additional coats treat the pen like a paint brush moving the paint without touching the actual surface. There was not much in terms of bleed so as long as the Peter is raised or lowered it work well.


M-Sport fan

9000 Post Club
Messages
14,104
Likes
6,755
Location
Princeton, N.J.
They are not perfect. Will require a few more coats to make it even but I and happy with how they turned out. Used Sharpie oil pen, cleaned the area well with a rubber safe degreaser and alcohol, applied light coats and used a heat gun in between coats.

View attachment 14771
View attachment 14772
View attachment 14773
That looks SHARP!! [thumb]

But my RS-RR's side walls turn brown so quickly (and they've NEVER even had any 'dressing' of ANY sort on them at all since new!), that I must use a brush aggressively on them at washing time, so this lettering would probably get rubbed off. [:(]


OP
CanadianGuy

CanadianGuy

4000 Post Club
Messages
4,097
Likes
942
Location
Southern Ontario
Thread Starter #289
That looks SHARP!! [thumb]

But my RS-RR's side walls turn brown so quickly (and they've NEVER even had any 'dressing' of ANY sort on them at all since new!), that I must use a brush aggressively on them at washing time, so this lettering would probably get rubbed off. [:(]
Possibly if the brown is from the tyre. If the brown is from the brake dust it should be fine. To remove the mistakes I did I needed to remove rubber. Mine have been cleaned for a few months now and tyre shine applied.


OP
CanadianGuy

CanadianGuy

4000 Post Club
Messages
4,097
Likes
942
Location
Southern Ontario
Thread Starter #290
July 1st 2017.

Finally got around to installing some oil monitoring gauges. I had many false starts with this as I wanted the gauges in the small cubby hole. I tried 2" ones but they were too deep. The equus 1 1/2" fit perfectly. I cute the cubby out and installed the bracket from the back with liberal use of JB weld. I replaced the incandescent light with LED back light (much bright and nicer, picture does not do them justice). I fished the hose through the sound symposer tube (pretty easy). The kit have just enough tubing, the water temp sensor was too big for the sandwich plate so I will order their electric version. Don't really need the volt but meh why not. The main goal is to have a true oil temp and pressure monitor, especially in winter. Over all I am happy.

19511517_1239572086169396_1664176287604535835_n.jpg
19598498_1239572079502730_3342414866742578050_n.jpg
19511198_1239572082836063_5470349683177466196_n.jpg
19274830_1239572129502725_4972983372751876583_n.jpg
19511537_1239572126169392_2029160985101718080_n.jpg
19511404_1239578219502116_7935622458928347956_n.jpg


OP
CanadianGuy

CanadianGuy

4000 Post Club
Messages
4,097
Likes
942
Location
Southern Ontario
Thread Starter #296
Nice install! looks really good!

I don't understand the cutout; is there a pocket behind the pocket? (I obviously haven't had my dash apart!)
It's actually two pieces they have hot glued (plastic melted) together at rivet points. I undid the rivets and cut the pocket out to fit the 3 hole bracket from the rear. There is not much more space behind but this made for a very clean look once reassembled.


Similar threads


Top