• Sign Up! To view all forums and unlock additional cool features

    Welcome to the #1 Fiesta ST Forum and Fiesta ST community dedicated to Fiesta ST owners and enthusiasts. Register for an account, it's free and it's easy, so don't hesitate to join the Fiesta ST Forum today!


Aero mods and cooling

OP
S

Siestarider

Senior Member
Messages
988
Likes
292
Location
Stuart
Thread Starter #162
I have been lurking over on Miata forums, they have a bunch of experience with inadequate cooling for tracking, and aero mods to help. First take is that we should be very carefully closing every crack that lets air bypass heat exchangers. I know we have addressed that before, but literally, let no air bypass heat exchangers anywhere is the Spec Miata creed.

Second take is ducting air outlets from heat exhangers is not nearly as well developed in terms of how best to do it. Undertray for sure. Functional hood vents probably required for higher HP. Looking forward to WRC vent testing, I believe Dusty318 and Wimp Lo are both exploring this.


RAAMaudio

5000 Post Club
Messages
5,268
Likes
925
Location
Carson City
Siesta, we are on at least mostly the same page if not more so:)

-----------


If we had the room all my coolers would vent out of the hood, totally sealed, this works incredibly well for cooling and adds significant front end downforce as well as cleans up the air under the car, less flow and less turbulence means added downforce on the whole vehile with less drag.

I am doing what I can but it seems nobody else has addressed some of the things that can help when all added up, it takes some effort but well worth it if you are making serious power and want to run HPDE, TT, etc events, especially in hot weather.

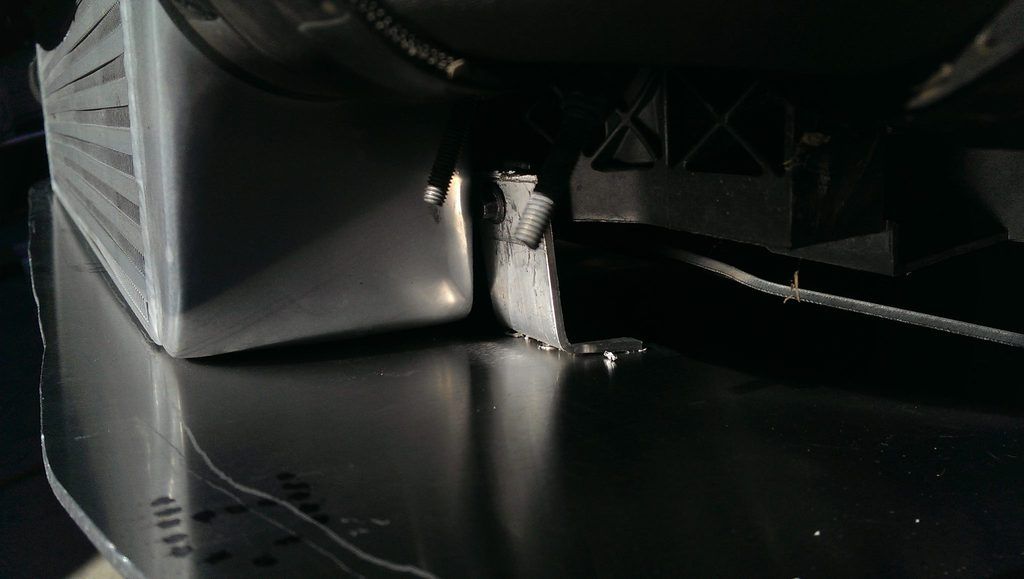
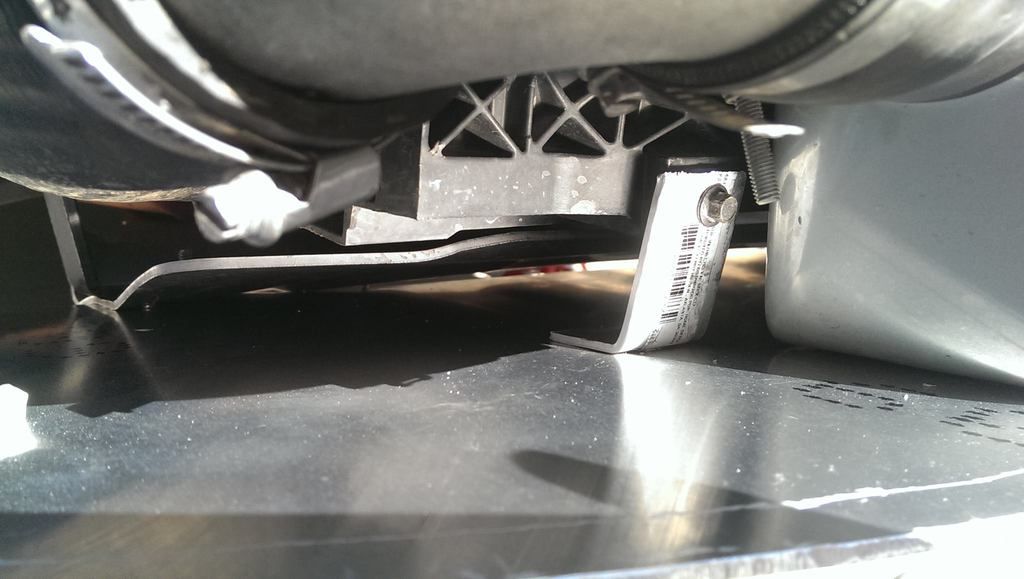
1) radiator support, drilling holes in the bottom between the grids to let more air through the bottom of the IC that is not blocked or forced to go through the other coolers. I also removed some foam in that area and the latest version I cut the whole bottom out and made an aluminum one with barely any air flow restriction.

2) oil cooler location and connectors, mine are on the same side, dual pass Setrab cooler, on hoses or fittings blocking air flow to the other coolers and less oil cooler core covering the front of the coolers.

3) opening up an area on the passenger side of the radiator support so than 1/3rd of the oil cooler air flow goes into the engine bay instead of heating up the other coolers. I need to put in a shield for the alternator and likely going to vents some air from the grill directly to it as well to keep it from burning out from overheating.

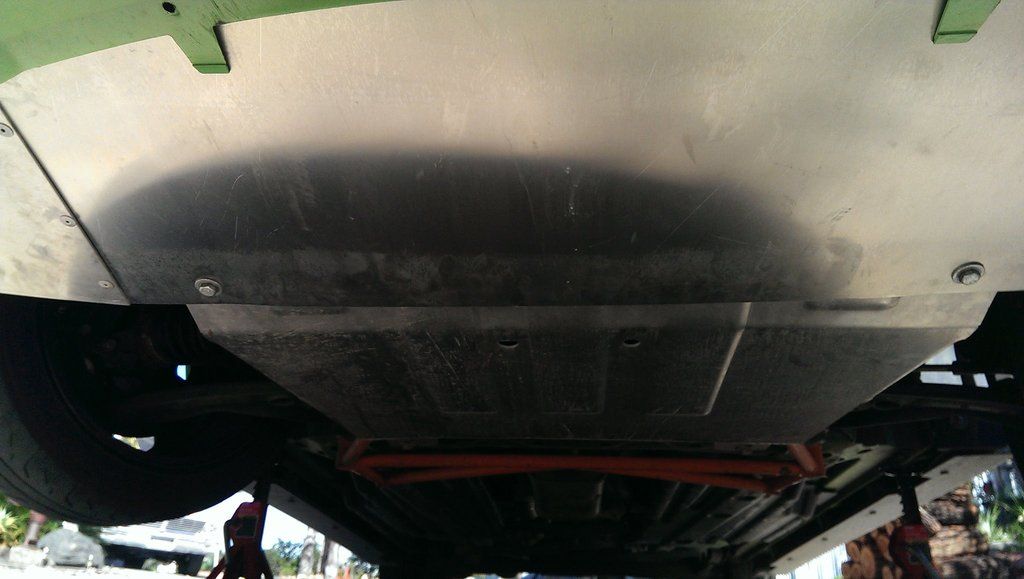
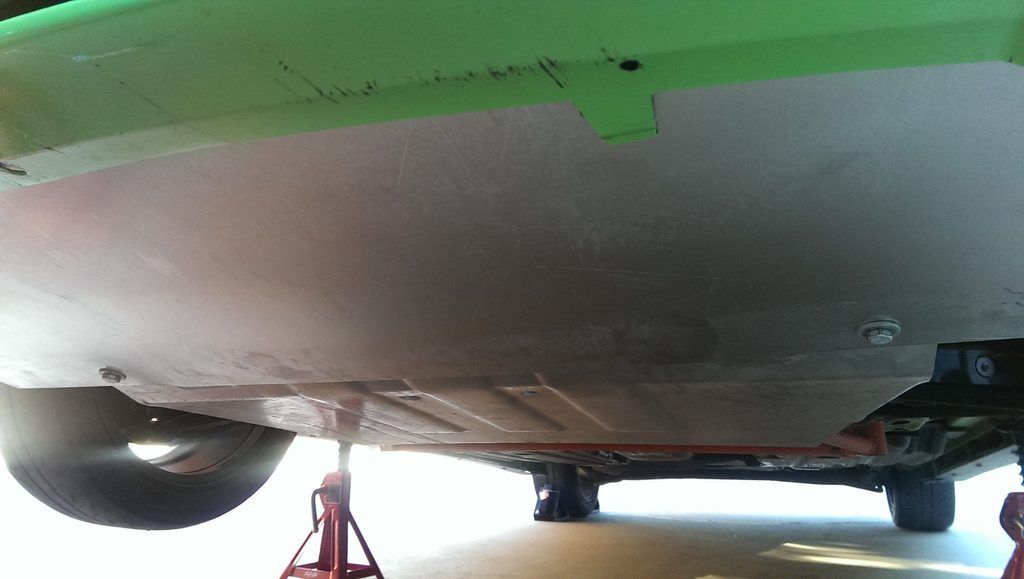
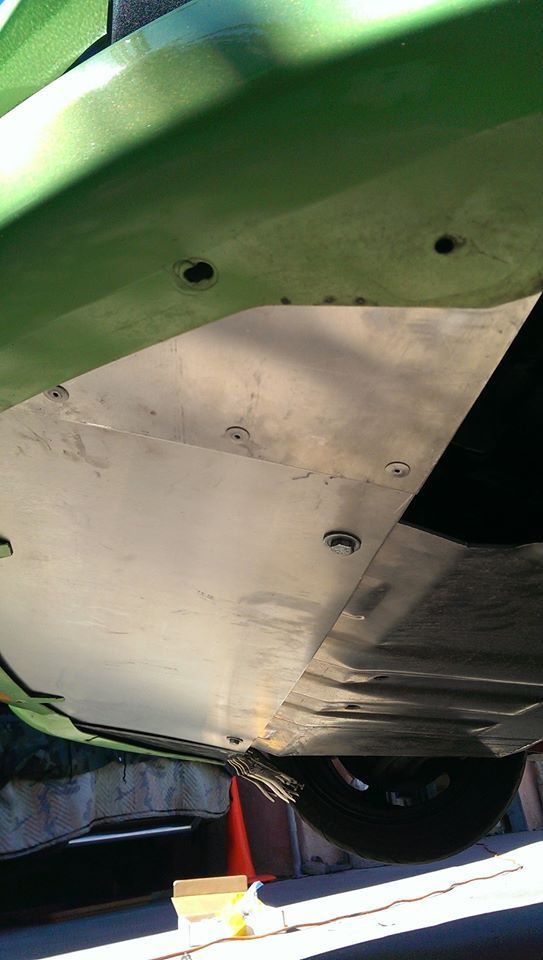
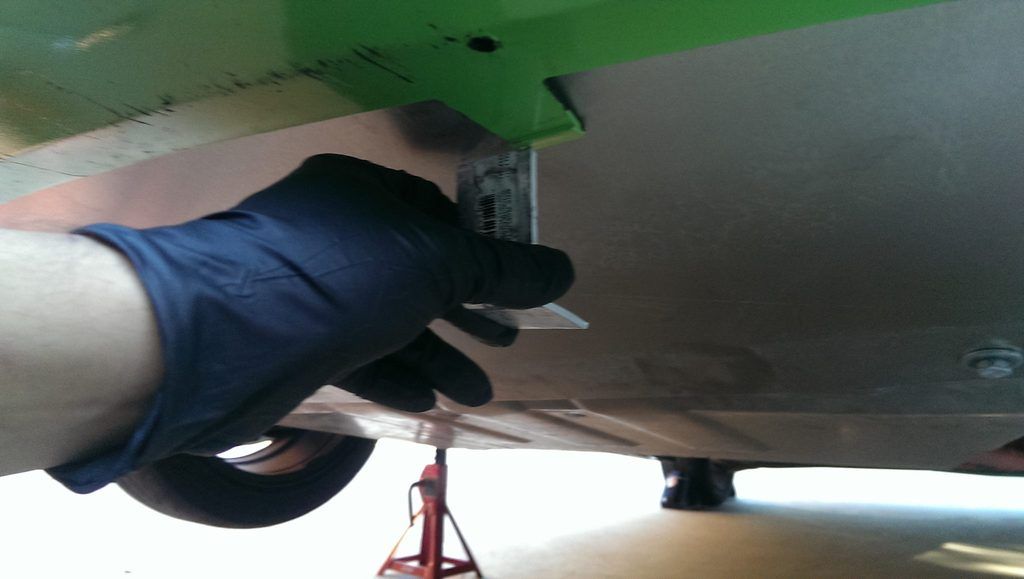
4) Undertray, I might not of done this right, need to do some testing, but a full length one can benefit from pulling air into the bay to pull more are out from under the hood.

5) Sealing up everything you can, probably the hardest job of all, fitting material between the coolers and the bumper cover is not easy as just cannot measure it all that well. I have tried a couple of methods and had it well done with the J'Line IC, have to start over with the DHM race setup but worth it to run that huge IC and only 4lbs added weight over the stock IC and bumper.

I just had a hopefully great idea. I have been working from the coolers out, I think I will do that but stop short and add material to the bumper cover, tape will hold it well enough, adjust it to slip in front of the cooler parts and trim as needed. This just might work out.

---------------

Even though I have done work to add more rear grip, camber and toe change, adding so much, more front end grip will cause a need to add more to the rear. I wanted to build a really cool undertray to keep things a bit less obvious like a wing on the street but ran out of time as needed to notch the bottom off the tire well, etc.....sold the house, most all my tools are in storage, full time RVing now..... Looking into an easier solution, real wing with quick release mounting, I really do not want to much attention on the street, invites less than honorable people to check out the car and can incite certain public employees do write expensive tickets.

--------
I am sure already mentioned, got a CF hood to install for weight savings, I want to paint it body color but my 52 year young wife loves CF and wants me to not paint it, go figure eh! I got it with the vents and hope they do some good but I might end up with the WRC type vents as well.


OP
S

Siestarider

Senior Member
Messages
988
Likes
292
Location
Stuart
Thread Starter #164
I used a lot of foam weatherstripping and black racers tape. With just that and an undertray, I kept coolant temps under 225 and oil under 247 for 20 min HDPE sessions in Feb. But ambient was around 75-80, not 90's typical of summer.

I thought about mounting a Setrab behind radiator on passenger side, cut the fan shield part with those sorry vent flaps and mount cooler in their place. A/C lines are in the way, and have to pull the whole radiator to get the fan shield off, seems like a lot of work for an experiment.

So for next experiment I will modify undertray some more, looking for an optimum shape between front wheel wells and front axle centerline.


Messages
435
Likes
108
Location
Campbell
Radiator exits are not a mystery, you want a diffuser with a smooth expanding exit to create a low pressure zone behind the radiator core.

In a race car that is what they do in radiator side pods. In a street car with a less aerodynamic design and an engine inconveniently located behind the radiator, you just do the best you can. An under tray is usually part of it and when you have big enough hood exits you can use the undertray to keep engine bay air out from underneath the car to enhance the ground effect (which reduces drag).

If you have no hood vents and the air has to exit under the car, you can add a little flap pointing down to create a low pressure zone behind the under tray (like the factory air dam) but that creates positive pressure under the nose and ground effect is greatly reduced.

A sports racer I worked on had it right, the radiator core was up front exiting in to an expanding duct leading up and out of the front body work and the exit of the duct had a bit of a flap to kick up the air and further enhance the low pressure zone at the exit, just like the no hood exit setup except upside down. That setup works with essentially no negatives.


RAAMaudio

5000 Post Club
Messages
5,268
Likes
925
Location
Carson City
When I first built my undertray I had the car out at MMP for the OA school and went to see the Ford Race Shop manager, he drove the car, loved it, looked at it on the lift, made some suggestions like add a lip in front of the tires and to the rest of the rear of the undertray. He also said to add an inlet to the underside of the tray to pull more air through the coolers and out of the engine bay.

First setup: 1" sq tubing used as 2 point brace, which he said is all the car needs and I agree, why I only did a 2 point, it is also the rear undertray mount and the lip down he said was very good design, just make it wider and add some in front of the tires.


Added duct, sorry not the best pictures but all I have. This has not been tested with yarn, video, etc, it was a guestimated setup but seems to work rather well, the added weight was just a few oz.


OP
S

Siestarider

Senior Member
Messages
988
Likes
292
Location
Stuart
Thread Starter #167
RAAM's pics show about what I started with, I use a Pierce 2 pt brace for rear connection and existing air dam for front. And I have no trick rear end flaps. This shape created the highest negative pressures in lower engine bay, but did not optimize cooling. Which seems counter-intuitive but the data are the data.

Gradually cutting away sides toward rear have improved cooling and aero both via coast down testing.

I am going to add a NACA duct to undertray, feed (assuming pressures show it works) cool air to top rear of engine bay, see if that does anything useful. Sort of the opposite of adding hood vents at WRC location in terms of rear engine bay pressure gradient. I know its counter-intuitive. But if NACA duct works at all, i can also try routing it to lower Mountune air box feed (currently closed for testing) or left CMZ brake cooling duct (not mounted yet, but ready for more testing).


Pete

Active member
Messages
784
Likes
332
Location
San Diego
For my undertray/skidplate it has a downward slope before leveling off. However I installed spacers to clear the 6 point brace which resulted in the undertray to have a slight angle instead of being level with the car. I haven't done nearly the amount of testing as siestarider but my coolant temps have been consistent and below 220 for multiple 20 minute HPDE events. I also opted to go with aluminum for rock protection as I now have separate suspension set up for dirt/rally driving. Thus needing something more durable than plastic.


OP
S

Siestarider

Senior Member
Messages
988
Likes
292
Location
Stuart
Thread Starter #169
Took me a few runs back and forth to understand, thanks Pete for all the views. Looks like an air dam delete is part of your undertray. Plus the rear of your tray is lower than rear of my version, which should enable better air extraction from rear of engine compartment.

I like the taper down from front, theory says that accelerating air by compressing flow like you did should decrease pressure in the area just past front axle. But you also have side venting at wheel wells, larger than mine are.

Your cooling performance better than I have achieved, but maybe more drag with that setup as well.

I have seen some Miata pics where a splitter is placed level with what would be your rear undertray, and an air dam inserted near nose between lower bumper cover and splitter. Maybe that variation would provide better cooling and aero performance as well.

Every time i think about doing that version I have to tell myself, its a DD, not a race car. Another advantage of your version, safe for street with nothing hanging too low to tear up.


shouldbeasy

1000 Post Club
Messages
1,469
Likes
824
Location
Calgary, AB, Canada
Oh man, that skid set up is stylin' Pete.

I think I'll be looking in to this - measuring out the coverage area I want and then get some aluminum to cover it up. How was mounting it? Are there tapped holes on the 'frame' that can be used?


Pete

Active member
Messages
784
Likes
332
Location
San Diego
[MENTION=1015]shouldbeasy[/MENTION] The main skid plate was purchased from the skidplate guy on facebook. That being said to mount it he provides two brackets for the front (where you see the bolts in the skidplate) that use a tab you insert into the frame. It is loose at first until you get the bolt in where it becomes sturdy and strong (I do not have pictures for that). The skidplate was designed to be used without the bracing so I added in my own spacers to make it fit accordingly. The front section (below the intercooler) I made where I connected the rear to the bolts from the existing skidplate and made my own L brackets to mount on the radiator support. The bolt holes where from the OEM intercooler was mounted. As you can see from the pictures I have the J line intercooler.
[MENTION=1391]Siestarider[/MENTION] I agree the venting on the side is larger than ideal but that was because that specific piece was purchased from a vender. If I had been brave enough to make said piece at the time, the side vents would be smaller. Live and learn they say right? I am designing and will be making a full smooth underbody to include an exhaust dump to enhance rear downforce (F1 used this idea for a time before it became banned from being to effective). But I still have to figure out how to make the full underbody but still have access to jacking points on the car. I am slowly moving towards the rear with the underbody.

Also I think there was someone a couple months back that proposed to make the same type of undertry/splitter you are speaking of. However I think that fell through as we haven't heard anything from it anymore.


Sourskittle

4000 Post Club
Messages
4,567
Likes
860
Location
Lakeland
"The skidplate guy" on fb, lol

My Service manual CD shows a skid plate. Be nice if it gave a part # !!


OP
S

Siestarider

Senior Member
Messages
988
Likes
292
Location
Stuart
Thread Starter #173
I am guessing that Pete's openings to each side of the skid plate are beneficial to cooling by offering more expansive openings to low pressure each side of engine bay behind the heat exhangers than either RAAM or I have tried.

So my next 'tray mod will head this direction from where it is now, somewhere between RAAM and Pete at rear sides of engine.


Young L

Active member
Messages
524
Likes
88
Location
Richmond
"The skidplate guy" on fb, lol

My Service manual CD shows a skid plate. Be nice if it gave a part # !!
Its probably in reference to the euro diesel model. Another Euro fist guy bought one and it mounted right up so I went to a ford dealer near my base and ordered one. Got the car on a lift and it doesn't match up at all to the US spec ones. I can make it work with a bit of cutting and some new holes in different spots.


shouldbeasy

1000 Post Club
Messages
1,469
Likes
824
Location
Calgary, AB, Canada
Looks good - I may have to duplicate his design, sourcing the material locally and putting in the labour hours is probably more cost effective for me, being Canadian and having the dollar not in my favour.


meFiSTo

Senior Member
Messages
865
Likes
229
Location
Redmond
Yikes. I'm following this thread now for entertainment purposes, but oy, this #$@% is WAY too serious for my purposes. I'm in the process of adding some cooling bits. My total objective is to keep temps low enough on warm summer days to make it through the occasional HPDE event without limping off the track or home. That never happened to me in my old car and I don't want it to happen with this one. But you kids are into some radical modifications for this little tin can. Good luck. I'll be lurking.


shouldbeasy

1000 Post Club
Messages
1,469
Likes
824
Location
Calgary, AB, Canada
I can get a sheet of aluminum 4'x10' - wondering if I should pull the trigger and set it aside to make up a good size front skid plate... If so, what gauge would you guys recommend? 3/16"? I want to have some decent gravel protection without going completely overboard.


Pete

Active member
Messages
784
Likes
332
Location
San Diego
I can get a sheet of aluminum 4'x10' - wondering if I should pull the trigger and set it aside to make up a good size front skid plate... If so, what gauge would you guys recommend? 3/16"? I want to have some decent gravel protection without going completely overboard.
For the front part of my skidplate I used 1/8" I can't remember what the main skidplate is but it looks about twice as thick. Could be 3/16 could be 1/4. I would say if you plan on driving on some crazy rocky roads go 3/16 for juat some protection 1/8 should work just as good.


OP
S

Siestarider

Senior Member
Messages
988
Likes
292
Location
Stuart
Thread Starter #180
Tracking 3/26, temps 80's-90's, sunny and humid. Experimental undertray without extended air dam was not performing adequately, coolant hitting 235 and oil 250 plus on consecutive hot laps in afternoon peak heat.

So I turned the heater on full blast and dropped temps within one lap to 210/225. Windows are already down, no appreciable discomfort. So if you are getting too hot on track, putting your heater on will loose enough extra heat to keep ECU from pulling timing.

I will probably go back to extended air dam testing, seemed I had better cooling than with undertray alone.


Similar threads


Top