• Sign Up! To view all forums and unlock additional cool features

    Welcome to the #1 Fiesta ST Forum and Fiesta ST community dedicated to Fiesta ST owners and enthusiasts. Register for an account, it's free and it's easy, so don't hesitate to join the Fiesta ST Forum today!


Bull's street "go-kart" build

CarGuy

1000 Post Club
Messages
1,057
Likes
661
Location
Daytona Beach, FL, USA
#21
I pretty much did what CarGuy mentioned above. The hardest part was holding the new fob just right on the steering column.
Yeah, I think that's why I had to do it a few times before it worked. That fob is fussy about being held in a certain location/position.

Sent from my SM-N960U using Tapatalk


OP
Bull Run

Bull Run

Member
U.S. Army Veteran
Messages
244
Likes
398
Location
Chandler, AZ, USA
Thread Starter #22
Found out after the purchase that I couldn't control the rear driver-side window using the master switch. That didn't bug me until I started having issues rolling up the front passenger-side. I found a used switch on eBay for $25 and since the replacement process didn't look difficult as shown in a YouTube video, I decided to roll the dice and try it out. Happy to say that the swap wasn't difficult and I can control all four windows without any issues so far.

This is one of the things I like about the Fiesta as there are plenty of parts for it, new or used, and a large amount of how-to knowledge in this forum and YouTube.

door_inside.jpg
master_window_switch.jpg


OP
Bull Run

Bull Run

Member
U.S. Army Veteran
Messages
244
Likes
398
Location
Chandler, AZ, USA
Thread Starter #23
Transported a few bags of salt for the water softener the other day. One of the bags leaked some salt which fell down the trunk floor handle hole. I had to remove the spare tire and tools to get all the salt out, so decided to get a liner for the rear (car already came with rubber "ST" floormats in addition of regular ones). I had good luck with Husky liners for the Mustang but doesn't seem like they make the trunk liner for Fiestas. I went with one from WeatherTech and it fits great!

20211102_135412.jpg


CarGuy

1000 Post Club
Messages
1,057
Likes
661
Location
Daytona Beach, FL, USA
#24
They made a trunk liner for the Fiesta. They even made one for the ST with the ST logo in it. I'm not sure if they make them anymore since the car is discontinued.

Sent from my SM-N960U using Tapatalk


OP
Bull Run

Bull Run

Member
U.S. Army Veteran
Messages
244
Likes
398
Location
Chandler, AZ, USA
Thread Starter #25
Forgot to post this earlier. I normally don't start with anti-sway bars for suspension mods, but I picked up a used Whiteline 22mm rear anti-sway bar at a great price. Install was pretty straightforward and the car feels more neutral with less body roll during hard turns.

rear_sway_bar.jpg


OP
Bull Run

Bull Run

Member
U.S. Army Veteran
Messages
244
Likes
398
Location
Chandler, AZ, USA
Thread Starter #26
I started hearing squeaking noises from the PSMM area between shifts when the weather turned colder. Instead of trying to fix the stock mount, I took advantage of Whoosh's Black Friday Sale and picked up a AWR PSMM. I opted for their new 62 durometer bushing option to keep any NVH increases to a minimum for this mild daily driver build (bushings can be swapped out later if the needs change, and they are less than $20).

AWR mount looks and feels much more solid than the crappy and mushy stock mount. I now can see how stock PSMM can break with is bad design even on cars with mild mods. The best part is that I couldn't feel any increase in NVH, and aside from getting rid of the annoying squeaking noise, shifts feel firmer and the car feels more solid between shifts now.

Next up are Wilwood front BBK and 17" Konig Hypergram wheels with Advan Flewva V701 tires to reduce unsprung weight and increase traction.

1639683657435.png


OP
Bull Run

Bull Run

Member
U.S. Army Veteran
Messages
244
Likes
398
Location
Chandler, AZ, USA
Thread Starter #27
They made a trunk liner for the Fiesta. They even made one for the ST with the ST logo in it. I'm not sure if they make them anymore since the car is discontinued.
You're probably right as I had hard time finding a good selection of trunk liners for this car. Amazon listed some liners made by never-heard-of brands, so I decided to go with the well-known WeatherTech brand and happy with its quality so far.


OP
Bull Run

Bull Run

Member
U.S. Army Veteran
Messages
244
Likes
398
Location
Chandler, AZ, USA
Thread Starter #28
Installed the Wilwood front BBK the other day. I chose black calipers with standard rotors to avoid standing out. While my primary goal was to save weight, I like that the same brake pedal effort provides greater braking power to the point that I had to adjust accordingly.

I also did a brake fluid flush at the same time with Motul DOT 5.1, which has higher boiling points than DOT 3 or 4, but without the shorter life of racing fluids.

Calipers barely clears the stock wheels on the sides but had no issues so far. According to Ron and others, Konig Hypergrams should also fit without needing spacers.

1641189030178.png
1641189344198.png
1641189483719.png


OP
Bull Run

Bull Run

Member
U.S. Army Veteran
Messages
244
Likes
398
Location
Chandler, AZ, USA
Thread Starter #29
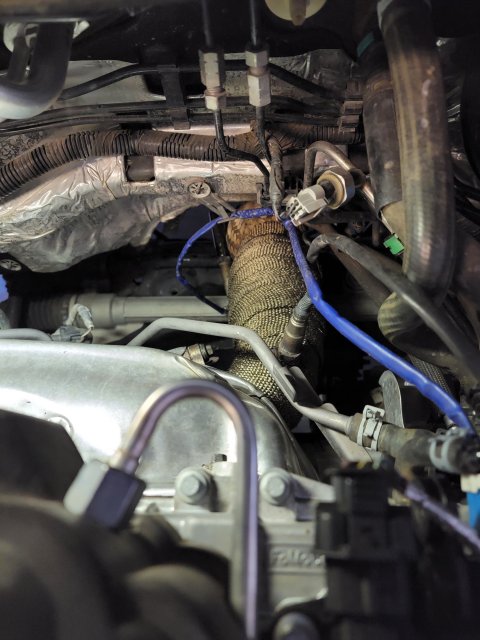
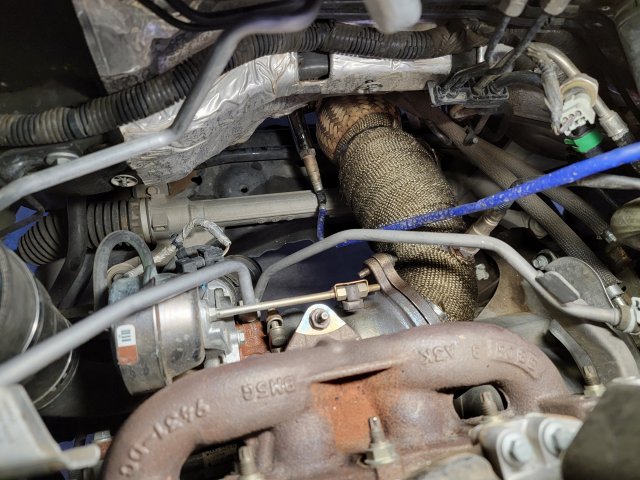
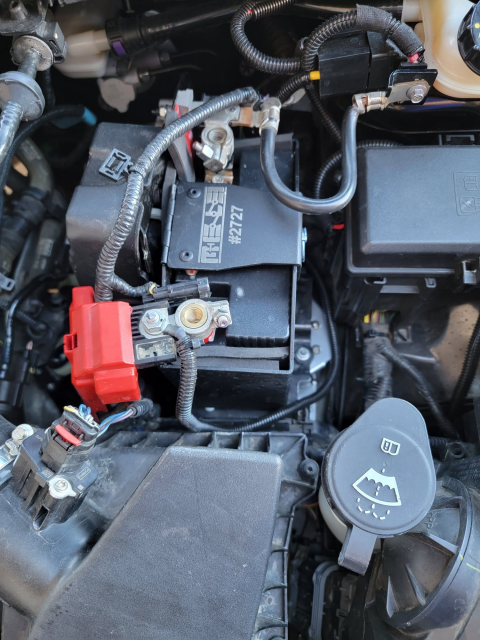
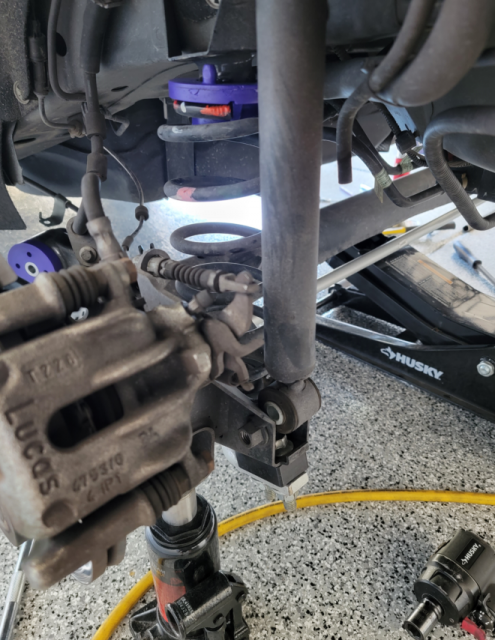
My original plan was to install upgraded downpipe, Whoosh hybrid turbo, and Whoosh ported/coated manifold all at the same time. However, I found a used Cobb catted DP at a good price that arrived last week. I went ahead and installed the DP during the last weekend so that I can inspect the manifold nuts and studs before the turbo and manifold arrive.

Happy to say that all the bolts, nuts, and studs were rust free and in good shape (one benefit of living in a desert). Nevertheless, I sprayed PB Blaster on the DP to turbo bolts and let them soak for an hour to be on the safe side, and they all came out without issues.

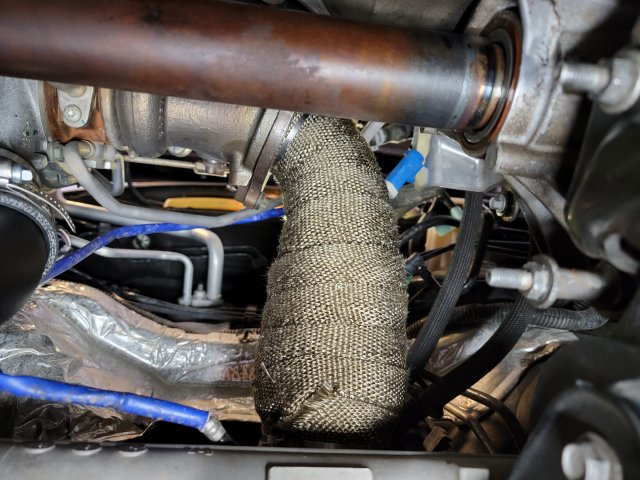
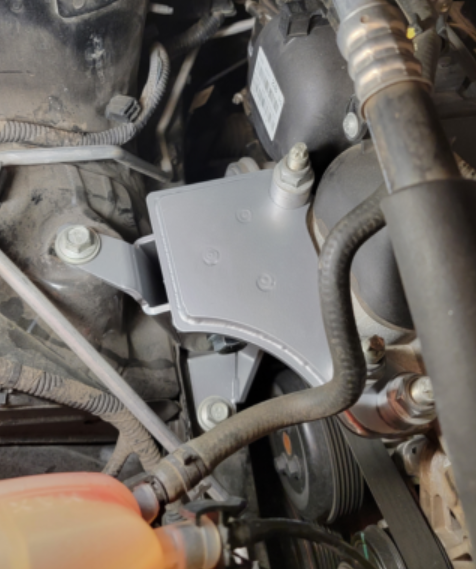
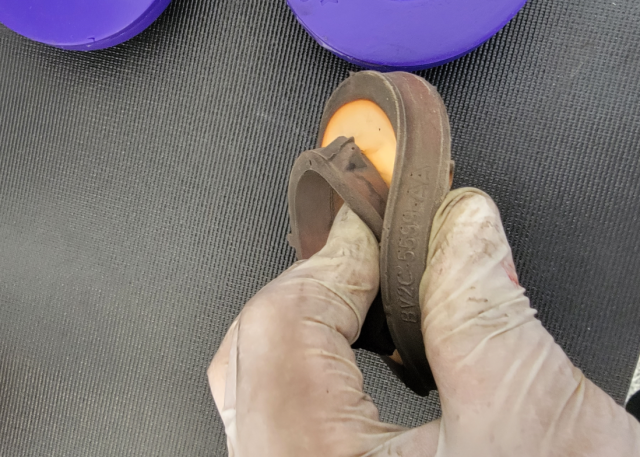
I wrapped the Cobb DP with the header wrap as it didn’t come with a way to install the stock heat shield.

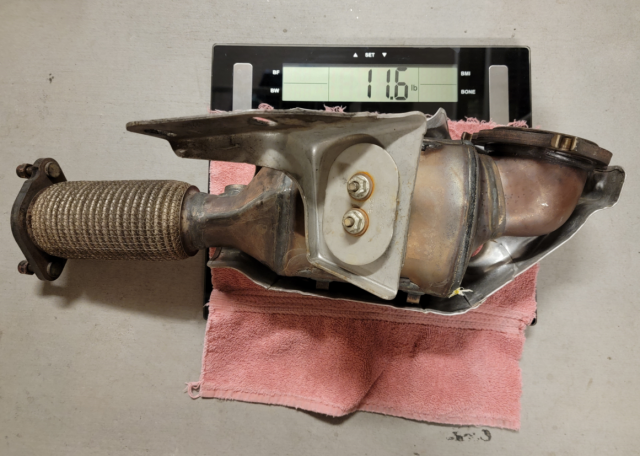
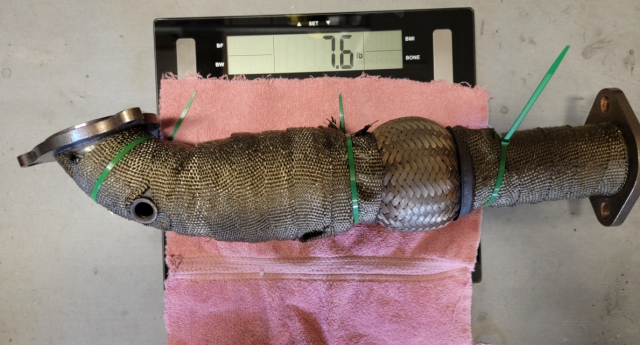
In case you are wondering, Cobb catted DP wrapped in header wrap’s about 4 pounds lighter than the stock DP with heat shield and bracket.
20220114_165243.jpg 20220114_161733.jpg
1642447446446.png
1642447483764.png


Attachments

OP
Bull Run

Bull Run

Member
U.S. Army Veteran
Messages
244
Likes
398
Location
Chandler, AZ, USA
Thread Starter #30
Whoosh exhaust hangers came in last week so spent some time this weekend to install them.

Aside from stockers being soft like gummy, I figured the Cobb downpipe can use more support due to the lack of a mounting bracket (which I prefer for a cleaner look). I also used an exhaust hanger removal tool this time (bought it off of Amazon for around $17) and it was totally worth it.

20220121_105229.jpg 20220121_105253.jpg 20220114_182522.jpg


OP
Bull Run

Bull Run

Member
U.S. Army Veteran
Messages
244
Likes
398
Location
Chandler, AZ, USA
Thread Starter #32
Fun build and I very much want your brakes, lol. Hope the turbo install goes well
Thanks! Once the turbo and ported manifolds are installed, everything between the stock airbox and cat-back exhaust (minus the engine) would been replaced. It'll been interesting to see if stock airbox and cat-back exhaust will be good enough to keep the noise increase to a minimum.


OP
Bull Run

Bull Run

Member
U.S. Army Veteran
Messages
244
Likes
398
Location
Chandler, AZ, USA
Thread Starter #33
I've been liking the AWR PSMM so far. Therefor, I decided to upgrade the transmission side mount with the AWR unit, also with the 62a bushing.

Like the PSMM, it’s well-built and feels solid, worth getting for the looks alone if you relocate your battery. I didn’t have any issues remounting the MeLe battery box using the included battery mount plate.

I noticed some increase in vibration after the install while idling, but not while driving. Shifts feel even more solid now, along with a large decrease in torque steer when I get on it. The car’s now ready to handle the extra power once the Whoosh hybrid arrives.

1643779514406.png
1643779603779.png
1643779627522.png


OP
Bull Run

Bull Run

Member
U.S. Army Veteran
Messages
244
Likes
398
Location
Chandler, AZ, USA
Thread Starter #34
17" Konig Hypergram wheels with Yokohama Advan Fleva V701 tires finally came in last week. 1st and 2nd gears are finally useable now!

Additionally, there's about 20mm of clearance between Wilwood calipers and wheel spokes now vs. 1mm for OEM wheels.

20220207_104124.jpg
20220207_104828.jpg 20220207_104835.jpg


OP
Bull Run

Bull Run

Member
U.S. Army Veteran
Messages
244
Likes
398
Location
Chandler, AZ, USA
Thread Starter #35
Installed the DNA Racing LCAs this weekend. I still have Powerflex rear axle beam bushings and spring pads to install so I will wait until installing them and getting an alignment before driving.

These are almost a pound lighter than the stockers.

1645986423962.png 1645986457653.png 1645986480757.png 1645986502565.png


Messages
206
Likes
108
Location
Santa Rosa
#36
17" Konig Hypergram wheels with Yokohama Advan Fleva V701 tires finally came in last week. 1st and 2nd gears are finally useable now!

Additionally, there's about 20mm of clearance between Wilwood calipers and wheel spokes now vs. 1mm for OEM wheels.

View attachment 46952
View attachment 46953 View attachment 46954
How are you liking those Avan Fleva? Have you pushed them pretty hard laterally?


OP
Bull Run

Bull Run

Member
U.S. Army Veteran
Messages
244
Likes
398
Location
Chandler, AZ, USA
Thread Starter #37
How are you liking those Avan Fleva? Have you pushed them pretty hard laterally?
Haven't driven much as I'm still working from home. But it is a night and day difference from all-season tires that came with the car as 1st and 2nd gears are somewhat useable now. I had MPS4S on the Mustang and like it, but DiscountTire site won't let me select them as they are slightly larger than what they allow.


Messages
206
Likes
108
Location
Santa Rosa
#38
Haven't driven much as I'm still working from home. But it is a night and day difference from all-season tires that came with the car as 1st and 2nd gears are somewhat useable now. I had MPS4S on the Mustang and like it, but DiscountTire site won't let me select them as they are slightly larger than what they allow.
For sure, any dedicated summer tires going to feel like a massive improvement compared to old all season. I’m curious how they compare to other summer tires.


Sent from my iPhone using Tapatalk


OP
Bull Run

Bull Run

Member
U.S. Army Veteran
Messages
244
Likes
398
Location
Chandler, AZ, USA
Thread Starter #39
Installed Powerflex purple (street) axle beam bushings and rear spring pads.

Impressions so far: The car feels tighter and I can feel the road more, further enhancing the go-kart feel that I love. There's a noticeable increase in tire noise even with street version of the bushings, but it's not very noticeable over other noises once you get up to speed on a major road or highway.

Lessons learned:
  • No need to remove brake calipers and lower shock bolts as there is enough slack to accommodate lowering of the axle beam enough to swap the bushings.
  • Gas tank gets in the way of pulling the driver side bushing bolt out, thus there's a need to remove the upper mounting bracket bolts and lowering the axle beam in order to pull the bolt out. I flipped the bolt during the installation so the bolt head faces out now. This eliminates the need to unbolt the bracket in the future if bushings needs to be serviced. I’ll post here if I encounter any negative consequences from this.
  • 80mm ID and 68mm OD sleeves worked for me. Bushings have a lip that prevents the use of the sleeve that would’ve pushed against the housing. However, 80mm ID sleeve fits over the lip and housing in order to push against the arm portion.
  • As seen in the picture, sleeve employed in this way is no longer deep enough to completely pull the bushing out, but it will be out far enough where few taps to side of the busing with a hammer pops them out.
  • Sleeves can be used to press in the new bushing if needed, but I was able to push Powerflex bushings into the housing with just my hands.
  • Afterwards, I unbolted the lower shock bolt and lowered the axle beam a little further until I was able to pop the spring off using my hands. I swapped the pad, popped the spring back in, raised the axle beam enough to reinstall the lower shock bolt.

1647547418977.png 1647547457113.png 1647547480603.png 1647547562140.png 1647547541972.png 1647547498438.png 1647547508010.png 1647547581751.png


Messages
206
Likes
108
Location
Santa Rosa
#40
Installed Powerflex purple (street) axle beam bushings and rear spring pads.

Impressions so far: The car feels tighter and I can feel the road more, further enhancing the go-kart feel that I love. There's a noticeable increase in tire noise even with street version of the bushings, but it's not very noticeable over other noises once you get up to speed on a major road or highway.

Lessons learned:
  • No need to remove brake calipers and lower shock bolts as there is enough slack to accommodate lowering of the axle beam enough to swap the bushings.
  • Gas tank gets in the way of pulling the driver side bushing bolt out, thus there's a need to remove the upper mounting bracket bolts and lowering the axle beam in order to pull the bolt out. I flipped the bolt during the installation so the bolt head faces out now. This eliminates the need to unbolt the bracket in the future if bushings needs to be serviced. I’ll post here if I encounter any negative consequences from this.
  • 80mm ID and 68mm OD sleeves worked for me. Bushings have a lip that prevents the use of the sleeve that would’ve pushed against the housing. However, 80mm ID sleeve fits over the lip and housing in order to push against the arm portion.
  • As seen in the picture, sleeve employed in this way is no longer deep enough to completely pull the bushing out, but it will be out far enough where few taps to side of the busing with a hammer pops them out.
  • Sleeves can be used to press in the new bushing if needed, but I was able to push Powerflex bushings into the housing with just my hands.
  • Afterwards, I unbolted the lower shock bolt and lowered the axle beam a little further until I was able to pop the spring off using my hands. I swapped the pad, popped the spring back in, raised the axle beam enough to reinstall the lower shock bolt.

View attachment 47491 View attachment 47492 View attachment 47493 View attachment 47497 View attachment 47496 View attachment 47494 View attachment 47495 View attachment 47498
Awesome write up! My only complaint about rear spring pads is they add some ride height.


Sent from my iPhone using Tapatalk


Top