• Sign Up! To view all forums and unlock additional cool features

    Welcome to the #1 Fiesta ST Forum and Fiesta ST community dedicated to Fiesta ST owners and enthusiasts. Register for an account, it's free and it's easy, so don't hesitate to join the Fiesta ST Forum today!


MTC Intercooler !

OffTheWall503

1000 Post Club
Messages
1,991
Likes
456
Location
Memphis, TN
#41
I had a fun time removing mine the first time but after doing it once, I'd have no worries doing it again.

Also my MTC intercooler fit perfectly, the shield underneath was a tight fit but I managed to squeeze it all together.


anticon

Active member
Messages
602
Likes
530
Location
Sherwood
#42
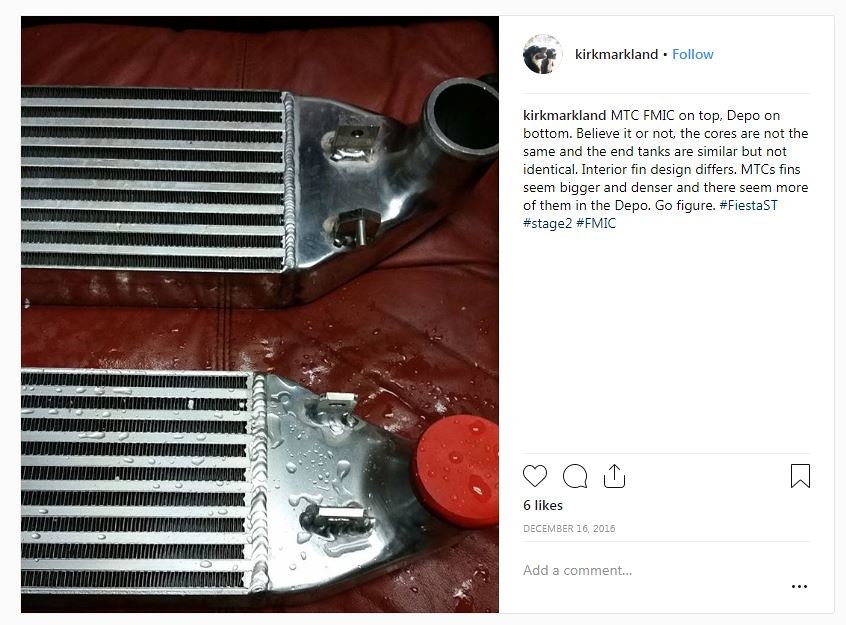
I got a used MTC intercooler and Depo intercooler pipe kit recently, and last weekend I was able to find some time to get it installed, so I figured I would give a write up here. In general the install was pretty simple. I just followed the instructions for the Mishimoto intercooler install on youtube.

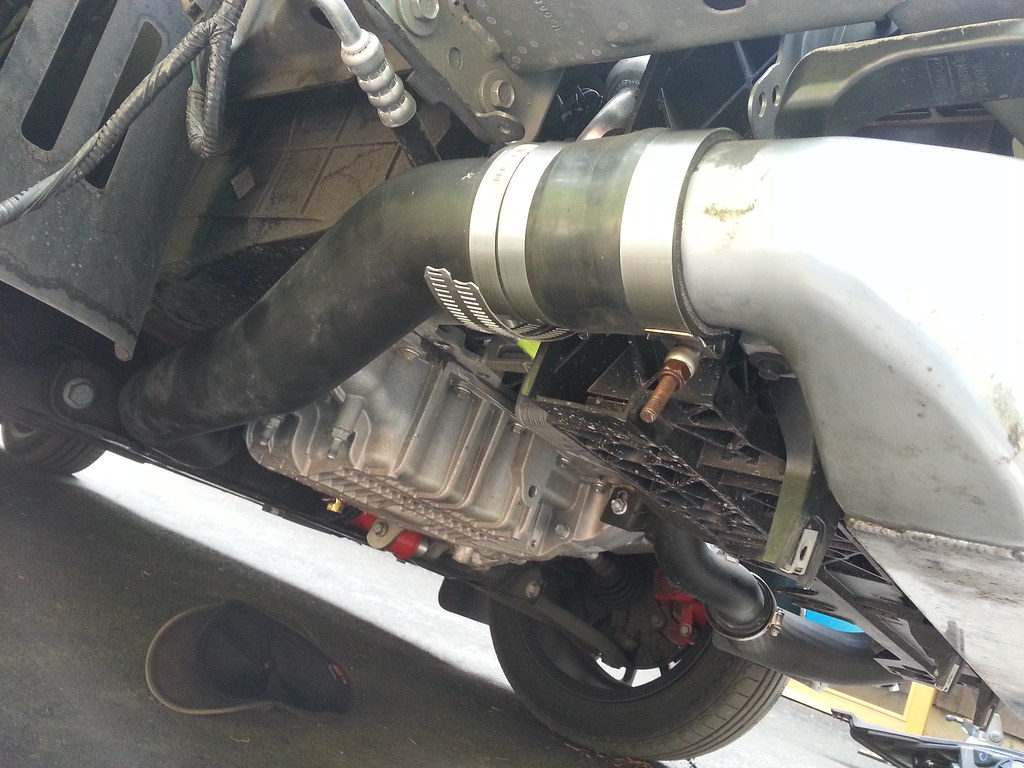
I used a leaf blower to blow out the intercooler and charge pipes before install. Also, I went through and checked all the hose clamps in the charge pipe connections and they were all hand tight so I went through and tightened them up. I had to remove the stock plastic pipe from the throttle body to get to the hose clamp screw and tighten it and then I reinstalled it. I decided not to install the Depo cold side hard pipe elbow, as it just added more joints in the system and it didn't look to add any diameter compared to the stock hose. Only two of the original t-bolt clamps were not destroyed during the removal by the previous owner, due to the bolts rusting. I installed those two t-bolts on the hot side, and just used two regular Home Depot hose clamps on the hotside intercooler connection. I tried to reuse the stock clamp that clamped directly to the turbo, but it has some little teeth on it that dig into the rubber hose and they didn't want to dig into the Depo hose, so I just used another Home Depot clamp there too. Otherwise I reused all the stock clamps.

The bracket on the Depo hotside pipe had been broken off, but as I understand this common with a full hard hotside pipe conversion as the connections are no longer as flexible. I will have to wait and see if this becomes a problem later.

I will say it barely fit, see the pics below on how the center air deflector mounting bracket pushed the intercooler out at the bottom. I wanted to leave this bracket in place, but if I did it again, I probably would have reinstalled the center bracket with some spacers to push it back a little, and then just get a longer bolt for the center bolt. This would probably alleviate the issue of the intercooler pressing on the bumper cover and air deflector. This probably would be pretty easy to do, without removing the bumper so I may try to take care of it at a later date. I think I only need about 1/8".

I loaded up my new Dizzy stage 2 tune, and it pushed up to 26 PSI and no problems yet.

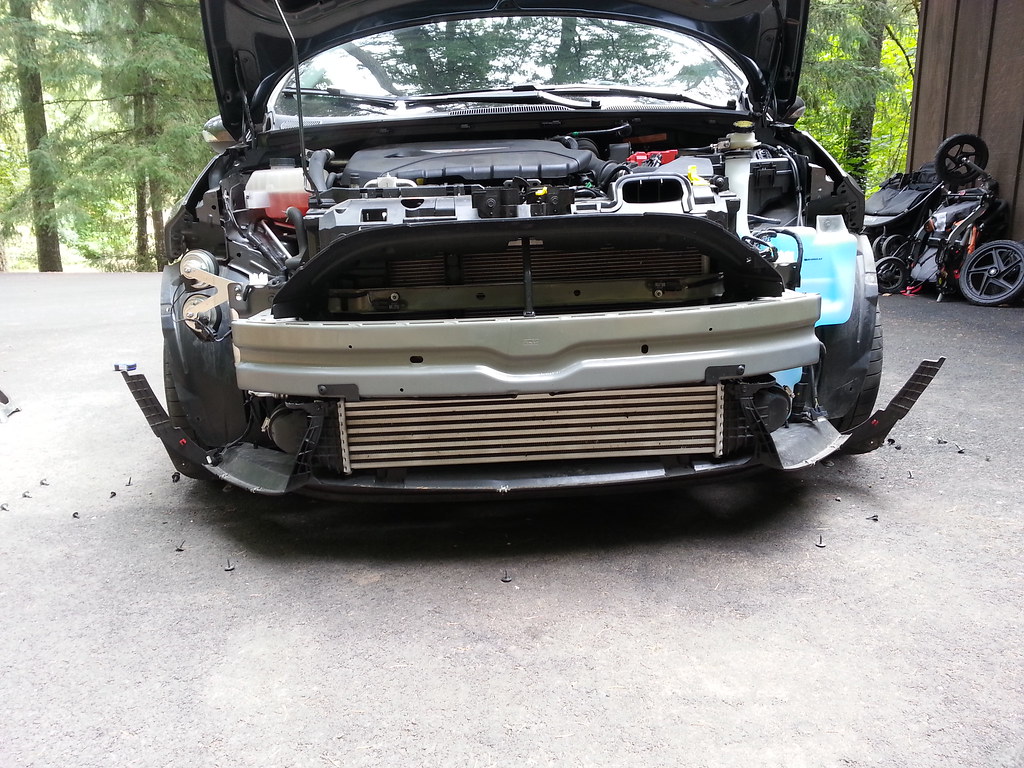
Here is a pic of the stock intercooler with the bumper cover off and the air deflector still on.


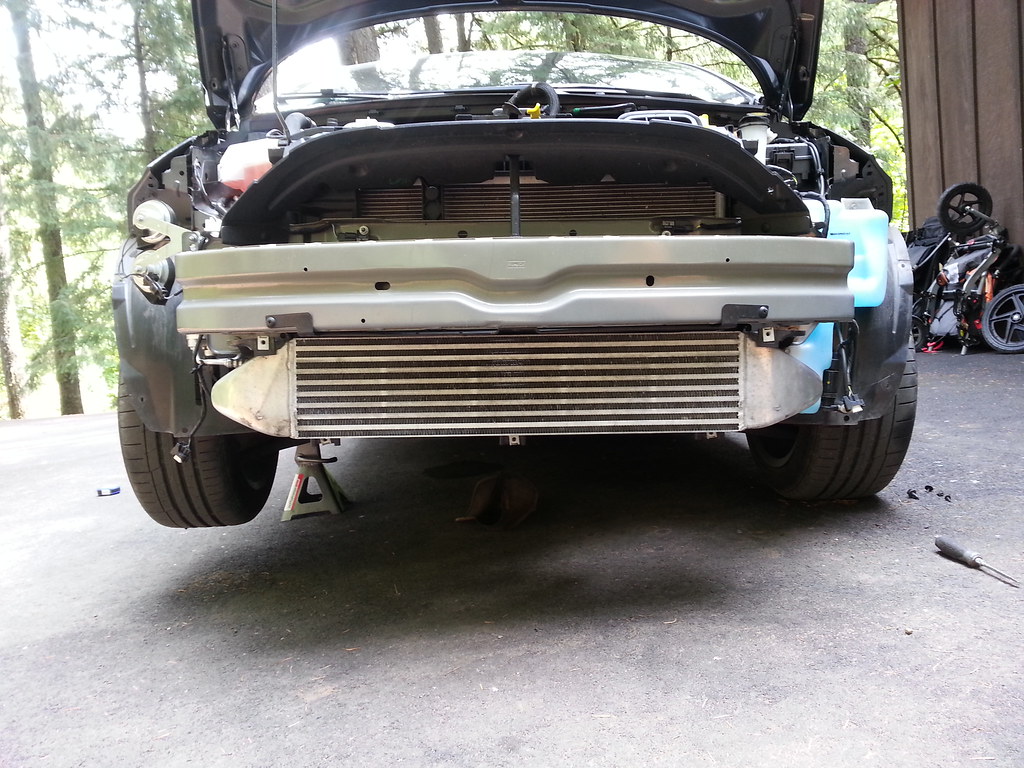
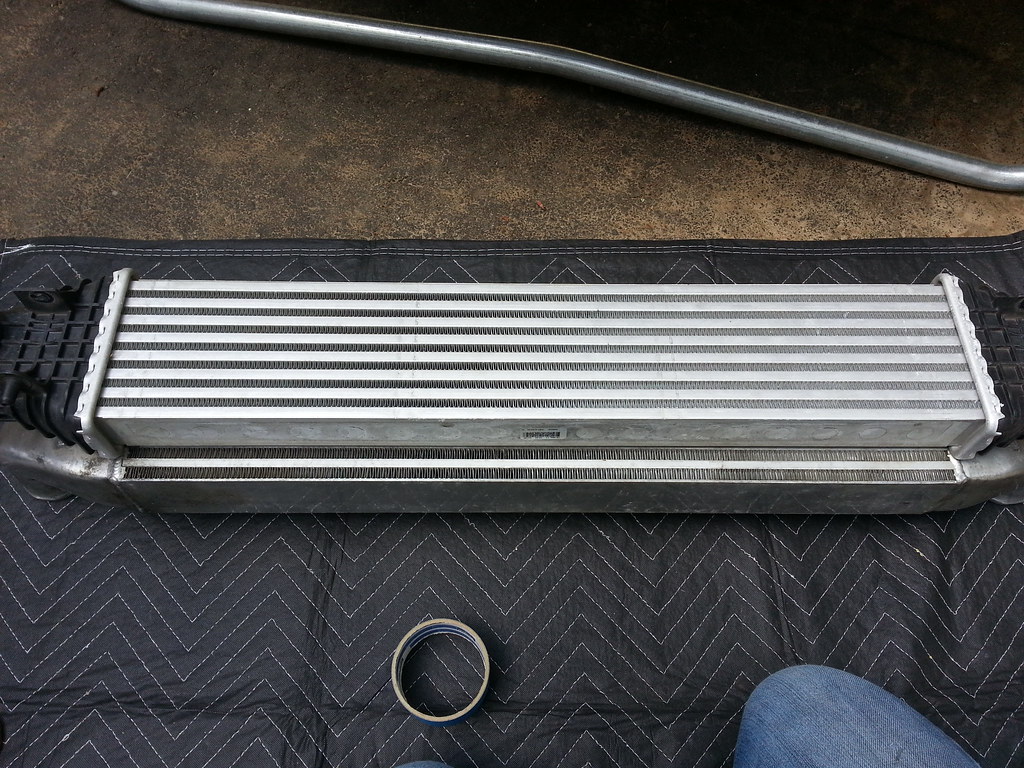
And a pic with the MTC intercooler. I hadn't reinstalled the air deflector yet.


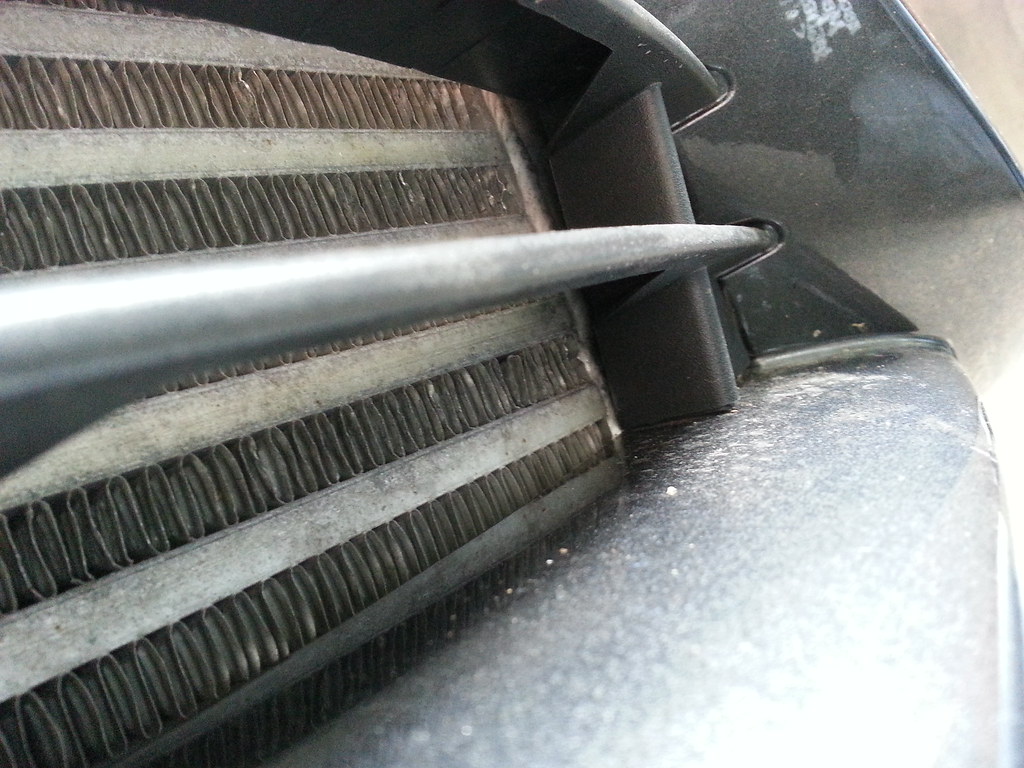
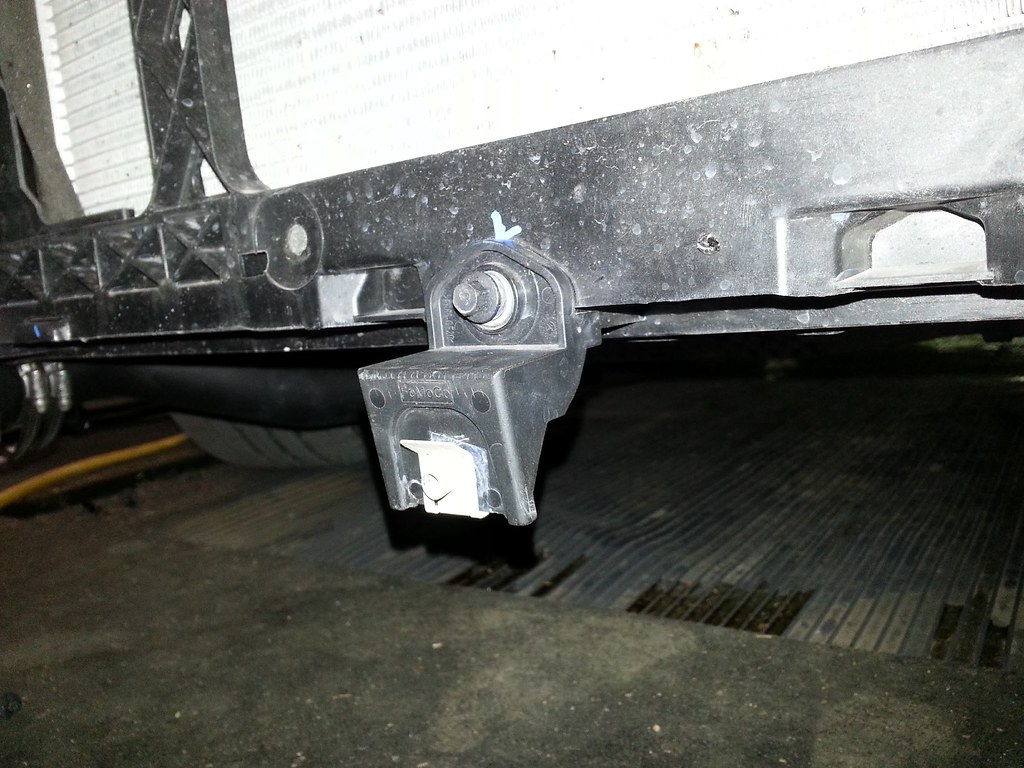
Here you can see the center mounting bracket for the air deflector is pressing on the intercooler. This made the bottom of the intercooler stick out further than the stock one, and also push the bumper cover out when it was reinstalled.


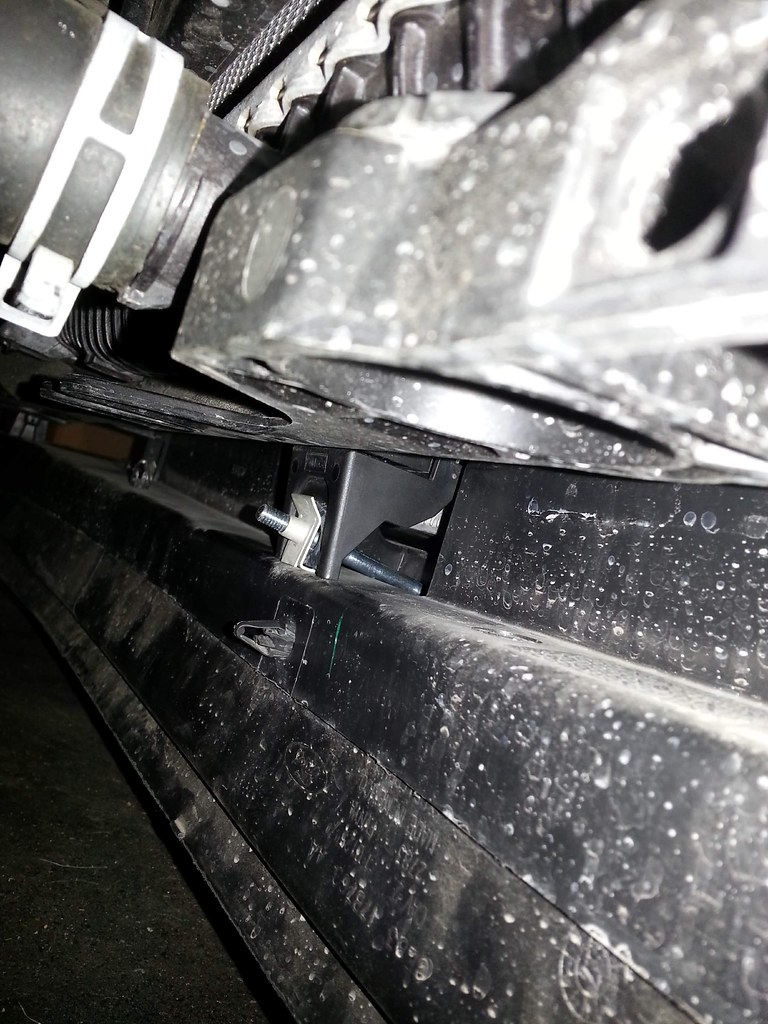
Here you can see the air deflector's upper mounting screws are pressed against the intercooler. Something must have changed between model years because you can see the marring in a different location from the previous owner.


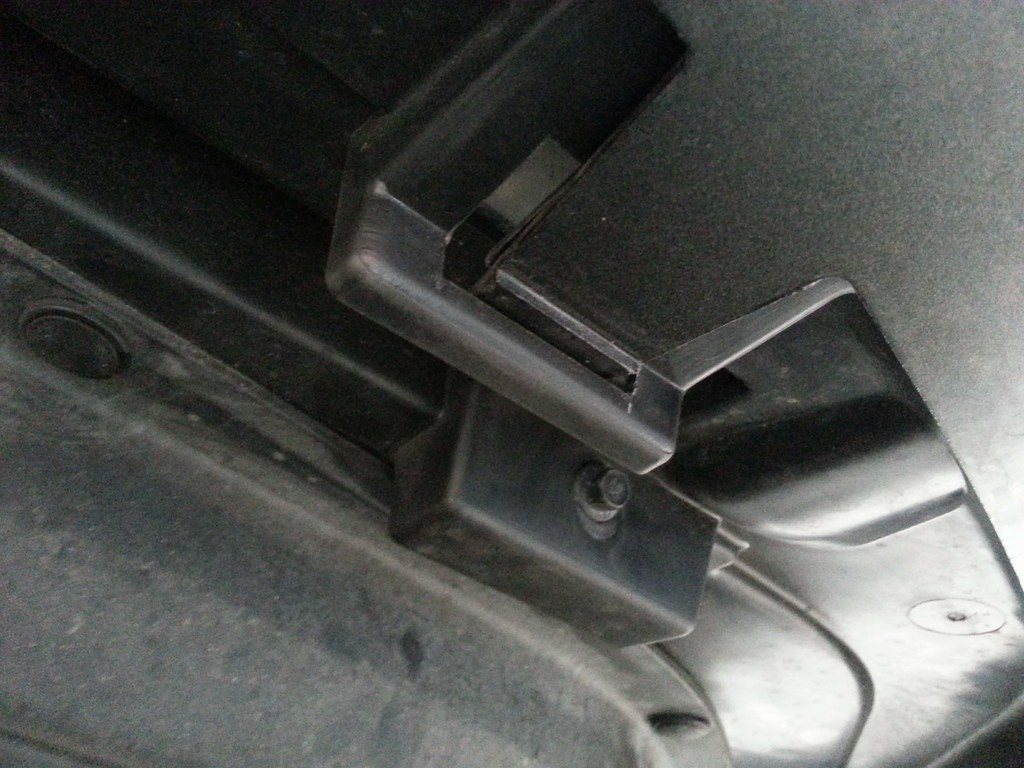
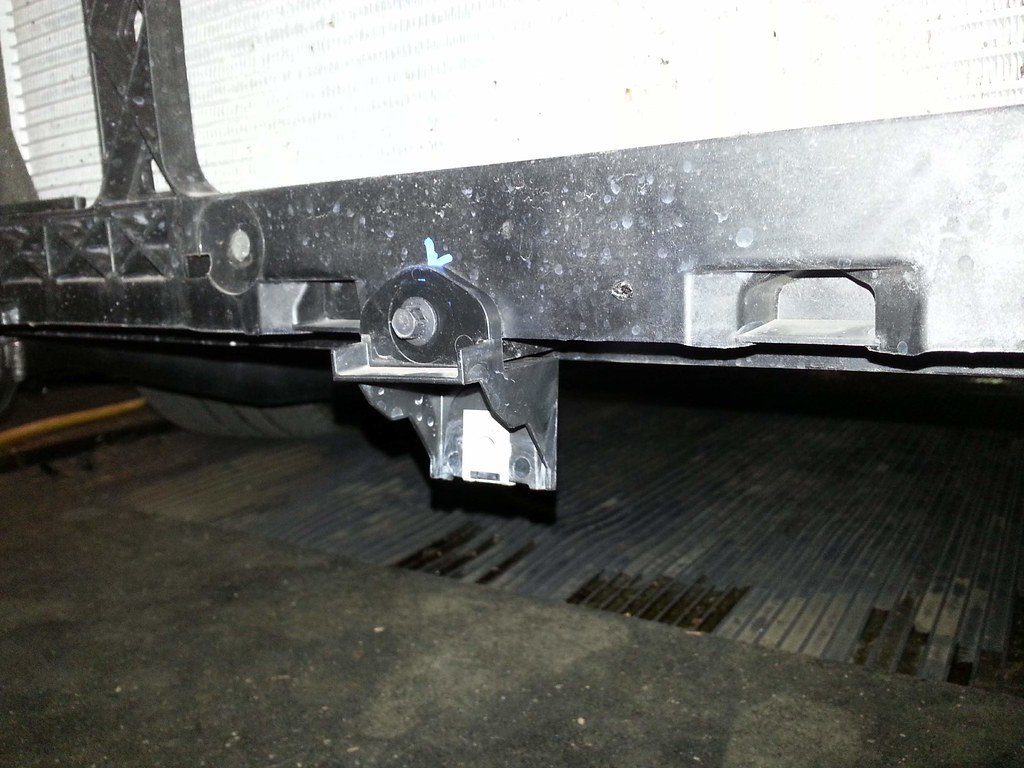
Here you can see the vertical support for the air deflector are pressed against the intercooler.


Here you can see how even the bumper cover is pressed against the intercooler when the bumper cover was reinstalled.


Here you can see how the bumper cover clips to air deflector do not engage anymore.


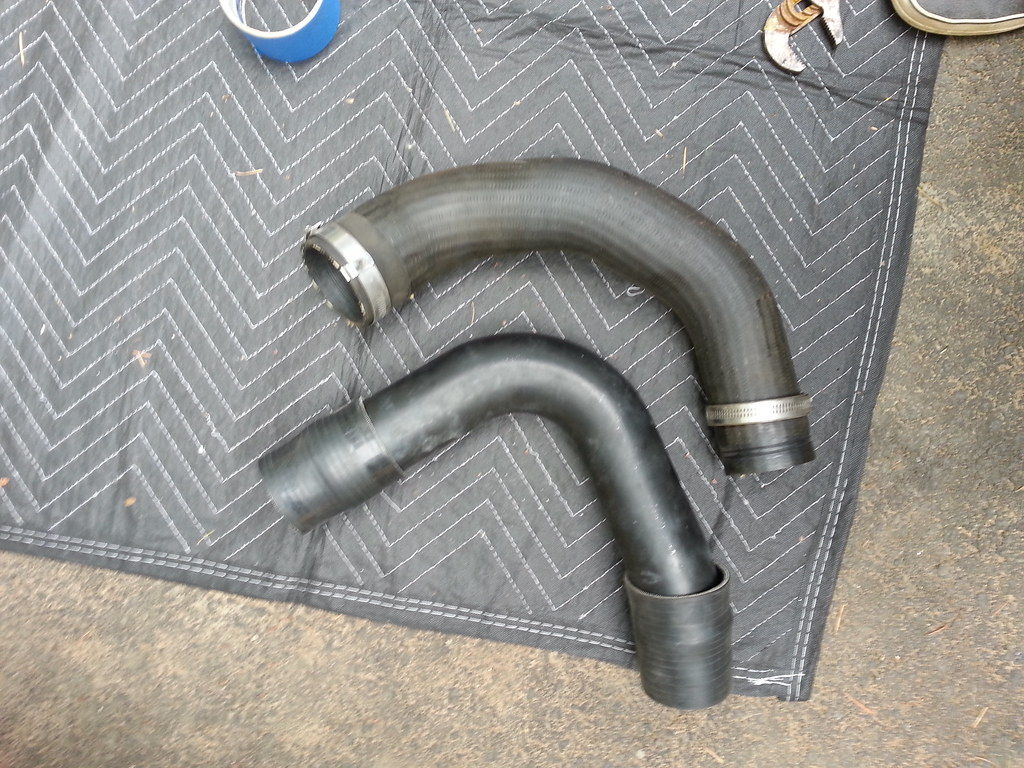
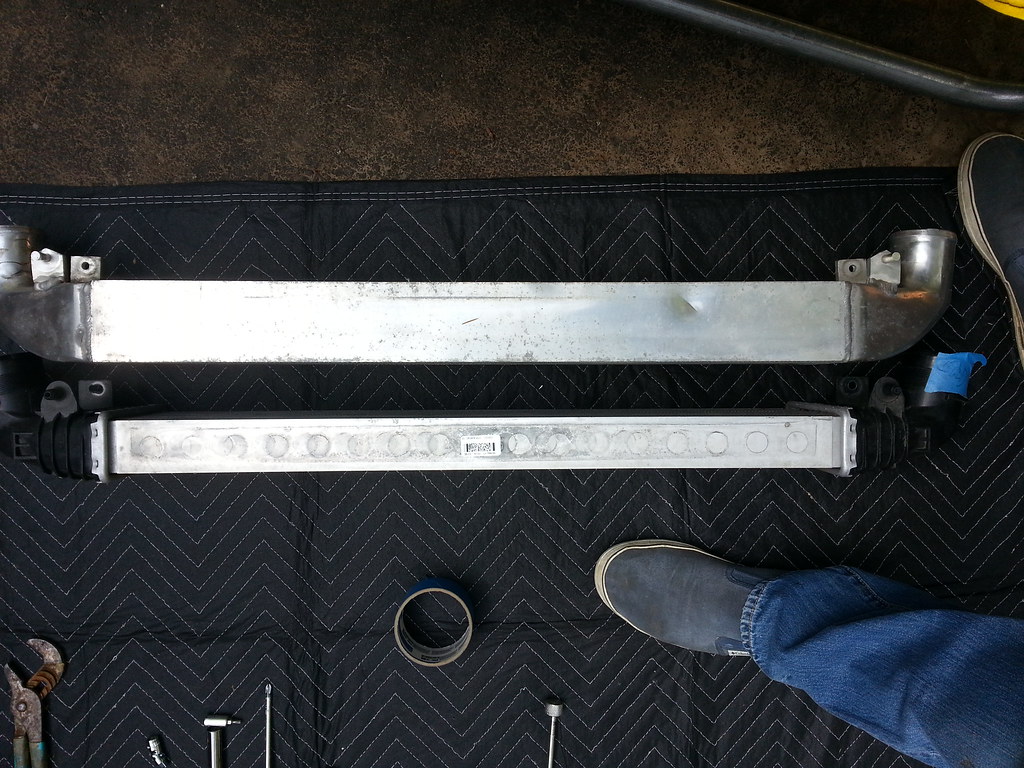
Here is the stock rubber cold side pipe next to the Depo hard pipe elbow.


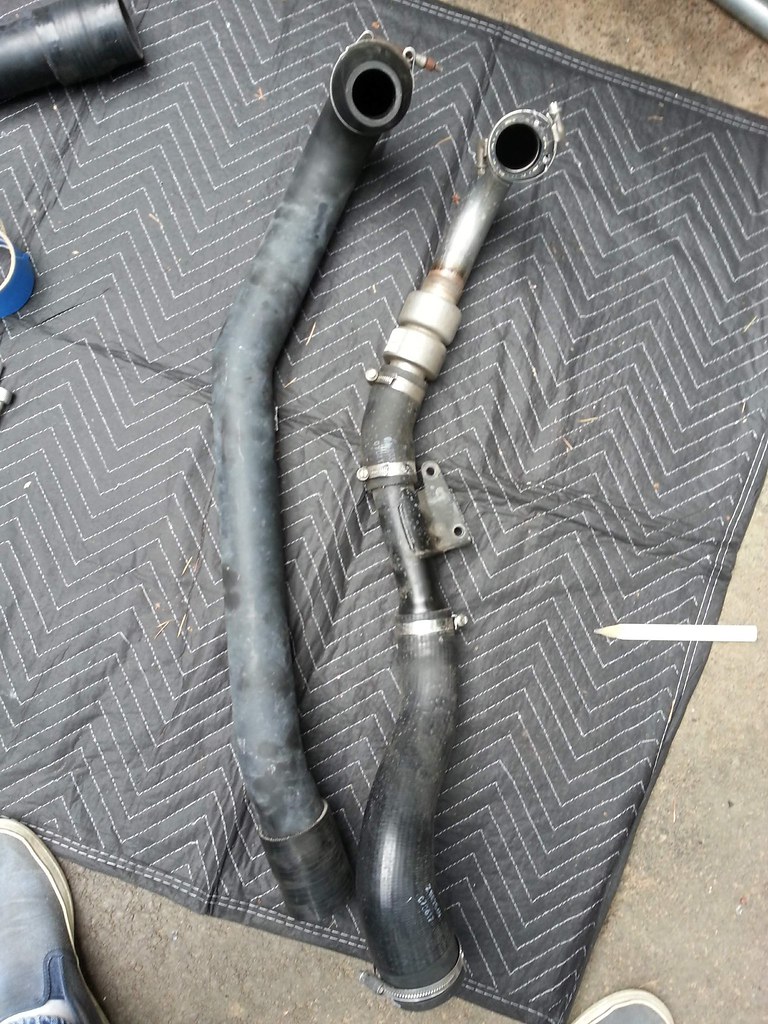
Here is the stock hot side pipe next to the Depo one.


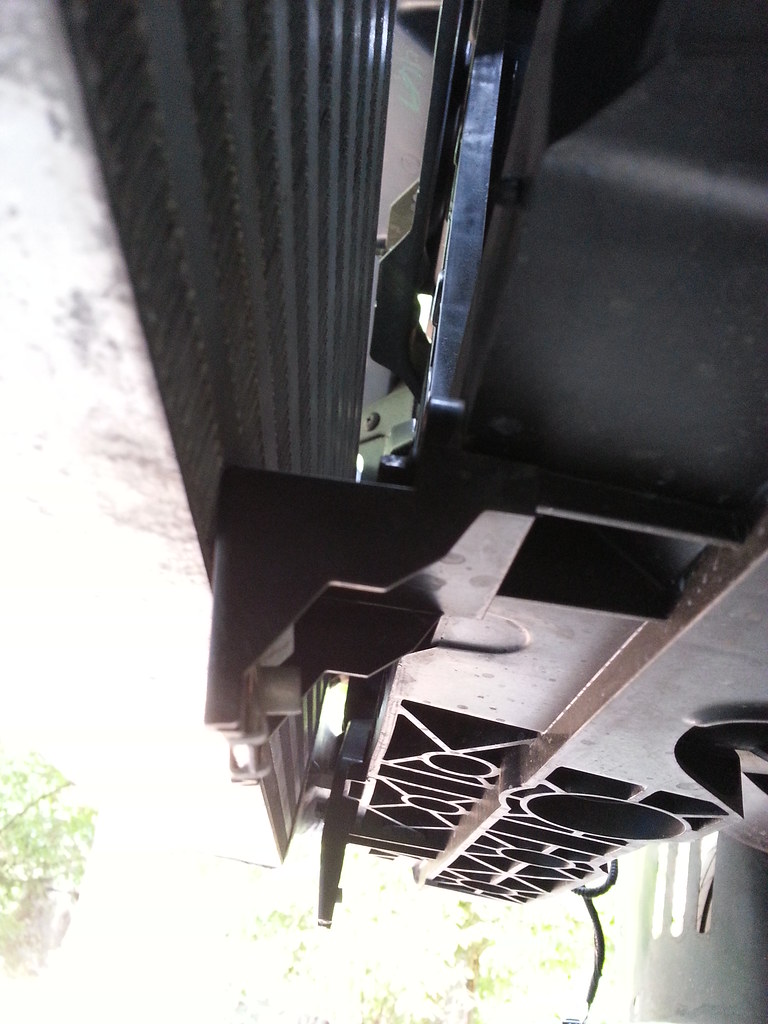
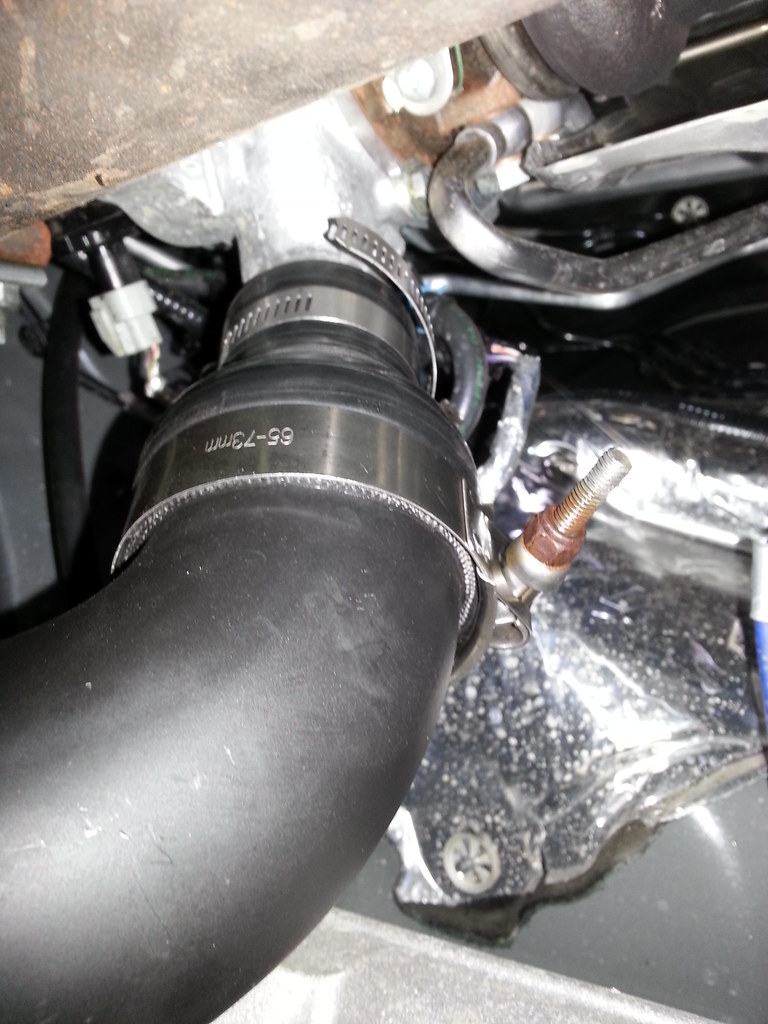
Here is the clamp setup I used on the hot-side intercooler connection


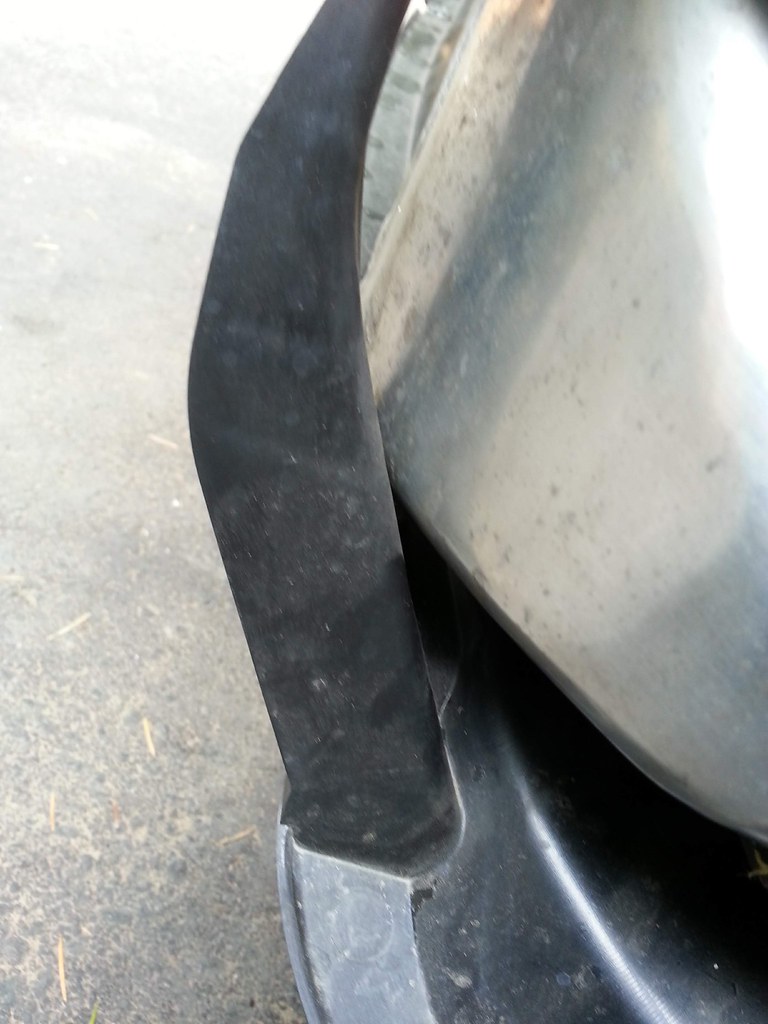
Here is the clamps at the turbo connection.


anticon

Active member
Messages
602
Likes
530
Location
Sherwood
#43
Another post with some comparisons between stock and MTC. First of all the MTC is significantly heavier, I weighed it at 13.3 lbs, and the stock one is around 5.5 lbs. The MTC and stock have just as many air channels (8), but the stock ones are a little thicker. The MTC has a higher fin density, and the fins are taller. Also the stock has the air channels on the top and bottom, whereas the MTC adds two more sets of fins followed by a protective plate, as you can see here.


The MTC is obviously much thicker, so the narrower air channels coupled with the additional thickness and extra sets of fins must be the main factor in the cooling difference.


Here is a comparison of the Depo vs MTC that I found on instagram from a previous [MENTION=5802]2Hemis[/MENTION] post here.


danbfree

3000 Post Club
Messages
3,510
Likes
1,196
Location
Tigard, Oregon, USA
#44
Looks like you can really see how the IC's that are 3" thick cause a bit of issues, but not too bad... I'll stick to the 2.5" thick one for ease of install but helluva deal you got, so don't blame you snagging that one and it should work really well!


XanRules

Active member
Messages
527
Likes
240
Location
Portland
#45
Cool thread. Just picked up a used fist. Am trying to figure out to just pick up the cob stage 2 kit or piece my own setup to save a few $$$...
Will look into this intercooler
Exact same core as Cobb.


danbfree

3000 Post Club
Messages
3,510
Likes
1,196
Location
Tigard, Oregon, USA
#46
Cool thread. Just picked up a used fist. Am trying to figure out to just pick up the cob stage 2 kit or piece my own setup to save a few $$$...
Will look into this intercooler
Nothing against Cobb quality, they are just a little overpriced, but you CAN get their "FB2" package with intercooler (Edit: Mountune, not cobb), which is a fin and tube design unlike most, for $1000 ($998 to be exact) with promo code WINNING for 10% off... Fin and tube allows a little more air to pass through to help cool the radiator.

Edit: Maybe I have the wrong brand that is fin and tube as the MTC that is supposedly the same is bar and plate, but still, not a bad price overall for full "Stage 2"... and I use quotes as some of us think Cobb's 3 stages, without a turbo upgrade is ridiculous. What matters most is the intercooler upgrade.

Edit 2: Yes, wrong brand, it's Mountune that has the fin and tube, that package I described, everything not Cobb, sorry! So yes Cobb is more overpriced than Mountune, which does have some decent priced packages with CUSTOM tune included, that's worth probably $150 alone.


Last edited:

anticon

Active member
Messages
602
Likes
530
Location
Sherwood
#47
Cool thread. Just picked up a used fist. Am trying to figure out to just pick up the cob stage 2 kit or piece my own setup to save a few $$$...
Will look into this intercooler
I get the feeling they dont make these anymore, they were the value fmic before depo, whoosh, pwnall, etc. But if you find one used they can be a good deal.


danbfree

3000 Post Club
Messages
3,510
Likes
1,196
Location
Tigard, Oregon, USA
#49
Yes no listing on MTC site for any Fiesta or Ford intercooler.
At least the Cobb is pretty much identical for those who want one, and honestly the Whoosh/Depo/Pwnall is pretty much the same too... But Steve (Anticon) got an awesome deal on the used one, and we can use his write up to install any of those very similar ones. For those wondering, Pwnall has the best price right now, $286 shipped free as he's moving and wants to clear inventory, I'm very seriously thinking about getting one even if it's not exactly the time of the year you need to buy one. :)


anticon

Active member
Messages
602
Likes
530
Location
Sherwood
#50
Well, I didn't like how the center air deflector mount was pressing on the intercooler which pushed the front bumper cover out, so I reinstalled it. I removed the center mount bracket and flipped it 180 degrees and reinstalled it. I needed a 75 mm long bolt to be able to reach the flipped bracket though. Here are some pics for reference.


Normal bracket


Reversed bracket


Not touching


75 mm reached the reversed bracket


Top