• Sign Up! To view all forums and unlock additional cool features

    Welcome to the #1 Fiesta ST Forum and Fiesta ST community dedicated to Fiesta ST owners and enthusiasts. Register for an account, it's free and it's easy, so don't hesitate to join the Fiesta ST Forum today!


How To Video: Install Mishimoto J-Line Front Mount Intercooler

Messages
8
Likes
6
Location
mia
#1
Thought I'd post over here on this forum as well.

It seems that there has been a lot of talk about this exceptional J-Line intercooler from Mishimoto. I've read threads from here and other forums, there's quite a bit of buzz on it, but no definitive "truths" on the parts to order or how to install.

I felt the need to help the community and make a very comprehensive install video that goes over the entire install from start to finish.

I hope you all find this rewarding and useful. (Grab a beer before you click the link LOL)

[video]https://www.youtube.com/playlist?list=PLXl_7CSwaaC94ygU4AZNJYPEvVP2agc7V[/video]

Part lists are in the video description.

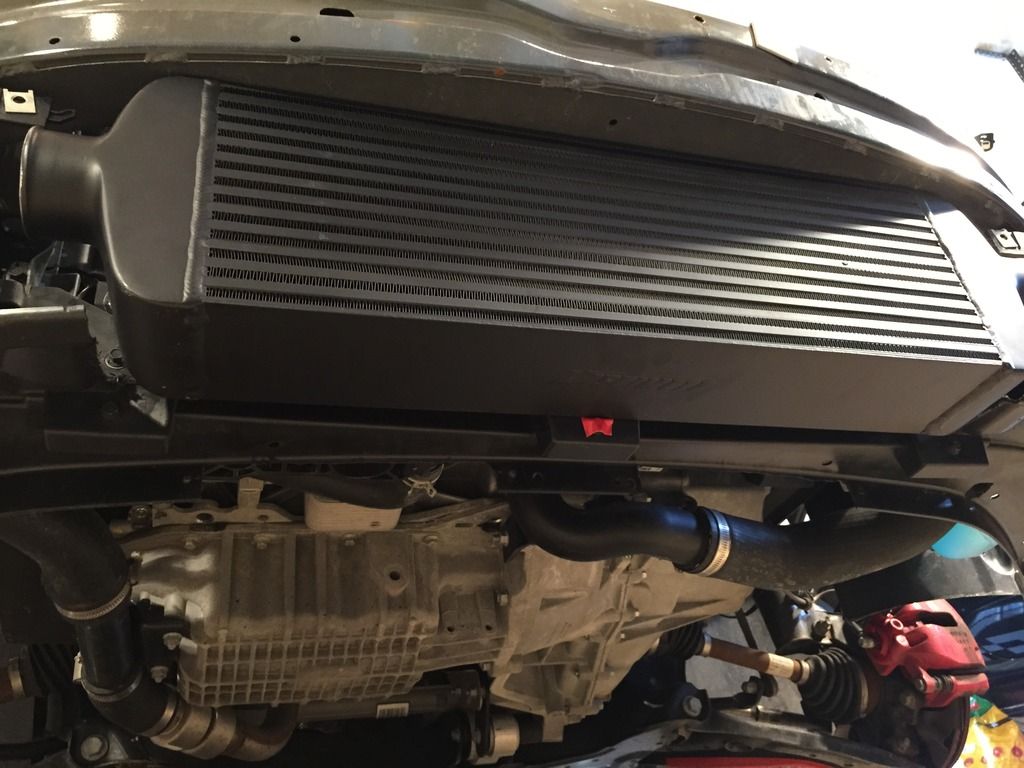
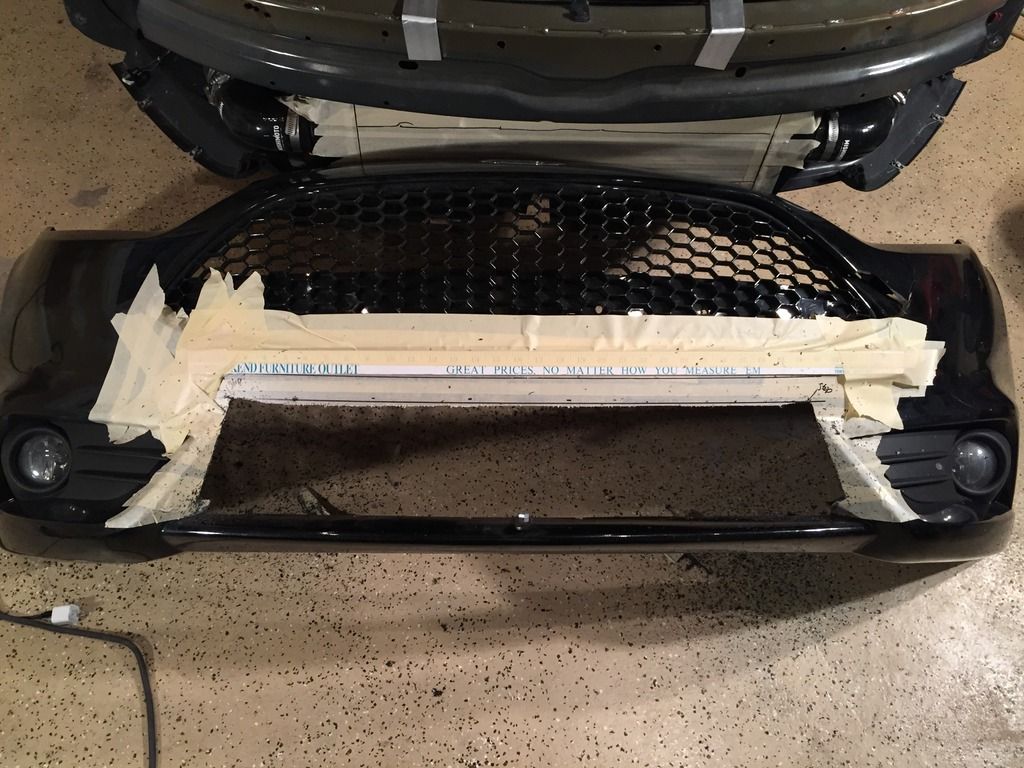
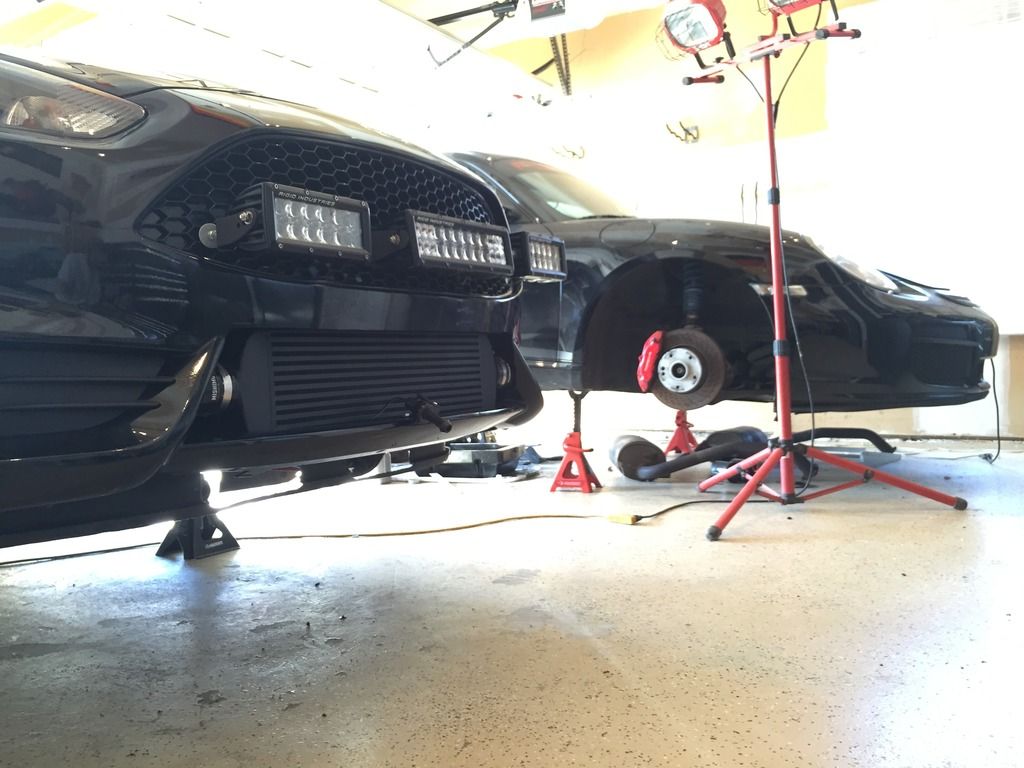
And here are some pictures from the install:


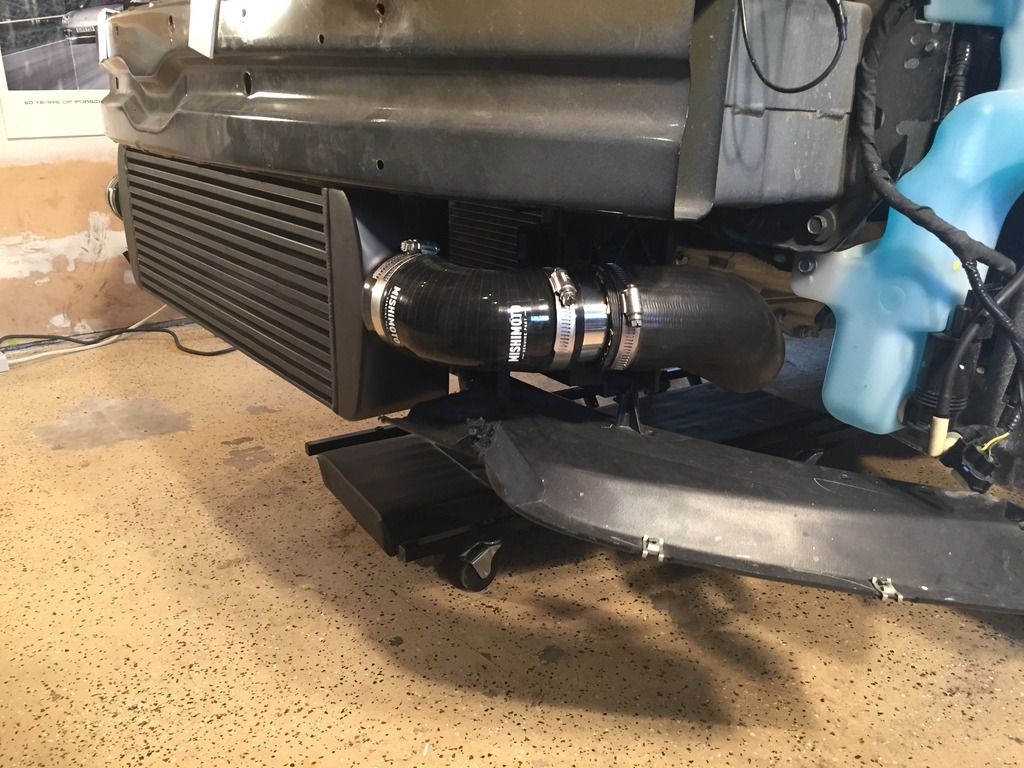
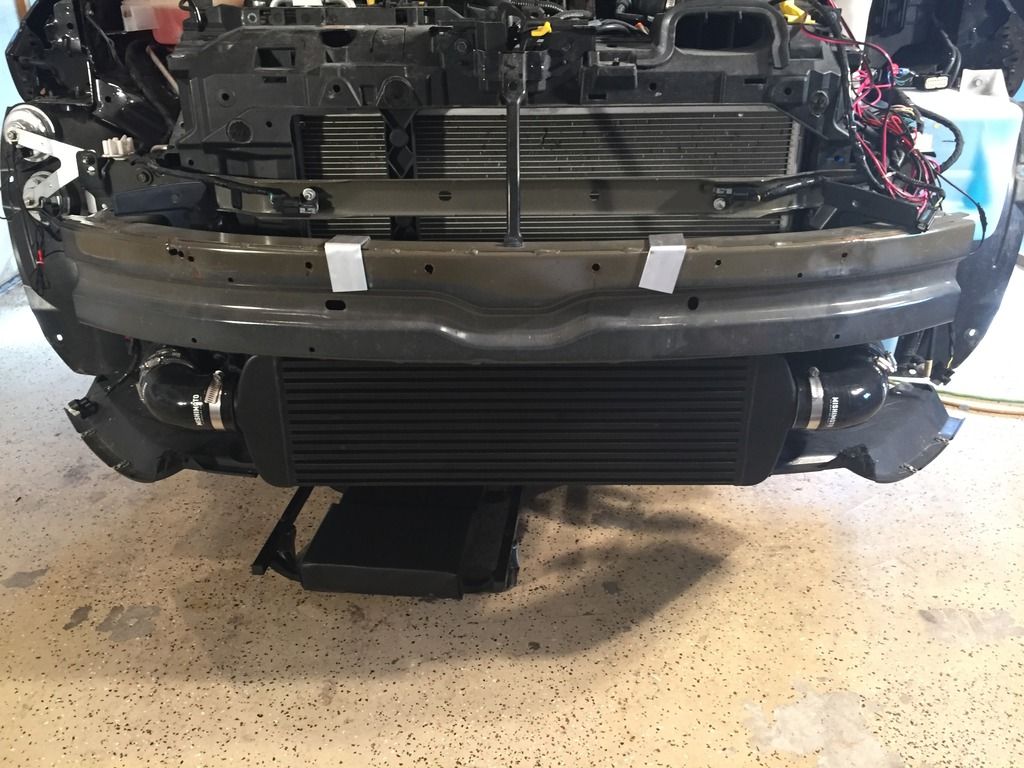
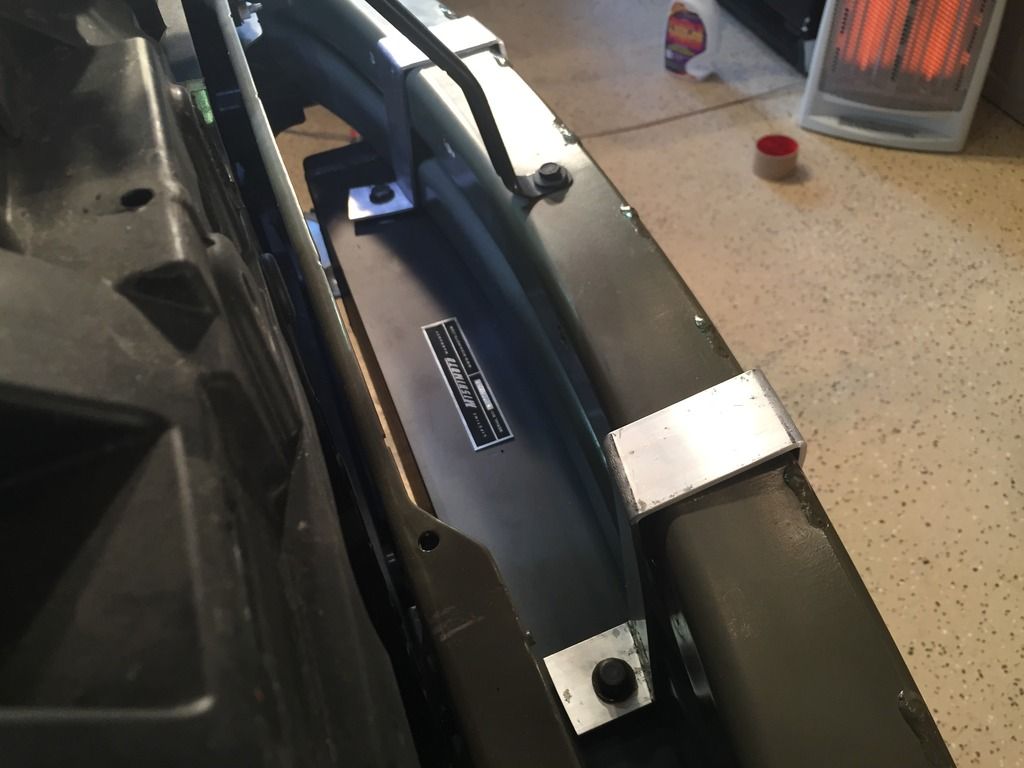
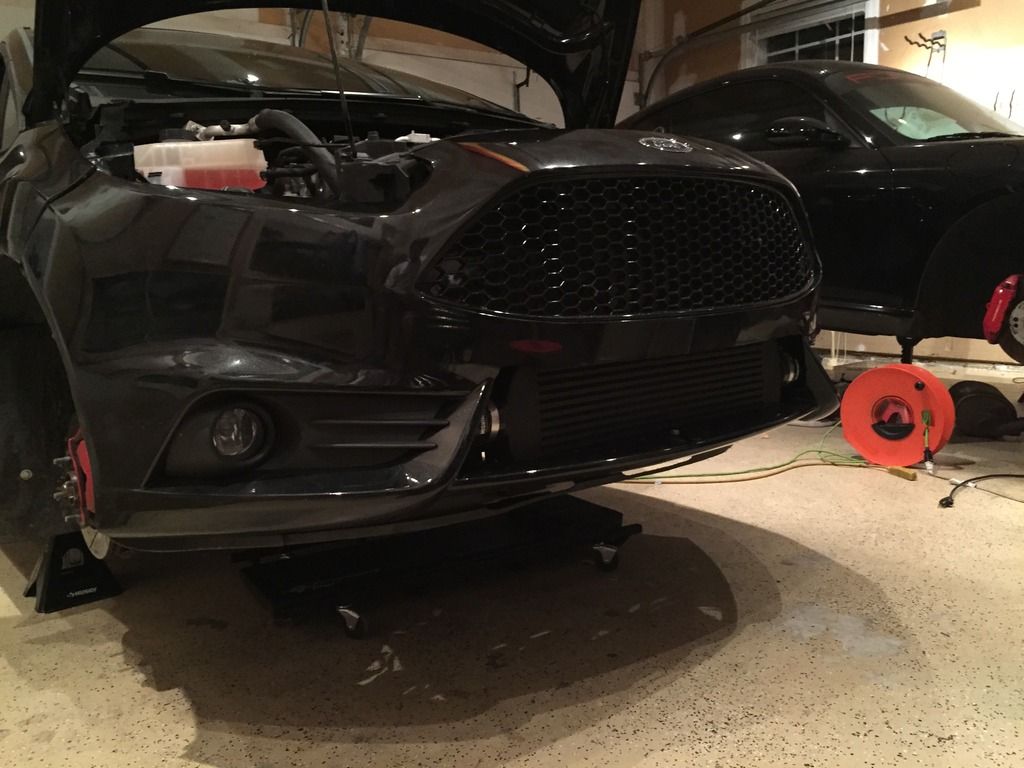
EDIT: You do not need to cut the vertical supports like I did in the video. The Mishimoto J-Line has the end pipes a-symetrical and if you orient the FMIC to have the pipes towards the rear of the car (unlike mine), then you do not have to cut the vertical slats that hold the lower black shroud up. I confirmed this on another member's car when I installed the FMIC on his. I was unaware that the pipes on the FMIC were a-symetrical.


lessard.dcj

1000 Post Club
Messages
1,560
Likes
140
Location
Petawawa
#2
Thanks for posting this. I've seen the youtube install on this twice and it had me questioning weather or not if i wanted to do so much cutting on my baby.
[MENTION=2544]golfguy11800[/MENTION]


iso100

1000 Post Club
Messages
1,500
Likes
135
#3
I just did a quick pull (didn't datalog though) and was blown away by this cooler's ability to cool the charge air.

Ambient temperature is just about 60 degrees and a quick pull starting in 3rd gear all the way up to 100mph only had my charge temps climb to 63. You read that right... literally only 3 degrees F rise. I'm running the Cobb OTS Stage 3 93 octane map and saw peak boost around 22.9psi.

OAR is -1 as it should be with good fuel and I saw a peak Cyl2 (the only one I had a gauge up for) Ignition Adj of +4.6 degrees.

I have a feeling I could beat on this thing from a standing stop all the way to the 140 MPH range and still be under 10 degrees of charge temp rise.


iso100

1000 Post Club
Messages
1,500
Likes
135
#4
Thanks for posting this. I've seen the youtube install on this twice and it had me questioning weather or not if i wanted to do so much cutting on my baby.
[MENTION=2544]golfguy11800[/MENTION]
I just did this install at Golfguy's house this past Saturday. Since I haven't yet mashed any deer with my car I was not going to do any more cutting that absolutely required.

The only stuff we cut on my bumper was a tiny bit on the left and right edges of the openings and the far left and right vertical grill supports. I only had him cut just enough to get the bumper cover to mount back up. Despite having something like 55% of the IC covered visually by the bumper top and bottom areas, I still have been running only 3 degrees over ambient during high-load WOT pulls.

Also, because of the sheer thermal mass of this IC, it takes forever for heat soak at a stoplight to make the charge temps rise. Once moving again, they drop super fast.

TL;DR - I think you can install this IC with minimal cutting and still have amazing performance.


Harvick

1000 Post Club
Messages
1,144
Likes
107
#5
Very informative post and thanks for sharing this.


Perfblue15

1000 Post Club
Messages
1,375
Likes
341
Location
Canyon country
#6
Wow nice video. Im gonna pull my bumper to remove the lower grille now because of you. It just looks so damn agressive. Also where did you get the led light mounts


iso100

1000 Post Club
Messages
1,500
Likes
135
#7
Wow nice video. Im gonna pull my bumper to remove the lower grille now because of you. It just looks so damn agressive. Also where did you get the led light mounts
If you want to be less drastic with your modifications you can just pop out the black horizontal grill slats for this kind of look:


Jutz

Member
Messages
54
Likes
6
Location
Warwick
#10
I've watched the vid and read a couple of additional threads, have a couple things I just wanted to confirm

1) The standard length 2.5" silicone elbows fit fine after all, right?
2) Sounds like cutting is barely, if at all, necessary, as long as you flip the IC so that the inlet and outlet are off center toward the rear?
3) The bracket described in this video...best option? It looks easy enough to make, so I'm already planning on using that, but if there's another thread feel free to point it out


Izzy

Active member
Messages
621
Likes
148
Location
Houston
#11
I've watched the vid and read a couple of additional threads, have a couple things I just wanted to confirm

1) The standard length 2.5" silicone elbows fit fine after all, right?
2) Sounds like cutting is barely, if at all, necessary, as long as you flip the IC so that the inlet and outlet are off center toward the rear?
3) The bracket described in this video...best option? It looks easy enough to make, so I'm already planning on using that, but if there's another thread feel free to point it out
A1)...I used 4" for better fit...didn't like placing unnecessary stress on the parts.
A2)...you are correct
A3)...If you have the tools to go over the bumper bar like the video by all means. I didn't...so I just made simple "L" brackets and secured through the bumper with pressure (split lock) washers on both sides and Nylock nuts. Trust me that thing is not going anywhere!...lol


Jutz

Member
Messages
54
Likes
6
Location
Warwick
#12
A1)...I used 4" for better fit...didn't like placing unnecessary stress on the parts.
A2)...you are correct
A3)...If you have the tools to go over the bumper bar like the video by all means. I didn't...so I just made simple "L" brackets and secured through the bumper with pressure (split lock) washers on both sides and Nylock nuts. Trust me that thing is not going anywhere!...lol
Bah, maybe I shouldn't have ordered the elbows already. As far as the bracket, did you do that on the fly? bend a 90, cut, drill? Doesn't sound like a ton of work, a simple L bracket would be nice


Izzy

Active member
Messages
621
Likes
148
Location
Houston
#13
I bent some 3/8th aluminum bar over the edge of an anvil. Tried doing the whole over the bumper bar thing, but...ain't no'body got time fo' dat!...lol


Jutz

Member
Messages
54
Likes
6
Location
Warwick
#14
I bent some 3/8th aluminum bar over the edge of an anvil. Tried doing the whole over the bumper bar thing, but...ain't no'body got time fo' dat!...lol
Turns out those elbows were out of stock anyway, (at modbargains, as have 90% of the parts I've tried to order for the FiST) so I'm going to grab the longer ones. Where did you order those from if you don't mind?


Izzy

Active member
Messages
621
Likes
148
Location
Houston
#15
Turns out those elbows were out of stock anyway, (at modbargains, as have 90% of the parts I've tried to order for the FiST) so I'm going to grab the longer ones. Where did you order those from if you don't mind?
HPS...you can find them here:

http://www.hiprospeed.com/HPS-63mm-90-Degree-Elbow-Silicone-Hose-p/htsec90-250-blk.htm

Also, I have the Cobb IC piping so I had no need for the Vibrant aluminum couplers. So if anyone needs them on the cheap...let me know.


Jutz

Member
Messages
54
Likes
6
Location
Warwick
#16

Izzy

Active member
Messages
621
Likes
148
Location
Houston
#17
I was hoping that wasn't the one...that's like triple the price, lol. I ordered the couplers on Summit, so I'm good there.
Expensive yes, but they are effective. I've had leaks with lesser brands. These have yet to fail me. Also, their clamps work great. Big part of keeping the IC leak free.


Ford Community Posts


Top