Nutshell: The slide mount guide pins routinely seize. Using 1/2" diameter steel wire pipe cleaner brushes, hone out the caliper slide mount bores. Reduced friction means much less heat. You won't burn-up your lubricant and won't damage your silicon boots. Getting the pins out of the bracket is easy and requires no special tool. Details below.
Tools Required:
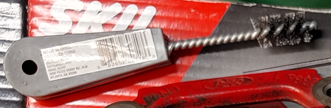
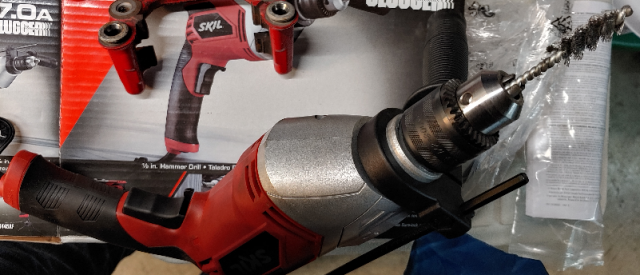
* Eight count Steel Wire Pipe Cleaner Brushes - must have enough neck to put in drill - 1/2" diameter will work for rear while front may require larger diameter brush.
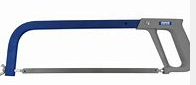
 * Hacksaw
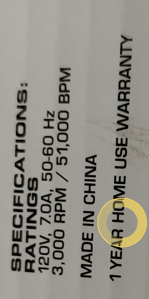
 * Drill - A/C Plug-In Powered (no battery) - High Speed 3,000 RPM
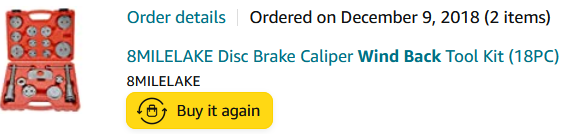
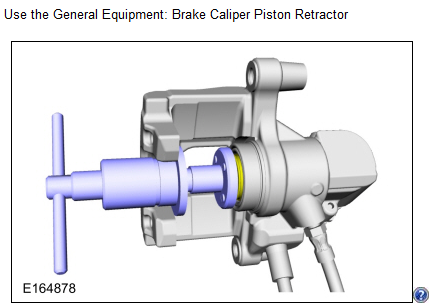
 * Caliper Piston wind-back tool.
 * Normal Metric Socket or wrench set.
 * Normal tools required to raise the vehicle, remove wheel, caliper, bracket.
HOW TO REMOVE THE SEIZED CALIPER SLIDE-MOUNT PINS:
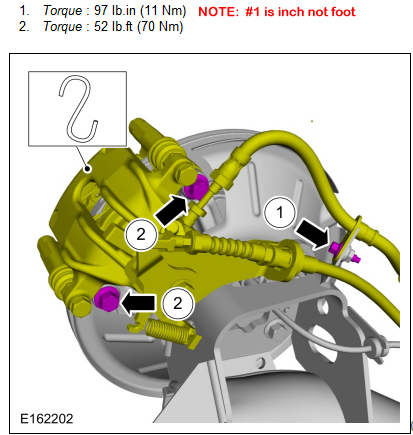
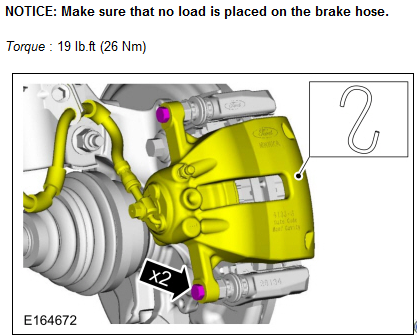
* Detach the brake caliper but leave the carrier bracket attached. (disassembly steps provided)
* To remove the seized slide-pins, begin turning the nut with your ratchet or wrench.
(not threaded-in so doesn't matter whether clockwise or counter-clockwise)
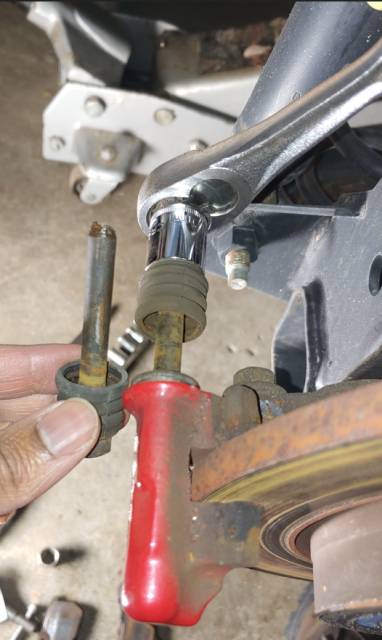
* As you turn the nut, with your thumb and index finger on the boot, place a little pressure against the pin.
* With each turn the pin will begin to back-out.
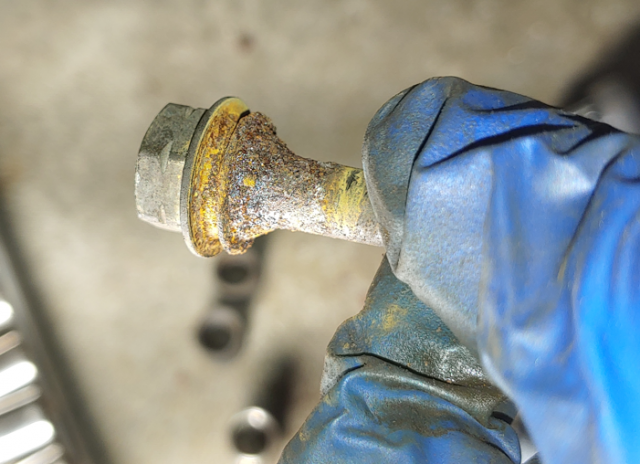

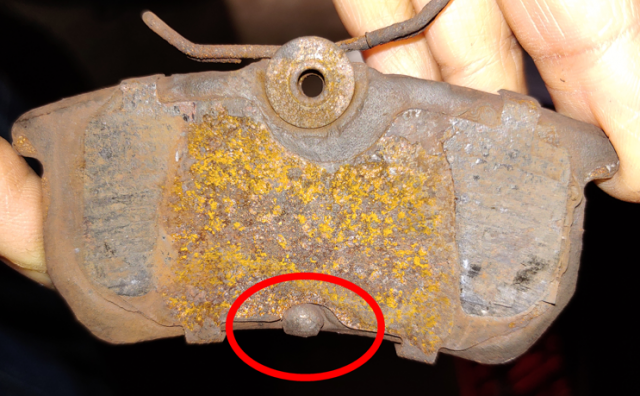
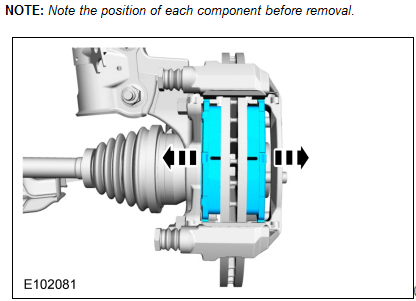
* Clean-up pins as needed. If after cleanup you find they're degraded, replace. (keep in mind these are brakes - literally the most important system on the vehicle)
* Clean up the silicon boots with silicon spray lubricant and protect with paste. If the silicon boots are ripped, degraded or provide a loose seal, replace.
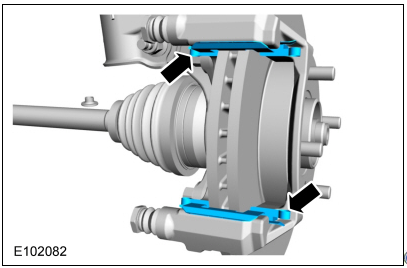
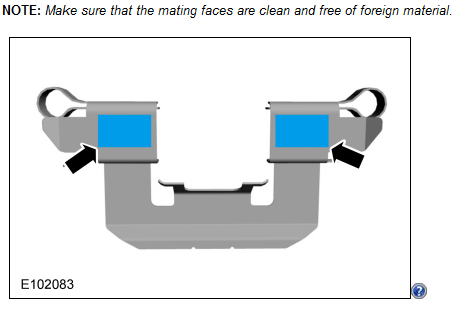
* Must thoroughly clean up and protect the seat for the boot on both the pin and the slide mount carrier bracket or the boot will not seal.
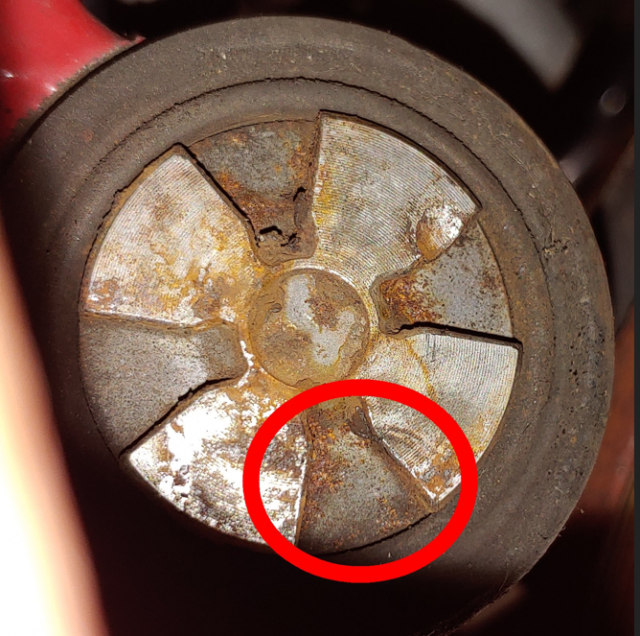
HOW TO HONE OUT THE CALIPER SLIDE-MOUNT BORES:
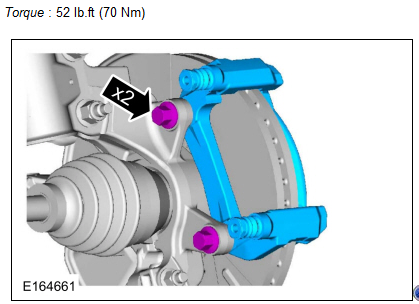
* Remove the bracket from the vehicle. (disassembly steps provided)
* Use carb/brake cleaner to clean out the bracket's bores.
* Use the hacksaw to remove the handle from the steel wire tube brush.
* Insert brush into high-speed drill.
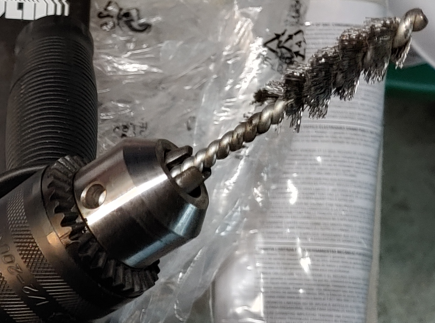 * Run the drill and insert into bore.
* The drill will burn-up and fail with extended runs. Give the drill breaks to cool down.
* Try to hone out each bore, thoroughly and evenly. The bracket will get HOT.
* Remove too little material means this will reoccur. Clean out the bores.
* Pack the bores with high-temp silicon based lubricant. (repels water, don't mean "pack" in a literal sense)
Pre-Service TIps:
* It is recommended that only one wheel be disassembled at a time. Helps in cases where you require the other for reference.
* It is always recommended that you perform brake services in pairs; never just do one side. Service both rears or service both fronts; never just one front or just one rear.
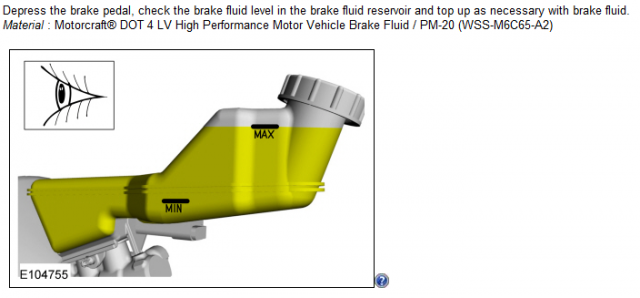
* Take off the brake reservoir cap. (add rag if topped-off reservoir sine last service)
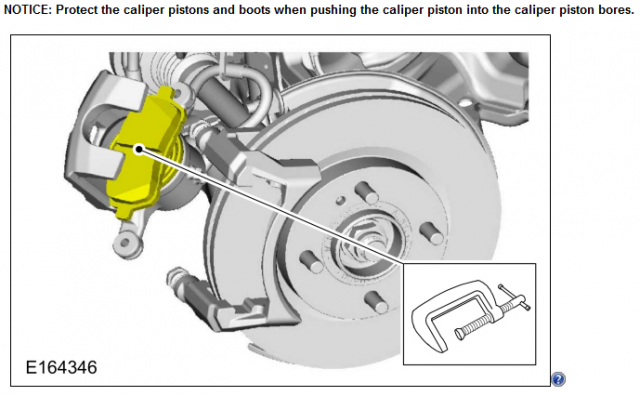
* To avoid possiblity of creating issue with ABS pump, many will place pressure on the piston with the wind-back tool, then crack the caliper piston bleed screw open. Lock the bleed screw before releasing wind back tool.
* Bleed screws can be damaged with little torque.
* Lug nut torque is 100 ft/lbs.
Rear Disassembly:
* Raise rear of vehicle, remove the wheel, caliper, brake pads. Use wheel chocks in front of and behind a front tire on the ground.
Front Disassembly:
* Raise front of vehicle, remove the wheel, caliper, brake pads. Use wheel chocks in front of and behind a rear tire on the ground.
Notes on reinstall...
Backstory:
Just parking the vehicle after a 30 mile trip, I notice a ton of patchy thick white smoke coming from the rear passenger side in my vehicle. Bored with driving, I had been gunning it pretty heavily from each traffic light. So you know what the first thought is. "Ugh did I *somehow* blow my engine?" Unmodded, this would certainly be an accomplishment. Leaving the engine running and driver door open I rapidly exit and begin walking around to witness the source and before I could even reach the rear, see it's coming from the side of the vehicle. The brake pads were vaporizing against a rotor with a blue tinge. Shutdown the engine, put it in first, released the parking brake, let it roll forward a little and rest on the transmission. (not on a steep decline and would hit a high curb so would be fine leaving it without a wheel chock) Couple of hours later I took to the road to head back home but using an alternate route that avoids the highway. Fortunately there was a lot of rain. I sort of looked for puddles and kept it below 55MPH for the first few miles before stopping to check on it. No issues.
Put the rear up in the air the next day and spun the rear passenger wheel. No real drag, it kept rolling for several rotations before slowly coming to a stop. 🤔 Pulled it apart the next day and noticed the caliper slide mounts were locked. Then the 💡 went off.
Dealt with the locking slide-mounts in a previous car more than a decade ago. It was a very regular issue until adequately honing out the slide mounts. You want to remove a little metal from the bore. That had proven to be the permanent solution.
TIP: Keep a wheel chock in your spare tire well.
Tools Required:
* Eight count Steel Wire Pipe Cleaner Brushes - must have enough neck to put in drill - 1/2" diameter will work for rear while front may require larger diameter brush.
HOW TO REMOVE THE SEIZED CALIPER SLIDE-MOUNT PINS:
* Detach the brake caliper but leave the carrier bracket attached. (disassembly steps provided)
* To remove the seized slide-pins, begin turning the nut with your ratchet or wrench.
(not threaded-in so doesn't matter whether clockwise or counter-clockwise)
* As you turn the nut, with your thumb and index finger on the boot, place a little pressure against the pin.
* With each turn the pin will begin to back-out.
* Clean-up pins as needed. If after cleanup you find they're degraded, replace. (keep in mind these are brakes - literally the most important system on the vehicle)
* Clean up the silicon boots with silicon spray lubricant and protect with paste. If the silicon boots are ripped, degraded or provide a loose seal, replace.
* Must thoroughly clean up and protect the seat for the boot on both the pin and the slide mount carrier bracket or the boot will not seal.
HOW TO HONE OUT THE CALIPER SLIDE-MOUNT BORES:
* Remove the bracket from the vehicle. (disassembly steps provided)
* Use carb/brake cleaner to clean out the bracket's bores.
* Use the hacksaw to remove the handle from the steel wire tube brush.
* Insert brush into high-speed drill.
* The drill will burn-up and fail with extended runs. Give the drill breaks to cool down.
* Try to hone out each bore, thoroughly and evenly. The bracket will get HOT.
* Remove too little material means this will reoccur. Clean out the bores.
* Pack the bores with high-temp silicon based lubricant. (repels water, don't mean "pack" in a literal sense)
Pre-Service TIps:
* It is recommended that only one wheel be disassembled at a time. Helps in cases where you require the other for reference.
* It is always recommended that you perform brake services in pairs; never just do one side. Service both rears or service both fronts; never just one front or just one rear.
* Take off the brake reservoir cap. (add rag if topped-off reservoir sine last service)
* To avoid possiblity of creating issue with ABS pump, many will place pressure on the piston with the wind-back tool, then crack the caliper piston bleed screw open. Lock the bleed screw before releasing wind back tool.
* Bleed screws can be damaged with little torque.
* Lug nut torque is 100 ft/lbs.
Rear Disassembly:
* Raise rear of vehicle, remove the wheel, caliper, brake pads. Use wheel chocks in front of and behind a front tire on the ground.
Front Disassembly:
* Raise front of vehicle, remove the wheel, caliper, brake pads. Use wheel chocks in front of and behind a rear tire on the ground.
Notes on reinstall...
Backstory:
Just parking the vehicle after a 30 mile trip, I notice a ton of patchy thick white smoke coming from the rear passenger side in my vehicle. Bored with driving, I had been gunning it pretty heavily from each traffic light. So you know what the first thought is. "Ugh did I *somehow* blow my engine?" Unmodded, this would certainly be an accomplishment. Leaving the engine running and driver door open I rapidly exit and begin walking around to witness the source and before I could even reach the rear, see it's coming from the side of the vehicle. The brake pads were vaporizing against a rotor with a blue tinge. Shutdown the engine, put it in first, released the parking brake, let it roll forward a little and rest on the transmission. (not on a steep decline and would hit a high curb so would be fine leaving it without a wheel chock) Couple of hours later I took to the road to head back home but using an alternate route that avoids the highway. Fortunately there was a lot of rain. I sort of looked for puddles and kept it below 55MPH for the first few miles before stopping to check on it. No issues.
Put the rear up in the air the next day and spun the rear passenger wheel. No real drag, it kept rolling for several rotations before slowly coming to a stop. 🤔 Pulled it apart the next day and noticed the caliper slide mounts were locked. Then the 💡 went off.
Dealt with the locking slide-mounts in a previous car more than a decade ago. It was a very regular issue until adequately honing out the slide mounts. You want to remove a little metal from the bore. That had proven to be the permanent solution.
TIP: Keep a wheel chock in your spare tire well.
Last edited: