
Hey guys, I've finally found the time to create a review for the Wagner intercooler clone available on Ebay. This was a very interesting experience and tested my fabrication and fitting abilities. There has been conflicting information available on the forums about the fitment of the Wagner intercooler. Some say it fits, others say it wont, and some say it fits with "minor " modification. Does it fit? Let's find out!
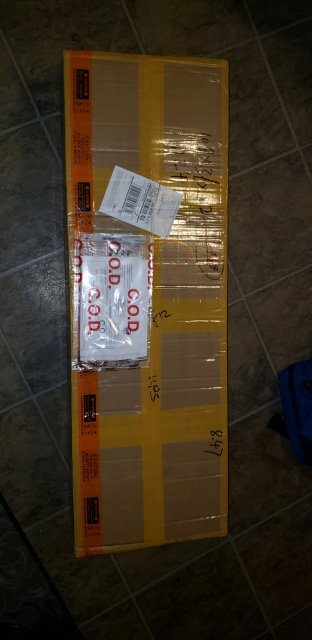
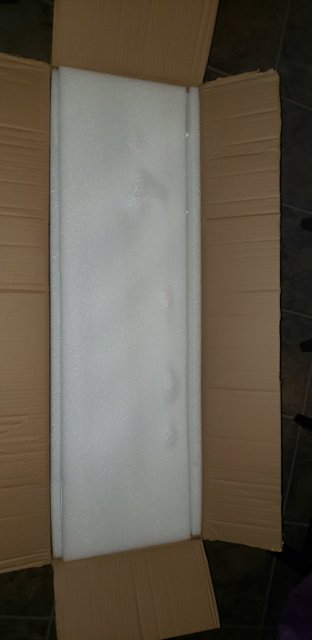
I ordered an intercooler off of Ebay (https://www.ebay.com/itm/193270620352) around $300 shipped, and it tool about two weeks to arrive. The package was well cushioned and showed no signs of damage.
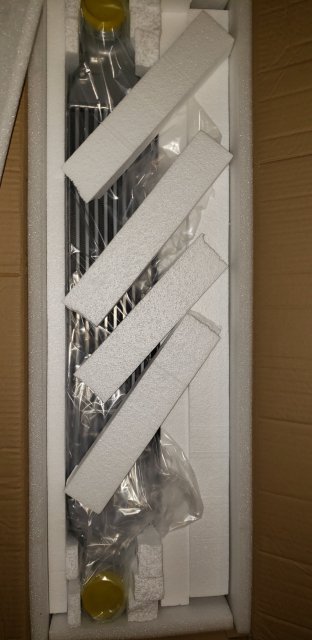
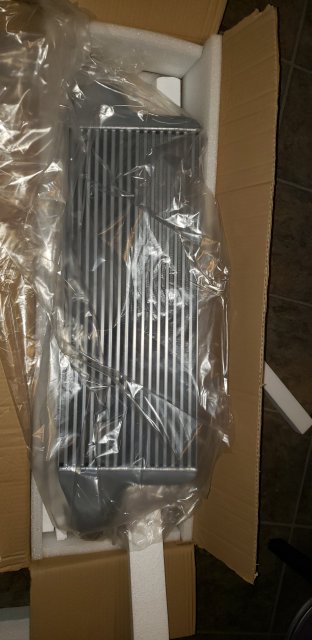
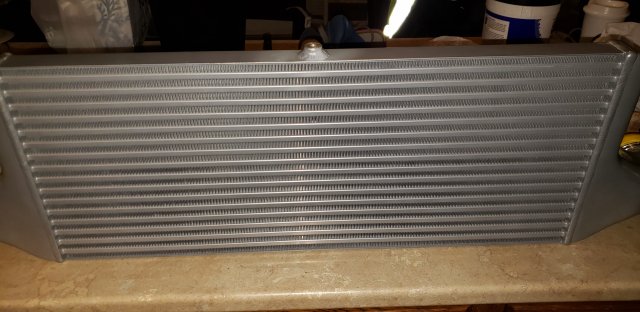
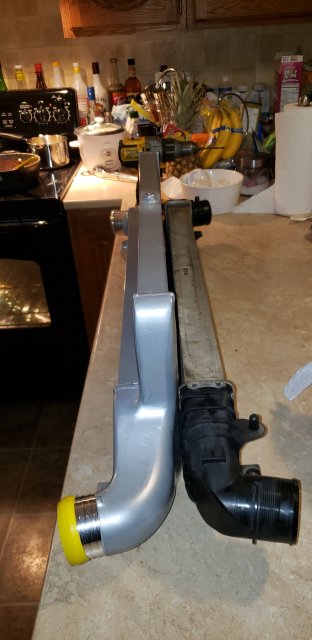
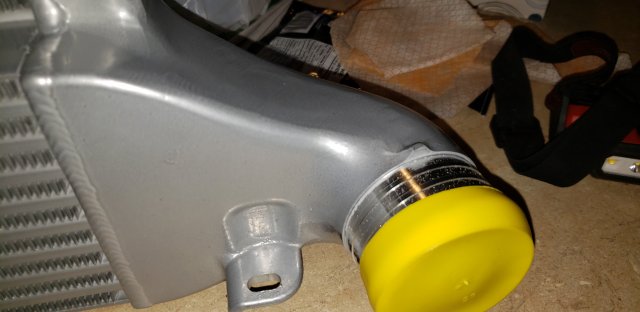
The first thing I noticed is how big it is! Its huge, the square footage is twice the size of the stock one and its at least 50% thicker. No bent fins or any crushed sections on the one I recieved.

Weld quality is good, no noticable blemishes or poorly done sections. Coverage is good and i feel like the quality is appropriate for the cost of this intercooler.
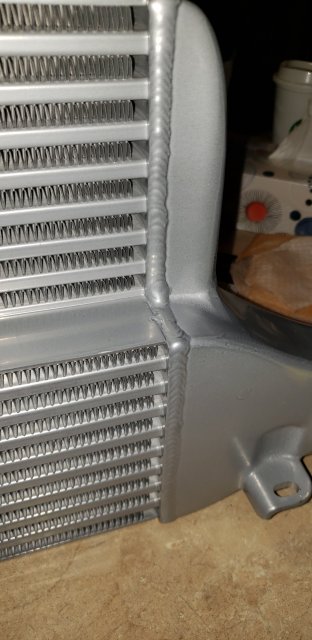
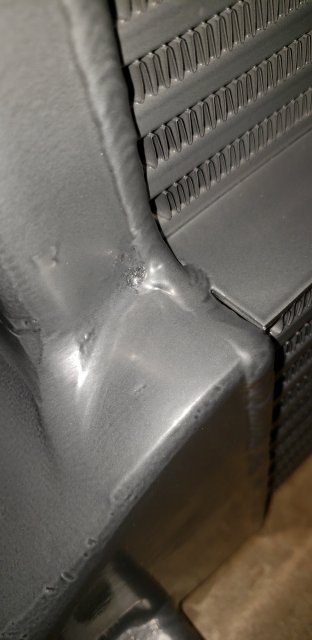
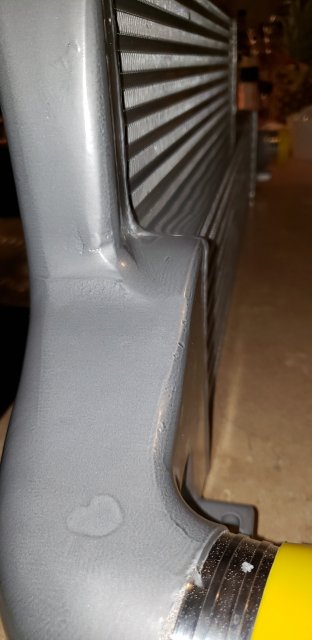
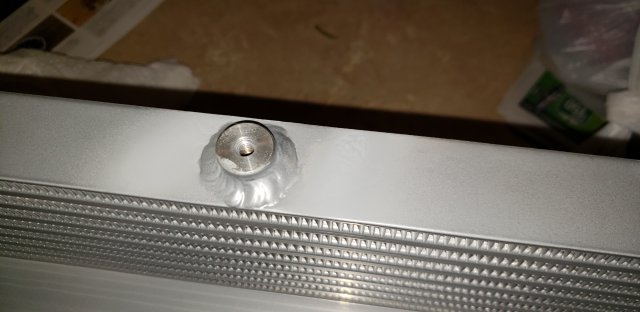
The only issue i have with the product is the coating/paint coverage and quality. It is hit and miss in some spots and seems to have been applied half assed. On one of the end tanks the coating is missing from what looks to be a poorly applied tape line. This is where you begin to see the cost cutting this product has been subjected to and it is definitely inferior to more expensive brand name options. The upper bracket nut on the top of the intercooler is nicely welded, but it looks like it was installed AFTER the original paint/coating was applied, and instead of recoating the intercooler they decided to rattle can it. Its cheesy, but functional. The stuff that matters seems to be high quality and you could always just buy a can of paint and redo it. Overall i would rate the initial quality of the intercooler 7.5/10. I like how they included rubber covers on the end tanks to prevent any foreign matter from entering.
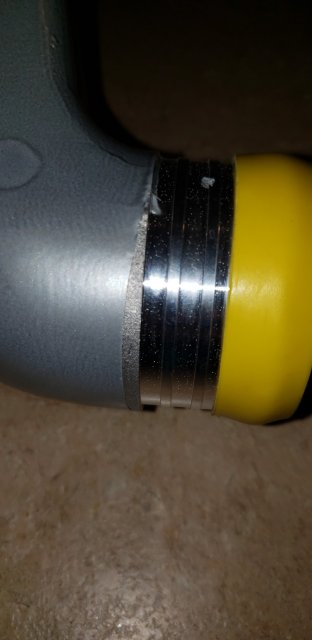
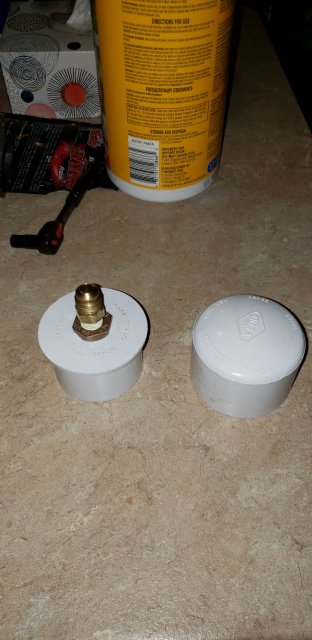
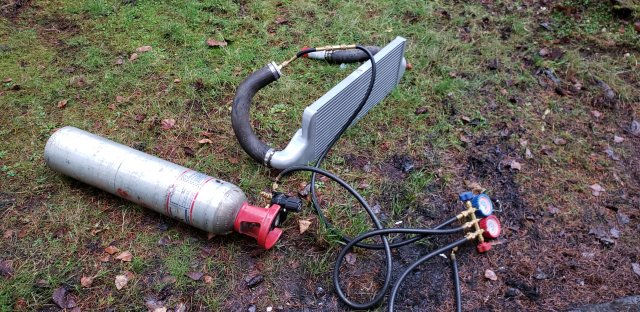
So it looks to be good, does it hold pressure? Luckily I am a refrigeration technician who is well accustomed to pressure testing equipment, so I dragged out my manifold set, nitrogen and leak soap. At first i tried to install some schrader fittings in the yellow rubber and glue them shut, but i blew the fittings off first try. I then went to the local plumbing wholesaler and picked up some PVC fittings to make a proper seal from which to test from. Cant remember the size but i think it was 2.5''
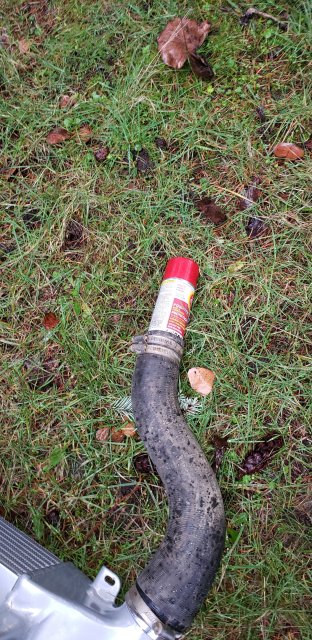
I took the charge pipes off the car, and installed them onto the intercooler and stuck the plugs in the other sides of the charge pipes, and them tightened them up. One of them fit, but the other was about a 1/4 inch too big. I didnt want to run out again, so I found that a can of fluid film fit perfectly . First i pressure tested the intercooler to 30 PSIG, and then ramped it above normal design pressures to 50PSIG, well above what this intercooler will be subjected to. Please do not copy my fluid film idea! I pressure tested it for 2 hours and noticed no changes. After it cleared the 2 hour timeframe I covered it in refrigerant bubble soap and found no microleaks anywhere. Hooray! I blew out the core afterwards and there were no metal particles or shit inside of it. This is a tube and fin design.


So there are no leaks, the quality isn't half bad, does it fit? Sort of. I have to echo what Ron from Whoosh has said about the Wagner style in that it fits, but it doesn't belong in there. This is definitely a DIY job, and if you do not have access to a grinder, metal files, plastic snips, and basic fabrication experience this intercooler does not fit.
First thing to do is to take the bumper off, remove the factory intercooler and remove the plastic front undertray. There are plenty of guides on this site which show that process, we are gonna skip that part.
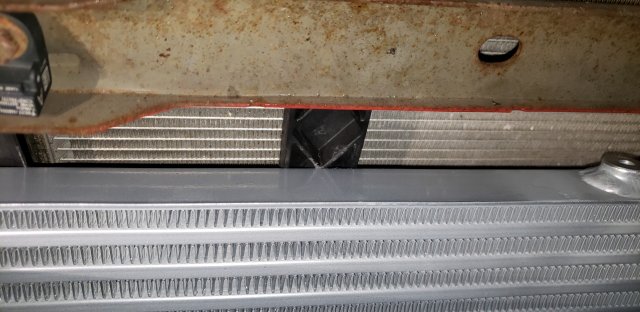
Once the bumper and stock intercooler are out and you try to install this thing, the first thing you will notice is that it doesn't fit. The crash bar is too wide, and there isn't enough room for the intercooler to sit up straight and for the mounting holes to align properly with the factory intercooler mounts. It also rubs on the front of the plastic thing in front of the radiator.
However I wasn't about to concede defeat and ended up making it work. The fact of the matter is that you will need to cut plastic off of the factory intercooler mounting brackets and grind away metal off of the crash bar along the edges where the intercooler hits to prevent rub through if you want to make this thing fit properly and not fail from chafing.
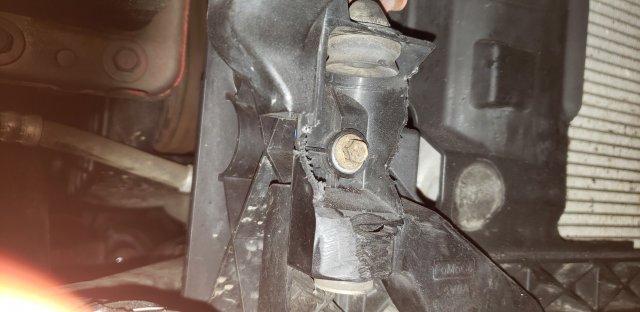
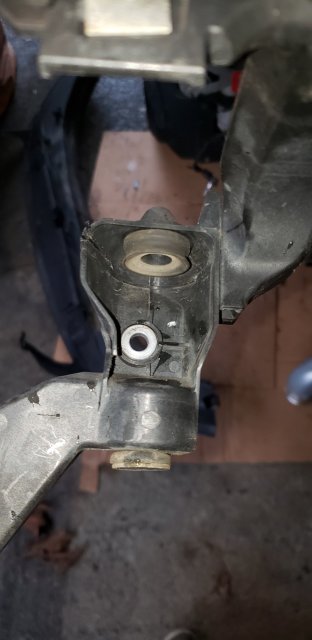
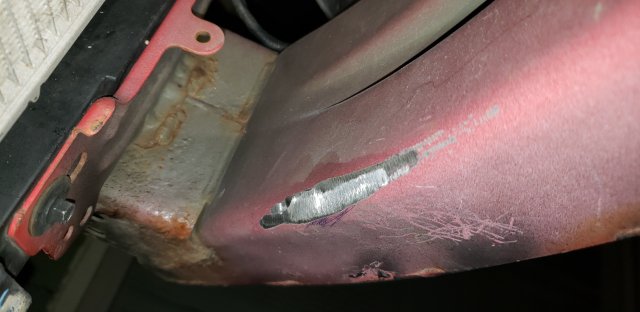
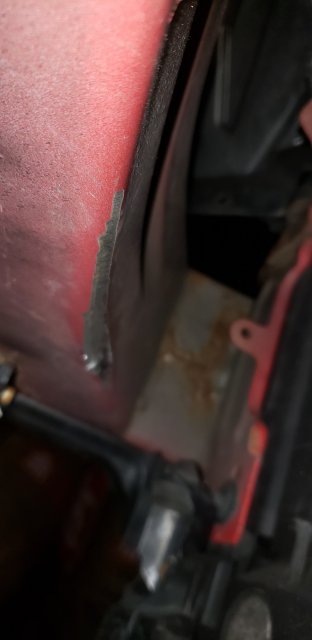
Pictured above is the factory mounting bracket before and after cutting, and the locations that need to be ground away on the crash bar. Theres no real advice that i can give you here for this part. Youll need to mount up the intercooler, see if it fits, take some material away, remount, see if it fits etc. You'll know when you've taken off enough and I recommend a extra set of hands or a floor jack to help you position everything correctly. I was determined to not completely ruin my mounts in case I changed this intercooler out for one that fits properly and I was able to get everything installed without permanently ruining any of the factory plastic or rendering anything unusable. Its a time consuming process but eventually you should have something that looks like this.
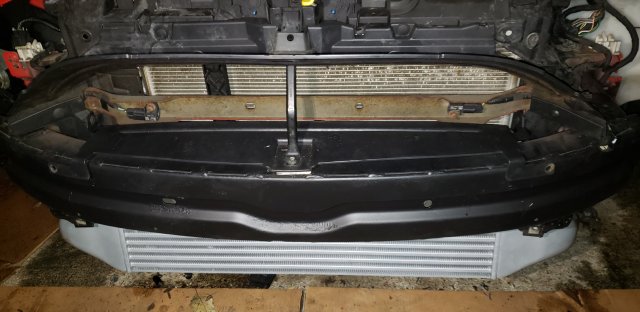
It fits just barely. With the top bracket fabricated and installed i was able to push the intercooler off of the crash bar to prevent any chafing. Once you mount up the charge pipes the driver side one is too long, it mounts up but begins to buckle and collapse. I ended up having to cut a few inches off of the total length to get it to fit right. I drilled some small holes in the plastic surrounding the lower mounting tabs on the intercooler and secured the lower half of the intercooler with zip ties. Jank, but it works. In the end the intercooler is securely installed even without the upper mounting bracket.
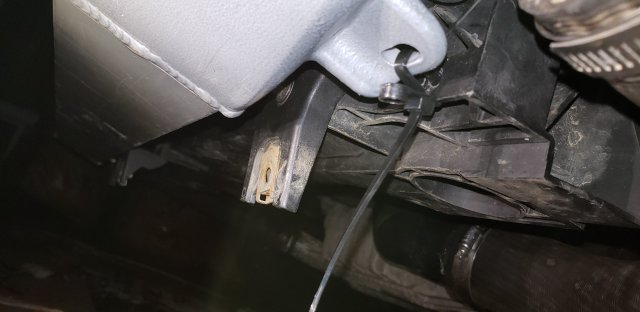
After this point i reinstalled the factory undertray assembly and began fabricating the mounting bracket for the upper bolt hole. We are going to utilize the existing hole for the hood prop latch on the crash bar to secure the upper half of the intercooler. You'll need to source a piece of 1/8'' thick steel at least 30 inches by 5 inches, I went to my local steel shop in town and paid 5 bucks for a piece. The hood latch rod will need to be bent upwards slightly in order for the steel to fit underneath. There will be a slight downwards angle to the intercooler side of the bracket, i used a hammer and just gave it a smack incrementally on the ground until i got the shape i desired. Meaure off the distance between the holes and use a 3/8 drill bit to drill holes in the steel plate. You could probably get a shop to make this part for you but its super simple to assemble. When drilling the holes you will need to keep in mind that the top bracket needs to pull the intercooler off of the crash bar ever so slighty, and leave a small offset. The goal is to push the intercooler back towards the rear of the car while threading in the front bracket bolt, insuring there is no chafing or rubbing.
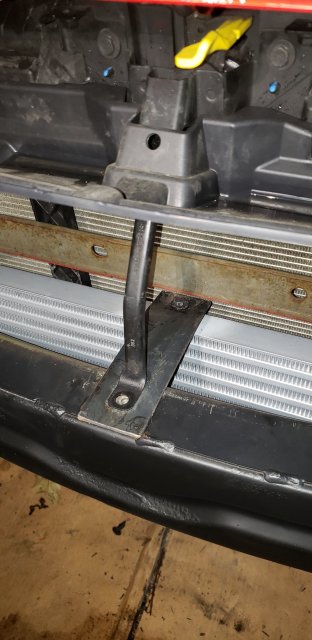
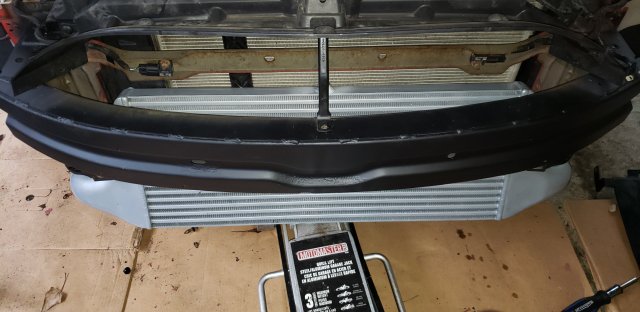
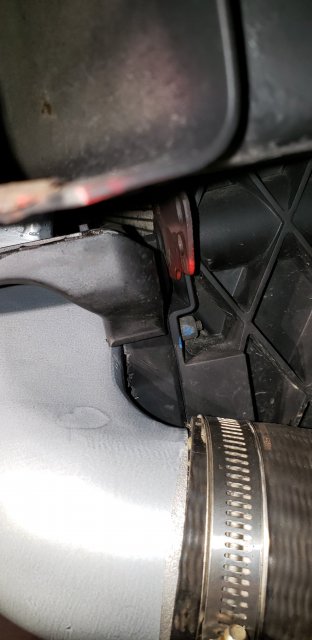
Once you have made the bracket its time to bolt it down. There is a little plastic tray that sits above the factory intercooler to force air through it, we are reusing this part to force air through the top half of the intercooler. Unbelievably it fits almost like a glove for this application and needs some minor trimming to the side feet to sit flush with the top of the crash bar. You'll know what i mean when you get to this part. Place the plastic tray on top of the crash bar and begin to thread in the bolt into the hole on the outwards end of the bracket while applying rearwards pressure. If enough material has been removed and the bracket properly assembled there will be no contact from the crash bar to the intercooler.
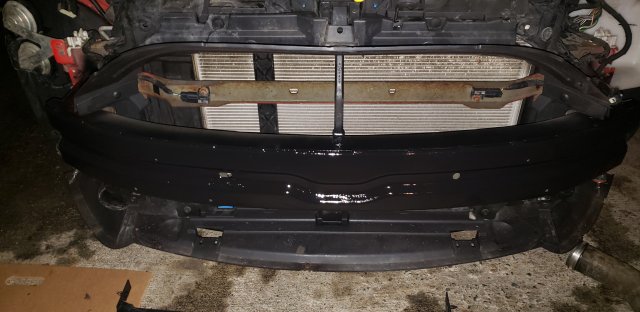
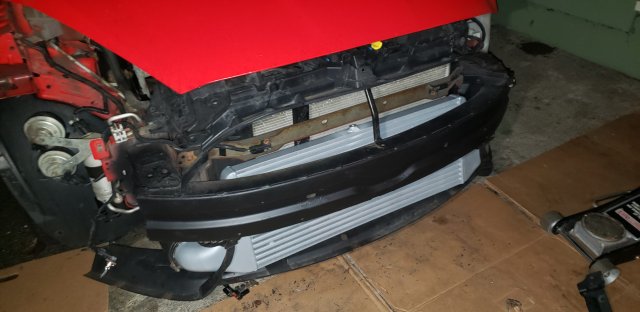
Final product is shown below.

All finished! This was a buttload of work, I must have spent 6 or more hours playing with it to get it to a point i was satisfied with. I cant say i would recommend this over a similarly priced Whoosh product or a Bravo Alpha intercooler. Its the biggest core your money can buy at $300 but its alot of fabrication and time to get it to fit properly. I would only recommend this product to people who absolutely need a big intercooler for cheap or for someone who has experience in fabrication and fitting.
I ordered an intercooler off of Ebay (https://www.ebay.com/itm/193270620352) around $300 shipped, and it tool about two weeks to arrive. The package was well cushioned and showed no signs of damage.
The first thing I noticed is how big it is! Its huge, the square footage is twice the size of the stock one and its at least 50% thicker. No bent fins or any crushed sections on the one I recieved.
Weld quality is good, no noticable blemishes or poorly done sections. Coverage is good and i feel like the quality is appropriate for the cost of this intercooler.
The only issue i have with the product is the coating/paint coverage and quality. It is hit and miss in some spots and seems to have been applied half assed. On one of the end tanks the coating is missing from what looks to be a poorly applied tape line. This is where you begin to see the cost cutting this product has been subjected to and it is definitely inferior to more expensive brand name options. The upper bracket nut on the top of the intercooler is nicely welded, but it looks like it was installed AFTER the original paint/coating was applied, and instead of recoating the intercooler they decided to rattle can it. Its cheesy, but functional. The stuff that matters seems to be high quality and you could always just buy a can of paint and redo it. Overall i would rate the initial quality of the intercooler 7.5/10. I like how they included rubber covers on the end tanks to prevent any foreign matter from entering.
So it looks to be good, does it hold pressure? Luckily I am a refrigeration technician who is well accustomed to pressure testing equipment, so I dragged out my manifold set, nitrogen and leak soap. At first i tried to install some schrader fittings in the yellow rubber and glue them shut, but i blew the fittings off first try. I then went to the local plumbing wholesaler and picked up some PVC fittings to make a proper seal from which to test from. Cant remember the size but i think it was 2.5''
I took the charge pipes off the car, and installed them onto the intercooler and stuck the plugs in the other sides of the charge pipes, and them tightened them up. One of them fit, but the other was about a 1/4 inch too big. I didnt want to run out again, so I found that a can of fluid film fit perfectly
. First i pressure tested the intercooler to 30 PSIG, and then ramped it above normal design pressures to 50PSIG, well above what this intercooler will be subjected to. Please do not copy my fluid film idea! I pressure tested it for 2 hours and noticed no changes. After it cleared the 2 hour timeframe I covered it in refrigerant bubble soap and found no microleaks anywhere. Hooray! I blew out the core afterwards and there were no metal particles or shit inside of it. This is a tube and fin design.
So there are no leaks, the quality isn't half bad, does it fit? Sort of. I have to echo what Ron from Whoosh has said about the Wagner style in that it fits, but it doesn't belong in there. This is definitely a DIY job, and if you do not have access to a grinder, metal files, plastic snips, and basic fabrication experience this intercooler does not fit.
First thing to do is to take the bumper off, remove the factory intercooler and remove the plastic front undertray. There are plenty of guides on this site which show that process, we are gonna skip that part
.
Once the bumper and stock intercooler are out and you try to install this thing, the first thing you will notice is that it doesn't fit. The crash bar is too wide, and there isn't enough room for the intercooler to sit up straight and for the mounting holes to align properly with the factory intercooler mounts. It also rubs on the front of the plastic thing in front of the radiator.
However I wasn't about to concede defeat and ended up making it work. The fact of the matter is that you will need to cut plastic off of the factory intercooler mounting brackets and grind away metal off of the crash bar along the edges where the intercooler hits to prevent rub through if you want to make this thing fit properly and not fail from chafing.
Pictured above is the factory mounting bracket before and after cutting, and the locations that need to be ground away on the crash bar. Theres no real advice that i can give you here for this part. Youll need to mount up the intercooler, see if it fits, take some material away, remount, see if it fits etc. You'll know when you've taken off enough and I recommend a extra set of hands or a floor jack to help you position everything correctly. I was determined to not completely ruin my mounts in case I changed this intercooler out for one that fits properly and I was able to get everything installed without permanently ruining any of the factory plastic or rendering anything unusable. Its a time consuming process but eventually you should have something that looks like this.
It fits just barely. With the top bracket fabricated and installed i was able to push the intercooler off of the crash bar to prevent any chafing. Once you mount up the charge pipes the driver side one is too long, it mounts up but begins to buckle and collapse. I ended up having to cut a few inches off of the total length to get it to fit right. I drilled some small holes in the plastic surrounding the lower mounting tabs on the intercooler and secured the lower half of the intercooler with zip ties. Jank, but it works. In the end the intercooler is securely installed even without the upper mounting bracket.
After this point i reinstalled the factory undertray assembly and began fabricating the mounting bracket for the upper bolt hole. We are going to utilize the existing hole for the hood prop latch on the crash bar to secure the upper half of the intercooler. You'll need to source a piece of 1/8'' thick steel at least 30 inches by 5 inches, I went to my local steel shop in town and paid 5 bucks for a piece. The hood latch rod will need to be bent upwards slightly in order for the steel to fit underneath. There will be a slight downwards angle to the intercooler side of the bracket, i used a hammer and just gave it a smack incrementally on the ground until i got the shape i desired. Meaure off the distance between the holes and use a 3/8 drill bit to drill holes in the steel plate. You could probably get a shop to make this part for you but its super simple to assemble. When drilling the holes you will need to keep in mind that the top bracket needs to pull the intercooler off of the crash bar ever so slighty, and leave a small offset. The goal is to push the intercooler back towards the rear of the car while threading in the front bracket bolt, insuring there is no chafing or rubbing.
Once you have made the bracket its time to bolt it down. There is a little plastic tray that sits above the factory intercooler to force air through it, we are reusing this part to force air through the top half of the intercooler. Unbelievably it fits almost like a glove for this application and needs some minor trimming to the side feet to sit flush with the top of the crash bar. You'll know what i mean when you get to this part. Place the plastic tray on top of the crash bar and begin to thread in the bolt into the hole on the outwards end of the bracket while applying rearwards pressure. If enough material has been removed and the bracket properly assembled there will be no contact from the crash bar to the intercooler.
Final product is shown below.
All finished! This was a buttload of work, I must have spent 6 or more hours playing with it to get it to a point i was satisfied with. I cant say i would recommend this over a similarly priced Whoosh product or a Bravo Alpha intercooler. Its the biggest core your money can buy at $300 but its alot of fabrication and time to get it to fit properly. I would only recommend this product to people who absolutely need a big intercooler for cheap or for someone who has experience in fabrication and fitting.
Last edited: