Hello everyone! This is my first post on here, and I think most of you will like this.
The stock FiST interior... Yes, overall it feels cheap, but the touch points are -pretty good- (pedals, shifter, steering wheel). Except for one thing that we touch almost every drive- the awful, molded plastic parking brake handle. Not only does it feel cheap, it looks cheap.
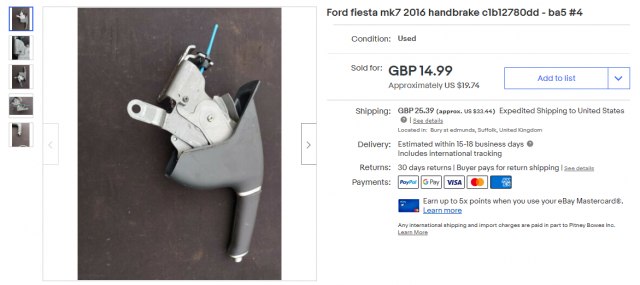
WELL I HAVE A SOLUTION! The OEM handle used in various Mk7 Fiestas across the pond.
The part number for this assembly seems to be: C1B1-2780-DD.
This is NOT out of a Fiesta ST, as those have colored stitching I did not want. Basic search terms were used to find one on eBay (I recommend using the UK version of eBay to find them, then copy the item number to the US version.)
I chose to purchase an entire assembly just to strip the cover, as it was the cheapest and easiest way to find one. I paid ~$53 USD and it took just over two weeks to arrive from the UK.
Anyways! Here's how you install it!
WARNING: THIS IS NOT EASILY REVERSIBLE. YOU WILL HAVE TO REPLACE THE HANDBRAKE ASSEMBLY TO REVERT, AS THE STOCK COVER IS CUT OFF.
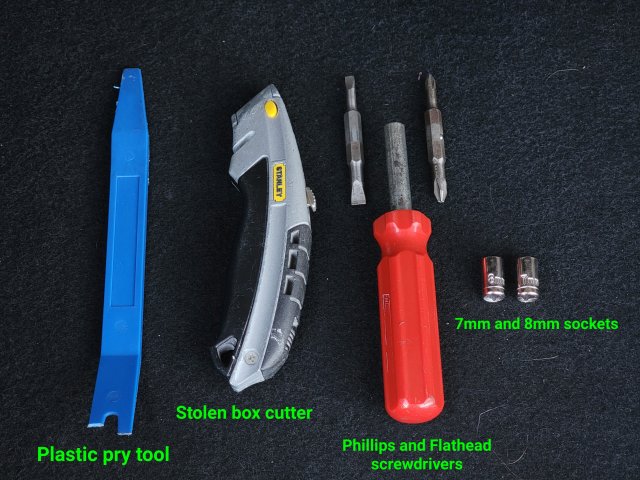
Step 0: Purchase the part and prepare the following tools:
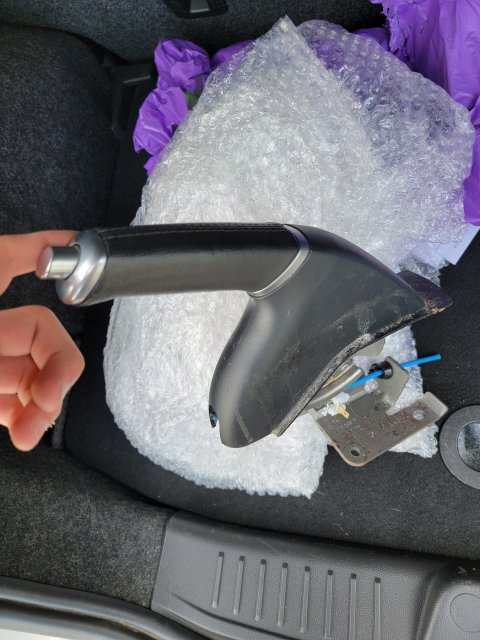
Step 1: Receive European model Fiesta handbrake after a long wait. It'll probably be disgusting- so I recommend giving it a good clean before moving on.
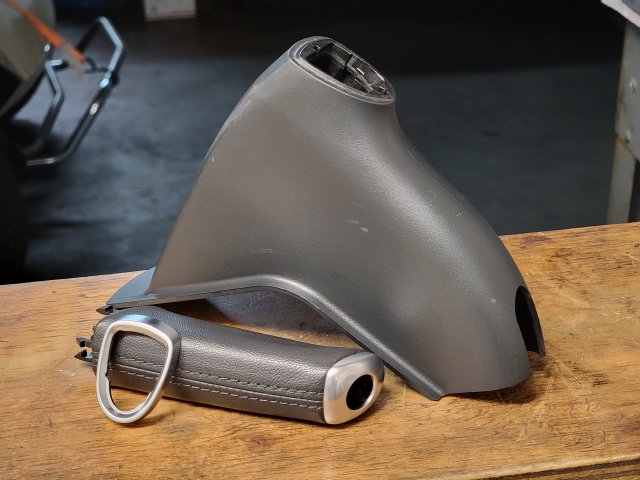
Step 2: Remove the cover from the assembly. I did this by holding the bracket down with my foot and pulling on the grip itself. It will be 3 pieces as shown here:
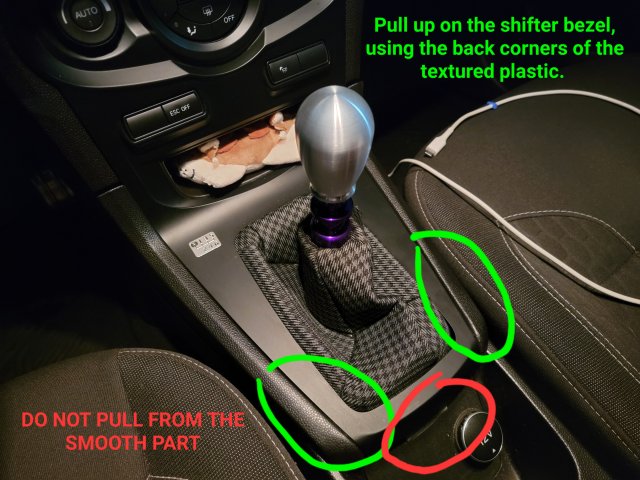
Step 3: Enter your Fiesta and remove the shifter bezel. This is done by pulling up and back on the rear of it, gripping the textured plastic! Unplug two connectors on the back that are clipped in.
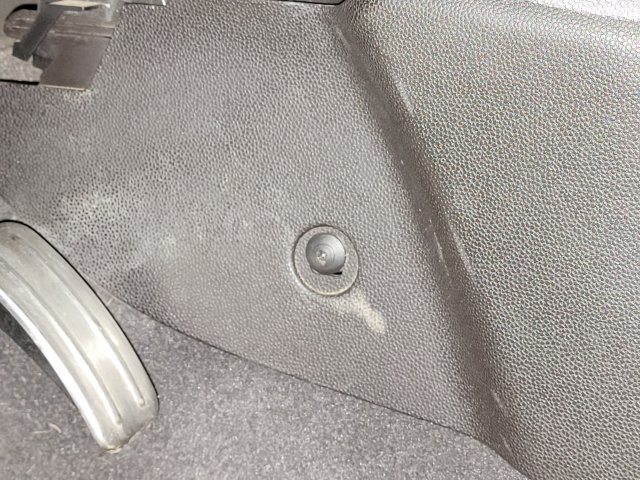
Step 4: Remove the plastic panel that goes from the console to under the dash (BOTH SIDES). To do this, remove the Phillips head screw-clip and then pull outwards from the area closest to the seats/back.
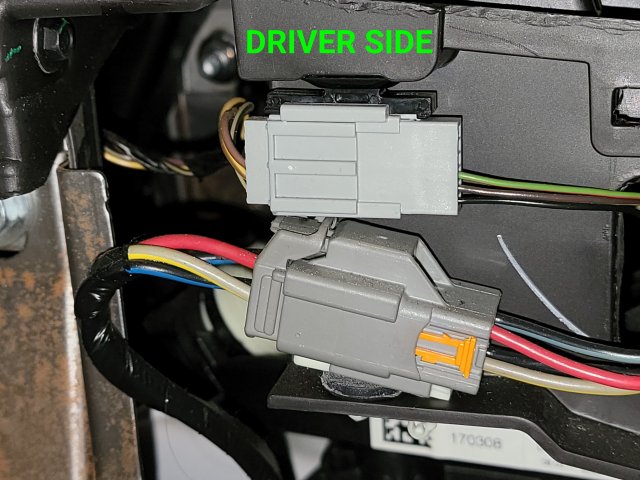
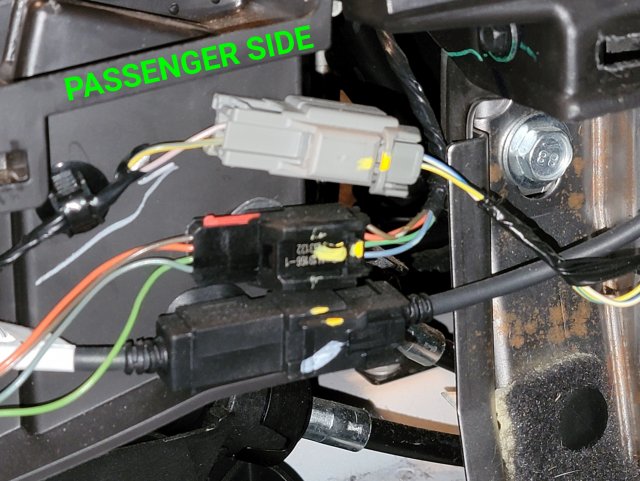
Step 5: Unplug the connectors pictured below. They all use a simple push-to-disengage style clip. 2 driver side, 3 passenger side.
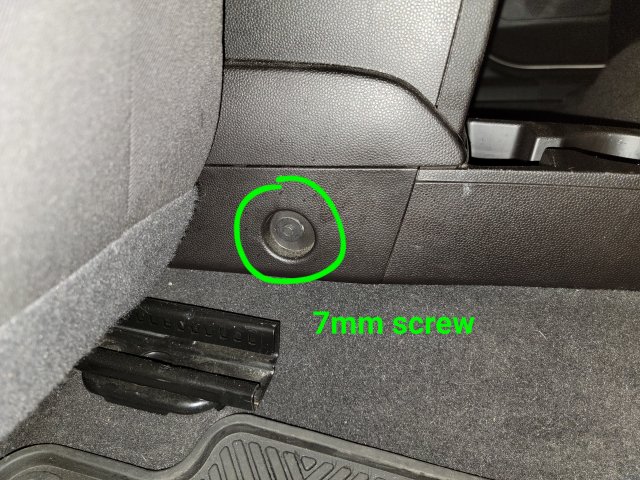
Step 6: Move your seats forwards and get into the back seat. Remove the 7mm head screw on each side of the console, near the rear.
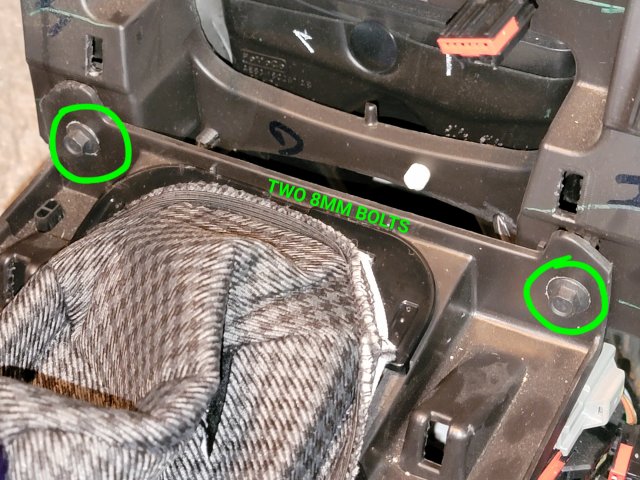
Step 7: Back in the front of your interior, remove the two 8mm bolts pictured below.
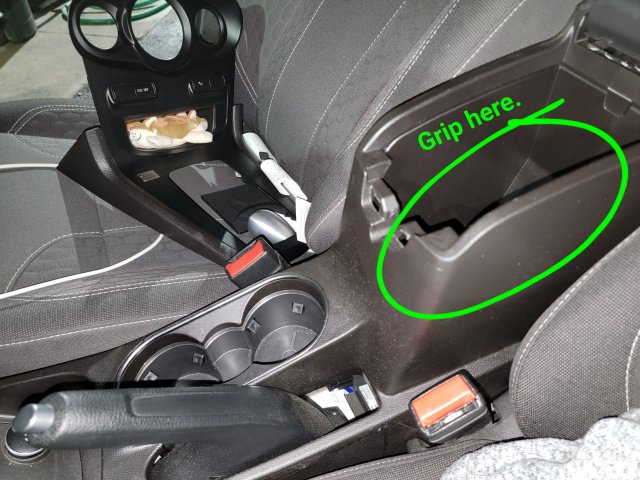
Step 8: Now it's time to remove the console! Open your console lid and use the side as leverage to lift the console up and back. Then, lift the console up, maneuvering the brake through. Make sure the handbrake is high as possible to ease removal of the center console.
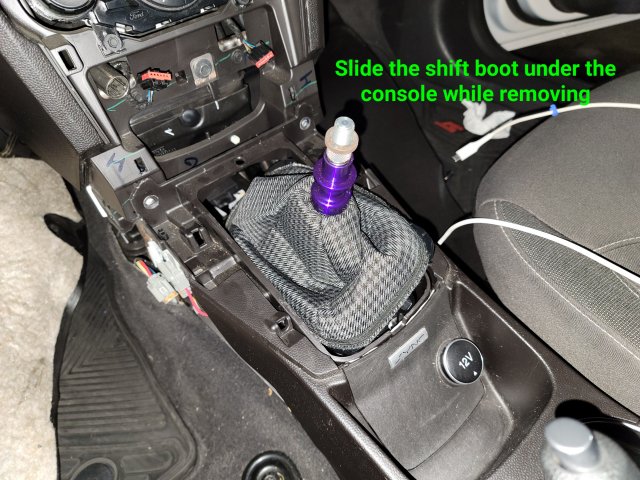
NOTE: I did not remove my shift boot or lockout. I simply unclipped the boot and used that little movement to slide it under the console as it came out.
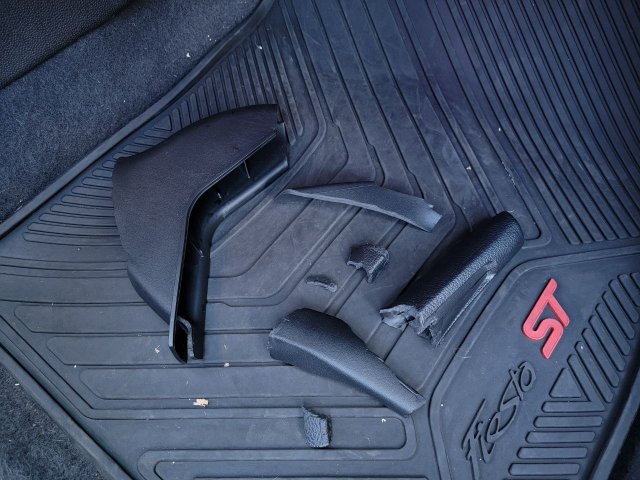
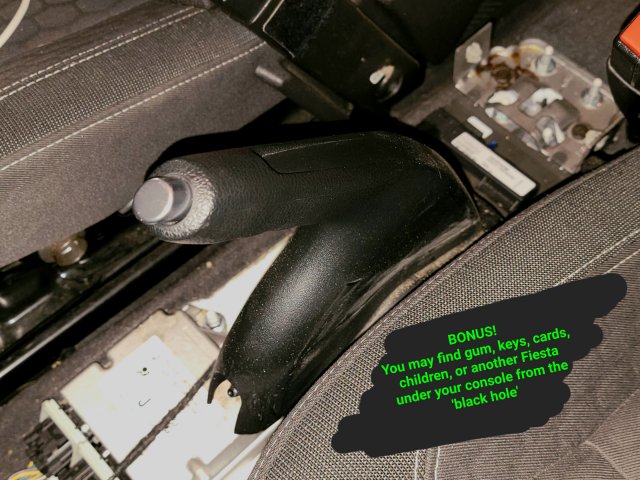
Step 9: Once your console is out, you can see the plastic handbrake cover fully exposed. So, it must just pull off like the new one, right? NOPE. There is a clip wedged right under the grip it seems, and it is not accessible. So my solution was to cut/hack it off as shown below.
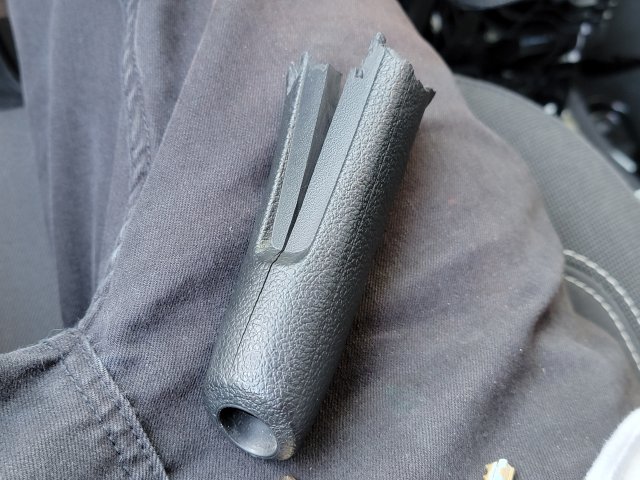
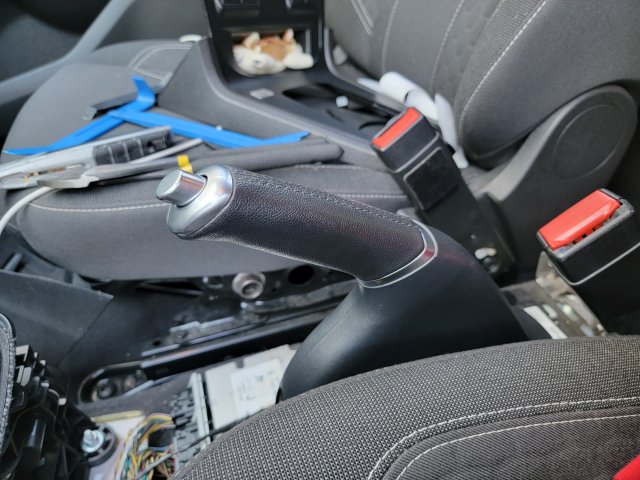
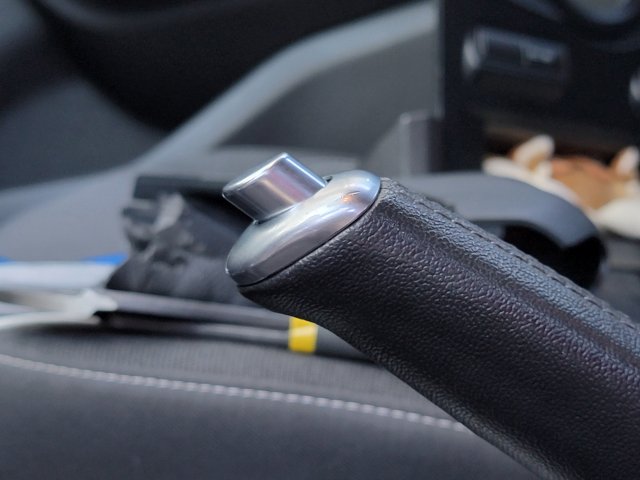
Step 10: Hopefully you didn't cut yourself on that last step, and now your stock cover should be in pieces (good.. it SHOULD suffer). Now, slide the new cover on piece by piece, making sure the clips on the leather grip go into the bottom correctly. It should look like this:
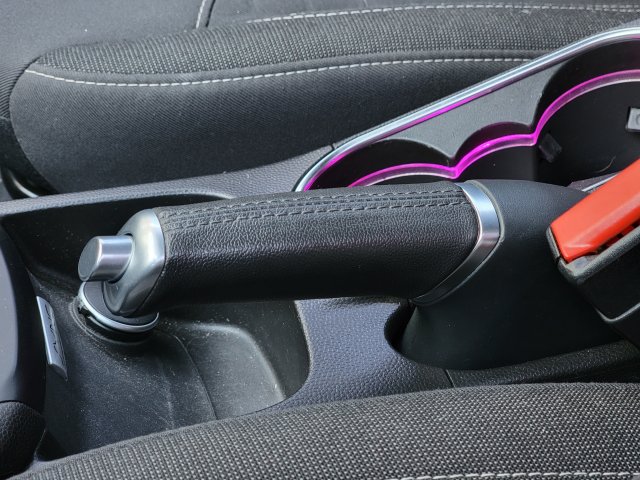
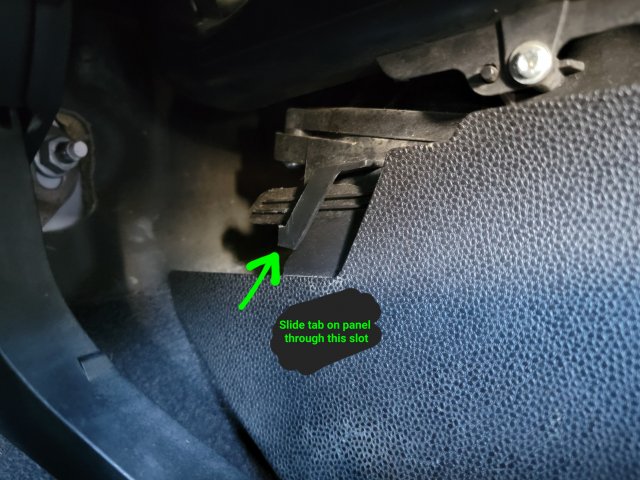
Step 11: Congrats! You now have a handbrake that's nicer to look at, and better to use. Reassembly is fairly simple, go step 8-3. My only tip is making sure the center console side piece is slid into this retainer piece on the driver side- as pictured below.
If you got lost somewhere or need a bit of help, feel free to shoot me a PM or reply to the thread. I'll try my best to answer any questions.
The stock FiST interior... Yes, overall it feels cheap, but the touch points are -pretty good- (pedals, shifter, steering wheel). Except for one thing that we touch almost every drive- the awful, molded plastic parking brake handle. Not only does it feel cheap, it looks cheap.
WELL I HAVE A SOLUTION! The OEM handle used in various Mk7 Fiestas across the pond.
The part number for this assembly seems to be: C1B1-2780-DD.
This is NOT out of a Fiesta ST, as those have colored stitching I did not want. Basic search terms were used to find one on eBay (I recommend using the UK version of eBay to find them, then copy the item number to the US version.)
I chose to purchase an entire assembly just to strip the cover, as it was the cheapest and easiest way to find one. I paid ~$53 USD and it took just over two weeks to arrive from the UK.
Anyways! Here's how you install it!
WARNING: THIS IS NOT EASILY REVERSIBLE. YOU WILL HAVE TO REPLACE THE HANDBRAKE ASSEMBLY TO REVERT, AS THE STOCK COVER IS CUT OFF.
Step 0: Purchase the part and prepare the following tools:
Step 1: Receive European model Fiesta handbrake after a long wait. It'll probably be disgusting- so I recommend giving it a good clean before moving on.
Step 2: Remove the cover from the assembly. I did this by holding the bracket down with my foot and pulling on the grip itself. It will be 3 pieces as shown here:
Step 3: Enter your Fiesta and remove the shifter bezel. This is done by pulling up and back on the rear of it, gripping the textured plastic! Unplug two connectors on the back that are clipped in.
Step 4: Remove the plastic panel that goes from the console to under the dash (BOTH SIDES). To do this, remove the Phillips head screw-clip and then pull outwards from the area closest to the seats/back.
Step 5: Unplug the connectors pictured below. They all use a simple push-to-disengage style clip. 2 driver side, 3 passenger side.
Step 6: Move your seats forwards and get into the back seat. Remove the 7mm head screw on each side of the console, near the rear.
Step 7: Back in the front of your interior, remove the two 8mm bolts pictured below.
Step 8: Now it's time to remove the console! Open your console lid and use the side as leverage to lift the console up and back. Then, lift the console up, maneuvering the brake through. Make sure the handbrake is high as possible to ease removal of the center console.
NOTE: I did not remove my shift boot or lockout. I simply unclipped the boot and used that little movement to slide it under the console as it came out.
Step 9: Once your console is out, you can see the plastic handbrake cover fully exposed. So, it must just pull off like the new one, right? NOPE. There is a clip wedged right under the grip it seems, and it is not accessible. So my solution was to cut/hack it off as shown below.
Step 10: Hopefully you didn't cut yourself on that last step, and now your stock cover should be in pieces (good.. it SHOULD suffer). Now, slide the new cover on piece by piece, making sure the clips on the leather grip go into the bottom correctly. It should look like this:
Step 11: Congrats! You now have a handbrake that's nicer to look at, and better to use. Reassembly is fairly simple, go step 8-3. My only tip is making sure the center console side piece is slid into this retainer piece on the driver side- as pictured below.
If you got lost somewhere or need a bit of help, feel free to shoot me a PM or reply to the thread. I'll try my best to answer any questions.
Last edited: