
Ok, so this is the 'HOW-TO'' I promised everyone that has purchased a kit. Thank you for the support and comments, this is a super easy install and will take about 45 minutes maybe an hour. If you are seeing this for the first time this kit is available to purchase in the 'For Sale'' tab in the forum and is a staggering $15.....Lol! If you have any questions please feel free to email me and I will get back to you fairly quickly. So for the install
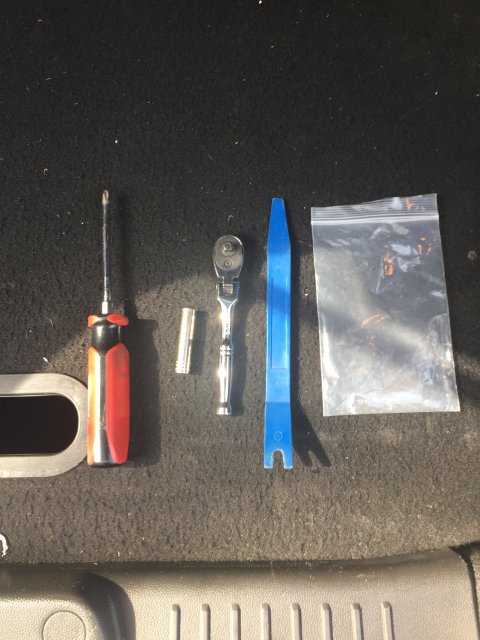
You will need the following tools- Phillips head screwdriver/ 8mm Socket and wrench/ Body panel remover/ or a flat head screwdriver *I HIGHLY RECOMMEND AGAINST THIS*/ Bag for spare parts.
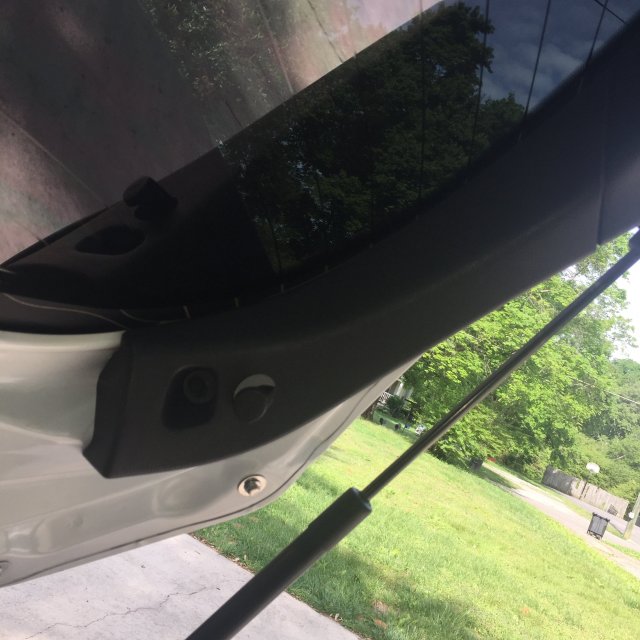
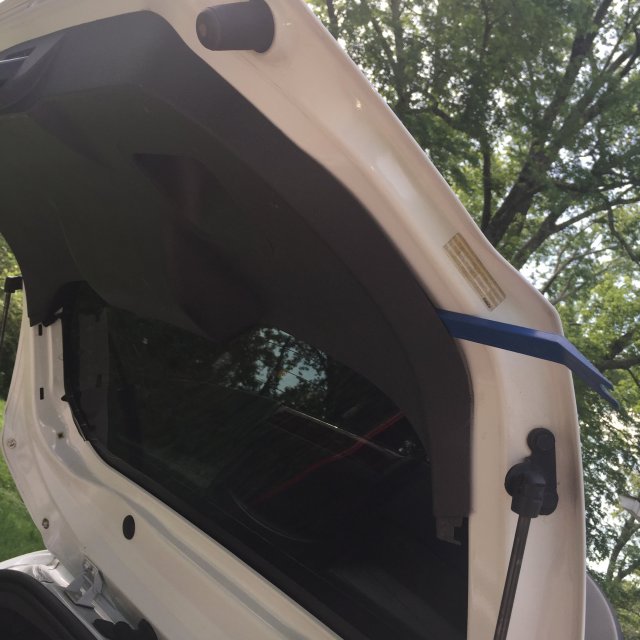
Lift The cover on the rear wiper and remove the nut, Sorry I didn't include the socket size for this oe in the previous picture . Its a 1/2 Socket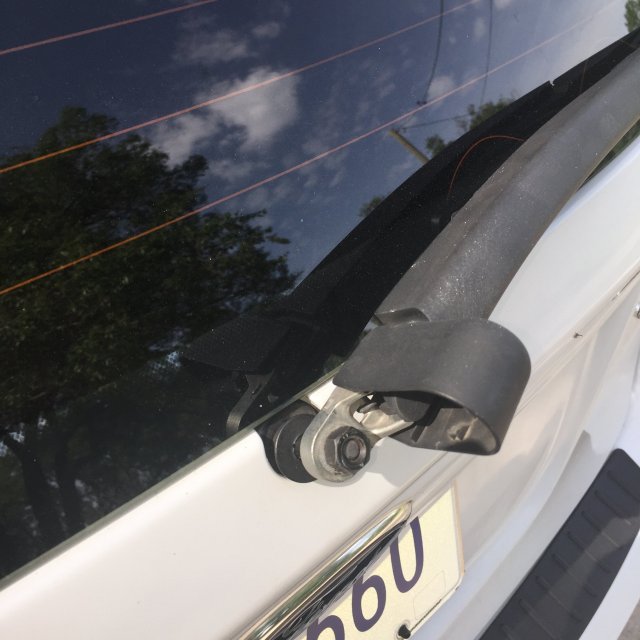
The threads are tough, wiggle it a little and it should pop off with ease. Be careful not to strip the threads.
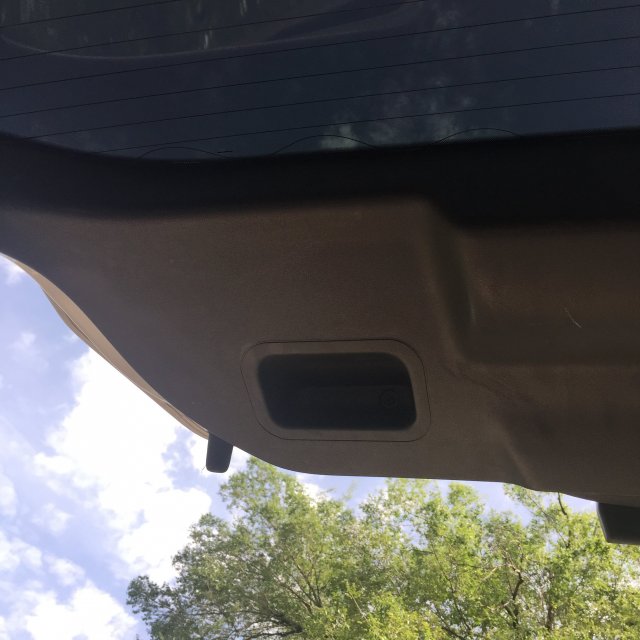
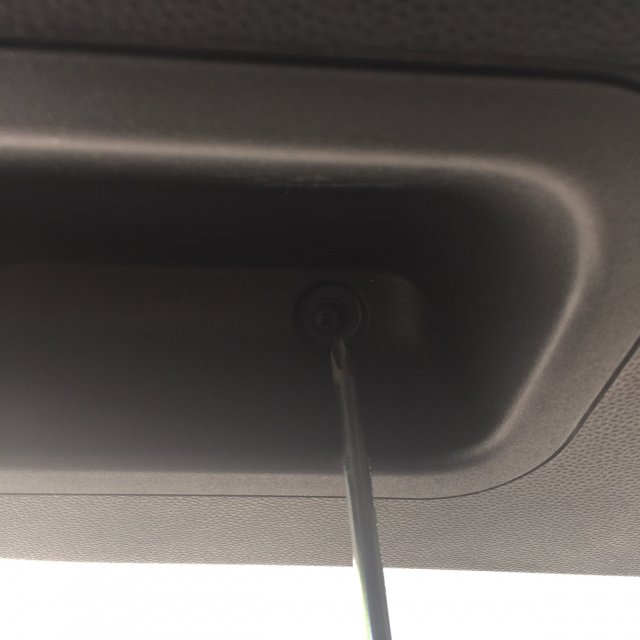
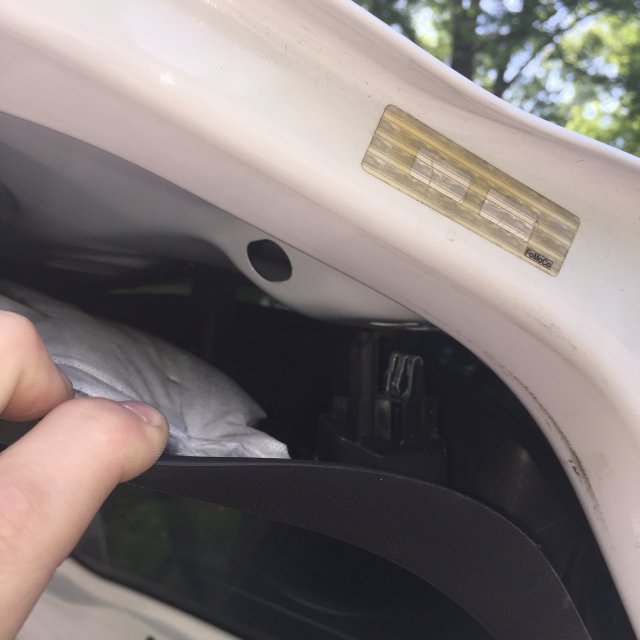
Inside the rear hatch panel is a hand hold. You will find one (1) Phillips head screw in here, you need to remove that.
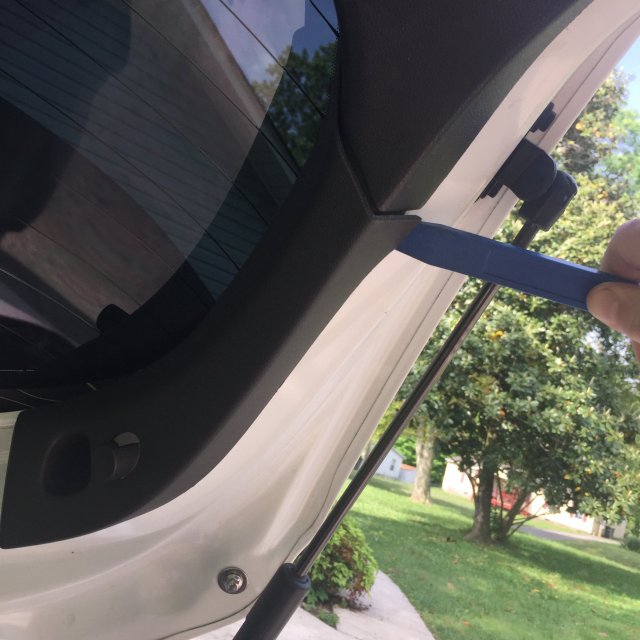
There is also one (1) Phillips head screw in this hole you need to remove on each side of the rear hatch.
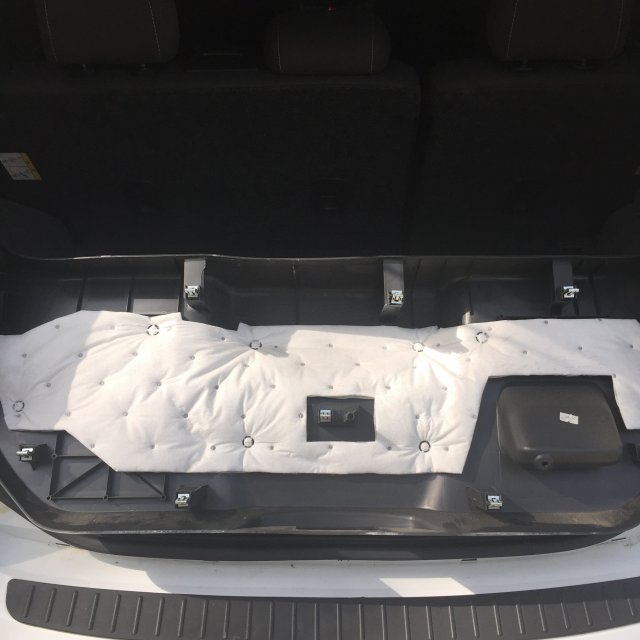
After removing the Phillips head screw, use a body panel remover to gently pry the plastic from the hatch. Its held on by two metal push tabs.
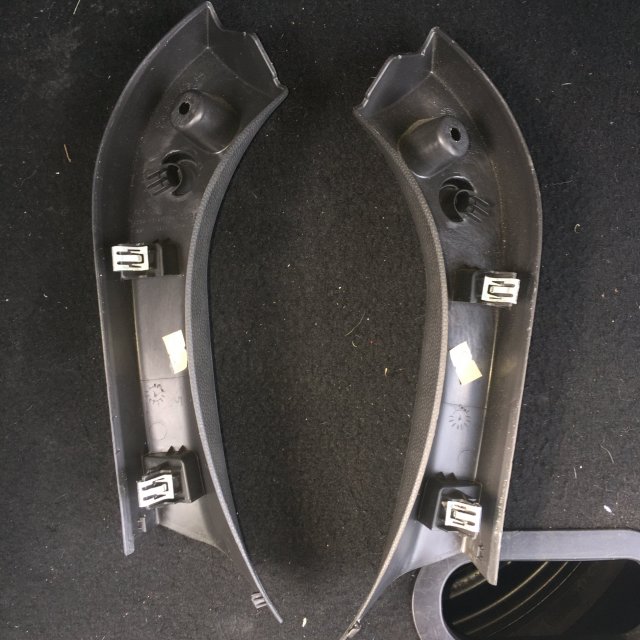
Once removed this is what you have. Lay them to the side.
Next you will be removing the back hatch panel, start at this point. I found it to the the easiest to get it started. Its only held on by the metal clips at this point, so pry downward and they will pop off. Patients is key here. And it will keep you from screwing up any of the metal clips. Be forceful but be gentle also.....Lol!
As you can see, all the metal clips are in tack and non damaged.
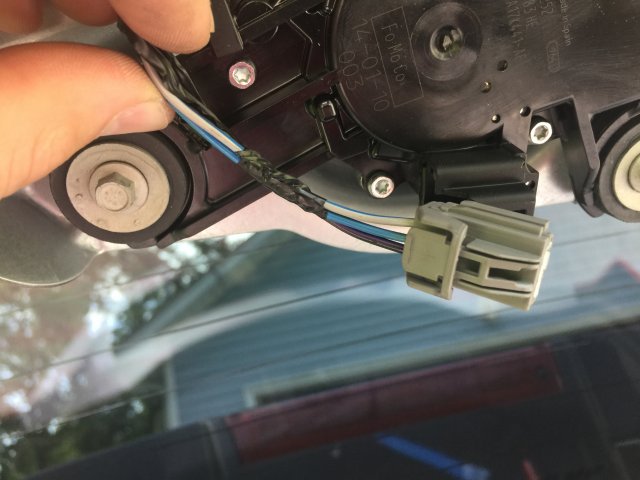
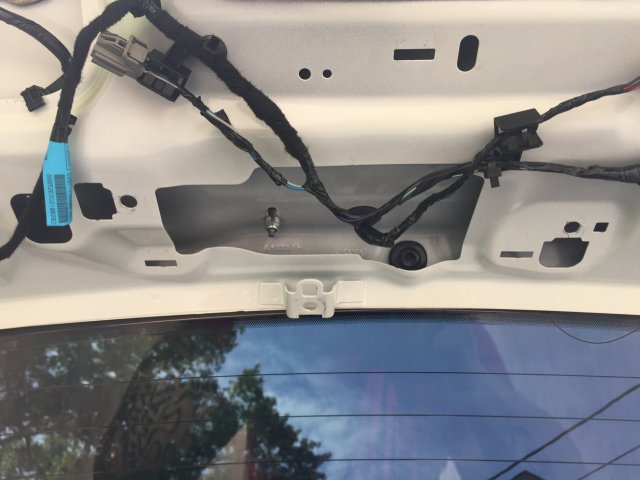
Next step is to remove this plug, this is what operates the rear wiper. YOU WILL NOTY GET ANY CODES REMOVING THIS PLUG!
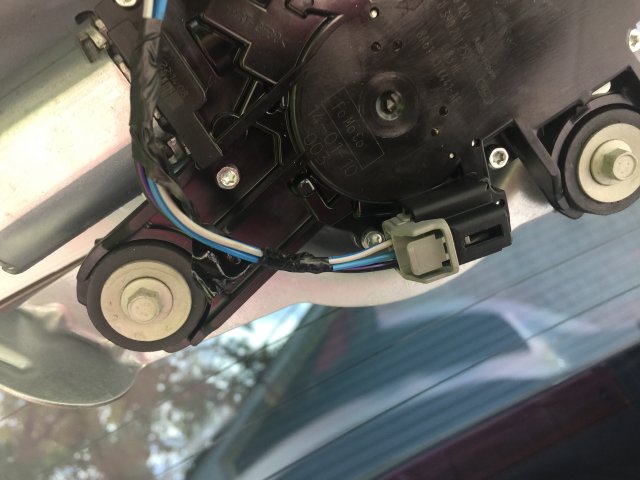
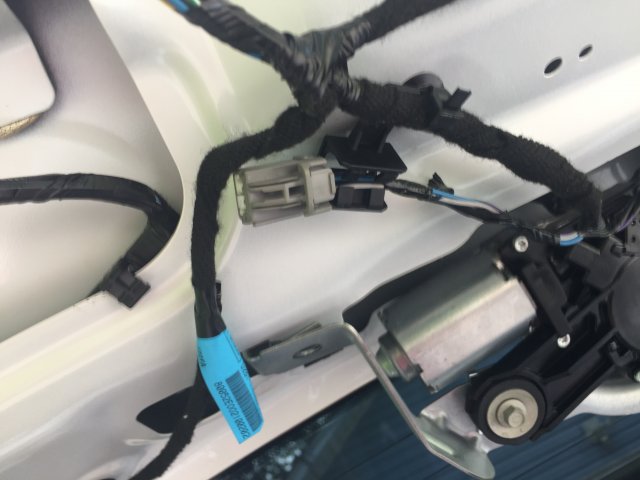
I used a existing clip to reattach it. it simply clips into this plastic retainer. It's almost like it's meant to be there. Good Call Ford!
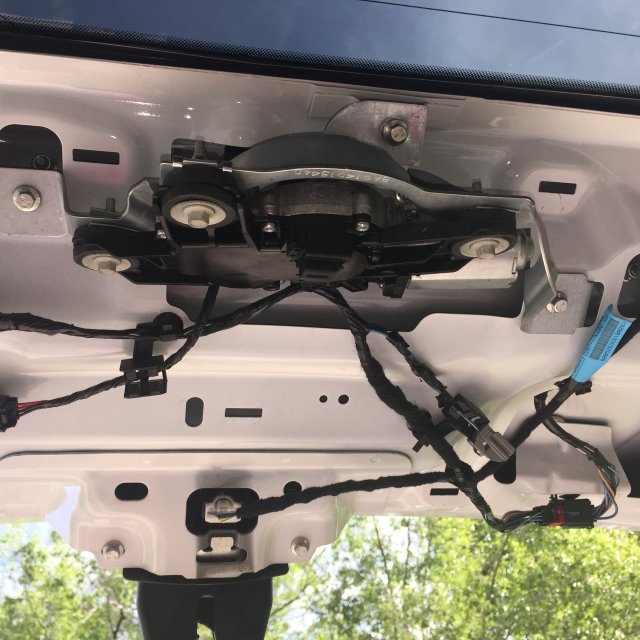
Pay close attention here: You have to remove the bolts on the bracket holding the motor, The otter bolts are what you want to remove here. Not the larger bolts on the motor/black plastic. These are the 8mm bolts.
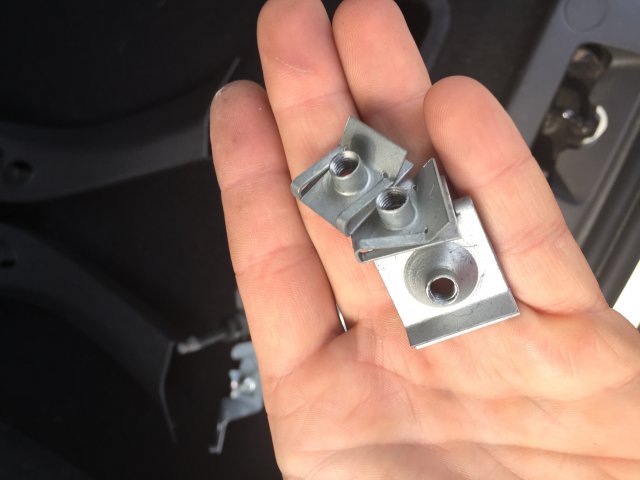
After removing the motor, remove these three (3) clips so they won't get lost, or worse they fall off and rattle.
After you remove the motor, the rubber grommet will be left. Remove that.....
After you remove the wiper grommet, you will have a hole. There is a lot of dirt inside here, I used a cotton swap and alcohol and cleaned the inside of the hole.
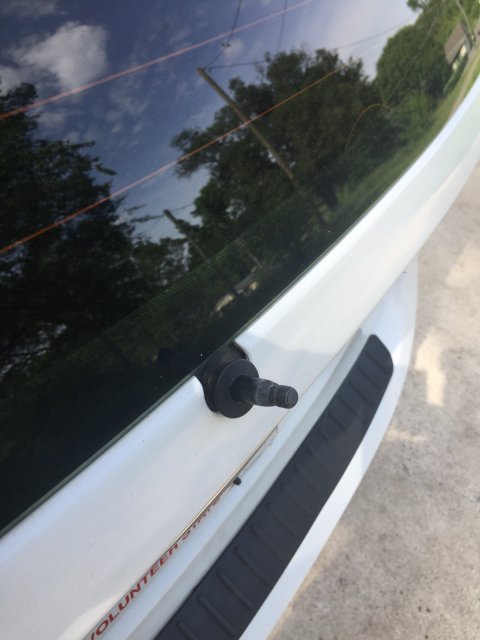
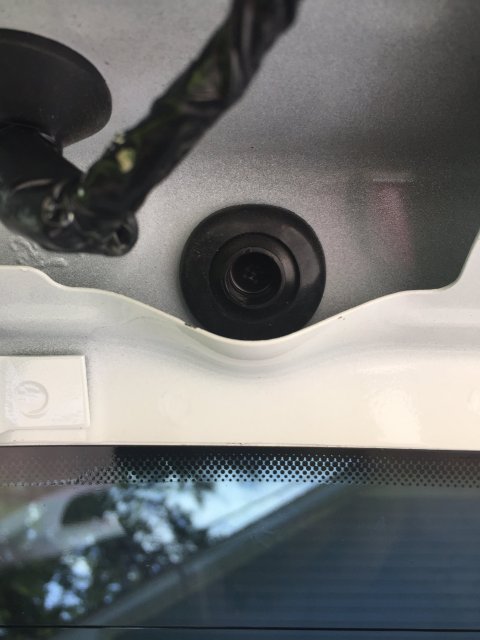
Next step is to insert the rubber grommet from the wiper delete kit. Its best to go in from the outside and work it in. Remember to be patient and it should look like this on both sides. It will fit and its "TIGHT" its that way for a reason. To prevent leaking.
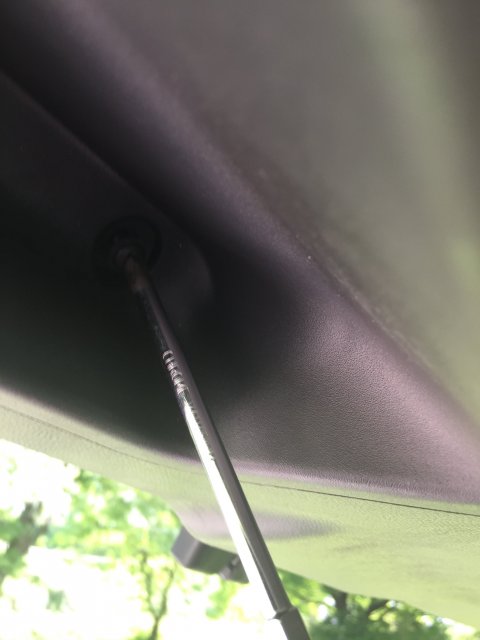
After that take the supplied 3D printed plug and insert it into the grommet. This is also a tight fit....
After you push the plug in, make sure the last groove on the plug is almost poking out at the bottom. It won't be pushed all the way through, but make sure it looks like the picture.
After that your all done and can reassemble the hatch panel.
After you instal the panel back on don't forget this screw. I did the first time and it rattled. Its best to install the large panel first then snap the small ones back on and screw the Phillips head screws back in..... If you have any questions please PM me and we will get it squared away!
You will need the following tools- Phillips head screwdriver/ 8mm Socket and wrench/ Body panel remover/ or a flat head screwdriver *I HIGHLY RECOMMEND AGAINST THIS*/ Bag for spare parts.
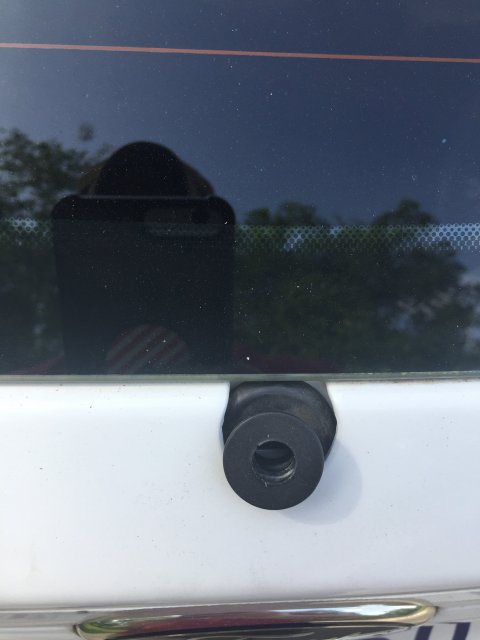
Lift The cover on the rear wiper and remove the nut, Sorry I didn't include the socket size for this oe in the previous picture . Its a 1/2 Socket
The threads are tough, wiggle it a little and it should pop off with ease. Be careful not to strip the threads.
Inside the rear hatch panel is a hand hold. You will find one (1) Phillips head screw in here, you need to remove that.
There is also one (1) Phillips head screw in this hole you need to remove on each side of the rear hatch.
After removing the Phillips head screw, use a body panel remover to gently pry the plastic from the hatch. Its held on by two metal push tabs.
Once removed this is what you have. Lay them to the side.
Next you will be removing the back hatch panel, start at this point. I found it to the the easiest to get it started. Its only held on by the metal clips at this point, so pry downward and they will pop off. Patients is key here. And it will keep you from screwing up any of the metal clips. Be forceful but be gentle also.....Lol!
As you can see, all the metal clips are in tack and non damaged.
Next step is to remove this plug, this is what operates the rear wiper. YOU WILL NOTY GET ANY CODES REMOVING THIS PLUG!
I used a existing clip to reattach it. it simply clips into this plastic retainer. It's almost like it's meant to be there. Good Call Ford!
Pay close attention here: You have to remove the bolts on the bracket holding the motor, The otter bolts are what you want to remove here. Not the larger bolts on the motor/black plastic. These are the 8mm bolts.
After removing the motor, remove these three (3) clips so they won't get lost, or worse they fall off and rattle.
After you remove the motor, the rubber grommet will be left. Remove that.....
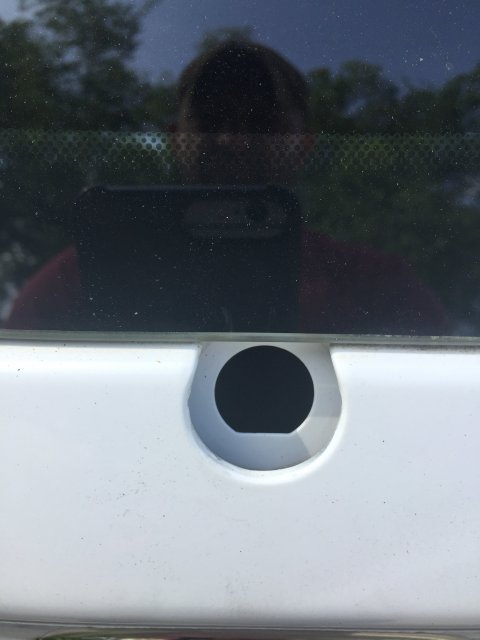
After you remove the wiper grommet, you will have a hole. There is a lot of dirt inside here, I used a cotton swap and alcohol and cleaned the inside of the hole.
Next step is to insert the rubber grommet from the wiper delete kit. Its best to go in from the outside and work it in. Remember to be patient and it should look like this on both sides. It will fit and its "TIGHT" its that way for a reason. To prevent leaking.
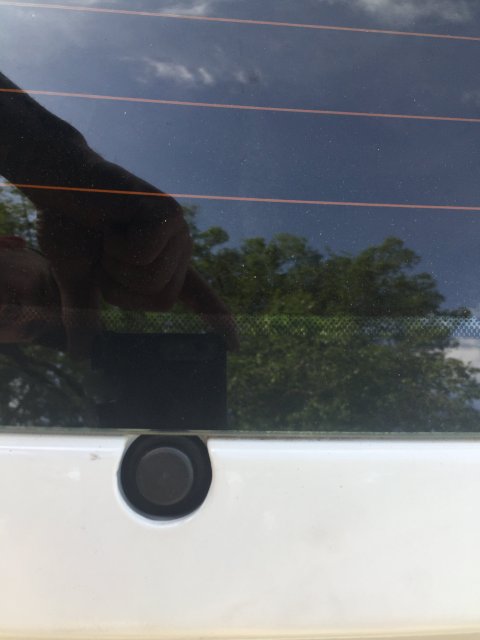
After that take the supplied 3D printed plug and insert it into the grommet. This is also a tight fit....
After you push the plug in, make sure the last groove on the plug is almost poking out at the bottom. It won't be pushed all the way through, but make sure it looks like the picture.
After that your all done and can reassemble the hatch panel.
After you instal the panel back on don't forget this screw. I did the first time and it rattled. Its best to install the large panel first then snap the small ones back on and screw the Phillips head screws back in..... If you have any questions please PM me and we will get it squared away!