Motive Power Bleeder 1108 vs 1118 reservoir caps

Member ID
#11632
Messages
198
Likes
105
#1
Thought I'd give everybody a heads up.

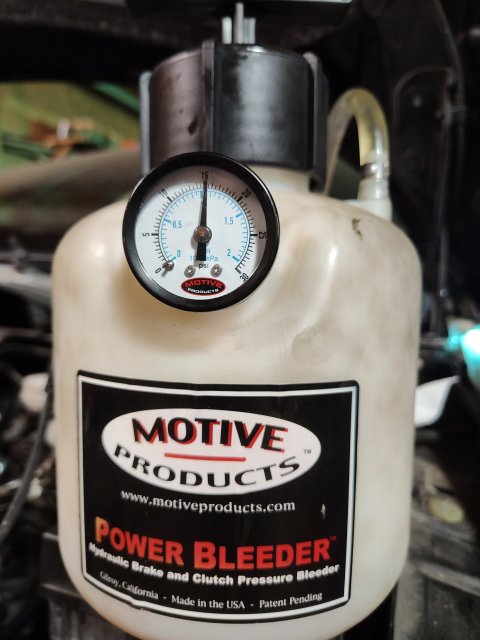
Way overdue to bleed the system on my 2019, fluid looking pretty murky. Dug out my 30 year old Motive Power Bleeder and clamped an 8mm bolt in the hose to see if it would still pressurize. All good, plastic a bit yellowed but still works.

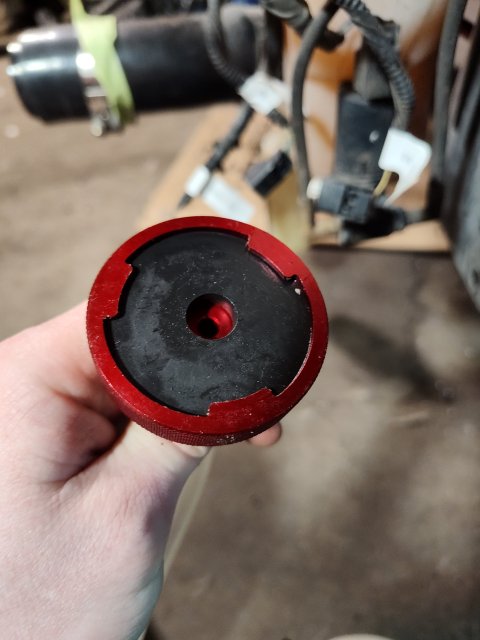
Which adapter? Searched all the threads on here, consensus either the plastic 1108 or billet 1118, same configuration just different material, though some reports of the plastic 1108 failing to seal. Went with the $20 cheaper 1108, I like a challenge.

Showed up, tested it, failed to seal. Not that it failed completely, just wouldn't seal consistently, any slight jiggling of the cap while pumping and it would leak. First tried the obvious, thicker gasket, apart from making the cap extremely difficult to install, no significant difference.

Noticed the underside of the cap wasn't flat, molding process had excess material at each of the 3 tab locations that extended onto the sealing surface. Ah ha moment, this would be the difference between the 2 caps, machined billet would be completely flat. May also explain why some had no issues with the 1108 if different tooling for the mold. Wrapped some 200 grit paper around a stick and went at it, 20 minutes later completely smooth. Worked, with the thicker of the 2 supplied gaskets seals fine.

Verdict, if you already have a 1108 it is possible to make it work, if you're ordering just get the 1118 and save yourself the headache.

One other comment, if you haven't bled your system yet, do it now, brakes are noticeably better, but the clutch is a revelation, significantly improved the shifting.


Member ID
#30075
Messages
9
Likes
5
#2
I've got a 2014 and I've tried a few different types of adapters (including the universal which just clamps down on it) and haven't had any luck getting a seal yet. I got the 1118 and it just doesn't snap into place when you turn it on the reservoir like the actual cap does. The 1118 has 3 tabs but they are just flat whereas the OEM cap has 3 tabs but a little notch that clicks into place when you turn it.

I was either gonna try to just clamp down the universal adapter with some quick grip clamps or just go back to the old fashioned have someone step on the brake pedal while I open the bleeder. Bummer as I was able to get the power bleeder to work on an older car I had years ago when I bought it. I didn't expect there to be so much variability in brake fluid reservoir caps haha.


Member ID
#359
Messages
402
Likes
340
#3
I've got a 2014 and I've tried a few different types of adapters (including the universal which just clamps down on it) and haven't had any luck getting a seal yet. I got the 1118 and it just doesn't snap into place when you turn it on the reservoir like the actual cap does. The 1118 has 3 tabs but they are just flat whereas the OEM cap has 3 tabs but a little notch that clicks into place when you turn it.

I was either gonna try to just clamp down the universal adapter with some quick grip clamps or just go back to the old fashioned have someone step on the brake pedal while I open the bleeder. Bummer as I was able to get the power bleeder to work on an older car I had years ago when I bought it. I didn't expect there to be so much variability in brake fluid reservoir caps haha.
I use the 1118 adapter on my 14. I switched to the thicker rubber gasket (not sure if they all come with 2), and you have to push down a little while turning. There is no stop point on the tabs, so you have to be careful and make sure you turn it just enough to have the tabs overlapping correctly. It was difficult the first few times, but has gotten easier over time. I've used it for ~9 years now, so unless they've changed the design, you should be able to get it.


Member ID
#30075
Messages
9
Likes
5
#4
it didn't seem to me like it would work to seal well enough but maybe I just need to try again. thanks for the tip!


Member ID
#359
Messages
402
Likes
340
#5
it didn't seem to me like it would work to seal well enough but maybe I just need to try again. thanks for the tip!
Yeah, I was skeptical at first as well, but you just need to push down a little and make sure the tabs on the adapter are all the way up the "ramp" of the tabs on the reservoir. It will make sense when you give a try.


Member ID
#30075
Messages
9
Likes
5
#6
I couldn't wait and went downstairs to see if I was just missing something obvious haha. I was able to get it to build to about 7 PSI before it started leaking at the slightest movement at the reservoir....maybe i'll try to 3d print another smaller gasket shape to put more downward facing pressure on the gasket (I'm using the thicker one now) or see if I can clamp it a bit more with something else too. It doesn't snap in like the actual cap right? I can't seem to turn it that far to get it to snap in like that and I was kinda thinking that was the goal when I first ordered the 1118.


Member ID
#359
Messages
402
Likes
340
#7
I couldn't wait and went downstairs to see if I was just missing something obvious haha. I was able to get it to build to about 7 PSI before it started leaking at the slightest movement at the reservoir....maybe i'll try to 3d print another smaller gasket shape to put more downward facing pressure on the gasket (I'm using the thicker one now) or see if I can clamp it a bit more with something else too. It doesn't snap in like the actual cap right? I can't seem to turn it that far to get it to snap in like that and I was kinda thinking that was the goal when I first ordered the 1118.
Correct, it doesn't have the little stop-pieces on the tabs like the real cap, so you can rotate too far. You can kind of feel when it gets to the right spot (more resistance to turning) right before it gets easy again.

Try putting a little brake fluid on the gasket to lube it a little, might help it turn/seal. Since I've used mine so much, there is always a little residual brake fluid on the gasket. I've had mine up to ~20 psi without issue.

It is the red anodized adapter, correct?


Member ID
#30075
Messages
9
Likes
5
#8
yeah good idea re: brake fluid to help it seal. will give that a go later...might also try 3d printing an additional thin gasket to push more on the one they provided. yeah it's the anodized red adapter. thanks for the tips. really appreciate it


Member ID
#359
Messages
402
Likes
340
#9
yeah good idea re: brake fluid to help it seal. will give that a go later...might also try 3d printing an additional thin gasket to push more on the one they provided. yeah it's the anodized red adapter. thanks for the tips. really appreciate it
No problem, I'm also not 100% sure I didn't cram both gaskets in. haha. This was back in 2017.

I'll be using it again later today to bleed my clutch, so I'll did through the box to see if the thin gasket is still floating around somewhere.


Member ID
#30075
Messages
9
Likes
5
#10
eh idk i've got a pretty good seal on there but can't build up pressure past like 7 to 9 PSI before it leaks. maybe i'll try using small quick clamps to clamp down on it. 3d printed some spacers of various thickness and put them in there but didn't really make much of a difference. will try the clamps I guess...if I can get one in there. not much space.


Member ID
#359
Messages
402
Likes
340
#11
Didn't end up getting to use mine today. But I'm wondering in the years since I got mine if they have changed the adapter/gasket design and/or sourcing. For reference, on mine with either the thick gasket (or both stacked, I can't remember) it just barely fits in underneath the tabs on the adapter, so it ends being fairly tight when twisted into place. From the sounds of it, yours is still loose even with the thick gasket and spacers?


Member ID
#30075
Messages
9
Likes
5
#13
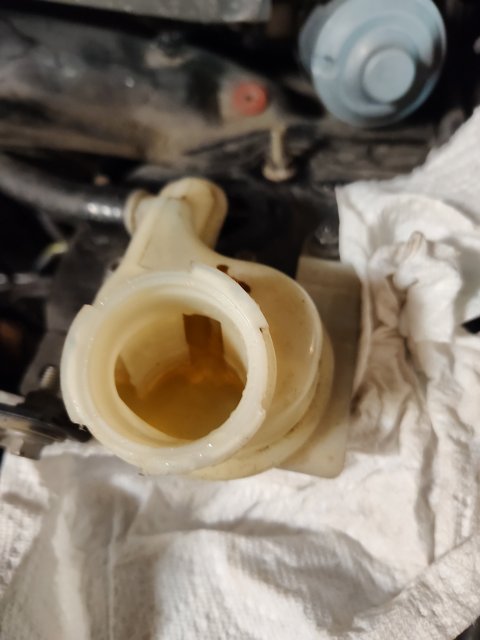
I bet it's the reservoir that is the problem. The tabs on my reservoir don't look nearly as large or as sturdy as the ones in your pic...maybe just worn down. Adapter looks the same. The thicker gasket seems like a more porous material than the thinner one which is just solid rubber. Maybe I'll try the spacers I made with the solid rubber one (though I was thinking the softer material would form around the reservoir opening a bit better.

https://ford.oempartsonline.com/oem-parts/ford-reservoir-ae8z2k478b

I could try picking up a new reservoir I guess. Only $43.

I'll keep futzing with it this weekend to see if I can get it to build enough pressure.


Member ID
#36271
Messages
6
Likes
4
#14
I don't know if this helps but I just bled my brakes this morning. Everything I have looks like arilsscm's photos. I ended up using the rubber one and then the foam one on top to get it to seal. When putting it on, I put one hand on the bottom of the reservoir to support it and then screwed it on. It wasn't particularly easy, but I couldn't get pressure to hold with either gasket by itself.

I guess one difference is that my reservoir does have "stops" so I could turn the red cap until it came to a stop against the stop.


Last edited:
Member ID
#30075
Messages
9
Likes
5
#15
Yeah the rubber one with the spacer I printed was the key ! Finally able to get it to work. It leaked a little fluid at the reservoir but not much pressure lost. Was able to get em bled today. I don’t know why it was not able to hold pressure the first time I tried it but worked today. Thanks again


Member ID
#11973
Messages
8
Likes
7
#16
I was delighted when I saw that the 1108 adapter I bought for my Corvette would also work with my Fiesta. I gave it a try about a month ago using the thicker gasket, and it appeared to hold pressure on my initial test. So I filled my bleeder up with brake fluid, pumped it up, and went to crack the right rear caliper bleeder. Upon returning to the front of the car a few minutes later, I was greeted with brake fluid squirting everywhere, and a river of brake fluid on the ground under the car.

I wasn't paying attention at the time, but I later realized that the thicker gasket appears to be some sort of squishy foam material, not rubber like the thin one. Motive's website claims it's made of "Brake-fluid-resistant elastomer", but clearly it is not. The thin rubber gasket was comically loose, and even with the thick foam one it would leak air pressure if I jiggled the adapter because it was still fairly loose. Trying to shove both gaskets into the adapter was a no go, way too thick to fit the reservoir.

Determined to figure out something that would work today, I cut up an empty isopropyl alcohol bottle I had laying around and used the rubber gasket as a template to cut out a plastic "gasket" to use as a spacer. It helped, but I could still hear some slight air leakage at the cap. Cut a second spacer and that did the trick. Held 15 PSI with zero fluid leakage the entire time while I bled my brakes. Forgot to bleed the clutch while I was at it though. Whoops.

I've seen a number of posts on CorvetteForum about this adapter not sealing as well. Not sure if they're shipping these with the wrong gaskets or what. But it was a quick and easy fix once I figured out what I wanted to try.

Update: went to use the 1108 adapter on my Corvette for the first time after successfully bleeding the Fiesta brakes. Did a dry run to make sure it held air pressure. My homemade "spacers" were not needed. Pumped it up to 10 PSI, looked at something else while waiting, and then heard a loud *POP* followed by a volcano of brake fluid shooting out of the reservoir. After cleaning up the aftermath, I picked up the adapter to try again, only to find that one of the three plastic ears was completely gone. Broke off and must have gone flying somewhere. Not sure if I damaged it with my gasket shenanigans on the Fiesta or what. But I'd highly recommend the 1118 metal version after this debacle. I've used the Motive bleeder on my past Focus ST and Mustang with zero issues. No leaks, no drama, just effortless brake bleeding. But this 1108 adapter has been an absolute nightmare.


Last edited:
Member ID
#30075
Messages
9
Likes
5
#17
I just changed to the 1 person method where I leave a bottle at the caliper filled with a small amount of clean brake fluid, crack the bleeder and go press the brake myself a few times and top off the reservoir. The pressure bleeder didn't seem to be worth it for me. Ended up leaking some brake fluid and wasting a fair amount with having to fill up the bleeder. I did get it to seal (albeit not great) but it was just more trouble than it was worth


Similar threads


Top