
I am doing a few things to raise the shifter.
1) raise the base mount by using metric 25mm nuts on the stock studs at the tunnel, parts on order.
2) the mount is two piece so I took it apart, can get it out without taking the console out that way, modify it to add more height to the top section, DONE, today, pretty intense job, raised the rear side 1", front side 1.4" to bring the shifter closer to the driver.
3) lengthen shift arm, this would normally make the shift throw longer but I already compensated for that yesterday with my SS build. This would be a bit tough to do and retain the reverse lockout but I do have an idea that might not be to tough.
4) taller shift knob, still sorting that out, I have a 3.5" tall delrin race knob I may use, cut off the threads, add proper ones, etc....it will take some work to make it look right so I might buy the longest screw on one that works I can find.
I want the knob as close to the steering wheel and high as possible without any interference issues, most race cars are done this way for good reason and I am going to have a very quick ST driven all out on many tracks so fast, accurate shifts are a must, one bad shift can end in a blown engine, an off, both.....not fun.
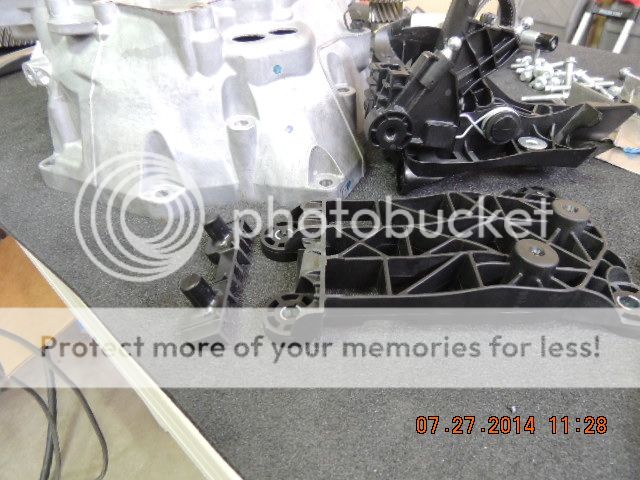
Stock two part shifter mount, sorry for the blurry photo.

Bottom section.

Back section removed, slot to be cut in the middle brace area, I was going to reuse the part but realized it was going to be a compromise so the job became much bigger at that point.
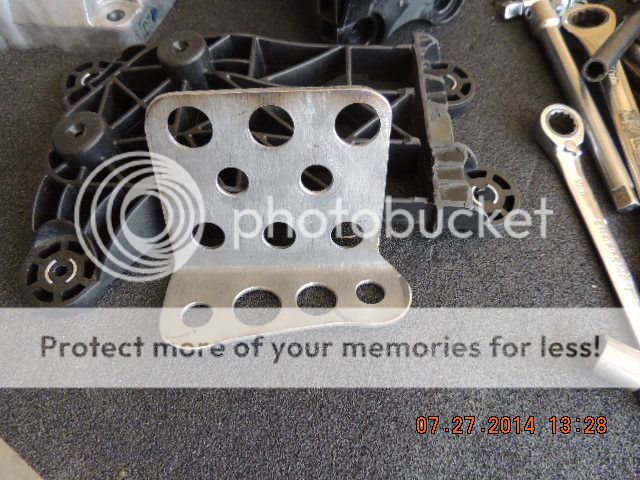
3/16" steel insert I made to raise the top section.
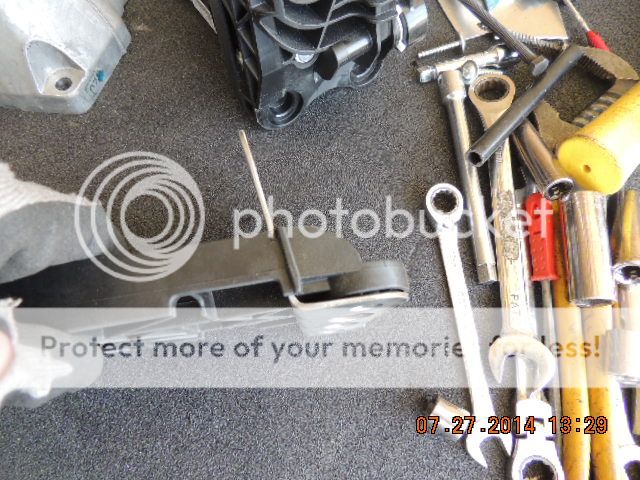
Inserted, I will add washers to the bottom on the front and back to raise the whole mount as far as I can on the stock studs until I get the long nuts I have on order.
The only "tubing I could find the right diameter was a craftsman 12mm long socket, lucky I had three so one was sacrificed for this ST.
3 corner welded, ground and then not shown but the front stock screws were used through the socket into the plastic on the other side, very snug and strong connection.

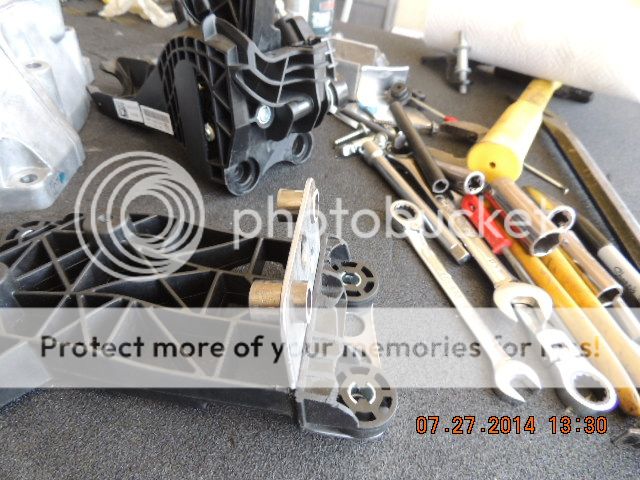
Angled stand offsets made to compensate for moving the top mount forward 3/16" and lifted at the front to bring the shifter close to the driver, braced with welded in rod.

Bolted together, tested on several axis and it is very solid, more so than stock yet it still has the rubber bushings so as not to transmit to much harshness.
Not show are 2 different types of screws going from the rear forward to tie the fabricated section into the rear and front parts where I slotted it to get the section inserted, this is all very very strong now.
1) raise the base mount by using metric 25mm nuts on the stock studs at the tunnel, parts on order.
2) the mount is two piece so I took it apart, can get it out without taking the console out that way, modify it to add more height to the top section, DONE, today, pretty intense job, raised the rear side 1", front side 1.4" to bring the shifter closer to the driver.
3) lengthen shift arm, this would normally make the shift throw longer but I already compensated for that yesterday with my SS build. This would be a bit tough to do and retain the reverse lockout but I do have an idea that might not be to tough.
4) taller shift knob, still sorting that out, I have a 3.5" tall delrin race knob I may use, cut off the threads, add proper ones, etc....it will take some work to make it look right so I might buy the longest screw on one that works I can find.
I want the knob as close to the steering wheel and high as possible without any interference issues, most race cars are done this way for good reason and I am going to have a very quick ST driven all out on many tracks so fast, accurate shifts are a must, one bad shift can end in a blown engine, an off, both.....not fun.
Stock two part shifter mount, sorry for the blurry photo.
Bottom section.
Back section removed, slot to be cut in the middle brace area, I was going to reuse the part but realized it was going to be a compromise so the job became much bigger at that point.
3/16" steel insert I made to raise the top section.
Inserted, I will add washers to the bottom on the front and back to raise the whole mount as far as I can on the stock studs until I get the long nuts I have on order.
The only "tubing I could find the right diameter was a craftsman 12mm long socket, lucky I had three so one was sacrificed for this ST.
3 corner welded, ground and then not shown but the front stock screws were used through the socket into the plastic on the other side, very snug and strong connection.
Angled stand offsets made to compensate for moving the top mount forward 3/16" and lifted at the front to bring the shifter close to the driver, braced with welded in rod.
Bolted together, tested on several axis and it is very solid, more so than stock yet it still has the rubber bushings so as not to transmit to much harshness.
Not show are 2 different types of screws going from the rear forward to tie the fabricated section into the rear and front parts where I slotted it to get the section inserted, this is all very very strong now.

")