
Figured it would be fun to document the process of how I ruined a perfectly good Recaro-equiped Fiesta.
I have a bunch of my incredibly amateur driving events on YouTube if you like watching FiSTs race: https://youtube.com/@djchameli9165
When I bought this car, I made a promise to myself that any mods I did to it I would install myself (unless it involved opening up the engine or transmission). I wanted to keep it from turning into a money pit like my 335i. To my credit, I've stuck to that, with the exception of the LSD, clutch, and alignment/corner balancing.
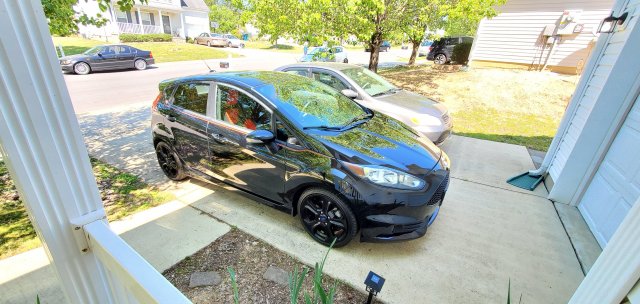
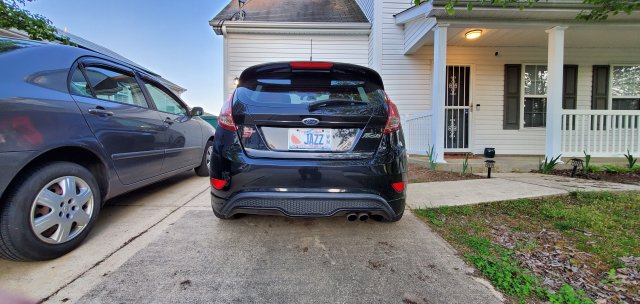
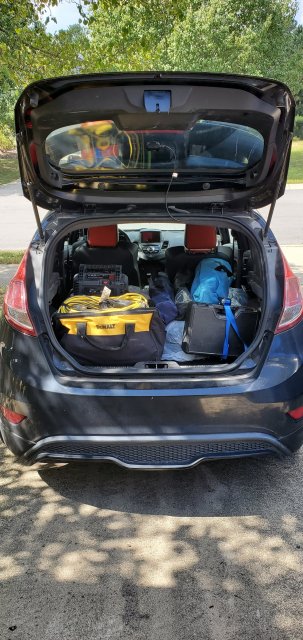
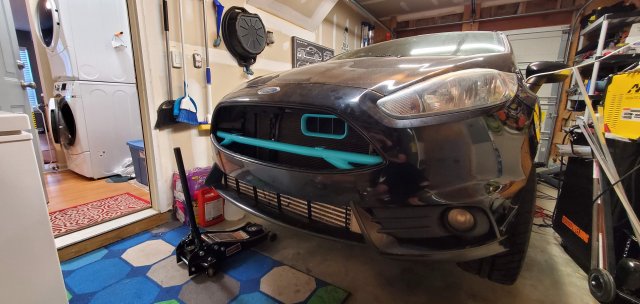
4/4/20 - I bought the car used with 33k miles for $14.5k. I traded in a 2008 Honda Fit (hence the transferred "Jazz" license plate) because, although it was fun, the lack of a highway gear and Android Auto was a pain when driving 5hrs roundtrip for work
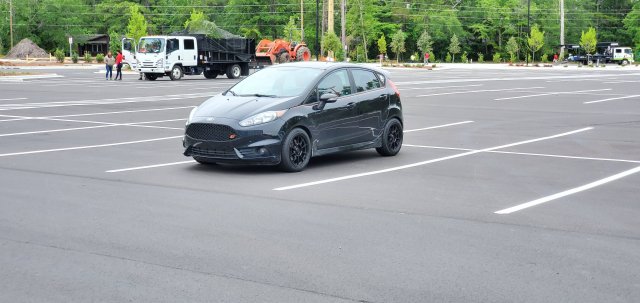
5/10/20 - I picked up some 16x8 Konig Dekagrams and some crappy Federal tires
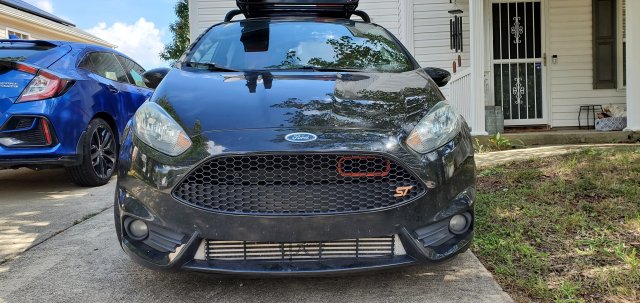
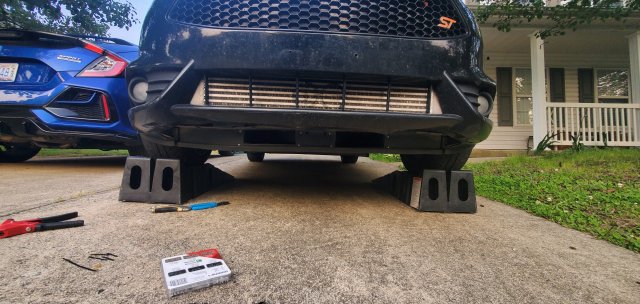
6/8/20 - cp-e intercooler purchased and installed along with the Mountune short shifter and a Cobb RMM
At this point, I was planning on doing minimal mods to the car and to keep it relatively stock as it was my daily driver. I stuck with it for a surprising amount of time in retrospect. But, as it always does, the upgrade bug got me. I decided it's much cheaper and MUCH less stressful to race and beat on a Fiesta than it is my garage queen GT350. Upgrades started getting more frequent and severe after this.
6/1/21 - Turbo Tech Racing motor and trans mounts. Ran these for about a month, but the NVH was pretty rough especially while still driving a ton for my commute. Ended up swapping to new OEM mounts with the Powerflex inserts. TTR mounts were re-installed about a year later
6/5/21 - Full brake job with pads, rotors, and stainless lines
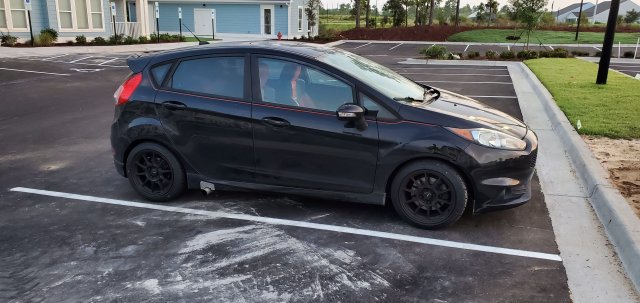
8/27/21 - Powerflex spring perches for the rear springs were ordered and installed. The OEM ones were practically non-existent at this point. Stock suspension was getting pretty work out so I replaces shocks and struts with Bilstein B6s all around
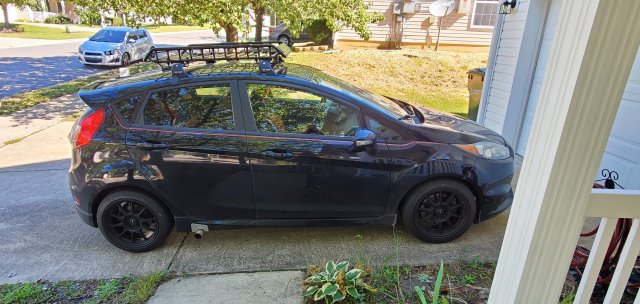
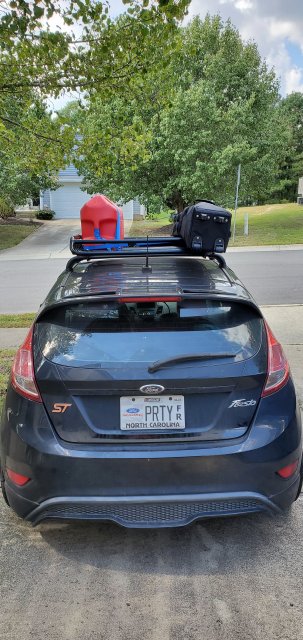
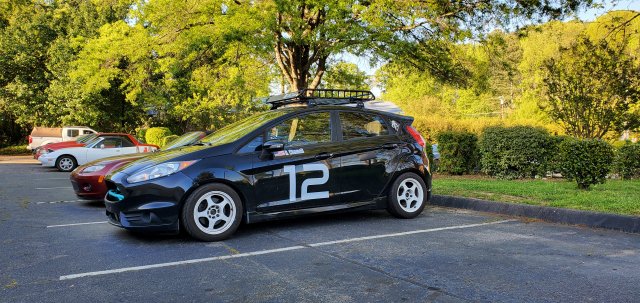
9/23/21 - Picked up a roof rack and basket because AESTHETIC
11/24/21 - I had been running a custom side exit exhaust for a little while now and figured I should get a proper exhaust to swap in for when the drone got to be too much. I went with the Milltek non-resonated exhaust. I loved the side exit too much and only recently switched to the Milltek within the last 2-3 months
4/14/22 - Picked up a sandwich plate and ProSport oil pressure and temp gauges
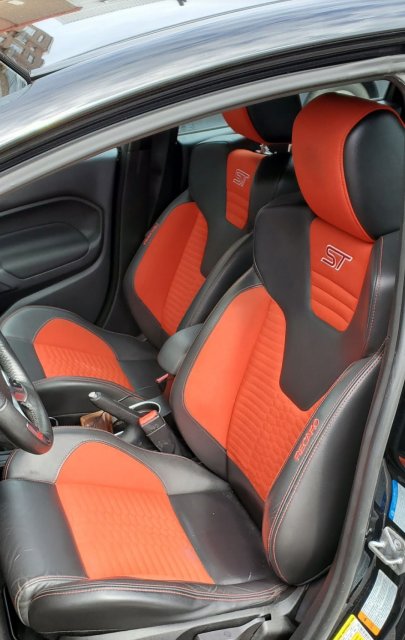
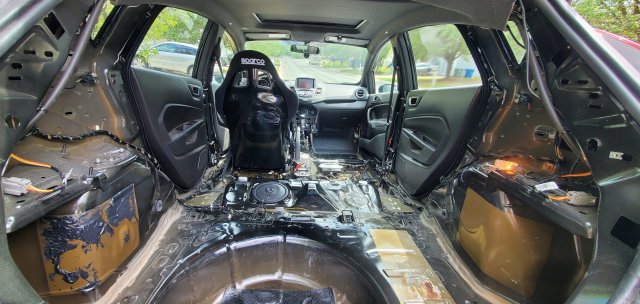
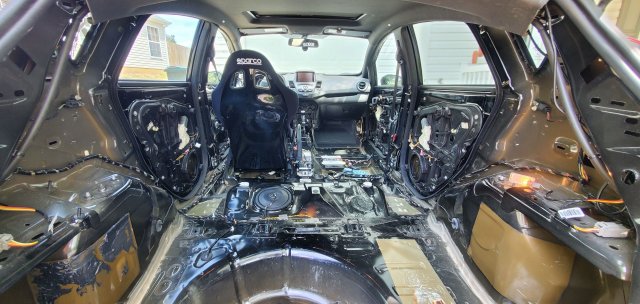
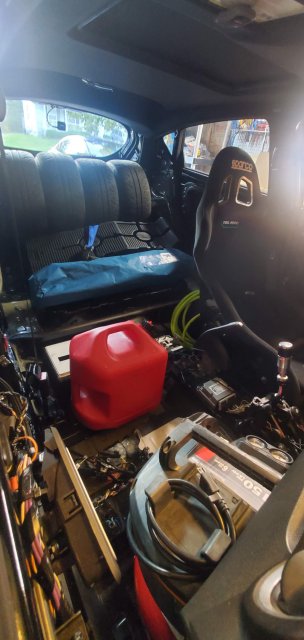
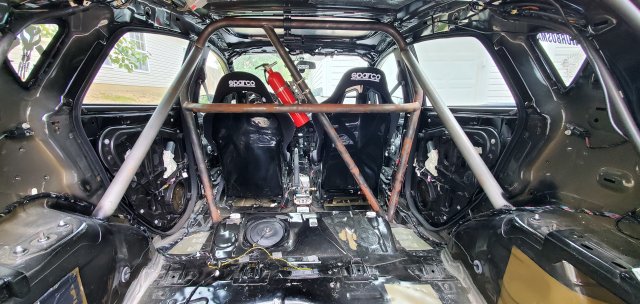
4/20/22 - Big life changes in the form of a new company which brought the benefit of a company vehicle. As the Fiesta was no longer needed as a daily, I got to fulfill my dream of turning it into a track focused car. Sparco bucket seat and all associated hardware ordered. This was huge and let me drop my seating position by several inches. I'm 6' 1" and with a helmet and the seat at it's lowest position, my head would hit the roof
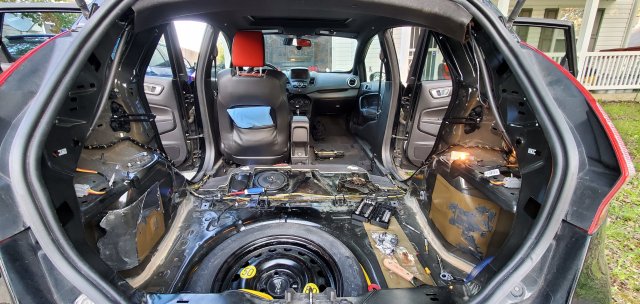
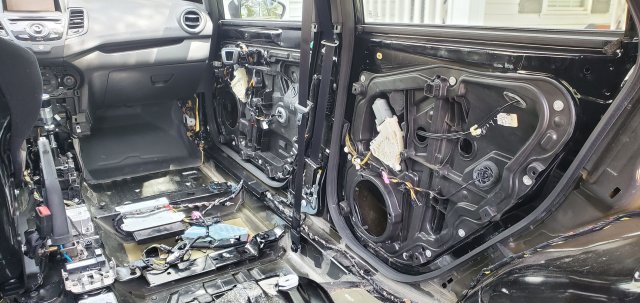
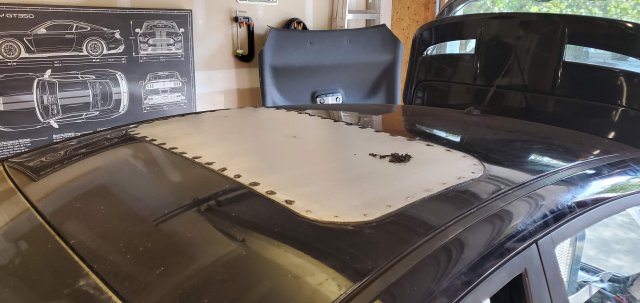
4/27/22 - The gutting begins. I took out a little over 280lbs out of the car from what I had measured. This doesn't factor in the sunroof so the actual number is a hair over 300
5/11/22 - Got H&R Super Sport springs. These were the lowest drop springs I could find and I desperately needed them after gutting the car. The rear looked like I had a lift kit on it, and even with the H&R springs, it still sat a bit above stock ride height. I only installed them on the rear, still ran the stock springs up front
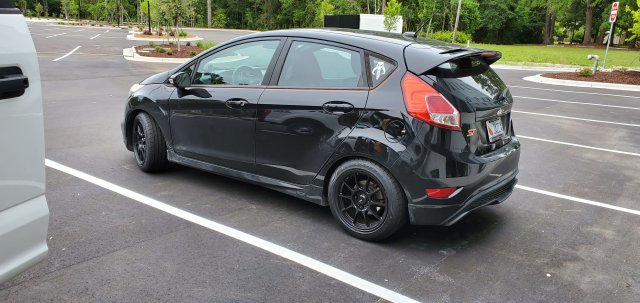
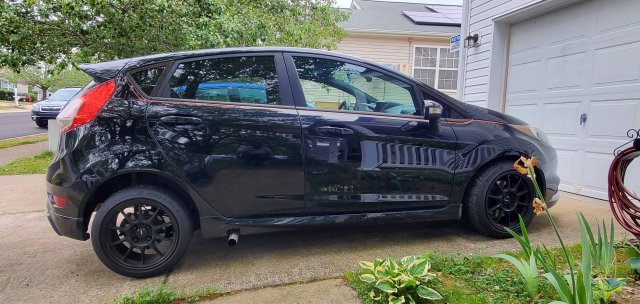
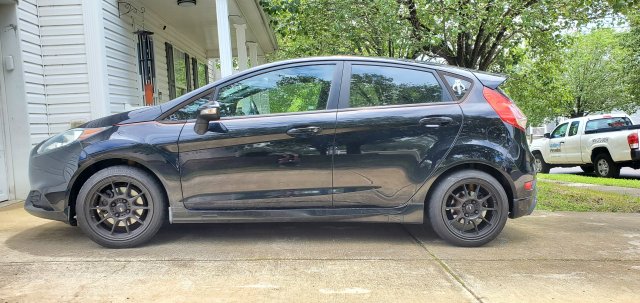
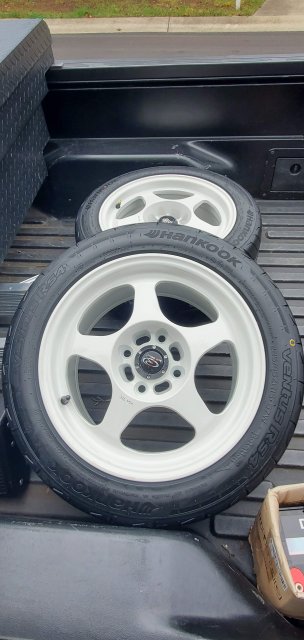
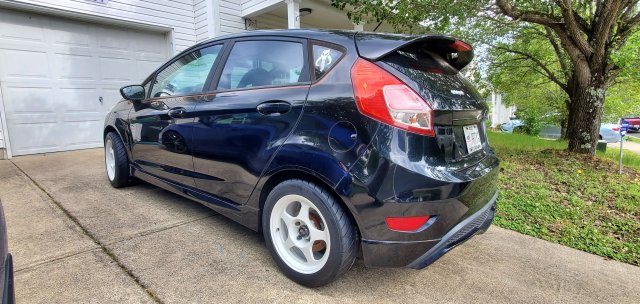
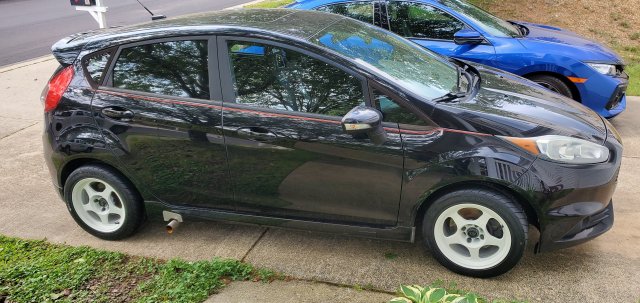
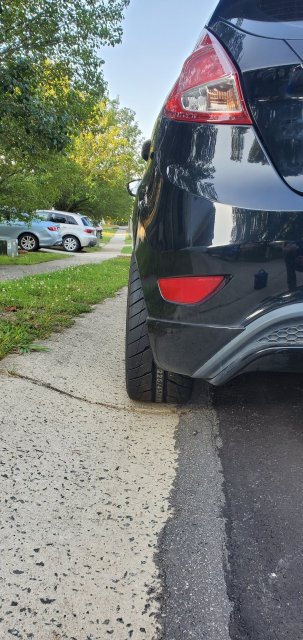
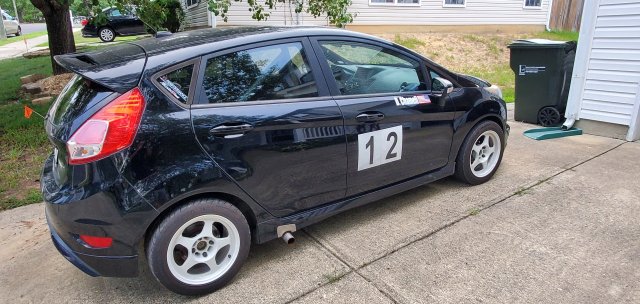
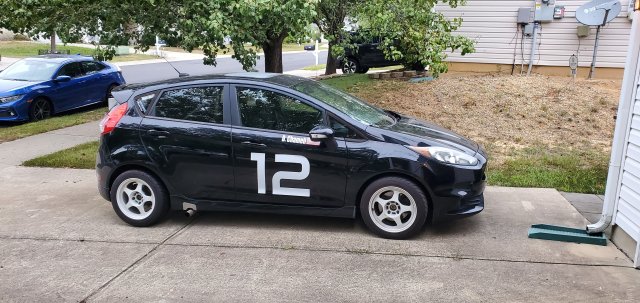
5/17/22 - First big, big upgrade in the form of an MFactory LSD and also some new tires, 225/45R15 Hankook R-S4s, to replace the absolutely trashed RE-71Rs. You may be saying "But those will not fit on your 16" Dekagrams" to which I say "Correct!" Dekagrams were sold to dhminer replaced with some Rota Slipstreams in 15x8. I also installed brake ducting up front to help the stock brakes out a little bit
5/31/22 - Installed DPro's camber plates to help with shoulder wear on the rear tires
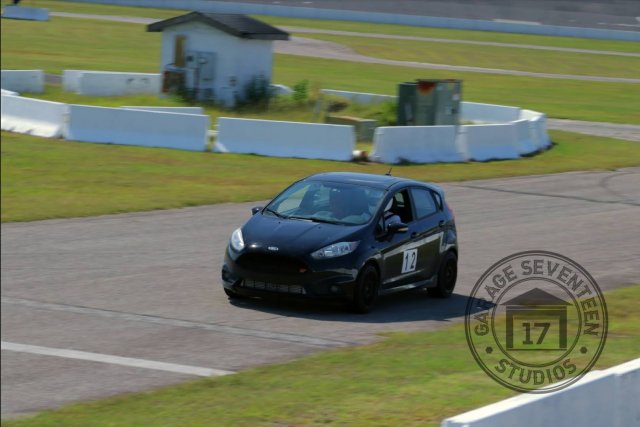
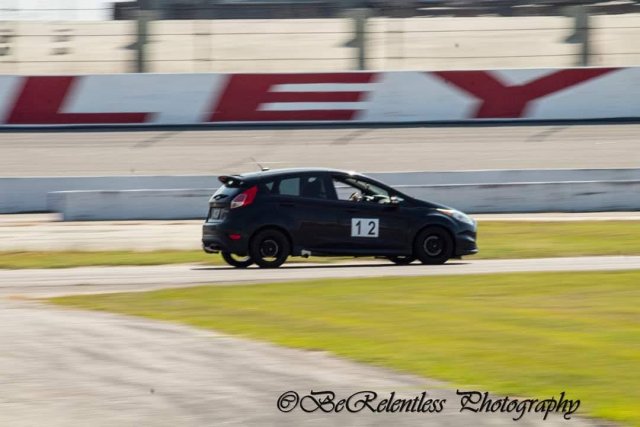
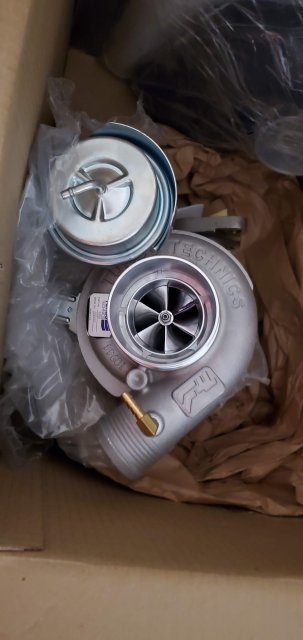
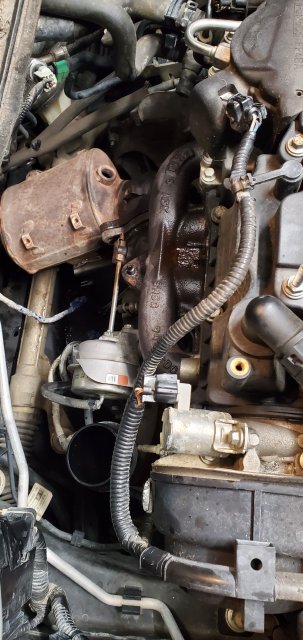
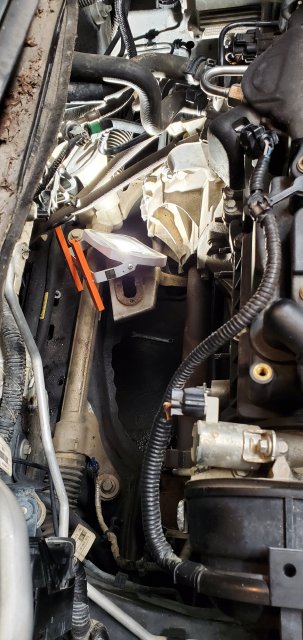
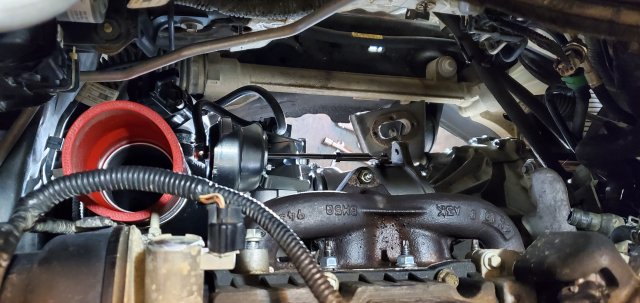
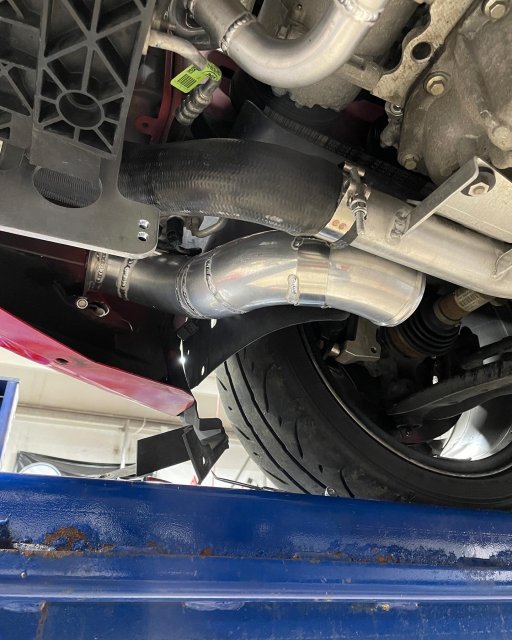
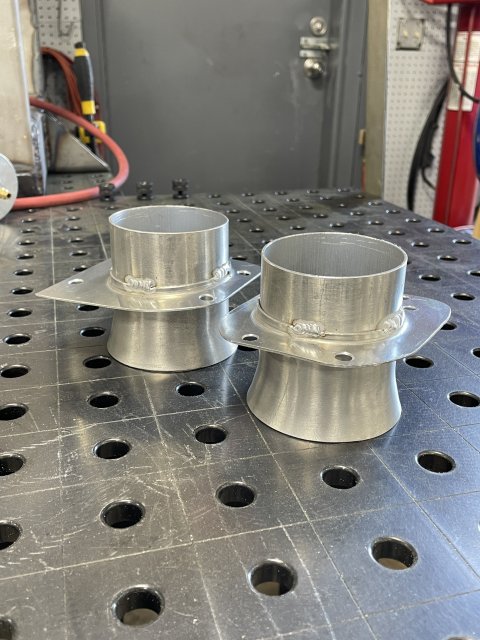
6/7/22 - The big day. It finally arrived, my S280 turbo upgrade. This would sit in the bag in a box for 3 months. Hey, I had a baby, cut me some slack. Oh and I was busy cutting, fabricating, and welding in my Autopower roll bar.
7/11/22 - Passenger Sparco seat ordered and installed
7 through 8/2022 - Worked on the cage when I had the time, it was very slow progress and took me more time than I care to admit. It's done. Fully installed, painted, the whole 9. Never again...
9/25/22 - Vinyl letters and the like installed because race car
10/4/22 - Original clutch slipped during a pull so I ordered a replacement. I went with the RTS Performance Twin Friction clutch kit. I love it, a little lighter than stock and hold the power very well
2/something/23 - Sparco 6 point harnesses ordered and installed. Had to get a little creative with the mounting as there isn't a whole lot out there for where people mounted their stuff. Shoulder belts to roll bar obviously. For the lap belts, I fabbed up my own version of this: https://shop.watsonracing.com/HARNESS-LAP-BELT-MOUNT-p/wr-harnessmnt.htm. Mine was just two 19" sections of 2" x 3/16" steel with a 3/4" lap stitch welded on both sides and then eye bolts mounted at the corners for the lap belt quick connects. Anti-submarine belts were attached to the Sparco seat bracket.
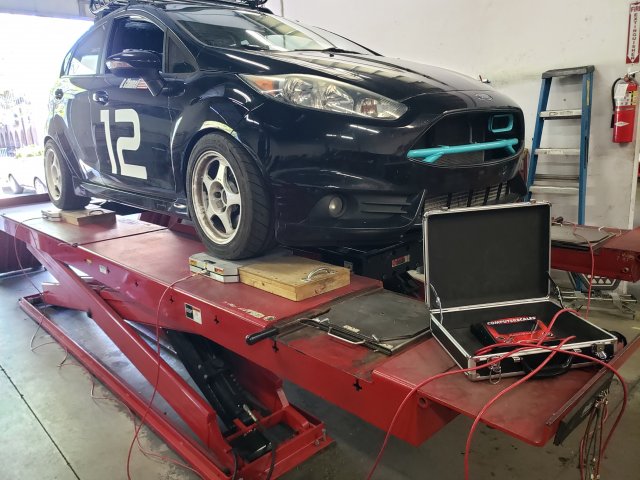
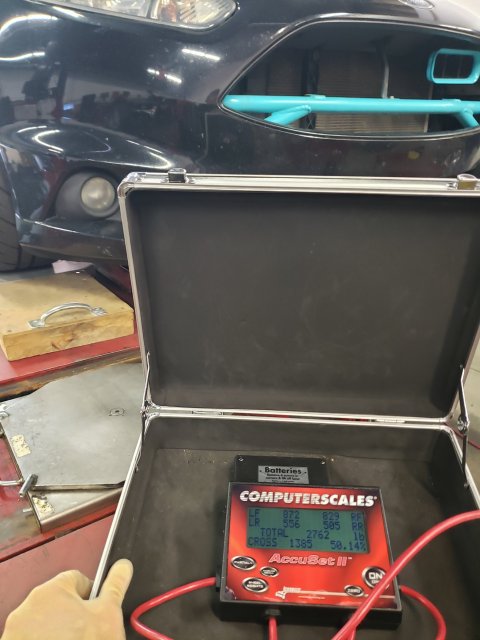
3/16/23 - ISC Suspension N1 STREET SPORT coilover kit with the track spring rate ordered to replace the Bilstein setup. Car is just finishing up at the shop for an alignment and corner balancing. Very excited to take it out for my first event of the year in 4 days
6/4/23 - Whoosh 285mm BBK ordered
7/9/23 - Whoosh BBK delivered and installed
I have a bunch of my incredibly amateur driving events on YouTube if you like watching FiSTs race: https://youtube.com/@djchameli9165
When I bought this car, I made a promise to myself that any mods I did to it I would install myself (unless it involved opening up the engine or transmission). I wanted to keep it from turning into a money pit like my 335i. To my credit, I've stuck to that, with the exception of the LSD, clutch, and alignment/corner balancing.
4/4/20 - I bought the car used with 33k miles for $14.5k. I traded in a 2008 Honda Fit (hence the transferred "Jazz" license plate) because, although it was fun, the lack of a highway gear and Android Auto was a pain when driving 5hrs roundtrip for work
5/10/20 - I picked up some 16x8 Konig Dekagrams and some crappy Federal tires
6/8/20 - cp-e intercooler purchased and installed along with the Mountune short shifter and a Cobb RMM
At this point, I was planning on doing minimal mods to the car and to keep it relatively stock as it was my daily driver. I stuck with it for a surprising amount of time in retrospect. But, as it always does, the upgrade bug got me. I decided it's much cheaper and MUCH less stressful to race and beat on a Fiesta than it is my garage queen GT350. Upgrades started getting more frequent and severe after this.
6/1/21 - Turbo Tech Racing motor and trans mounts. Ran these for about a month, but the NVH was pretty rough especially while still driving a ton for my commute. Ended up swapping to new OEM mounts with the Powerflex inserts. TTR mounts were re-installed about a year later
6/5/21 - Full brake job with pads, rotors, and stainless lines
8/27/21 - Powerflex spring perches for the rear springs were ordered and installed. The OEM ones were practically non-existent at this point. Stock suspension was getting pretty work out so I replaces shocks and struts with Bilstein B6s all around
9/23/21 - Picked up a roof rack and basket because AESTHETIC
11/24/21 - I had been running a custom side exit exhaust for a little while now and figured I should get a proper exhaust to swap in for when the drone got to be too much. I went with the Milltek non-resonated exhaust. I loved the side exit too much and only recently switched to the Milltek within the last 2-3 months
4/14/22 - Picked up a sandwich plate and ProSport oil pressure and temp gauges
4/20/22 - Big life changes in the form of a new company which brought the benefit of a company vehicle. As the Fiesta was no longer needed as a daily, I got to fulfill my dream of turning it into a track focused car. Sparco bucket seat and all associated hardware ordered. This was huge and let me drop my seating position by several inches. I'm 6' 1" and with a helmet and the seat at it's lowest position, my head would hit the roof
4/27/22 - The gutting begins. I took out a little over 280lbs out of the car from what I had measured. This doesn't factor in the sunroof so the actual number is a hair over 300
5/11/22 - Got H&R Super Sport springs. These were the lowest drop springs I could find and I desperately needed them after gutting the car. The rear looked like I had a lift kit on it, and even with the H&R springs, it still sat a bit above stock ride height. I only installed them on the rear, still ran the stock springs up front
5/17/22 - First big, big upgrade in the form of an MFactory LSD and also some new tires, 225/45R15 Hankook R-S4s, to replace the absolutely trashed RE-71Rs. You may be saying "But those will not fit on your 16" Dekagrams" to which I say "Correct!" Dekagrams were sold to dhminer replaced with some Rota Slipstreams in 15x8. I also installed brake ducting up front to help the stock brakes out a little bit
5/31/22 - Installed DPro's camber plates to help with shoulder wear on the rear tires
6/7/22 - The big day. It finally arrived, my S280 turbo upgrade. This would sit in the bag in a box for 3 months. Hey, I had a baby, cut me some slack. Oh and I was busy cutting, fabricating, and welding in my Autopower roll bar.
7/11/22 - Passenger Sparco seat ordered and installed
7 through 8/2022 - Worked on the cage when I had the time, it was very slow progress and took me more time than I care to admit. It's done. Fully installed, painted, the whole 9. Never again...
9/25/22 - Vinyl letters and the like installed because race car
10/4/22 - Original clutch slipped during a pull so I ordered a replacement. I went with the RTS Performance Twin Friction clutch kit. I love it, a little lighter than stock and hold the power very well
2/something/23 - Sparco 6 point harnesses ordered and installed. Had to get a little creative with the mounting as there isn't a whole lot out there for where people mounted their stuff. Shoulder belts to roll bar obviously. For the lap belts, I fabbed up my own version of this: https://shop.watsonracing.com/HARNESS-LAP-BELT-MOUNT-p/wr-harnessmnt.htm. Mine was just two 19" sections of 2" x 3/16" steel with a 3/4" lap stitch welded on both sides and then eye bolts mounted at the corners for the lap belt quick connects. Anti-submarine belts were attached to the Sparco seat bracket.
3/16/23 - ISC Suspension N1 STREET SPORT coilover kit with the track spring rate ordered to replace the Bilstein setup. Car is just finishing up at the shop for an alignment and corner balancing. Very excited to take it out for my first event of the year in 4 days
6/4/23 - Whoosh 285mm BBK ordered
7/9/23 - Whoosh BBK delivered and installed
Last edited:

![[wink]](/images/smilies/wink.gif "Wink [wink]")
")