• Sign Up! To view all forums and unlock additional cool features

    Welcome to the #1 Fiesta ST Forum and Fiesta ST community dedicated to Fiesta ST owners and enthusiasts. Register for an account, it's free and it's easy, so don't hesitate to join the Fiesta ST Forum today!


2014 Fiesta OEM+ build

OP
Volumetrik
Messages
99
Likes
74
Location
Montreal
Thread Starter #21
In parallel to my adventures with rust management, I'm experimenting with different suspension setups. I have the 2014MY and the 2014-2016 (up to feb) model years have a stiffer spring rate (around 10% stiffer) than later-model cars (2016 March and beyond). Also, the dampers have a different part number and the later model years have beefier front sway bars and possibly thicker rear beams. Qualitative reports on this forum indicate that the ride is softer and less harsh on the later year models.

I want that better ride quality as I find my 2014 is pretty hardcore. As I'm approaching my 30s this summer, I find myself wanting a more sophisticated ride (less NVH and more compliant). When I got this car at 20, I certainly did not mind the harsh ride, but I'm doing way more daily driving in the city and the roads here in Montréal are pretty bad. As I plan to keep this car for the next five years at least, I don't mind investing in refreshing the suspension all around.

From here on out, I'll refer the early model springs & dampers as 2014 and the later model ones as 2019. It'll be easier to type and to refer to.

I purchased stock 2019 springs from @Dialcaliper and mounted them at the rear with the stock 2014 dampers. (Here)

Change in ride, almost nothing. What did change was the clunking from the worn bushings was gone, but I could not detect the difference in the rear.

Next up, I bought the OEM 2019 dampers and installed them with the stock OEM foam spring perches.
IMG_9929.jpg

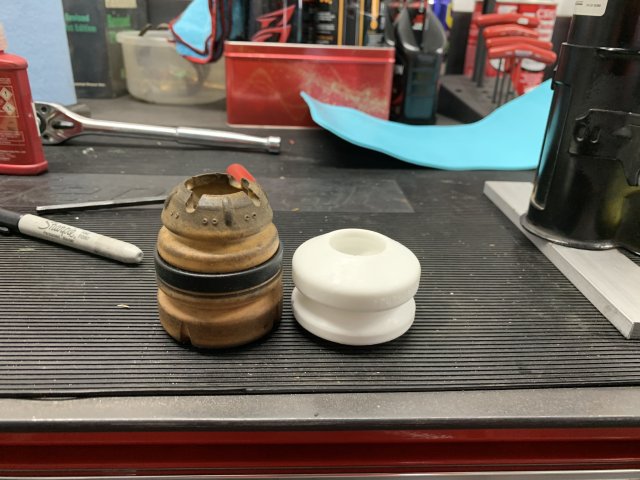
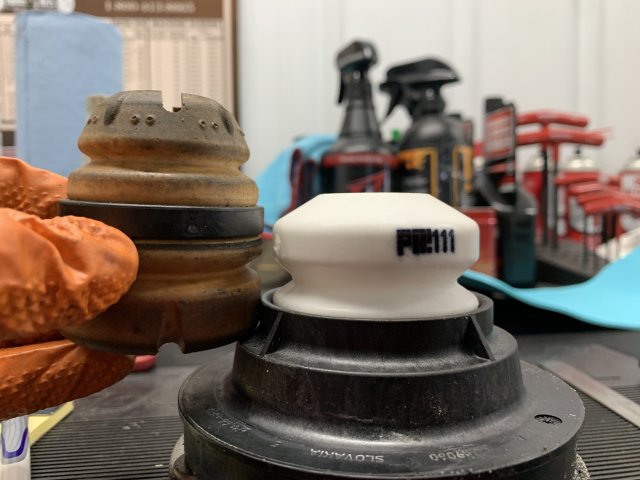
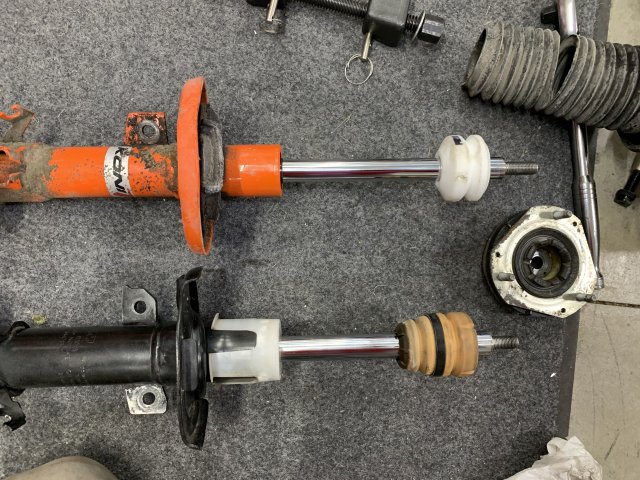
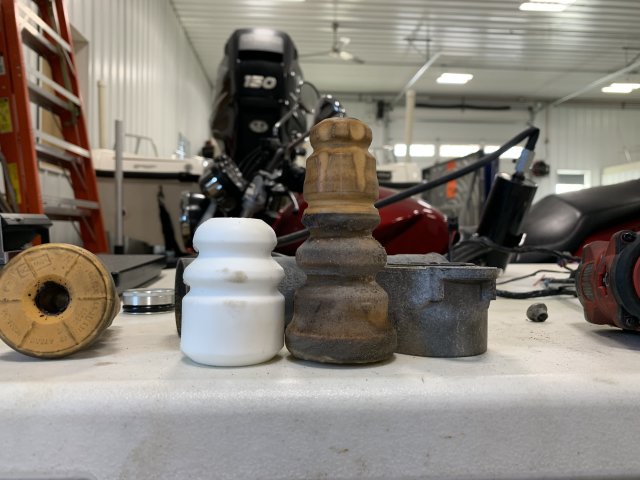
Here are some photos comparing the 2014 and 2019 dampers.
IMG_9925.jpg
If you notice, the two different colors. Red & yellow indicate 2014 dampers. Blue & yellow indicate 2019 dampers. Anyone else can confirm/infirm this?

IMG_9926.jpg
IMG_9927.jpg
Serial numbers.

IMG_9928.jpg
The left dampers have 14500 kms (9k miles). So I would consider them broken in.

IMG_9930.jpg
View from the back.

Now I have the full 2019 rear setup (springs + dampers). Since then, I have not been able to feel a difference for the back end. It's still as ''crashy'' and harsh as the 2014 rear setup (good to know).

Up next, I would like to get both the 2014 and 2019 dampers on the shock dyno to compare the curves of both. Now I know this is of little importance as people are manly swapping these out for B6's or coilover adjustable dampers, but this is for my curiosity. I'm also interested in dynoing the front dampers eventually, as my front left one was replaced not too long ago due to a hit & run (gotta love downtown). My goal is to dyno somewhat fresh dampers, but now new new ones. I'd like to see 8-9k miles on them to get them settled and then dyno. I'd be super interested to see the results in comparison to @Fusion Works thread.

If I compress the 2014 rear shocks, they ''almost'' can't extend back out on their own. It takes a good minute to extend back. This is either high rebound damping and/or low gas force if I would guess.


OP
Volumetrik
Messages
99
Likes
74
Location
Montreal
Thread Starter #23
Do not use extension time or compression feel to try and determine shock forces. They mean nothing when doing it by hand. Also there is very little pressure in the OEM dampers as they are a twin tube shock, not a mono tube.
Noted, thanks for the insight.


OP
Volumetrik
Messages
99
Likes
74
Location
Montreal
Thread Starter #24
Interesting developments in my suspension experiments. I managed to get a used set of BC Racing coil overs for $350CAD (255 USD) on a Fiesta ST group on facebook.

The person selling them hit a monster pothole and the front right damper gave out. He ordered two new front replacement dampers to replace them, but failed to disassemble them fully. He did not have impact tools and some rings were stuck in place.

IMG_0009.jpg
Big package and quite heavy.

IMG_0010.jpg
The two boxes in the center are the new replacement dampers.

IMG_0011.jpg
Here is a full inventory of parts.

IMG_0012.jpg
Difference in height between OEM springs (left) and BC Racing 3k rear springs (right). Rightmost is a front 5k spring.

Does anyone have experience with unfreezing stuck rings on these coil over threaded bodies? I managed to get a couple of ones off, but the remaining are the two rear dampers and one ring for the front damper.

I could buy new rings for the front, but I need a solution for the rear rings. I tried a bunch of penetrating oil as well as heating up the rings to no avail. I'm starting to chew up the rings themselves. I've seen online videos and posts about soaking the shock bodies in ATF, that will probably be my next step.

It's an inherently difficult part to clamp or affix to a bench... Circular body with threads you don't want to damage + slim rings with limited angles.


Messages
207
Likes
144
Location
none
#25
Leather/rubber straps to clamp it down and a hammer and chisel/flathead screwdriver to knock the rings loose.

Tools of this nature does exist, but can be jerry rigged with rubber/leather strap in a vice.
1714032561216.png


OP
Volumetrik
Messages
99
Likes
74
Location
Montreal
Thread Starter #26
Leather/rubber straps to clamp it down and a hammer and chisel/flathead screwdriver to knock the rings loose.

Tools of this nature does exist, but can be jerry rigged with rubber/leather strap in a vice.
View attachment 61473
I actually broke a tool just like this at the handle. I'll have to buy a sturdier one.

I've seen recommendations for an air chisel. Knocks the rings loose, but not sure if you can reuse them after.


Messages
207
Likes
144
Location
none
#28
I actually broke a tool just like this at the handle. I'll have to buy a sturdier one.

I've seen recommendations for an air chisel. Knocks the rings loose, but not sure if you can reuse them after.
An air chisel might wreck some of the outer threads. Especially if they're a soft metal, but might be worth a try.

Else if it's corrosion creating the issue you might try to soak it in some mild acid. This is a reference to cookware in aluminium, but there could be a trick or two to try out.
https://schaumburgspecialties.com/how-to-remove-oxidation-from-aluminum-stepbystep-instructions/


Similar threads


Top