
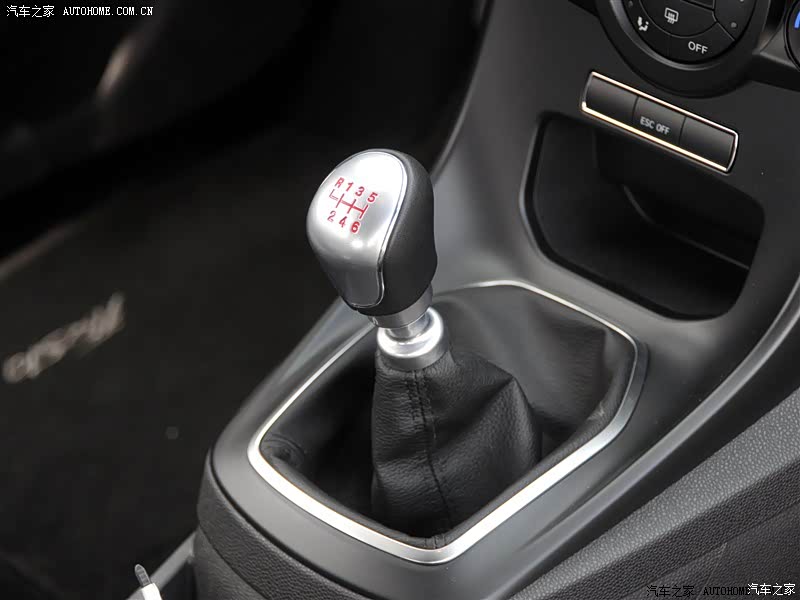
As title states, installed my Boomba Short Shift Lever, Shifter Base Bushing, Transmission Cable Bracket Bushing and Shift knob a couple months ago. Didn't have time to post this until now.
But there are SIGNIFICANT differences between Euro spec and US spec cars.
Referring to Boomba's instruction steps (link), steps 3 to 9 is completely useless. Our cars have ENTIRELY different panels. No luck searching internet for DIY's on Euro spec center console either. I had to figure out myself and break a couple of tabs in the process, but now posting this I hope you guys won't make the same mistake.
Unfortunately, I was in a rush during the installation and did not take pictures. Therefore, thanks to internet, I found some that can be used as general reference to my descriptions.
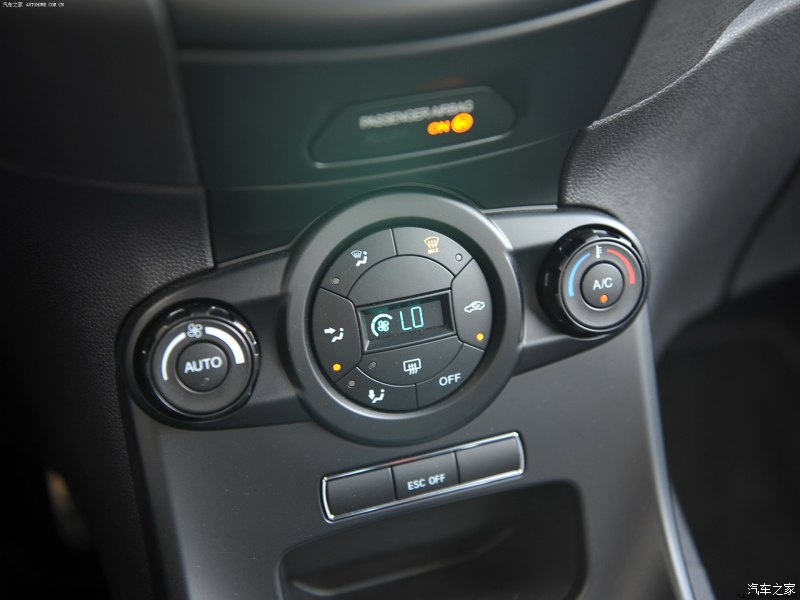
a) Using plastic panel removal tool set, pry the rectangular plastic where Passenger Airbag ON indicator is. Unplug harness.

b) Now for the center console, the usual. Remove shift knob, remove shift boot trim (just pull upwards). After this is the tricky part.
c) The smooth black plastic is separate from the grey textured plastic, you need the plastic tool to pry up and backwards starting from lower corner. Once you have space to fit your hands in, start pulling upwards and towards the back of the car until the top part. Step a), you removed this piece leaving a gap between the smooth plastic and the car. Now there's two tabs on both side that you need to use plastic tools to pull backwards and it is TIGHT. Be careful here because this is where I broke one of the tabs. Unplug harnesses.
d) Then you remove the textured plastic, start from the back and pull upwards until the front, in which you pull backwards.
e)Viola! Continue from step 10 in boomba's instrutions.
For our cars, we do not need to remove the side panel plastic as stated in boomba's instruction.
After reassembly, I tested out the shifter and to my horror... There was horrible noises whenever going in R, 1, 3. The culprit below:


Our shift boot surround piece has diagonal corner in the front and shorter while US spec is completely squared. This caused contact between shifter surround tab and the cable linkage.
Euro
US

I could have reduced the throw by changing the position of the shift lever contact point in order to make this work, but I paid shipping to Canada, flew to Canada to pick it up then brought it back to China, there was NO way I was settling for less. I wanted MAXIMUM reduction. I wanted 40%. That's right, FORTY PERCENT (I assumed that's how much I'll get combined with Mountune short shifter).
So the following ensued


Yes, I cut the factory stock plastic pieces. No going back.
End result?
Works perfect. I am in LOVE with this shifter!!
Went on a 6300km road trip later on, the entire package of cable bushing, shifter base bushing, shift lever, shift knob makes this a breeze to drive. Boomba cleverly designed it that even shifting to 5th gear, I can still have my arm on the armrest and the direct feel from bushing makes it just slip into the gear slots just feels amazing! Totally worth the trouble and ruining my factory pieces. Thanks [MENTION=1045]Boomba Racing[/MENTION]!
But there are SIGNIFICANT differences between Euro spec and US spec cars.
Referring to Boomba's instruction steps (link), steps 3 to 9 is completely useless. Our cars have ENTIRELY different panels. No luck searching internet for DIY's on Euro spec center console either. I had to figure out myself and break a couple of tabs in the process, but now posting this I hope you guys won't make the same mistake.
Unfortunately, I was in a rush during the installation and did not take pictures. Therefore, thanks to internet, I found some that can be used as general reference to my descriptions.
a) Using plastic panel removal tool set, pry the rectangular plastic where Passenger Airbag ON indicator is. Unplug harness.
b) Now for the center console, the usual. Remove shift knob, remove shift boot trim (just pull upwards). After this is the tricky part.
c) The smooth black plastic is separate from the grey textured plastic, you need the plastic tool to pry up and backwards starting from lower corner. Once you have space to fit your hands in, start pulling upwards and towards the back of the car until the top part. Step a), you removed this piece leaving a gap between the smooth plastic and the car. Now there's two tabs on both side that you need to use plastic tools to pull backwards and it is TIGHT. Be careful here because this is where I broke one of the tabs. Unplug harnesses.
d) Then you remove the textured plastic, start from the back and pull upwards until the front, in which you pull backwards.
e)Viola! Continue from step 10 in boomba's instrutions.
For our cars, we do not need to remove the side panel plastic as stated in boomba's instruction.
After reassembly, I tested out the shifter and to my horror... There was horrible noises whenever going in R, 1, 3. The culprit below:
Our shift boot surround piece has diagonal corner in the front and shorter while US spec is completely squared. This caused contact between shifter surround tab and the cable linkage.
Euro
US
I could have reduced the throw by changing the position of the shift lever contact point in order to make this work, but I paid shipping to Canada, flew to Canada to pick it up then brought it back to China, there was NO way I was settling for less. I wanted MAXIMUM reduction. I wanted 40%. That's right, FORTY PERCENT (I assumed that's how much I'll get combined with Mountune short shifter).
So the following ensued
Yes, I cut the factory stock plastic pieces. No going back.
End result?
Works perfect. I am in LOVE with this shifter!!
Went on a 6300km road trip later on, the entire package of cable bushing, shifter base bushing, shift lever, shift knob makes this a breeze to drive. Boomba cleverly designed it that even shifting to 5th gear, I can still have my arm on the armrest and the direct feel from bushing makes it just slip into the gear slots just feels amazing! Totally worth the trouble and ruining my factory pieces. Thanks [MENTION=1045]Boomba Racing[/MENTION]!
