• Sign Up! To view all forums and unlock additional cool features

    Welcome to the #1 Fiesta ST Forum and Fiesta ST community dedicated to Fiesta ST owners and enthusiasts. Register for an account, it's free and it's easy, so don't hesitate to join the Fiesta ST Forum today!


Genuine FORD Shark Fin

D1JL

7000 Post Club
Staff Member
Premium Account
U.S. Navy Veteran
Messages
7,834
Likes
4,074
Location
SFV, So.Cal.
#1
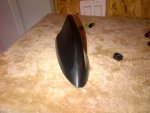
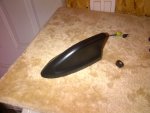
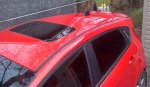
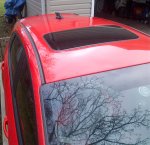
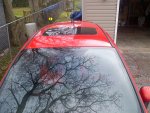
I have always wanted a Shark Fin Antenna on my FiST because I think they just look better.
Aftermarket antennas work poorly if at all.
I was always hoping to use a factory Ford antenna.
However until just recently Fords didn't have Shark Fin Antennas.


I was alerted to the fact that the new Ford Edge now has one.
With the help of Perfblue15 who provided the VIN to his new Edge I was able to order a Ford Shark Fin.


It is important to understand that the Fiesta has two available antennas.
These are for with or without Sirius XM.
As my FiST has the Premium Sound Package with Sirius XM, the antenna I ordered is the correct one for my car.
Let me make it clear that NO testing was done on a NON-Sirius XM car.


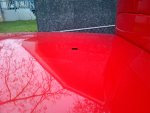
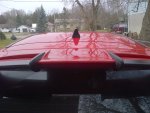
This is a Plug-N-Play exchange.


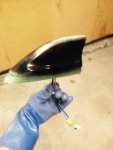
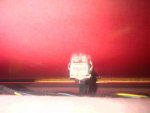
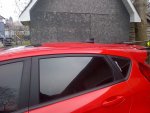
Yes, the Shark Fin is larger than the Fiesta antenna base but the mount point is the same.
Even the connectors are the same.
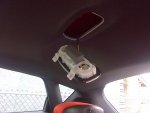
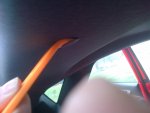
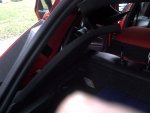
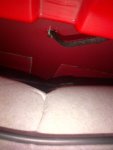
The install is fairly simple if you remove the headliner first.
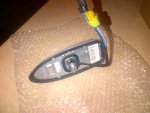
The only trick I found was to use the original Fiesta retainer clip (on the left in photo #5 below).


OK, I lied about the Plug-N-Play, you will need to paint it.


Dave


Perfblue15

1000 Post Club
Messages
1,375
Likes
341
Location
Canyon country
#2
Since I gave you the Vin to get this i decided I want your old one. Also I'm glad I could help the community find a bolt on shark fin. Just don't tell my wife we stole her Vin lmao.

Also the antenna looks great


CanadianGuy

4000 Post Club
Messages
4,097
Likes
942
Location
Southern Ontario
#3
Oh I am so getting this. [MENTION=879]D1JL[/MENTION] any pictures of the headliner steps? That is the step that always scares me as it is a force pull and not usually a tool used.

For those looking to copy paste the part number is: FT4Z-18936-ADPTM


CanadianGuy

4000 Post Club
Messages
4,097
Likes
942
Location
Southern Ontario
#5
Why did I know that you would want this?
This should help:

Headliner.pdf

I just pulled down the back section.

I do refuse to install yours.


Dave
So if I read it correctly. Take the rear dome light off. Take the 2 pieces where the seat belts come out at the rear and you should have access to the antenna hardware. Maybe remove the sun roof trim. Correct?


OP
D1JL

D1JL

7000 Post Club
Staff Member
Premium Account
U.S. Navy Veteran
Messages
7,834
Likes
4,074
Location
SFV, So.Cal.
Thread Starter #6
So if I read it correctly. Take the rear dome light off. Take the 2 pieces where the seat belts come out at the rear and you should have access to the antenna hardware. Maybe remove the sun roof trim. Correct?
I don't have a sun roof, so not sure about that.

Yes, remove the upper C-Pillar Trims, just move out of the way, you do not need to remove the seatbelts and remove the dome light.
That should give you enough access.


Dave


CanadianGuy

4000 Post Club
Messages
4,097
Likes
942
Location
Southern Ontario
#7
I don't have a sun roof, so not sure about that.

Yes, remove the upper C-Pillar Trims, just move out of the way, you do not need to remove the seatbelts and remove the dome light.
That should give you enough access.


Dave

Thanks will likely order this soon as a winter project as I detest our antenna so fugly. Will update if the sunroof trim is required to be removed.


--------------

Edit just ordered via ebay international processing. Should be in within 2 weeks. Will keep everyone posted.


OP
D1JL

D1JL

7000 Post Club
Staff Member
Premium Account
U.S. Navy Veteran
Messages
7,834
Likes
4,074
Location
SFV, So.Cal.
Thread Starter #8
Further Update

I have now had a couple days to do further testing.
I never had any issues with the OE antenna on my Fiestas.
However with a shorty antenna mast on both and later the cover by Visual Garage on the FiST, I had intermittent loss of signal with HD radio, not bad, but there.

With this new Ford Shark Fin I have had absolutely no signal loss.
I purposely took a road trip this morning to known problem areas to prove this.


Dave


CanadianGuy

4000 Post Club
Messages
4,097
Likes
942
Location
Southern Ontario
#10
Ford OEM Shark Fin Antenna (FT4Z-18936-ADPTM) install guide part deux

Finally had a chance to install the Ford OEM Shark Fin Antenna (FT4Z-18936-ADPTM). I painted it satin black to match the Mountune winglet. Let it dry/cure for 3 weeks and applied a few coats of wax before installing it.

When you get it it is only a primer colour as it is made to be colour matched to the vehicle. I painted it satin black to match the Mountune winglet. Painted about 12 light coats over the course of a week. Let it dry/cure for 2-3 weeks and applied a few coats of wax before installing it.


IMG-20151112-00398.jpg
IMG-20151112-00399.jpg
FullSizeRender1.jpg
IMG-20151205-00479.jpg
IMG-20151205-00481.jpg

To install

I started by removing the rear dome light. You can access / see the bolt but cannot (without damaging the headliner) reach the cable harness to unplug it. So pop the rear two headliner retention plugs (they are long), and I did one side of the rear trim (you could do both). This gives you access to the bolt and wiring. Using a 10mm ratchet wrench take the bolt out.


IMG-20151205-00482.jpg
IMG-20151205-00483.jpg
IMG-20151205-00484.jpg
IMG-20151205-00485.jpg
IMG-20151205-00486.jpg

Out with the old in with the new. To unplug the wires simply follow them with your hand to the mounting block (4 white clip you will see at the back). Look at the new antenna to understand how the connector unmate (location of the tabs and such). As you will be doing the unplugging blind note if the tab is at the top/side/bottom (sorry I can't remember). Once you press the plastic levers the plugs easily pull apart. No force required.

Now I did not follow when Dave suggested about reusing the old hardware mounting. I used the mounting hardware that came with the new antenna plus a washer from the old. After you disassemble the new antenna bolt make sure the the plastic clip remains on the base. Next fish the wires into the hole and press the antenna down (it will slightly snap into place due to the plastic sleeve). From the inside add the clip and the washer and tighten, there is a long way to tighten until the bolt bottoms out. The 4 legs of the clip will spread a little but will hold the antenna secure. You may need to adjust the alignment before the final turns of the bolt, either have someone hold it in place or use for painters tape. Reconnect the wires (this is were it can be frustrating as you are connecting blind. The big one was easy and the single wire took me a while to rotate it until it clicked.


IMG-20151205-00487.jpg
IMG-20151205-00491.jpg

Voila. The antenna works great, before I started i picked an AM and FM station that was just on the edge of reception with the stubby. Once installed those came in clear and the XM radio had no problem even on the cloudy day. Well worth it and the result is what I wanted. from the factory

IMG-20151205-00497.jpg
IMG-20151205-00496.jpg
IMG-20151205-00495.jpg
IMG-20151205-00493.jpg
IMG-20151205-00498.jpg


CanadianGuy

4000 Post Club
Messages
4,097
Likes
942
Location
Southern Ontario
#12
How much you pay canadianguy
Got it off ebay.ca for $110 Canadian to my door, included taxes and duty and shipping. There are 2 current listing on ebay for about $130 Canadian which includes everything to get it to your door. You could try a local dealer to get it cheaper or places like Tasca has them for $75 USD plus shipping.


Messages
221
Likes
16
Location
south shore, montreal
#13
Got it off ebay.ca for $110 Canadian to my door, included taxes and duty and shipping. There are 2 current listing on ebay for about $130 Canadian which includes everything to get it to your door. You could try a local dealer to get it cheaper or places like Tasca has them for $75 USD plus shipping.
Thanks I tough you got.it from Ć  canadian dealer.


CanadianGuy

4000 Post Club
Messages
4,097
Likes
942
Location
Southern Ontario
#17
[MENTION=4517]WPG-FiST[/MENTION] Since I wanted a finish that is the same as the black trim and Mountune winglet I used Duplicolor Trim and Bumper paint. To be honest you can use any automotive paint. If you want gloss or a colour match, sky is the limit. It comes primed and ready for paint. IF you know a paint shop they can even do a colour match if you want.


SFP

Member
Messages
330
Likes
88
Location
Coolville
#18
[MENTION=3771]konatodd[/MENTION] here is any info you may need on install


Similar threads


Top