• Sign Up! To view all forums and unlock additional cool features

    Welcome to the #1 Fiesta ST Forum and Fiesta ST community dedicated to Fiesta ST owners and enthusiasts. Register for an account, it's free and it's easy, so don't hesitate to join the Fiesta ST Forum today!


Turpid Porpoise's Track Toy Build

OP
T
Messages
95
Likes
137
Location
Lovettsville, VA, USA
Thread Starter #21
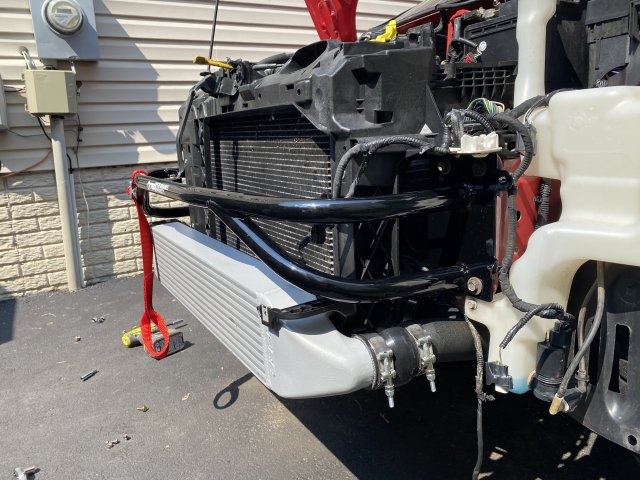
TB Performance crash bar showed up and I was able to drop that in yesterday after work. I have to say that the fit and finish of the bar is great although when I paid $50 to have a nut welded on for a tow strap I expected a nut rather than a strap just looped around the bar.

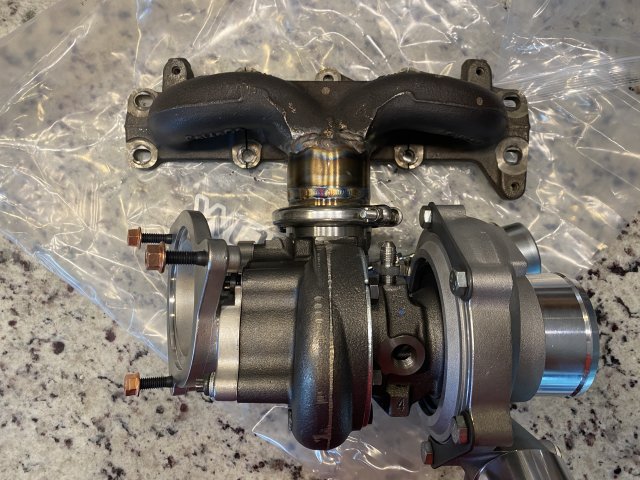
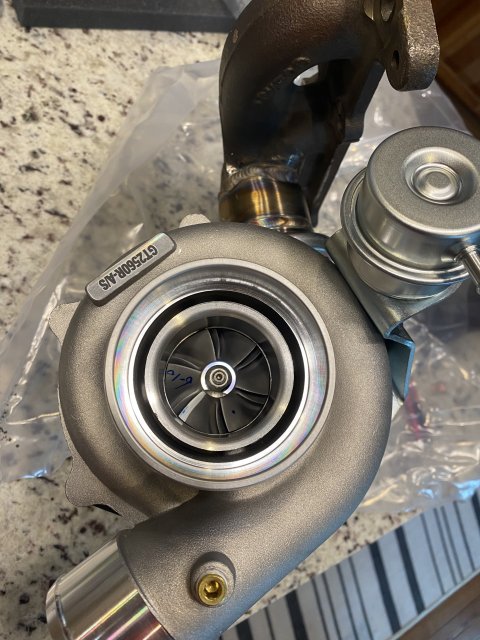
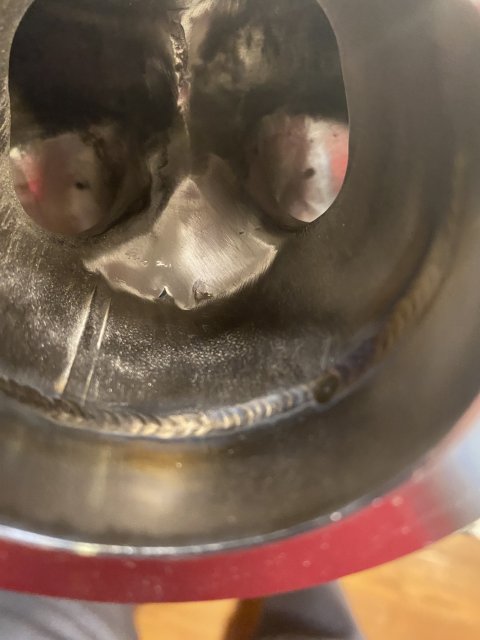
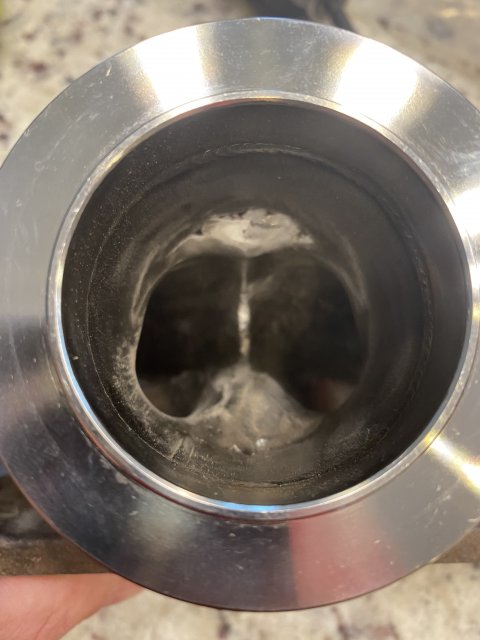
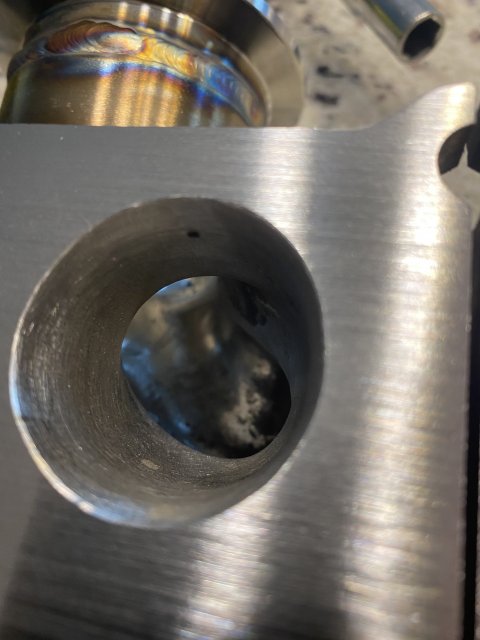
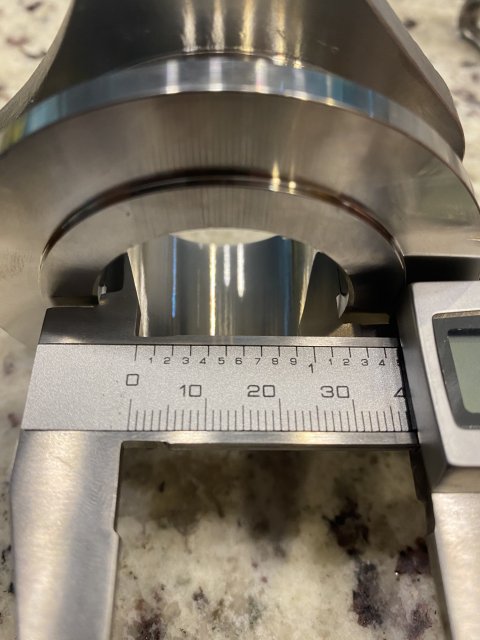
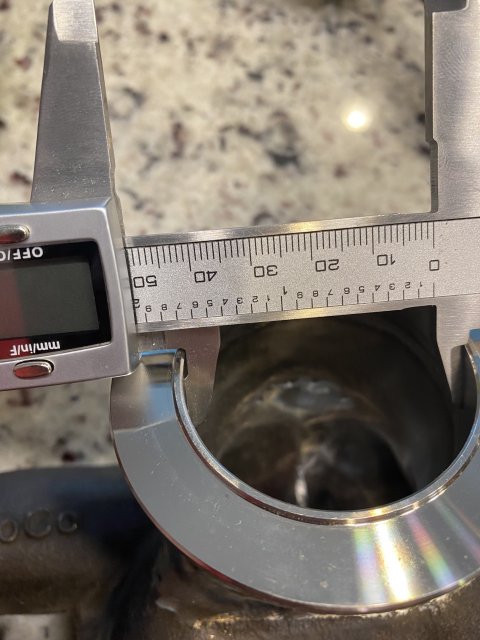
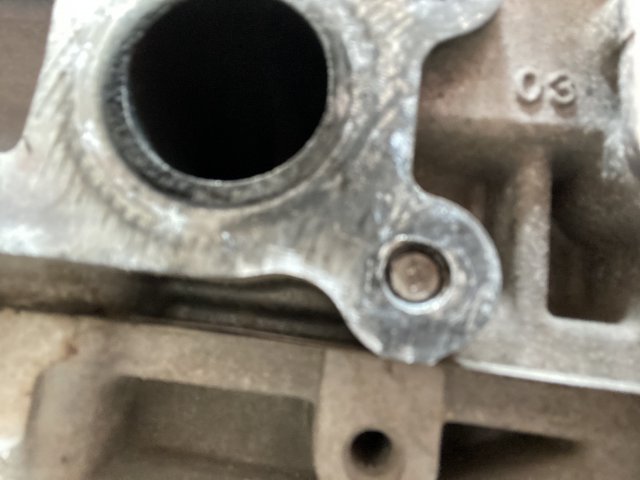
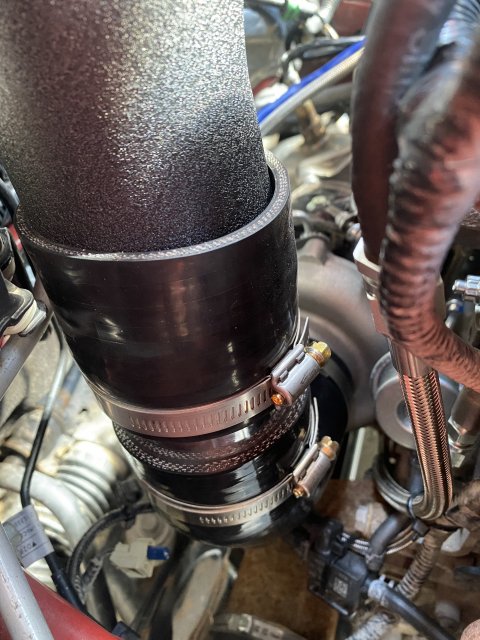
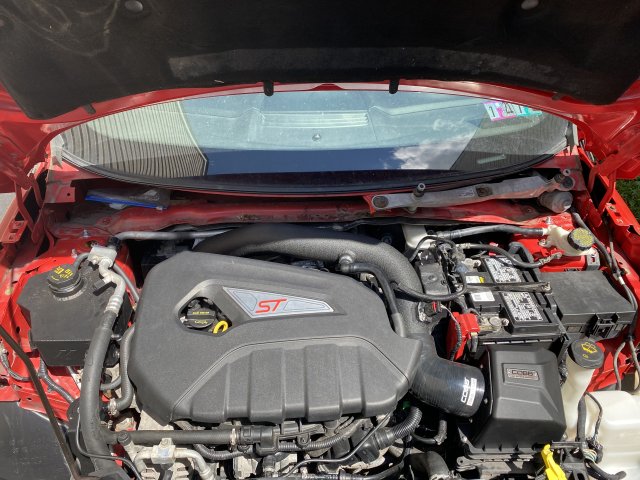
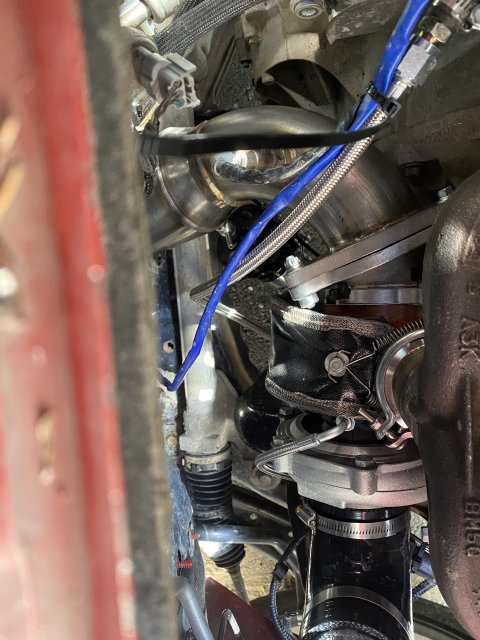
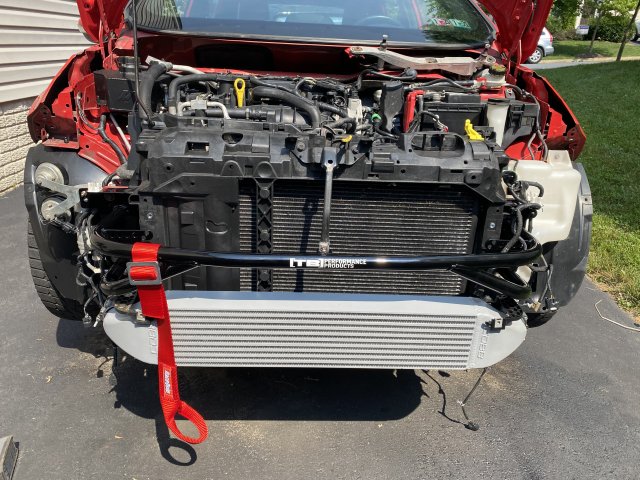
I also got tired of waiting for the Whoosh Hybrid as my first event is approaching quickly and I haven’t gotten any answer on the ETA so I ordered the ATP 2560 kit and a WOR modified OEM manifold with the adapter port matched and welded on there. ATP turbo arrives Tuesday so things should start moving more quickly now. F8EBFA92-EA0D-47D7-93A9-D4FAAE526BF8.jpeg 349BB9A2-284F-4EB0-9EA1-7EF250A00B9D.jpeg


Last edited:
OP
T
Messages
95
Likes
137
Location
Lovettsville, VA, USA
Thread Starter #22
Finally got around to pulling the OEM turbo/manifold off this weekend and it went fairly well except for one manifold stud snapping off in the head. It's the one closest to the passenger side on the bottom so chances of my being able to get to it and extract it are very low so I'm probably just going to slap it back together and hope it doesn't leak for the time being.

WorFab manifold and GT2560 turbo are both scheduled for delivery this afternoon so I'm on the right track.


OP
T
Messages
95
Likes
137
Location
Lovettsville, VA, USA
Thread Starter #24
So the lower passenger side stud broke while I was disassembling everything and I was able to drill and extract it. Upon trying to reinstall new arp studs I found that the hole just above that one had also snapped a stud at some point and someone just threw another stud into the 3-4 threads remaining. That one is being a PITA so it might just stay that way for awhile. 9F8D3B2F-5BA3-47EE-92AD-539CFAC6F948.jpeg E0DCB2F1-2F95-4CB0-9627-139AB242AC6E.jpeg


Last edited:
OP
T
Messages
95
Likes
137
Location
Lovettsville, VA, USA
Thread Starter #25
So over the weekend I was able to install the turbo, manifold, fluid lines, downpipe and the front two exhaust hangers. I made a last minute decision to go with the MAP catted downpipe rather than the Whoosh decat downpipe so that I can pass an emissions test in order to get my title/registration in my name; the MAP downpipe has a shoulder inside the flange that is too long to allow the fire ring to seal the two flanges. I was seeing about an 1/8"-1/4" of gap between the two flanges so I spent about half an hour on my belt sander taking that shoulder down and now everything appears to fit up just right. I tried to fit the Cobb intake to the ATP turbo inlet elbow and it looks like I need about 4"-6" of tubing to close the gap between ATP's 3" silicone elbow and the Cobb intake tube itself so I'll be cutting and bead rolling a small section of tube to fill that void.

Also, took a couple minutes to install the trunk brace and even though I doubt it does all that much it does look nice and fits up very easy. My replacement driver's rear caliper and bracket arrived so I can finally finish up the brakes and bleed the system which marks one more thing off my to do list before I start datalogging and testing before my first event.


Woods247

2000 Post Club
Messages
2,515
Likes
4,342
Location
Atl
#26
I just discovered WOR yesterday. Glad to see someone going for it. I’ll definitely be following this build so thanks for keeping it updated. Who’s tuning you?


OP
T
Messages
95
Likes
137
Location
Lovettsville, VA, USA
Thread Starter #27
I just discovered WOR yesterday. Glad to see someone going for it. I’ll definitely be following this build so thanks for keeping it updated. Who’s tuning you?
I’m using JST currently. The WOR manifold was definitely welded properly, the inside of the welds look perfect so it was properly prepped and backpurged.


Jabbit

2000 Post Club
Messages
2,237
Likes
2,895
Location
New England
#28
Wondering why you went with that WOR manifold vs another company? Most affordable option for v-band?


OP
T
Messages
95
Likes
137
Location
Lovettsville, VA, USA
Thread Starter #29
Wondering why you went with that WOR manifold vs another company? Most affordable option for v-band?
Price was determining factor #1 and being in stock was #2. I was not impressed with the ATP adapter and wanted a quick solution to increase flow into the turbine and this looked like that answer.

I’m not shooting for big numbers so I saw no need for a tubular manifold.


OP
T
Messages
95
Likes
137
Location
Lovettsville, VA, USA
Thread Starter #30
Just a few pics of where I stand currently. Turbo is installed, plumbed and torqued. Downpipe is installed but it took some time on the belt sander to take the shoulder on the downpipe flange down far enough for it to seal. Intake is installed minus a couple of clamps; I had to use a couple of them to seal the extra 5” of tubing and extra coupler used to bridge the gap between the turbo inlet coupler and the Cobb intake tube.

I need to spend some time of hose/wire routing and heat management but that can wait until I get the basemap done. For now I believe I just have to replace the coolant, drain/fill the oil, prime the turbo and then fire it up. After that it will be mount/balance the tires and get an alignment. 2D822A05-53F1-47D4-BFCF-78899FE00D8B.jpeg 95DB0071-AE5F-4F1D-BCFB-20393811B26D.jpeg CBDD808B-D527-49BB-B8EC-98CBD46EF907.jpeg


dhminer

2000 Post Club
Messages
2,157
Likes
2,577
Location
Burlington, NC, USA
#31
Just a few pics of where I stand currently. Turbo is installed, plumbed and torqued. Downpipe is installed but it took some time on the belt sander to take the shoulder on the downpipe flange down far enough for it to seal. Intake is installed minus a couple of clamps; I had to use a couple of them to seal the extra 5” of tubing and extra coupler used to bridge the gap between the turbo inlet coupler and the Cobb intake tube.

I need to spend some time of hose/wire routing and heat management but that can wait until I get the basemap done. For now I believe I just have to replace the coolant, drain/fill the oil, prime the turbo and then fire it up. After that it will be mount/balance the tires and get an alignment. View attachment 42557 View attachment 42558 View attachment 42559
Does the WOR manifold leave the turbo hanging low enough that the factory oil return fits well?


OP
T
Messages
95
Likes
137
Location
Lovettsville, VA, USA
Thread Starter #32
Does the WOR manifold leave the turbo hanging low enough that the factory oil return fits well?
It fits exactly as the stock manifold with atp adapter does so yes, it uses the stock return line. I had to line up the oil line, downpipe and charge pipe before tightening down the turbo-manifold vband to get everything lined up perfect but it was a pretty simple install.


dhminer

2000 Post Club
Messages
2,157
Likes
2,577
Location
Burlington, NC, USA
#33
It fits exactly as the stock manifold with atp adapter does so yes, it uses the stock return line. I had to line up the oil line, downpipe and charge pipe before tightening down the turbo-manifold vband to get everything lined up perfect but it was a pretty simple install.
That's awesome, thanks a ton.


OP
T
Messages
95
Likes
137
Location
Lovettsville, VA, USA
Thread Starter #34
Got her back together yesterday and did my first two WOT datalogs on spring pressure. I was very happy to have zero leaks and zero issues so far so here’s to hoping tuning goes smoothly and I’m on the track soon.
I definitely need to raise the car back up maybe 1/2”-3/4” but I have an MBRP 3” catback on the way so I can adjust the height when I install that. Still need to swap out the tires and get an alignment before I hit the track.

87A55C06-7BFE-4D3F-B4C1-E35730B247AA.jpeg 603D1CA5-88A2-41AE-8072-A26449D40F2A.jpeg B6DAD6B7-9615-4F1B-AD08-0B9A0EFC2AD9.jpeg EBB062BC-FDB5-437F-9B2C-EFF0FA0CD781.jpeg


OP
T
Messages
95
Likes
137
Location
Lovettsville, VA, USA
Thread Starter #40
My MBRP exhaust came in and I was able to get that installed pretty quickly; while I was at it I threw a UPR check valve in my PCV hose and just those two changes gave the me results below. Quite a noticeable difference by just making sure my pcv/catch can wasn't leaking and opening up the exhaust a bit. I just wish the MBRP exhaust actually had a 3" flange on the downpipe side rather than an OEM flange but I'll probably cut that off and weld on some 3" tube in the not so distant future.

Datalag 10 VDyno-1.jpg


Top