-
Sign Up! To view all forums and unlock additional cool features
Welcome to the #1 Fiesta ST Forum and Fiesta ST community dedicated to Fiesta ST owners and enthusiasts. Register for an account, it's free and it's easy, so don't hesitate to join the Fiesta ST Forum today!
Flex-Free Cornering. Mishimoto Fiesta ST Trunk Brace R&D
- Thread starter mishimoto1
- Start date
Thread Starter
#109
I purchased through one of your retailers... since I had a gift card. Any idea when these will be mailed out? I've not received word from anyone but purchased this quite a while ago.
Suppose to be 6/23/16. Have not received any tracking emails yet either.
Yeah, I'm on the same boat. I purchased from mishimoto and still haven't heard a thing.
Sent from my iPhone using Tapatalk
Sent from my iPhone using Tapatalk
Just received Tracking number this AM ![Thumbs Up [thumb] [thumb]](/images/smilies/icon_smile_thumb.gif)
mine too.. guess they're done.
I got it as well
Sent from my iPhone using Tapatalk
Sent from my iPhone using Tapatalk
Just got my trunk brace! Nice finish!
Sent from my iPhone using Tapatalk
Sent from my iPhone using Tapatalk
Great! I have to wait till 7/5 ![Me Cry [mecry] [mecry]](/images/smilies/icon_smile_mecry.gif)
I have to admit, Mishimoto's packaging is second to none ![Thumbs Up [thumb] [thumb]](/images/smilies/icon_smile_thumb.gif)
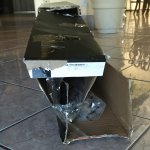
I got mine yesterday I can't wait install it. I was horrified when it came ups managed to destroy the box. Luckily all the hardware was still there and the bar with one or two paint chips no big deal it was all well packaged.
-Sara
I'm admittedly not much of a mechanic, and the brace came without instructions. Do the plastic braces that the "floor" fits into have to be removed to install the brace, then re-installed? Will it take a socket wrench or an end wrench to put it in? .. any hints would be appreciated.
Sent from my iPhone using Tapatalk
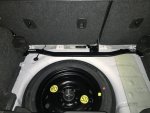
One thing I did learn from all this is the extra room that is being wasted in the trunk! I think I'm going to modify the plastic retainers so I can lower the floor.
Sent from my iPhone using Tapatalk
Sent from my iPhone using Tapatalk
The floor will sit in the lower position without modifying anything. There is a thread here somewhere, but basically you put in the front UNDER the plastic retainer pieces then pull it toward you. It WILL be right on top of the spare tire, but it works. I use the space created by having it in the stock position to "hide" things like an air compressor, jump start battery, cleaning products, etc that I don't want in the "trunk" sliding around.
Sent from my iPhone using Tapatalk
Similar threads
-
Advice on Powerflex inserts for transmission mount and passenger sode motor mount
- Started by jm2628
- Replies: 4
-
FS Powerflex passenger Front Upper Engine Mount Insert (street)
- Started by tri-pedaler
- Replies: 4
-
-
-
FS Price Reduced: Cobb drop-in air filter, Powerflex sway bar busings, and various other parts for sale
- Started by Bull Run
- Replies: 9
-
-
-
-
FS Power Flex Front Sway Bar Bushing (19mm) MY14/15, and Rear Shock Mount
- Started by thecman02
- Replies: 3


