• Sign Up! To view all forums and unlock additional cool features

    Welcome to the #1 Fiesta ST Forum and Fiesta ST community dedicated to Fiesta ST owners and enthusiasts. Register for an account, it's free and it's easy, so don't hesitate to join the Fiesta ST Forum today!


COBB intercooler install -- my experience

Messages
35
Likes
4
Location
Jersey City
#1
Did an install of a Cobb intercooler today, some of my experiences:
- Removing the bumper was a breeze, as long as you remove all screws per instructions carefully, don't rush it, remember how the pieces between the wheel wells and the bumper align as they will fall out when you remove the bumper.
- Removing the old intercooler was also simple, nothing really to report, other than that the original hoses were a bit hesitant to leave the intercooler
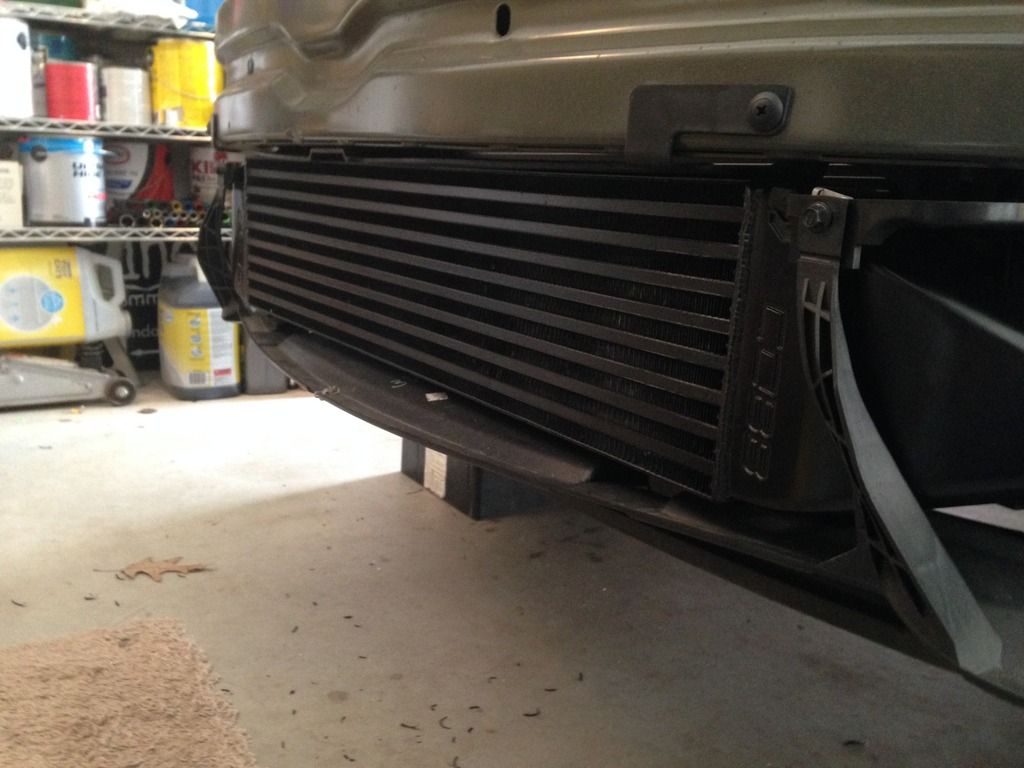
- Installing the cobb intercooler in its place was a bit difficult, it is a super tight fit and i ended up breaking the center tab on which the intercooler should rest, I realized there was no way I would fit it with that piece there so I ended up leaving it broken off...
- the instructions dont mention reinstalling the bracket around the intercooler, but I did it anyway, it did not really fit and I had to mount it somewhat crooked with the mount bolts slanted and the bracket touching the intercooler in multiple places.
- the reassembly is easy also, I noticed the bumper does touch the intercooler slightly on each side, but should be ok.

As for the results -- I'm still shopping for a used accessport to run a tune with the setup, for now obviously no gains from the intercooler :) the sound is about the same too..


Messages
117
Likes
22
Location
bakersfield
#2
Also a breeze for me. the charge pipes on the other hand, trying to reach the clamp to tighten at the turbo while on my back praying the tiny ac delco jackstand wasnt gonna collapse, thats a diff story. charge pipes were simple other than that


OP
G
Messages
35
Likes
4
Location
Jersey City
Thread Starter #3
I hear ya on that! I did the MBRP charge pipe earlier and yes that upper clamp at the turbo was a nightmare..

I'm curious, for your cobb intercooler, did you end up installing the bracket around the intercooler or did you remove that part? the instructions did not mention reinstalling it and on the video that car did not even have it anymore, but I ended up somehow forcing that thing back on top of the cobb intercooler :)

Also a breeze for me. the charge pipes on the other hand, trying to reach the clamp to tighten at the turbo while on my back praying the tiny ac delco jackstand wasnt gonna collapse, thats a diff story. charge pipes were simple other than that


Messages
117
Likes
22
Location
bakersfield
#4
I dont recall a bracket off the top of my head w/o looking at my intercooler. i remember screwing the intercooler in on both sides but thats it. ill have to look at my car in the morn. curiosity has the best of me


newmz

New Member
Messages
3
Likes
0
Location
Perth
#5
I'm also very interested to hear anyone else's experiences, since I am strongly considering this upgrade to my car? Anyone? Anyone? Bueller?


rallytaff

1000 Post Club
Premium Account
Messages
1,377
Likes
923
Location
Los Angeles
#6
What sort of gains are you guys getting with the aftermarket charge pipes? I didn't bother and am more than happy with the performance!


jeff

2000 Post Club
Messages
2,310
Likes
3,235
Location
Evans
#7
I installed mine today and have a few tips/responses to the above questions.

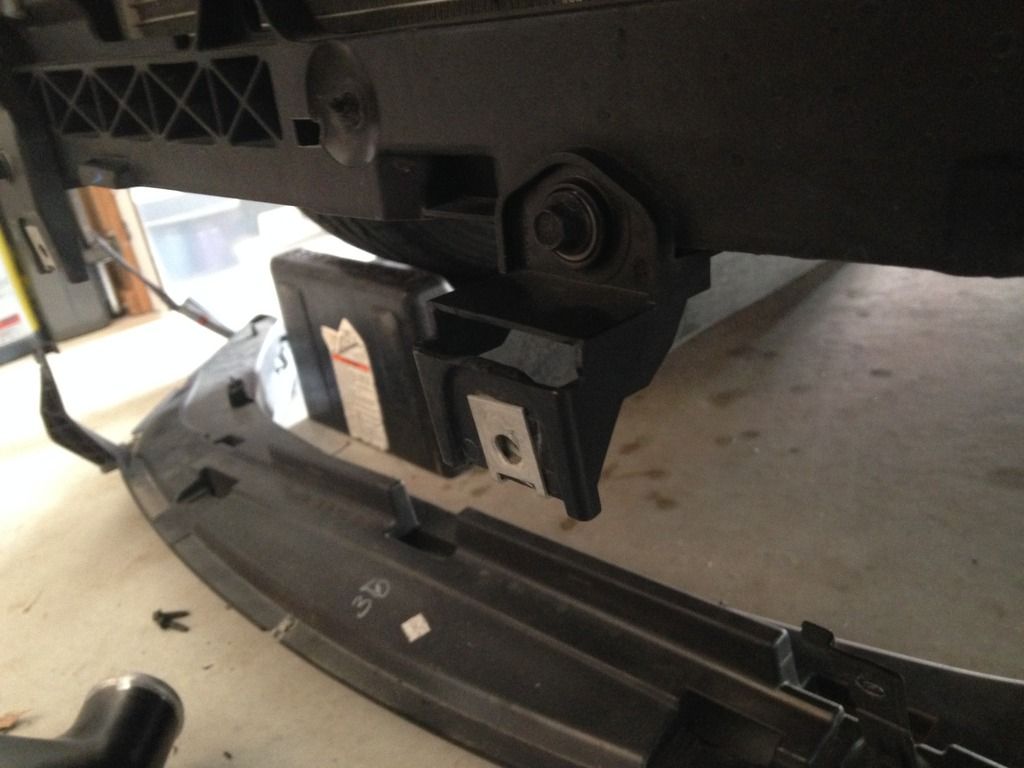
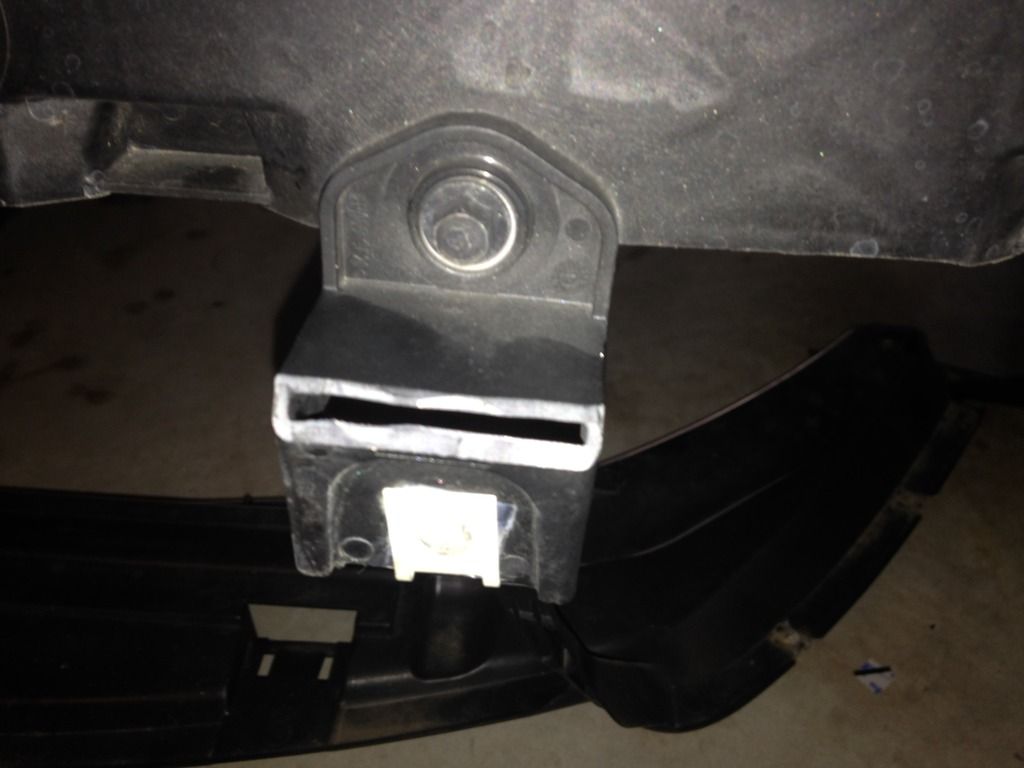
The FMIC does not fit perfectly with the stock bracket - I'm talking about the one that sits behind the FMIC. Others have mushed the FMIC into it which makes the bottom mounting tab (screw receptacle) cocked downward. What I did to avoid this was cut a bit of the tab away. Doing so allows the FMIC to fit perfectly into the bracket. See my pictures below.


With this done, everything fits quite nicely.

Install was 3 hours start to finish, but I also installed a "BIG MOUTH" intake thingy which was about 30 minutes of that, as I had to hack and slash a bit. I am BEOWULF!

Install is extremely easy so long as you have the right tools....I didn't even take my wheels off. I do recommend a swivel head socket, it will make those 3 headlight/bumper bolts super easy. Without it I would have been cussing.

FLashed the Cobb OTS map, the difference is nice. It's not as smooth as my Stratified stage 1 flash tune, but there is a good bit more power than stage 1. Mid range is quicker and the car just feels more beastly. It sort of feels like a WRX now.

And, I painted it black for stealth.


DaveG99

Active member
Messages
747
Likes
216
Location
Dallas
#9
I don't like the idea of cutting things to fit an intercooler that's advertised as a direct factory fit. I wonder if other ones are like this


jeff

2000 Post Club
Messages
2,310
Likes
3,235
Location
Evans
#10
I don't like the idea of cutting things to fit an intercooler that's advertised as a direct factory fit. I wonder if other ones are like this
I agree and I was a bit ticked especially since it is a Cobb product. It seems anymore that Cobb is going the way of Wal-mart - they're adding more and more platforms and the quality is diminishing. Still it's a great part. Others commented that the bumper it a tiny bit off with the FMIC on and that was my experience too. But 99% of people won't notice....I'm a perfectionist so I did, but it's no big deal. There have to be some sacrifices to achieve awesomeness.

But I agree I don't like it being advertised as direct fit and it's not.


dyn085

2000 Post Club
Messages
2,434
Likes
820
Location
Vancouver
#11
I agree and I was a bit ticked especially since it is a Cobb product. It seems anymore that Cobb is going the way of Wal-mart - they're adding more and more platforms and the quality is diminishing. Still it's a great part. Others commented that the bumper it a tiny bit off with the FMIC on and that was my experience too. But 99% of people won't notice....I'm a perfectionist so I did, but it's no big deal. There have to be some sacrifices to achieve awesomeness.

But I agree I don't like it being advertised as direct fit and it's not.
The installation guide specifically addresses this tab on step three, page nine. There's literally a big arrow pointing to it and a couple very specific sentences.


jeff

2000 Post Club
Messages
2,310
Likes
3,235
Location
Evans
#12
The installation guide specifically addresses this tab on step three, page nine. There's literally a big arrow pointing to it and a couple very specific sentences.
Point taken, but "shoving" and "bending" plastic tabs that stay bent at an angle is not direct fit in my opinion. And, for anyone like me who used the video (Cobb endorsed mind you) to install, there is ZERO mention of this.

Besides that I modified the tab to fit better and it's still a hair off. I think the intercooler is just a tad too large. But again most people will never notice.


jayrod1980

Active member
Messages
776
Likes
189
Location
Viva Las Vegas!
#13
Bummer on the bending and trimming. The coolest thing about the DHM IC is that once you swap the stock for the cro-moly crash bar, you only leave off two small plastic side duct pieces and the bumper literally fits in perfectly. No bending, pushing, or cutting anything. Two plastic arms just sort of hang against the end tanks but no problem at all with bumper fitment. Too bad STOCK the bumper lines up a little weird on my car. One headlight bulges a bit more and the driver's side bumper seam is not quite perfectly gapped. Oh well... It's a Mexican made econobox.


Ford Community Posts


Top