
I just upgraded all my interior lights to LEDs. After searching I didn't find a comprehensive DIY so I thought I'd make one to help others in the future.
Special thanks to [MENTION=4616]speed_easy[/MENTION] from whom I stole a few of the pictures, he posted a partial install which prompted me to swap my lights.
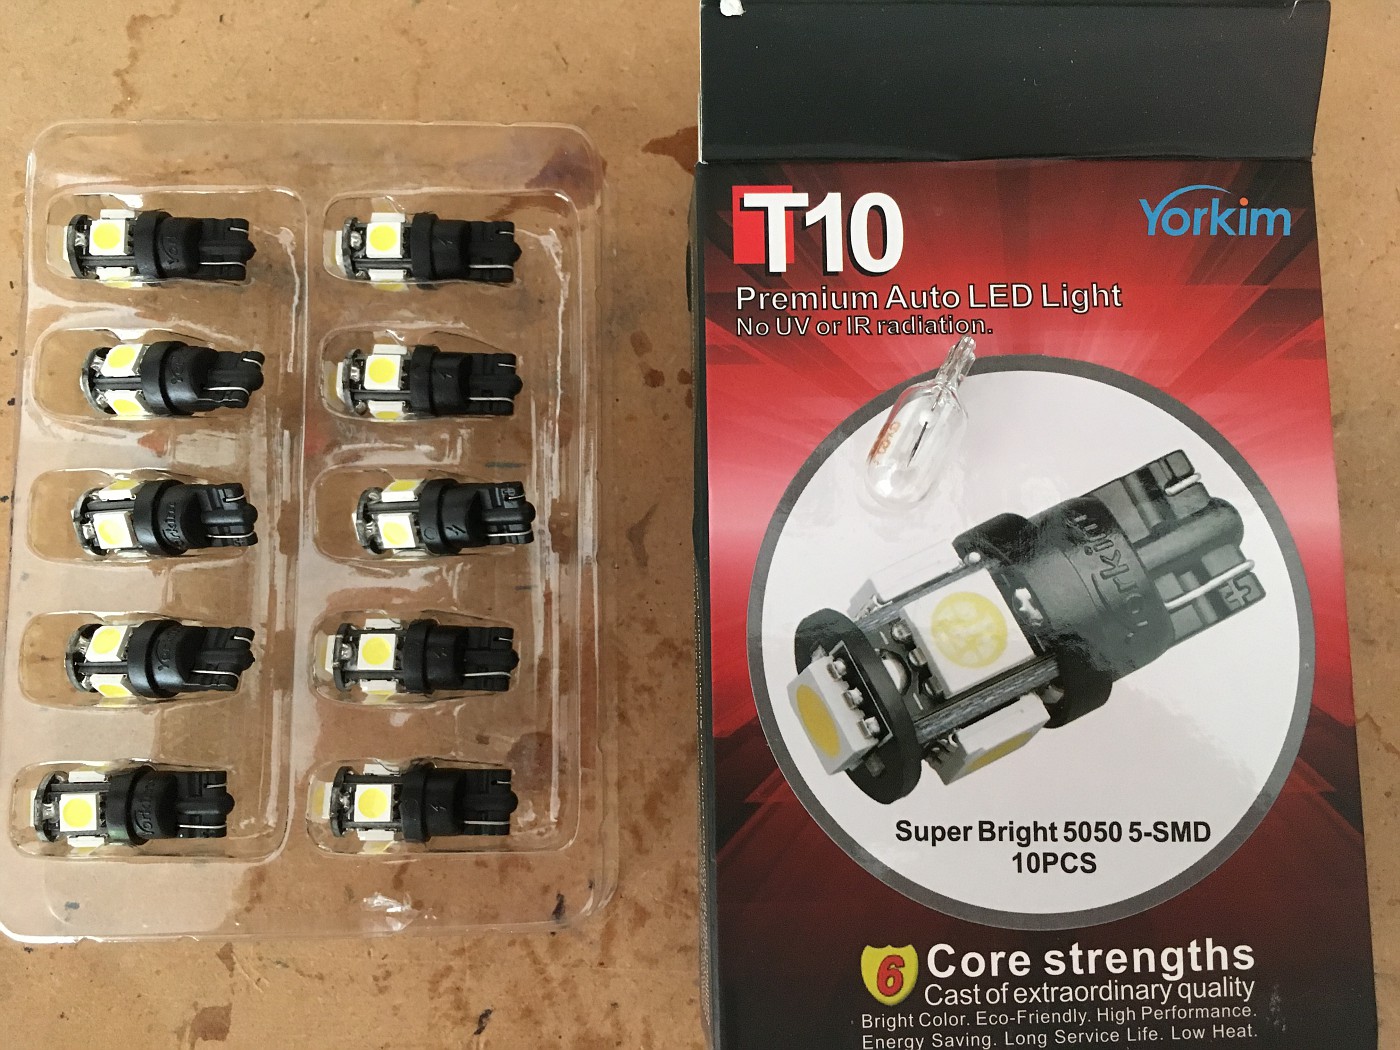
I used the Yorkin LEDs, set of 10 for $9.99 shipped available on Amazon here. They might be junk but we'll see....4 1/2 starts on Amazon though...cheap and easy install so future replacement won't be too bad. IMPORTANT: If you're using LEDs I suggest testing before final install because if you have them reversed they will not turn on, then you have to take everything apart again blah blah blah.
 Hosted on Fotki
We're talking 7 bulbs in all (sunroof model) - 1 for rear hatch, 1 for glove box, 2 for front bezel, 3 for rear bezel.
*****
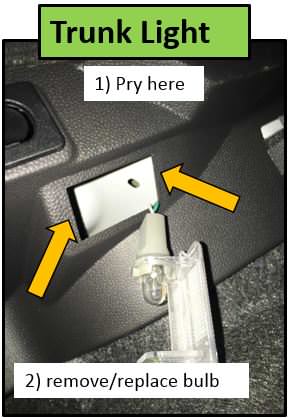
REAR HATCH TRUNK LIGHT
We'll start with the easiest first. 2 minute install.
1. Pop light cover off.
2. Swap bulb.
3. Replace light cover.
 Hosted on Fotki
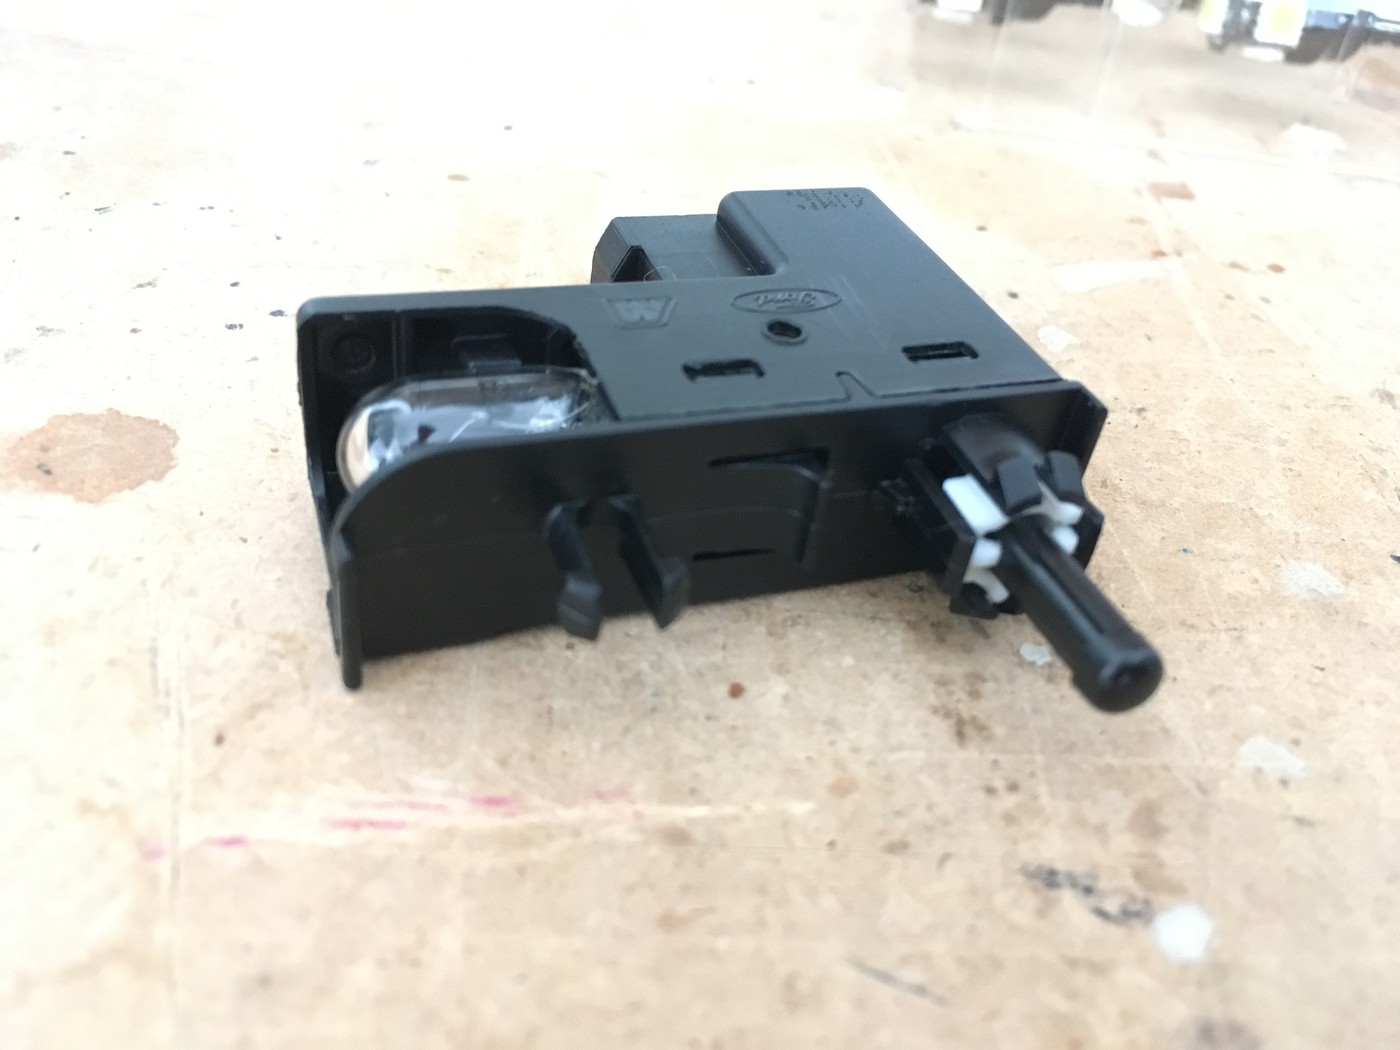
GLOVE BOX LIGHT
A little tricky but not bad. 5 minute install.
1. Open glovebox.
2. Squeeze sides near dashboard and it will lower.
3. Gently pull the glovebox toward you and it will pop out of the hinges and out completely; this will give you room to work.
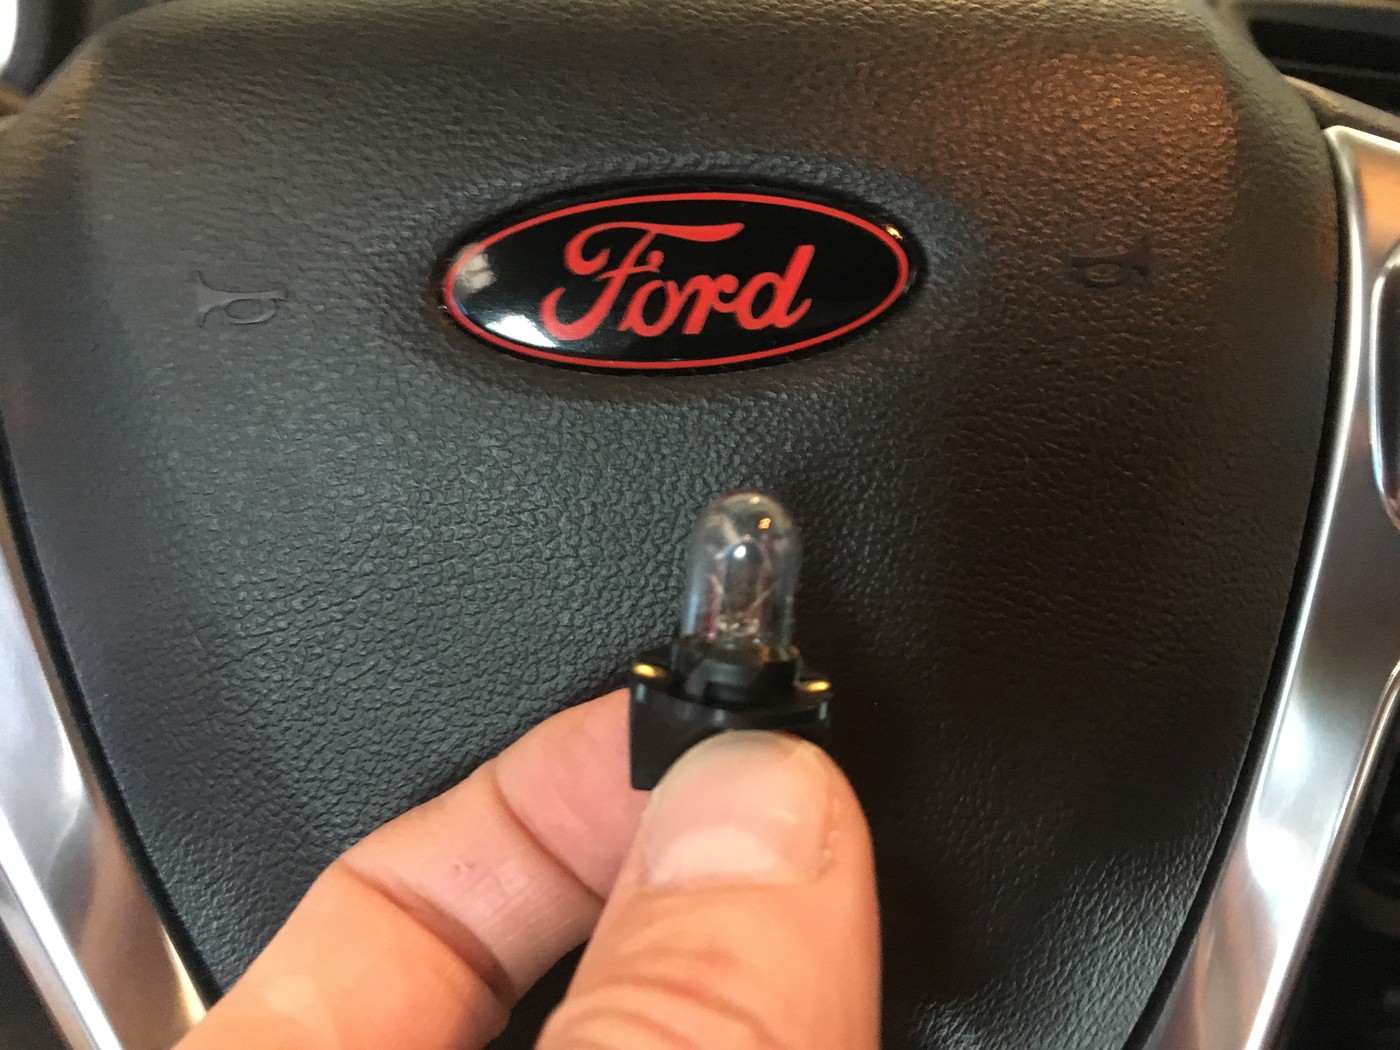
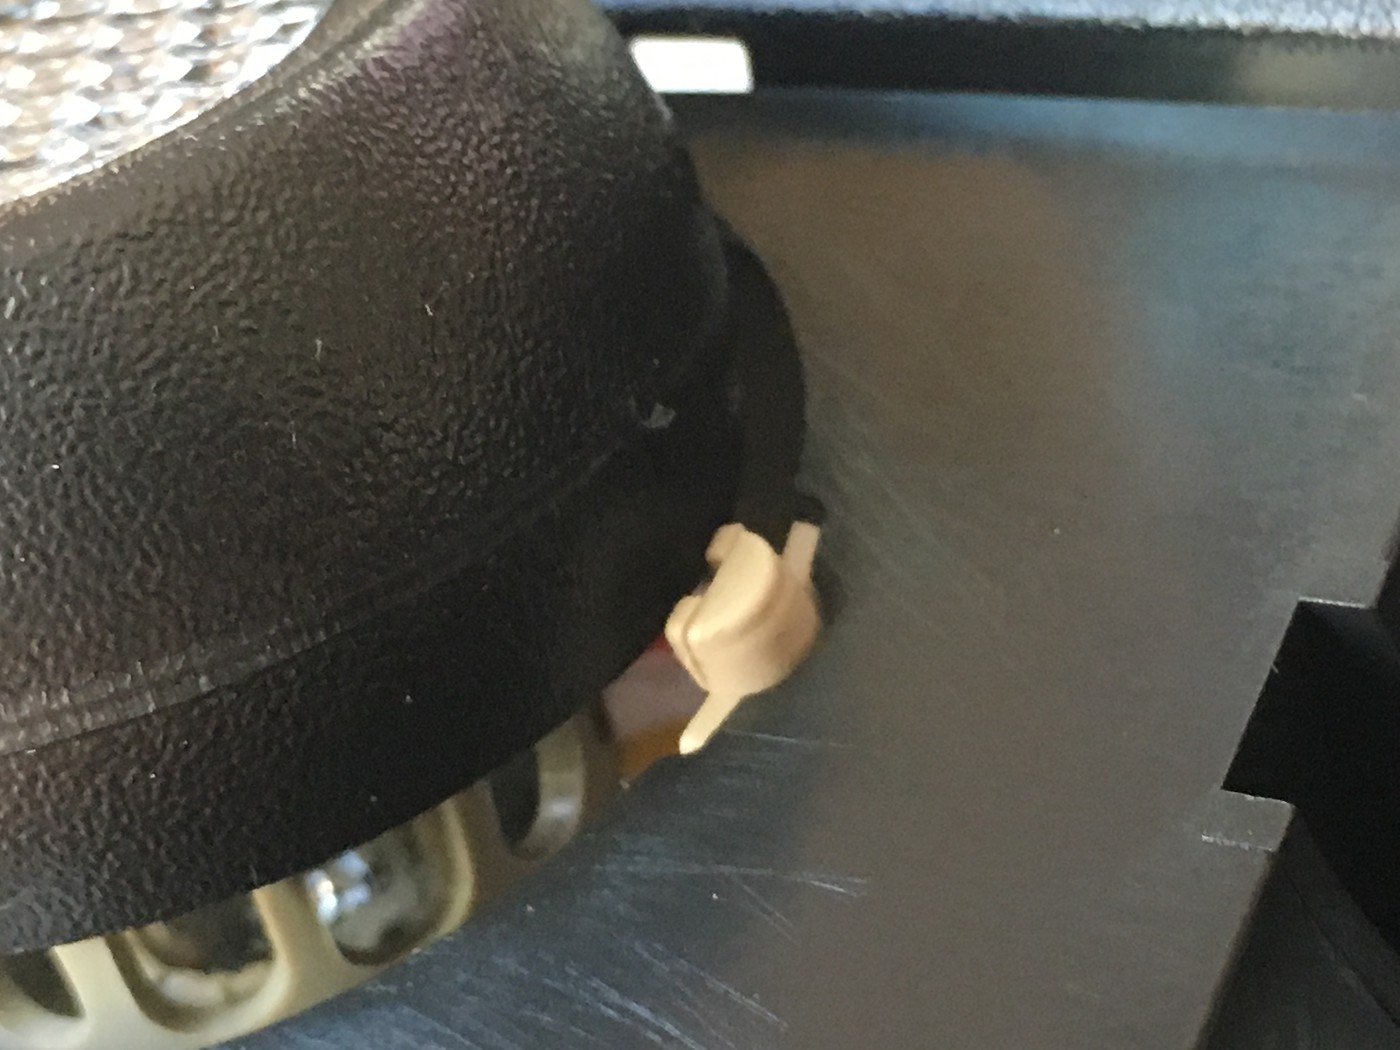
4. Stick your head in there and see what's up...the pic below demonstrates what's going on. Just take your fingernail and gently squeeze the tabs around the on/off switch, and push it out of the frame area, then you can swing the light switch assembly out of the dashboard frame area to work on it. Then you'll need a small screwdriver to gently push the tab that holds the assembly to the wire. The bright "on" bulb is bothersome while doing this no doubt.
5. Once the switch assembly is out simply pop out the bulb with a small screwdriver. Be careful, it will shoot a few feet if you're not prepared.
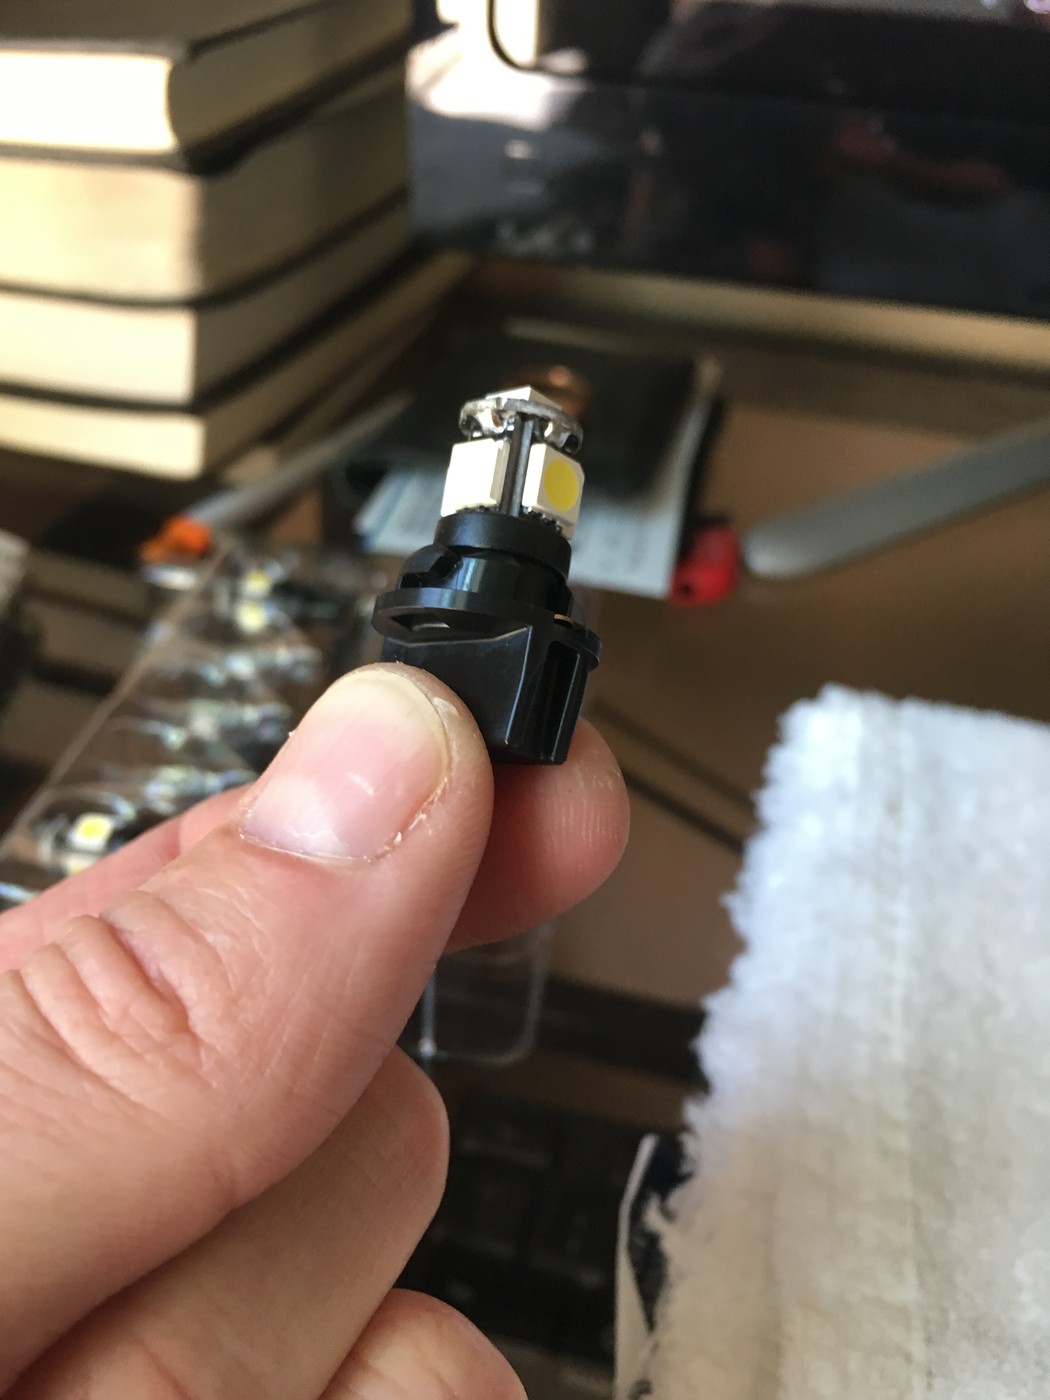
6. Install new LED. The Yorkim does fit but there is a little tab that holds the OEM light that is slightly in the way, but just push the bulb in and it will seat just fine. It will be a little cocked but it won't matter.
7. Re-install everything in reverse order.
 Hosted on Fotki
 Hosted on Fotki
*****
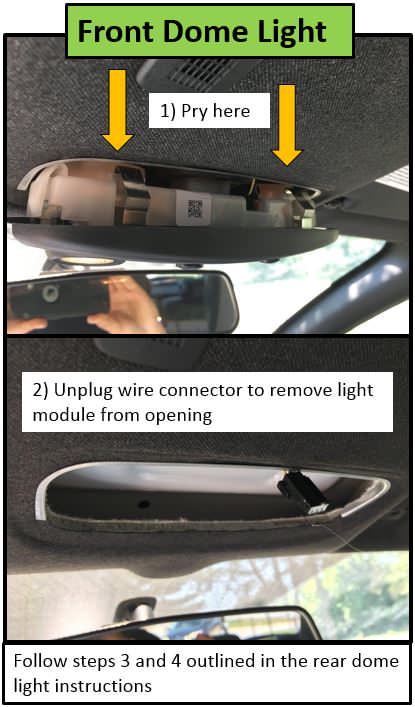
FRONT DOME LIGHTS
My car has a sunroof, install is super easy, 5 minutes. If you have a non-sunroof it looks a bit more more involved. I used a picture from [MENTION=4616]speed_easy[/MENTION] for reference.
1. Use your fingernails or a flat screwdriver and pop the bezel down from the rear side. Sunroof version is different, the metal clips are on the sides. It's sturdy and nothing to break, just pop it right out. See first pic.
2. Using your hand or needlenose pliers, turn the bulb housing counterclockwise about 1/8 turn and it will come right out (there are 2, right and left). See second pic.
3. Pop bulb out of housing, replace bulb. See third pic.
4. Re-install housing, turn clockwise to lock.
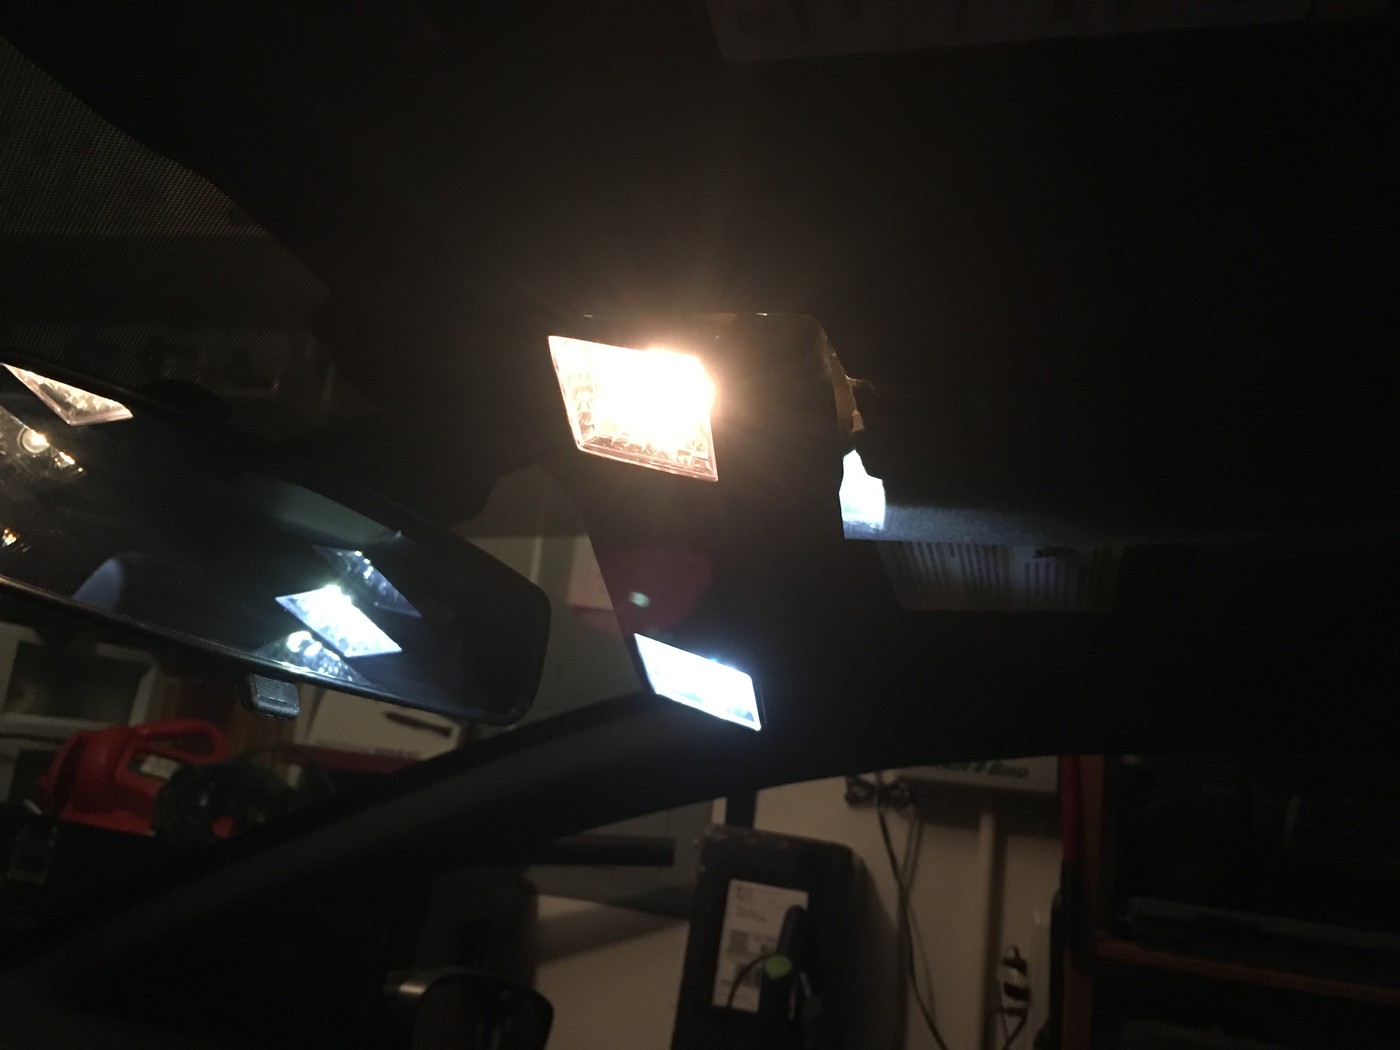
5. Snap bezel back into ceiling. Make sure wires are not pinched. 4th pic shows one standard bulb vs. one LED.
Again, non-sunroof is different, see 5th picture at bottom of this portion for info on that.
 Hosted on Fotki
 Hosted on Fotki
 Hosted on Fotki
 Hosted on Fotki
NON-SUNROOF INSTALL PIC:
 Hosted on Fotki
*****
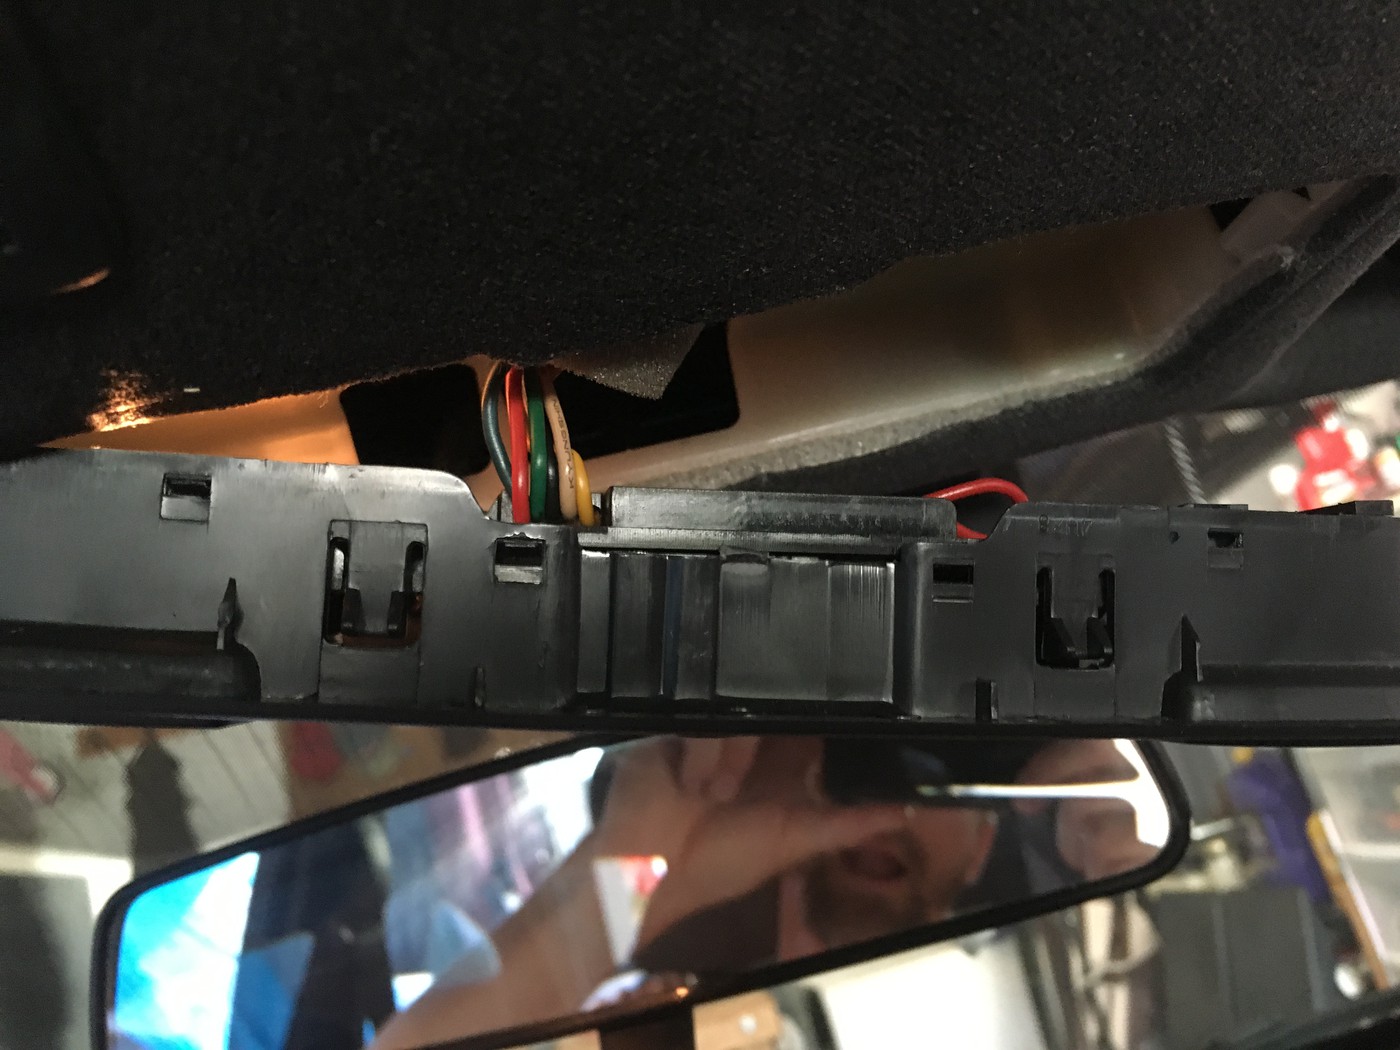
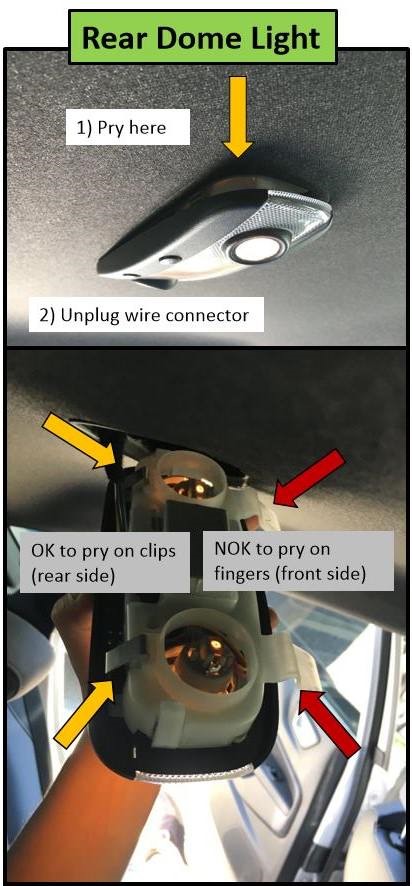
REAR DOME LIGHTS
This is the one that takes time, a good 45 minutes.
1. Pry housing out from rear side. It will pop right out. I used a picture from [MENTION=4616]speed_easy[/MENTION] for reference.
2. Unplug harness and take assembly to your work station of choice.
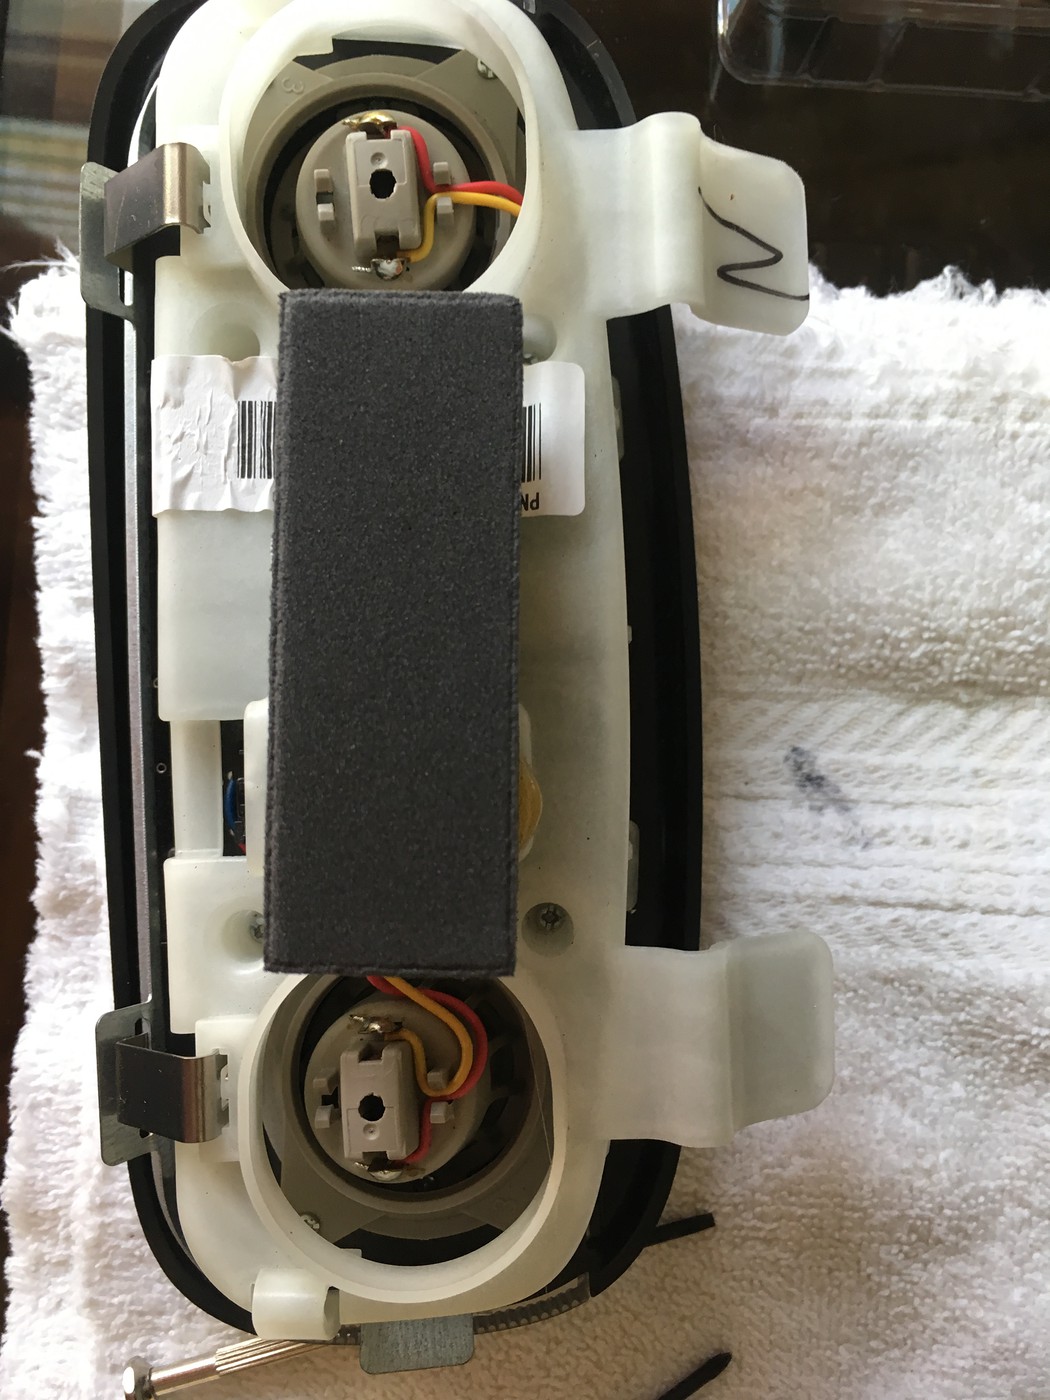
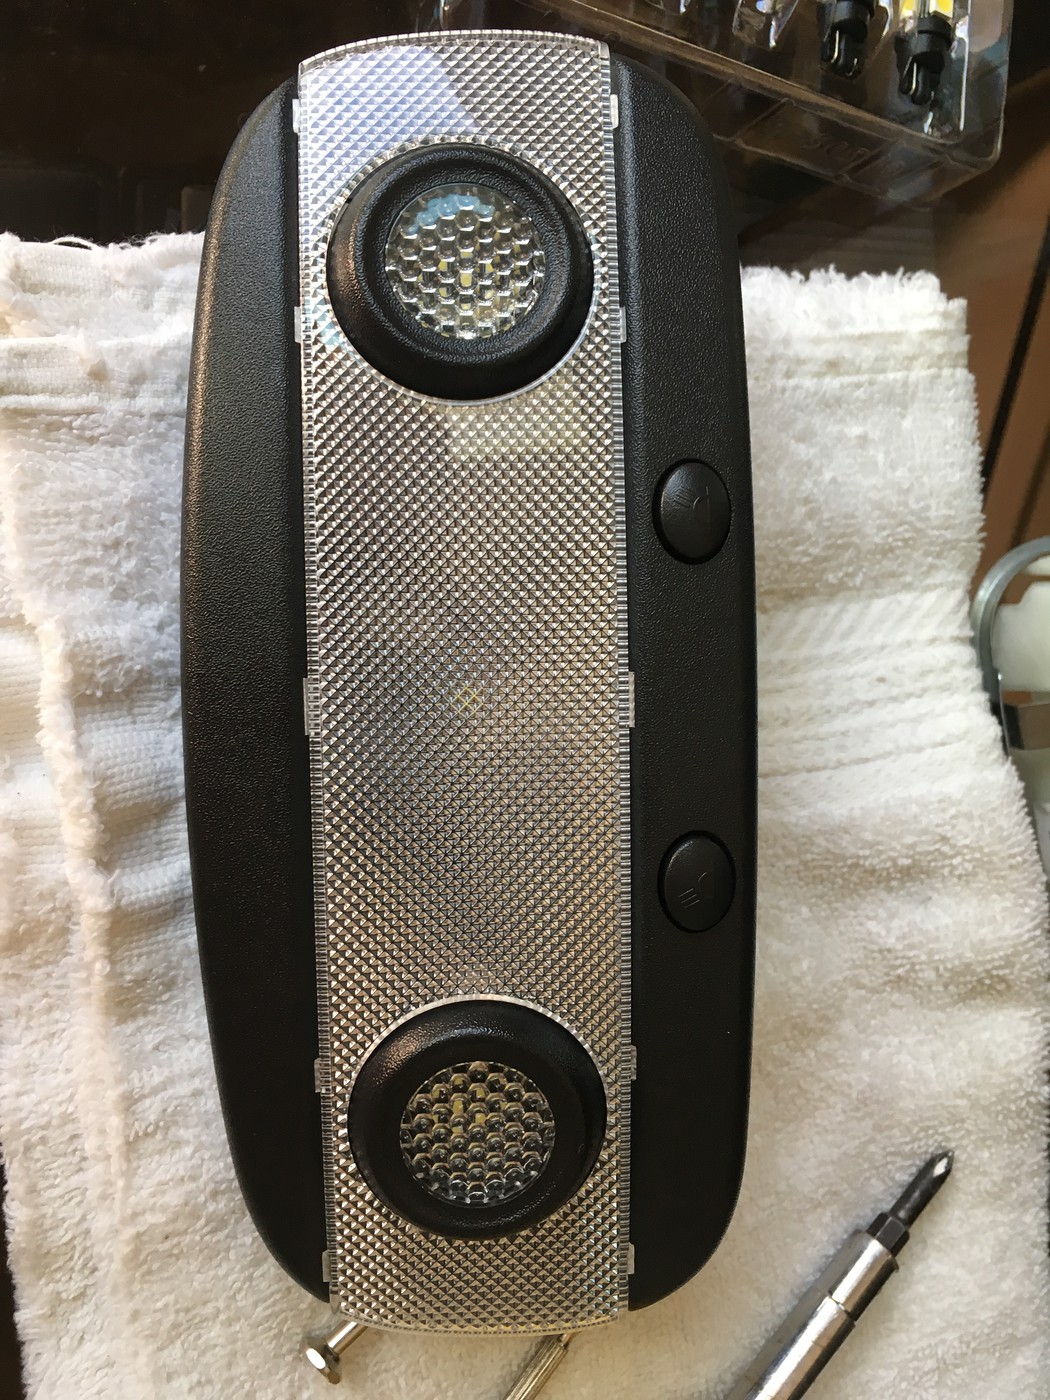
3. At this point you have 2 options. You can unscrew the 4 screws surrounding the foam block as seen in picture 2 below. This allows better access to the 9 tabs that hold on the light cover. If you're like me you want to remove these and the corresponding plastic frame to get to those tabs, push on them from the back side and the cover will come off. Option 2 is just pop the cover off from the front side. I didn't want to risk cracking the thin plastic but it will pop off and save a bit of time. In any case get the plastic off and feed the light through the front so you have access to the 2 screws holding it in. Third picture shows tabs (light cover is removed and sitting on top of assembly in this pic).
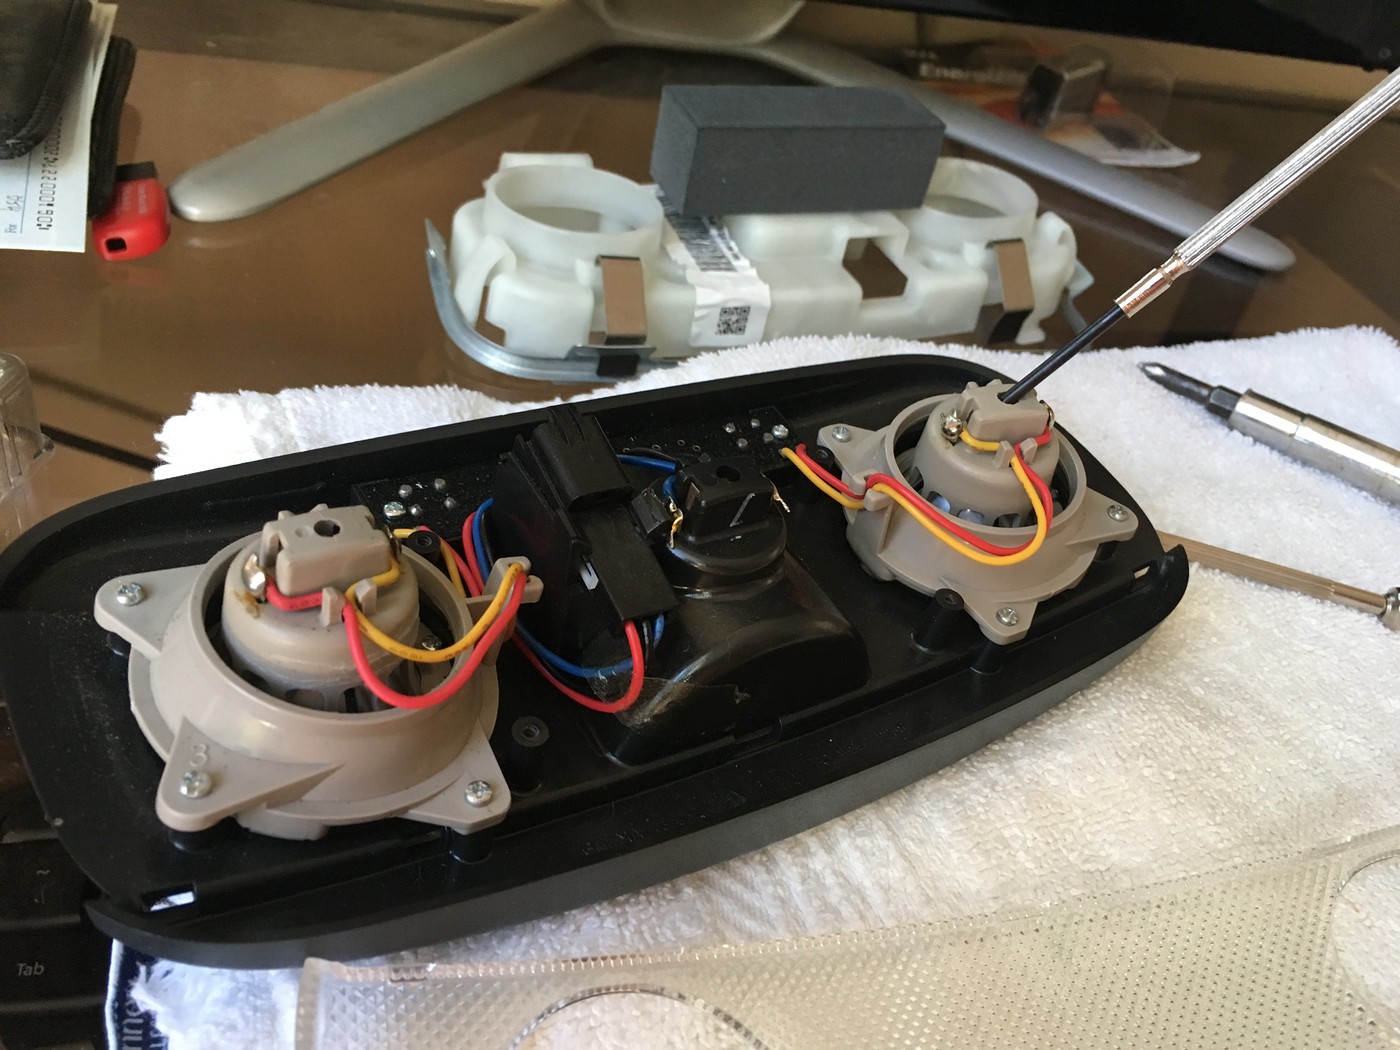
4. Pop out the three lights. See picture 4 below...take a screwdriver or something else and push from behind, they come right out. The center one you have to get from the front.
5. New lights in. The metal cone-shaped housing didn't quite fit with my LEDs, I pinched it slightly to allow the screws to engage the holes, no problemo.
6. Reassemble...there is a little dot that lines things up, see pic 5. Make sure you install correctly, small black dot on black piece fits into female receptacle on beige piece.
7. Note, when reassembling you'll want to make sure the metal tab on the bracket fits into the frame. Otherwise it dangles loose and that is not good. Mine was loose when I removed it, someone was in a rush. See pic 6.
8. Plug back in and fit into your ceiling. Be careful to get all the tabs secured.
 Hosted on Fotki
 Hosted on Fotki
 Hosted on Fotki
 Hosted on Fotki
 Hosted on Fotki
 Hosted on Fotki
 Hosted on Fotki
*****
Nice and bright!!!
Thanks for reading!!!
![[thumb]](/images/smilies/icon_smile_thumb.gif "Thumbs Up [thumb]")
Special thanks to [MENTION=4616]speed_easy[/MENTION] from whom I stole a few of the pictures, he posted a partial install which prompted me to swap my lights.
I used the Yorkin LEDs, set of 10 for $9.99 shipped available on Amazon here. They might be junk but we'll see....4 1/2 starts on Amazon though...cheap and easy install so future replacement won't be too bad. IMPORTANT: If you're using LEDs I suggest testing before final install because if you have them reversed they will not turn on, then you have to take everything apart again blah blah blah.
Hosted on FotkiWe're talking 7 bulbs in all (sunroof model) - 1 for rear hatch, 1 for glove box, 2 for front bezel, 3 for rear bezel.
*****
REAR HATCH TRUNK LIGHT
We'll start with the easiest first. 2 minute install.
1. Pop light cover off.
2. Swap bulb.
3. Replace light cover.
Hosted on FotkiGLOVE BOX LIGHT
A little tricky but not bad. 5 minute install.
1. Open glovebox.
2. Squeeze sides near dashboard and it will lower.
3. Gently pull the glovebox toward you and it will pop out of the hinges and out completely; this will give you room to work.
4. Stick your head in there and see what's up...the pic below demonstrates what's going on. Just take your fingernail and gently squeeze the tabs around the on/off switch, and push it out of the frame area, then you can swing the light switch assembly out of the dashboard frame area to work on it. Then you'll need a small screwdriver to gently push the tab that holds the assembly to the wire. The bright "on" bulb is bothersome while doing this no doubt.
5. Once the switch assembly is out simply pop out the bulb with a small screwdriver. Be careful, it will shoot a few feet if you're not prepared.
6. Install new LED. The Yorkim does fit but there is a little tab that holds the OEM light that is slightly in the way, but just push the bulb in and it will seat just fine. It will be a little cocked but it won't matter.
7. Re-install everything in reverse order.
Hosted on FotkiHosted on Fotki*****
FRONT DOME LIGHTS
My car has a sunroof, install is super easy, 5 minutes. If you have a non-sunroof it looks a bit more more involved. I used a picture from [MENTION=4616]speed_easy[/MENTION] for reference.
1. Use your fingernails or a flat screwdriver and pop the bezel down from the rear side. Sunroof version is different, the metal clips are on the sides. It's sturdy and nothing to break, just pop it right out. See first pic.
2. Using your hand or needlenose pliers, turn the bulb housing counterclockwise about 1/8 turn and it will come right out (there are 2, right and left). See second pic.
3. Pop bulb out of housing, replace bulb. See third pic.
4. Re-install housing, turn clockwise to lock.
5. Snap bezel back into ceiling. Make sure wires are not pinched. 4th pic shows one standard bulb vs. one LED.
Again, non-sunroof is different, see 5th picture at bottom of this portion for info on that.
Hosted on FotkiHosted on FotkiHosted on FotkiHosted on FotkiNON-SUNROOF INSTALL PIC:
Hosted on Fotki*****
REAR DOME LIGHTS
This is the one that takes time, a good 45 minutes.
1. Pry housing out from rear side. It will pop right out. I used a picture from [MENTION=4616]speed_easy[/MENTION] for reference.
2. Unplug harness and take assembly to your work station of choice.
3. At this point you have 2 options. You can unscrew the 4 screws surrounding the foam block as seen in picture 2 below. This allows better access to the 9 tabs that hold on the light cover. If you're like me you want to remove these and the corresponding plastic frame to get to those tabs, push on them from the back side and the cover will come off. Option 2 is just pop the cover off from the front side. I didn't want to risk cracking the thin plastic but it will pop off and save a bit of time. In any case get the plastic off and feed the light through the front so you have access to the 2 screws holding it in. Third picture shows tabs (light cover is removed and sitting on top of assembly in this pic).
4. Pop out the three lights. See picture 4 below...take a screwdriver or something else and push from behind, they come right out. The center one you have to get from the front.
5. New lights in. The metal cone-shaped housing didn't quite fit with my LEDs, I pinched it slightly to allow the screws to engage the holes, no problemo.
6. Reassemble...there is a little dot that lines things up, see pic 5. Make sure you install correctly, small black dot on black piece fits into female receptacle on beige piece.
7. Note, when reassembling you'll want to make sure the metal tab on the bracket fits into the frame. Otherwise it dangles loose and that is not good. Mine was loose when I removed it, someone was in a rush. See pic 6.
8. Plug back in and fit into your ceiling. Be careful to get all the tabs secured.
Hosted on FotkiHosted on FotkiHosted on FotkiHosted on FotkiHosted on FotkiHosted on FotkiHosted on Fotki*****
Nice and bright!!!
Thanks for reading!!!

