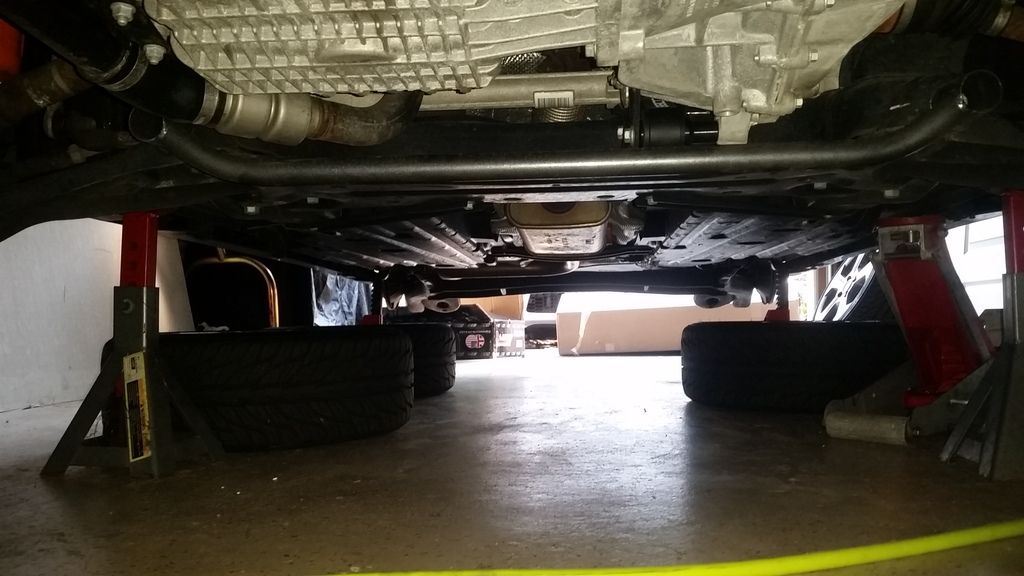
Got the sways on this past weekend. I was installing a MAP catback so i figured i'd cut the OEM exhaust out before starting the front sway. The additional clearance without the pipe connected to the DP was very welcomed. While I believe it could have been done with the exhaust on, it would have been even more annoying.
Great reference here -->
https://cobbtuning.zendesk.com/hc/en-us/articles/202951760-Tutorial-Fiesta-ST-Anti-Sway-Bar-Install
First things first, get your car WAYYY up in the air. I could have stacked two wheels under it so i had her at least 14" off the ground. You'll need the clearance to massage the front sway out of it's maze
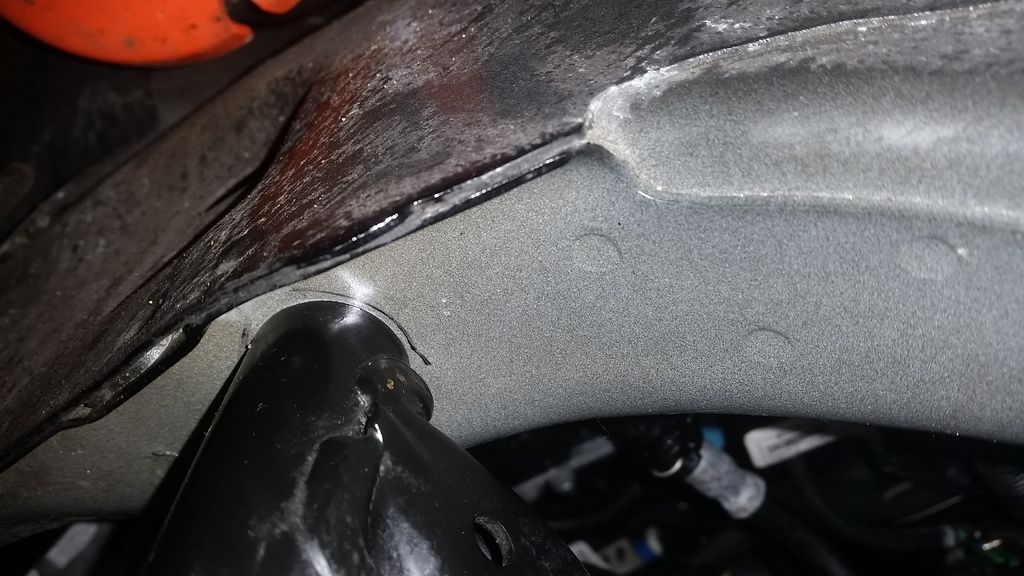
Before even thinking about turning a ratchet, use a sharping to mark a line around EACH of the 4 bolts holding the subframe. Take pictures of them so that you have a reference when putting it back together!
Front bolt:
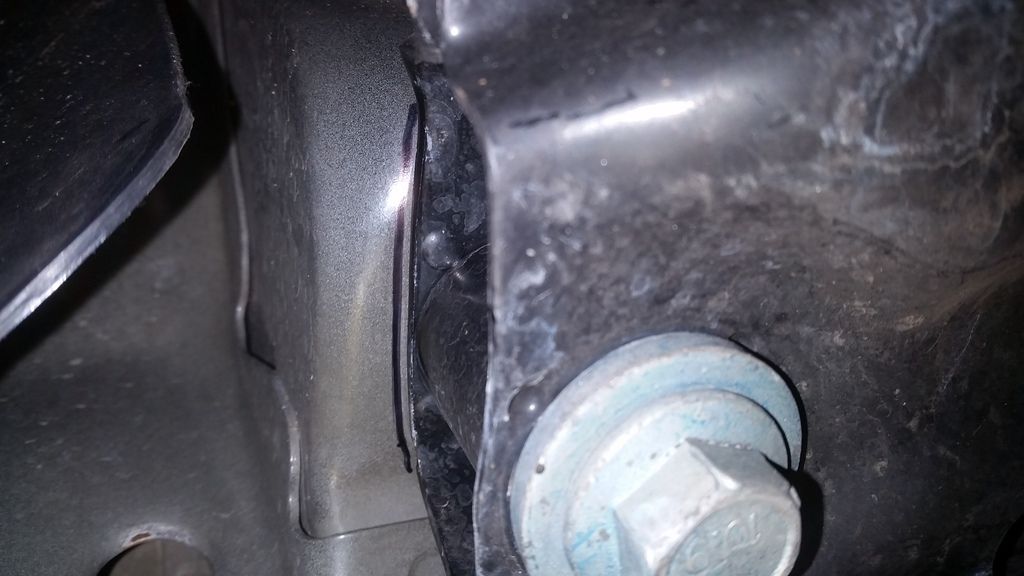
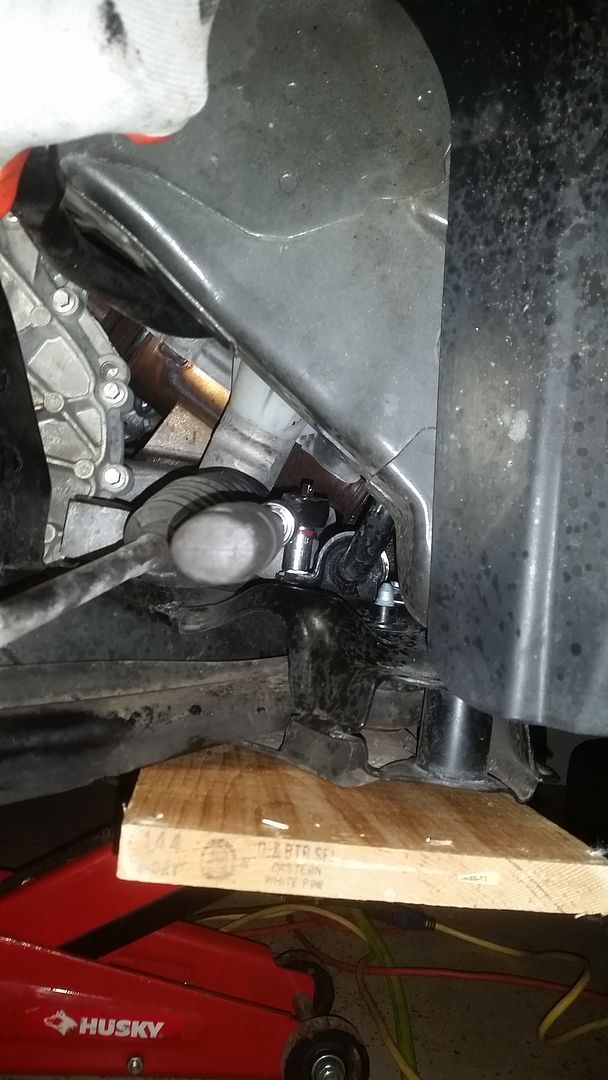
Rear bolt:
I first tried it with only the front subframe bolts removed. While it looked possible, the way i had to twist and turn the sway had it just banging into everything and anything. Also, trying to squeeze it through the small space left at the rear of the subframe was requiring some serious pulling. I was concerned i might break something once I yanked it free. Also,installing the new one would have been very difficult. There was probably a 1/2" still left in that bolt but I decided it would just make life easier to drop the subframe.
That is an E12 Torx bolt you're looking at in this pic. After checking THREE auto parts stores, only Harbor Freight had the tool. Thanks to [MENTION=2800]martinw89[/MENTION] for the heads up!
There are 3 bolts holding the steering rack to the sub. Two of them on the driver side. One on the passenger side. Get the front one from the wheel well on the driver side. The rear one the driver's side i did from behind while laying under the car. And while under there i reached over and felt around for the passenger side. You could also get that one from the passenger side wheel well.
I then got my 2nd jack and my trusty "jack wood" in place under the sub and removed the remaining 2 front bolts. I recommend the wood be as wide as the sub or it may teeter tooter and fall off the jack.
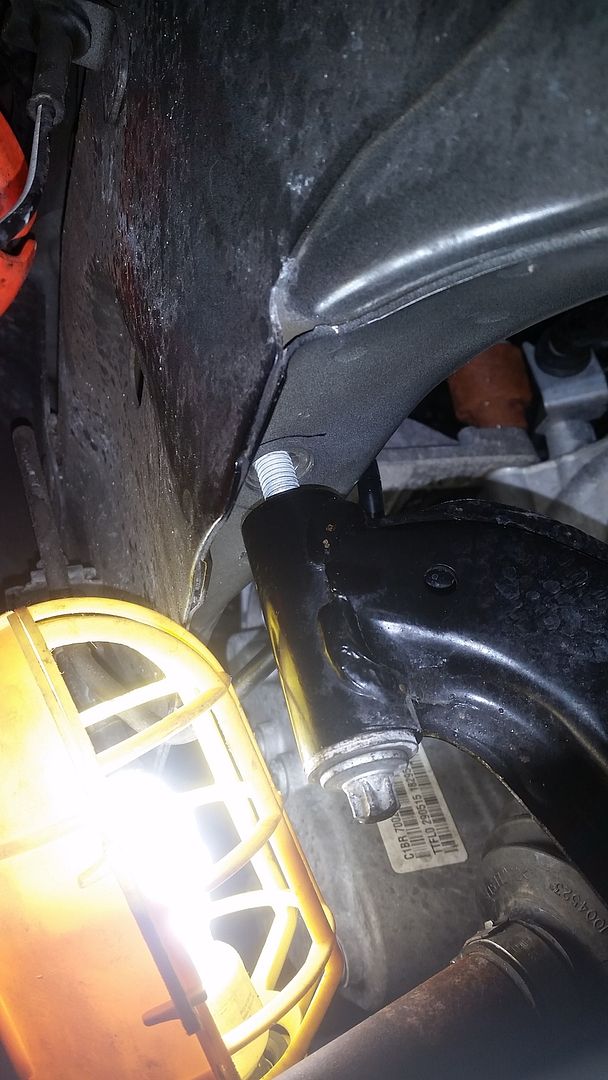
Each of the 4 sway bar bushing bracket bolts (say that 3x fast) are reached from different locations. The driver side shown in the pic above is where you will get to the front bracket bolt. By now you should have already disconnected the sway end links. You'll have to swing the sway bar up to give yourself room to work that bolt out. Also, i have a harbor freight ratchet with an extending handle. GET ONE. The yellow dot in this pic is the rack swung forward and resting on the tranny. The red dot is my ratchet.
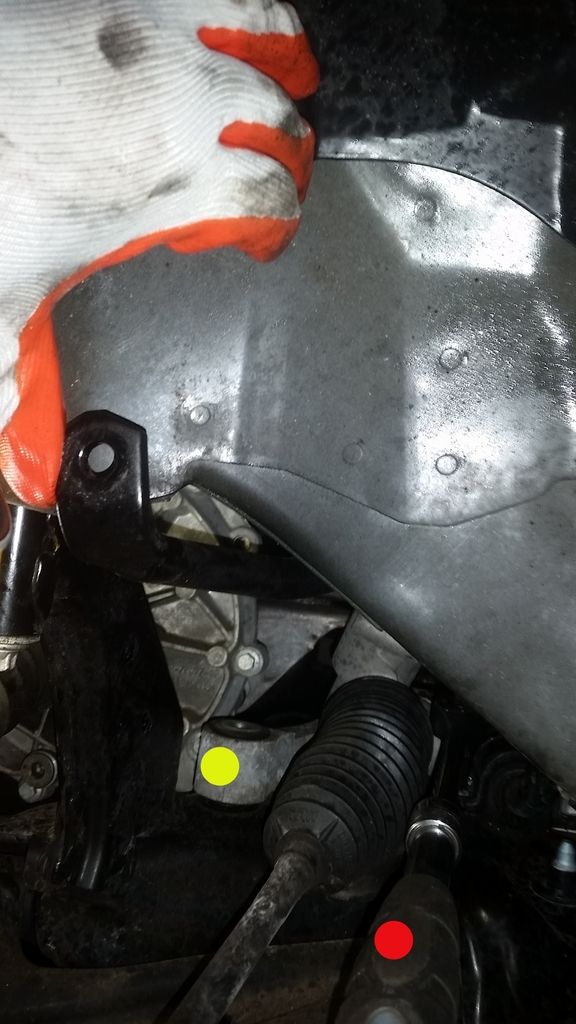
The rear bracket bolt for the driver side is accessed on your back (in my case) while looking at the subframe from behind. While down there, i was also able to reach the passenger side front and rear bolts. Without the gear assembly of the steering rack in the way, there's tons of clearance on the passenger side.
From this point i just toyed with how low i was brave enough to lower the subframe. I didn't remove the RMM so i wouldn't want to stress the bushing by lowering the sub too much. Anywho, the lower the more clearance you'll have at the rear of the subframe to slide the sways in/out of. There's no secret or technique to pulling it out or putting a new one in. Just twist and turn and pull and you'll figure it out. Just be careful not to tear the boots on the tie rods or axles. Always be aware of where the front curvy part of the sway is while you tug and twist and you won't have a problem. I did it by getting the passenger side out first then working the other side.
Getting the new thicker one in required i get even braver and lower the sub a bit more. Be sure to grease the new brackets and bushings BEFORE putting the sway in. I used hi-temp red lithium grease. I would've taken more pics and done a better write up but i got really frustrated at one point and just focused on getting it done. I still had an exhaust and coils to do. In the end, it wasn't that bad. I didn't use any swivels just varying sizes of extensions, box wrenches, and my lovely extending handle ratchet. And to answer the OPs questions, i would absolutely do it again! lol


 Has anyone tried the yoko / advan ad09 tires on their fiesta?
 Has anyone needed to replace this part?
 Has anyone tried the Carly OBD scanner?