whoa, that's real soon! I was thinking of drawing up a how-to guide. I took a bunch of photos. It's not absolutely necessary, but I wish there was something when I was starting and little pointers can help make the experience easier and quicker. I know there a few others on the horizon that will be getting their kits soon too. There's going to be quite a few DHM turbocharged FiST this coming summer. ![[rockon]](/images/smilies/icon_smile_headbang.gif "Rock On [rockon]")

-
Sign Up! To view all forums and unlock additional cool features
Welcome to the #1 Fiesta ST Forum and Fiesta ST community dedicated to Fiesta ST owners and enthusiasts. Register for an account, it's free and it's easy, so don't hesitate to join the Fiesta ST Forum today!
koozy's ST
- Thread starter koozy
- Start date
OP
Thread Starter
#182
Thread Starter
#182
I think that's a great idea. I know I would certainly appreciate having a point of reference. ![[perfect10]](/images/smilies/icon_smile_perfect10.gif "Perfect 10 [perfect10]")
") I'm not going to spell every little thing out, but make it concise and focus on things that may need some attention. Anyone tackling this install will probably have to know how and can figure things out. My intention is to perhaps make installs go a little smoother by being better prepared.
I'm not going to spell every little thing out, but make it concise and focus on things that may need some attention. Anyone tackling this install will probably have to know how and can figure things out. My intention is to perhaps make installs go a little smoother by being better prepared.
I think a how to guide would be a great idea to go along with this thread. It will probably be the most comprehensive source in covering most of the install for this it. As much as I love to get dirty myself, I am really fortunate to be going up to visit Russ in Troy and having the kit installed done at the shop! I am beyond excited, next week needs to go quickly!!!
![[biggrin]](/images/smilies/biggrin.gif "Big Grin [biggrin]")
OP
Thread Starter
#184
Thread Starter
#184
add the Chrome Photobucket Hotlink Fix browser extension if you have problems seeing the photos.
https://chrome.google.com/webstore/...nk-fix/kegnjbncdcliihbemealioapbifiaedg?hl=en
__________________________________________________________________________________________________________________
__________________________________________________________________________________________________________________
Here are my DHM Turbo kit installation notes. I am posting it here for my own reference in the event I need to remove and re-install the kit in the future, for entertainment purposes, and for those that would like some insight into what is involved.
**Use at your own risk if you decide to use it. Practice safety first. Never work under a car that's not properly supported, use a lift or jack stands. Seek a professional mechanic if the task is beyond your skill level.
General comments and questions regarding these notes or DHM turbo kit installation are welcomed here for discussion.
Some hand tools I used (incomplete list)
Sockets - 7, 8, 10, 11, 12, 13 (mm)
Wrenches - 1/2", 8, 14 (mm)
Bits - T20, T30
Removing the OE turbo assembly
Installing the DHM turbo kit.
https://chrome.google.com/webstore/...nk-fix/kegnjbncdcliihbemealioapbifiaedg?hl=en
__________________________________________________________________________________________________________________
__________________________________________________________________________________________________________________
Here are my DHM Turbo kit installation notes. I am posting it here for my own reference in the event I need to remove and re-install the kit in the future, for entertainment purposes, and for those that would like some insight into what is involved.
**Use at your own risk if you decide to use it. Practice safety first. Never work under a car that's not properly supported, use a lift or jack stands. Seek a professional mechanic if the task is beyond your skill level.
General comments and questions regarding these notes or DHM turbo kit installation are welcomed here for discussion.
Some hand tools I used (incomplete list)
Sockets - 7, 8, 10, 11, 12, 13 (mm)
Wrenches - 1/2", 8, 14 (mm)
Bits - T20, T30
Removing the OE turbo assembly
- Disconnect the battery.
- Remove the wipers, upper cowl, head lights and lower cowl.
- Remove intake plumbing from the airbox to the turbo.
- Disconnect both O2 sensor connectors.
- Remove the turbo manifold heat shield nuts and move the heat shield out of the way to gain access to the downpipe to turbo bolts.
- Lift the front end of the car up and support it with jack stands.
- Remove the downpipe. Stock downpipes will have to have the O2 sensors removed first prior to removing the downpipe from the car.
- Disconnect both coolant banjo bolts on the turbo to let the coolant drain out. There are permanent washers on the banjo fittings, so don't worry about losing them.
- Remove the coolant hard lines from the car.
- Remove the turbo manifold heat shield.
- Disconnect the oil feed line from the feed port on the cylinder head. Leave the line connected to the turbo.
- Disconnect the oil drain line from the engine block. Leave the line connected to the turbo.
- Disconnect the recirculating OE compressor bypass valve and Boost Control solenoid connectors on the turbo.
- Disconnect the vacuum lines on the boost control solenoid, then then unclip and remove the boost control solenoid from its mounting bracket.
- Remove the charge pipe and rubber coupler from the turbo.
- Disconnect ~3 connectors that may be in the way near the top firewall side of the cylinder head.
- Remove the turbo manifold nuts.
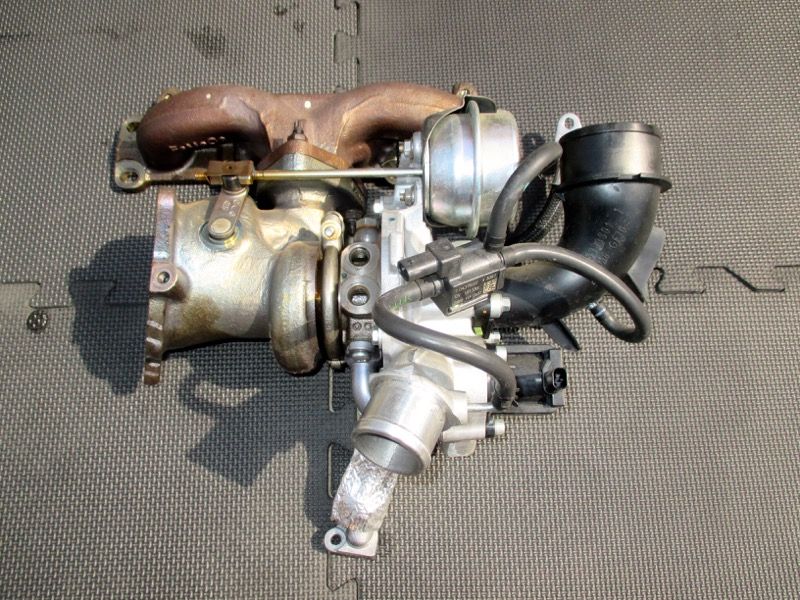
- Carefully lift the turbo assembly unit as a whole from the top and out of the car.
What the whole OE turbo assembly looks like once removed.
Here's the OE turbo assembly next to the DHM turbo assembly that is replacing it.
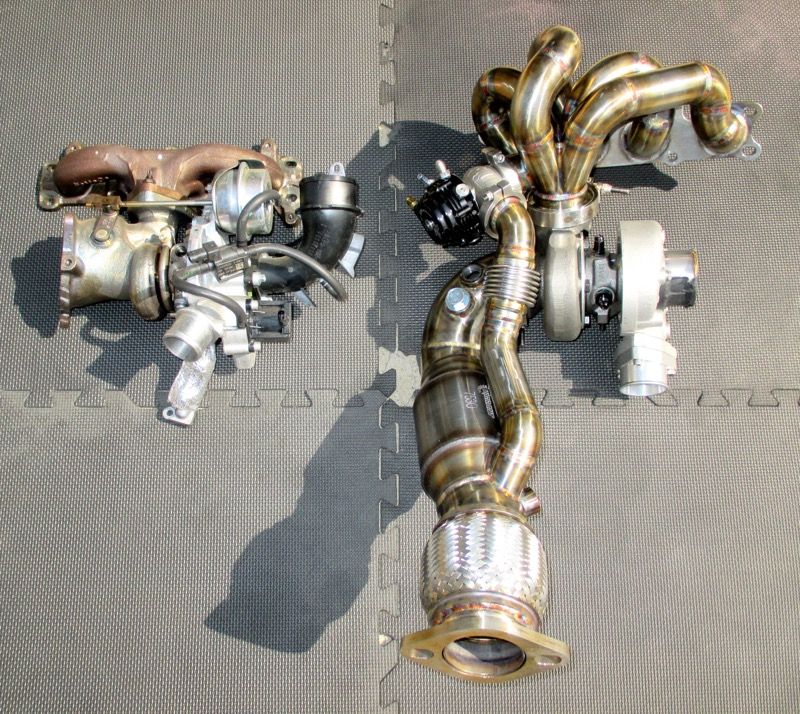
Installing the DHM turbo kit.
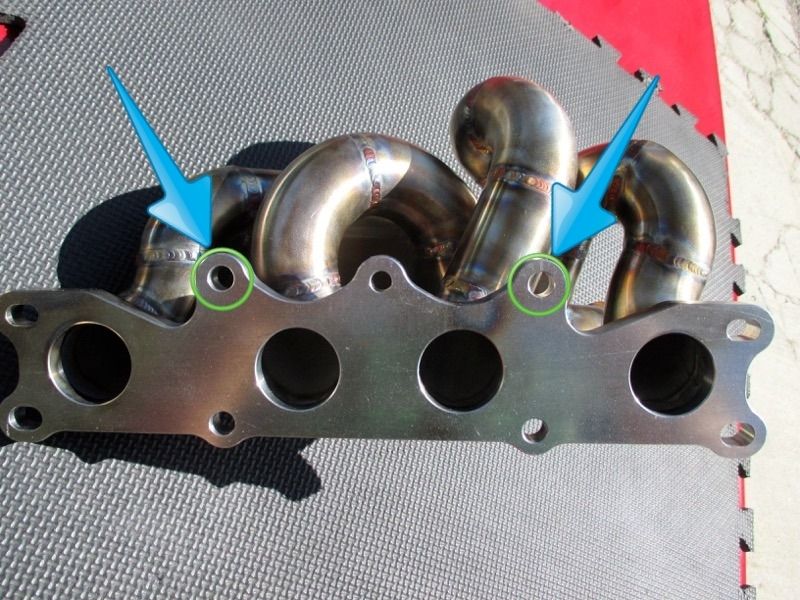
- Install the DHM manifold from the top. These top two manifold nuts for cylinder runners 2 and 3 have to go on first, due to the clearance between the runners and the studs.
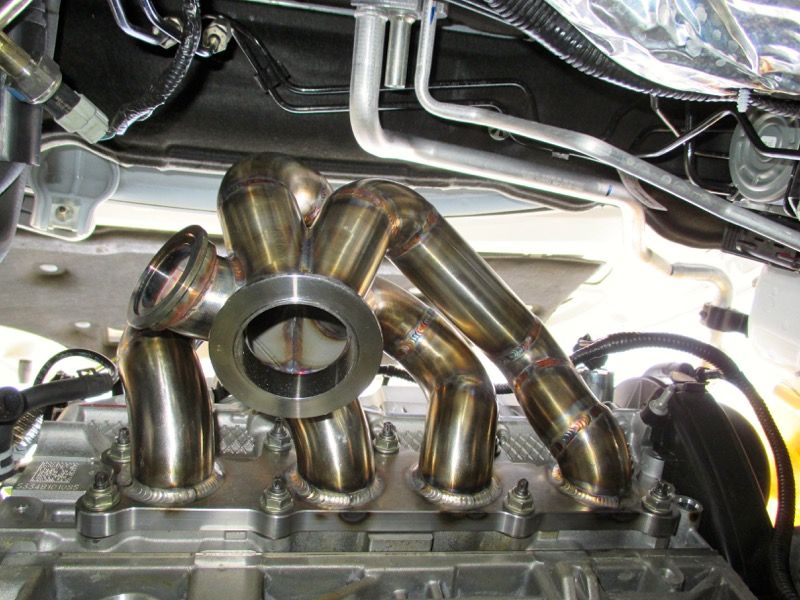
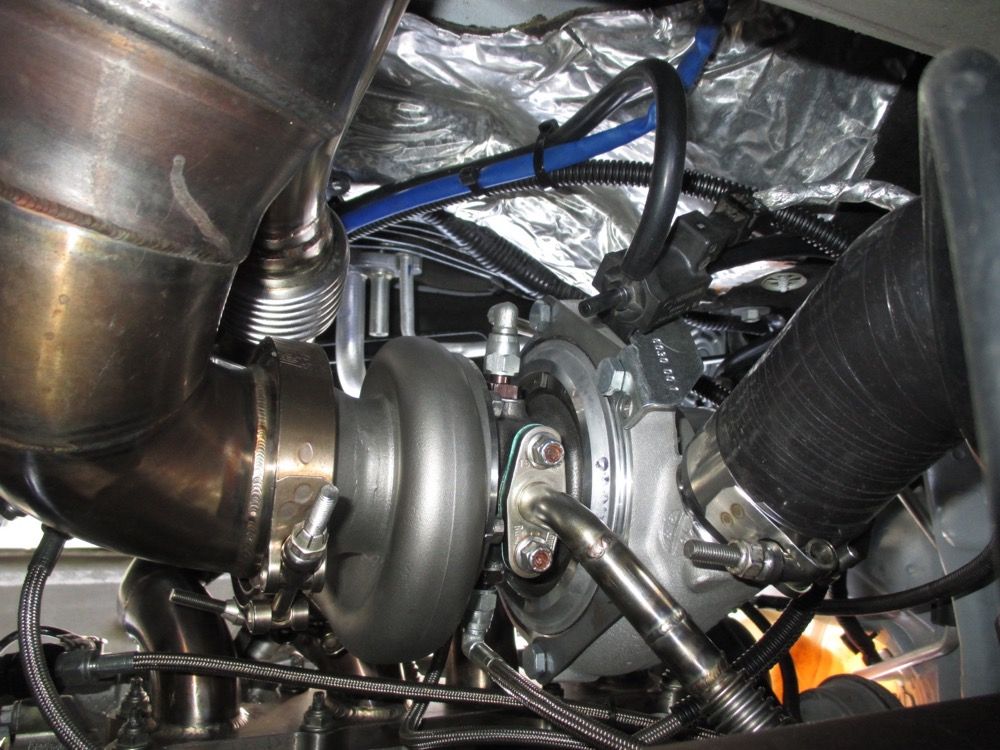
The manifold mounted in place.

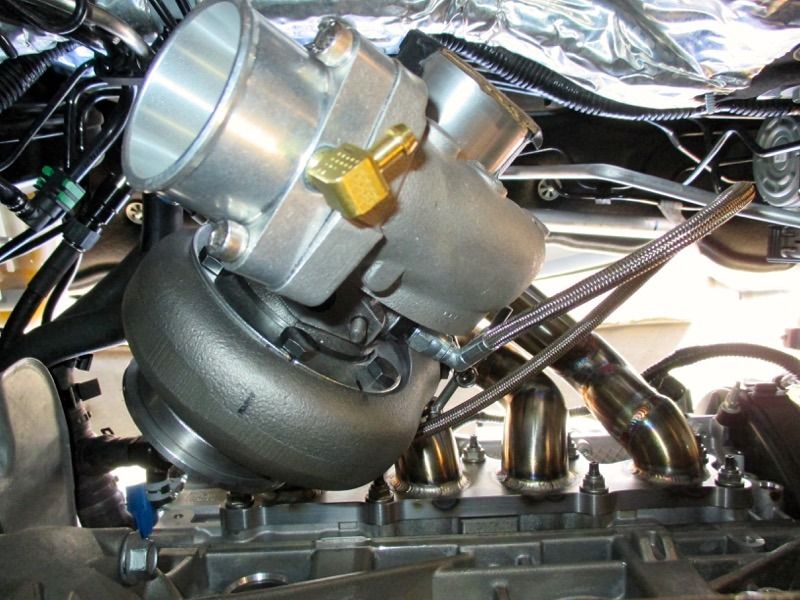
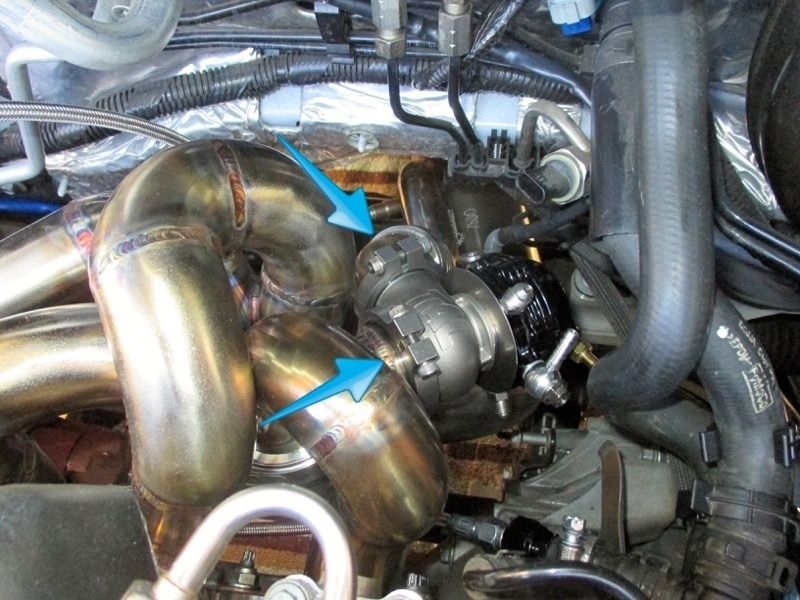
- Mount the turbo on to manifold from the bottom. An extra set of hands would be useful here, but not necessary. It is possible to install it by oneself. I made a rig out of rope and cords to help hold the GT2560R turbo up the first time I was installing it. For the GTX2860R turbo I upgraded to I was able to hold it up with one hand and use the other hand to fit and tighten the v-band without any help. Do not tighten the v-band clamp all the way, leave the v-band snug enough to still be able to rotate the turbo on the manifold with little effort.
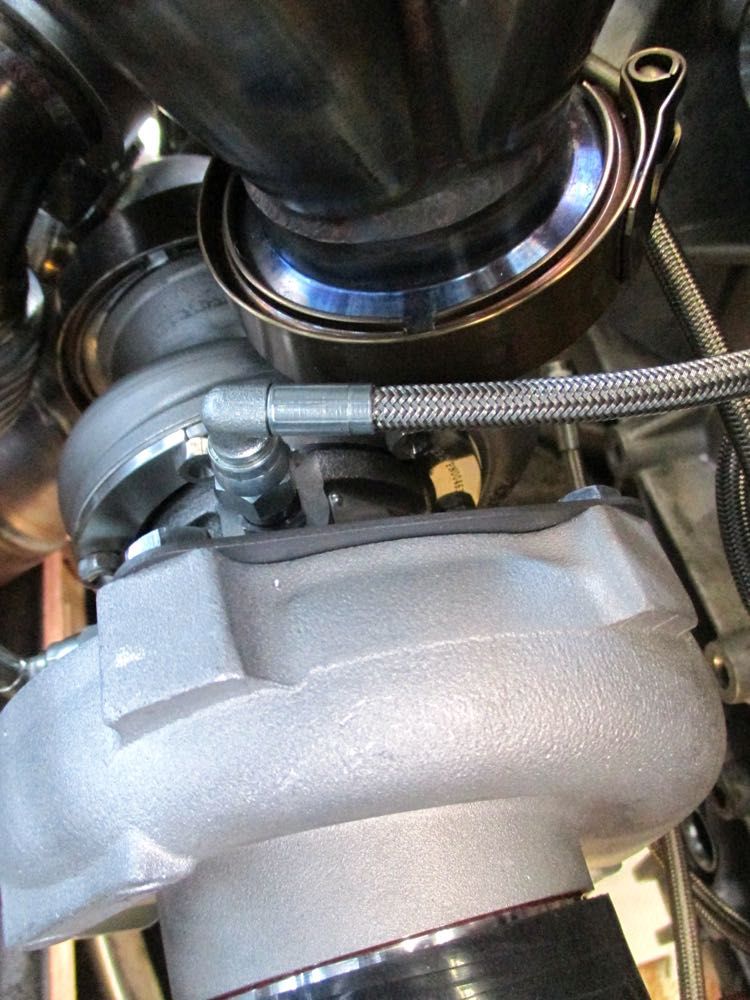
- Install and tighten the engine side coolant line to the turbo. Rotating the turbo on it's axis allows access to tighten the coolant line fitting on to the turbo.
- Install and tighten the other end of the coolant line to the driver side feed hose using the DHM supplied worm gear clamp. If necessary, move away the OE spring clamps to allow the OE plastic coolant T-fitting to rotate and rotate the T down, so that the driver side braided DHM coolant feed line routes away from the manifold.
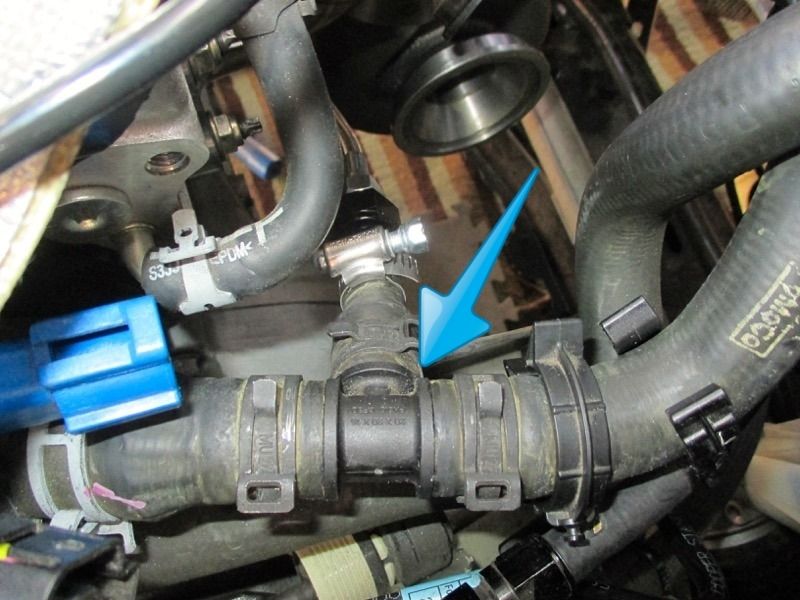
The coolant line with the T fitting rotated down for better clearance and away from the manifold.
- Rotate the turbo back into place and continue to leave the v-band loose, but snug enough to let the turbo rotate with little effort.
- Install the oil feed line on to the turbo, leave it loose and leave the other end alone for now.
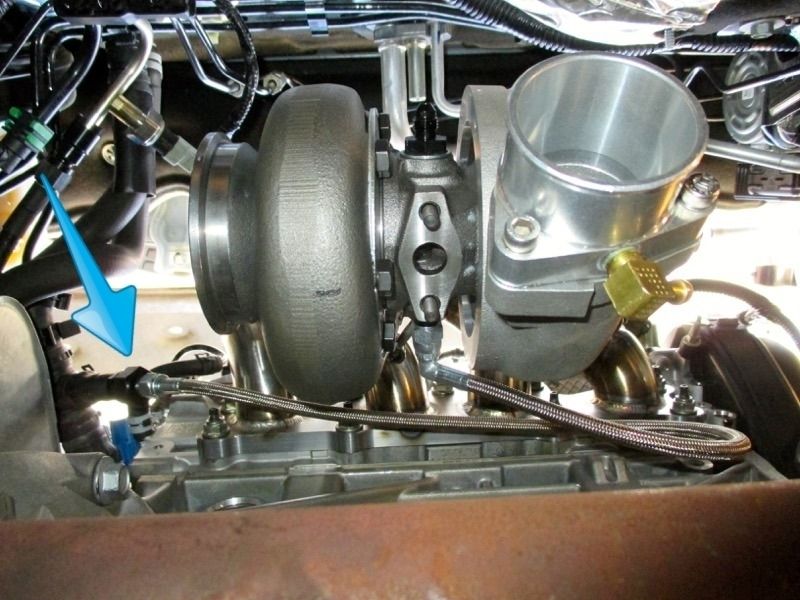
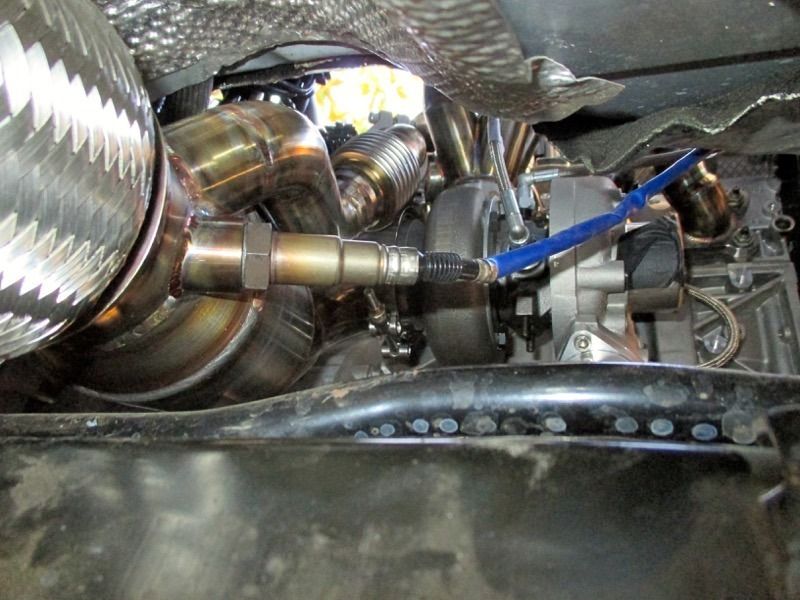
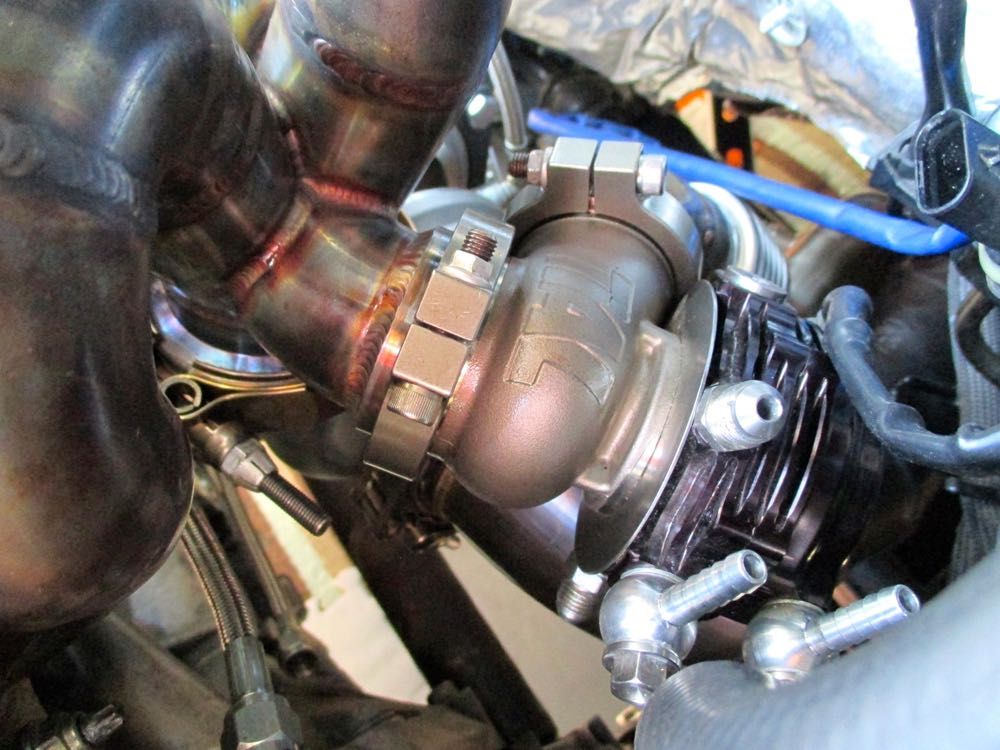
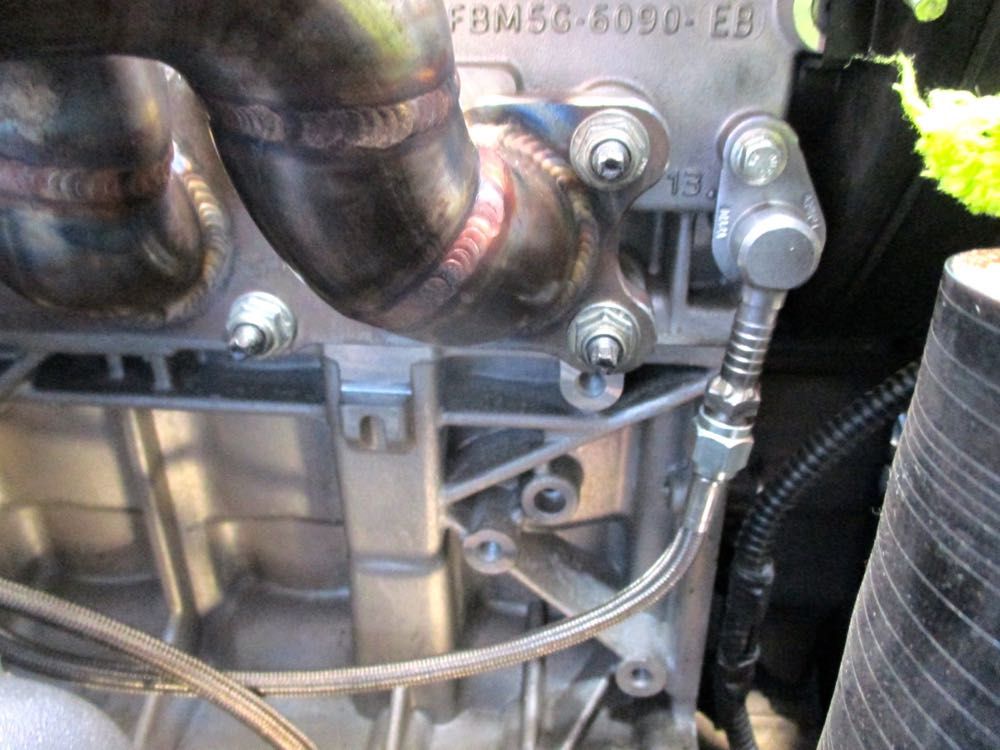
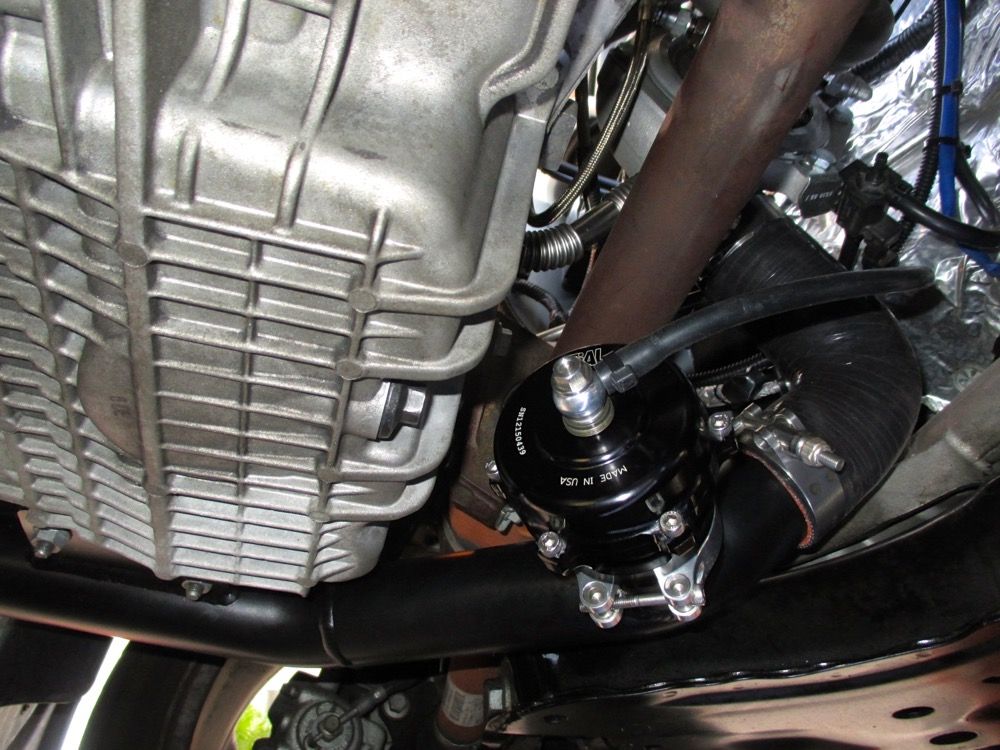
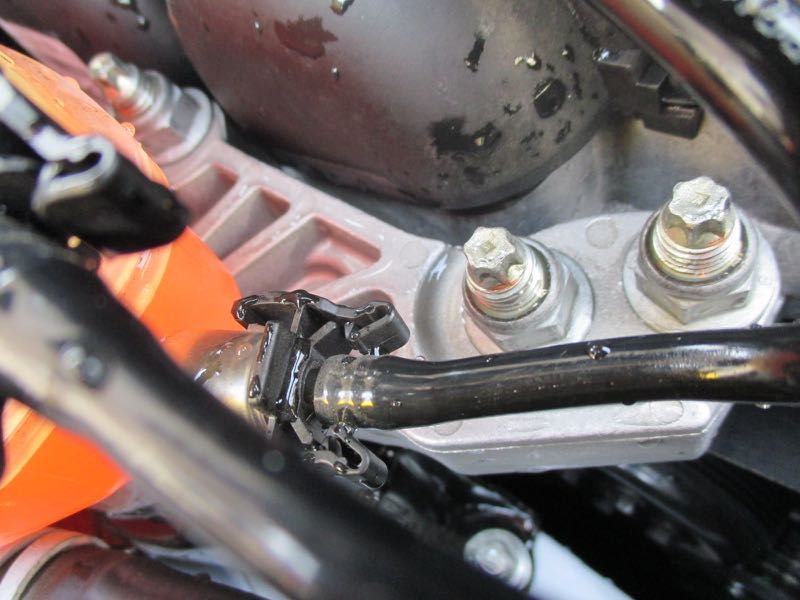
- Install the firewall side coolant line on to the turbo. The line will eventually need to go to the side wastegate coolant port depicted here.
- Install the O2 sensors on to the DHM down pipe.
- Install the downpipe on to the manifold from the bottom and leave the v-band clamp loose for now. Connect the downpipe to the catback exhaust to help keep the rear of downpipe elevated with the exhaust system, but do not tighten the bolts to the catback exhaust. The downpipe needs to be able to move freely without forces from the catback pulling on it, making it difficult to install the recirculation dump pipe if the downpipe is outfitted with one.
- Install the recalculating wastegate discharge pipe on to the wastegate if your downpipe has one. Keep the clamp loose for now.
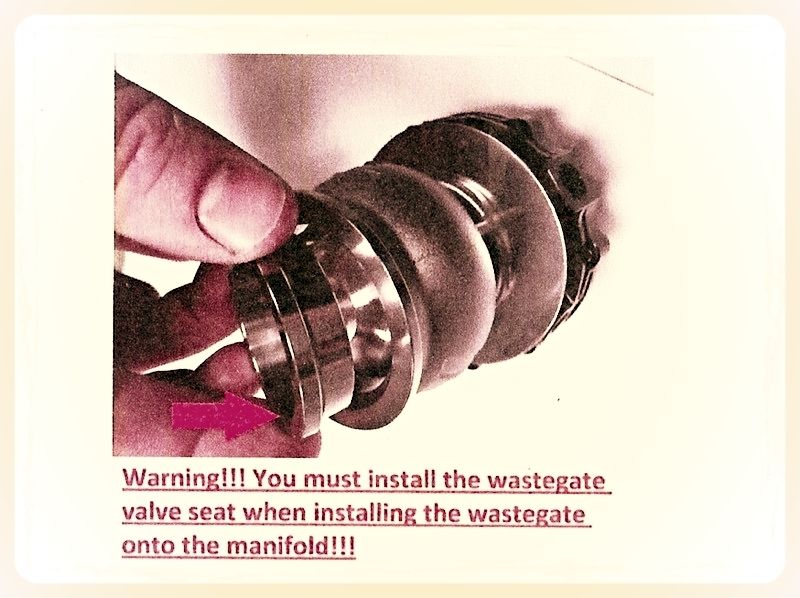
- Now install the wastegate on to the manifold, remember to install the wastegate valve seat.
- Install the external wastegate dump pipe, if you have one.
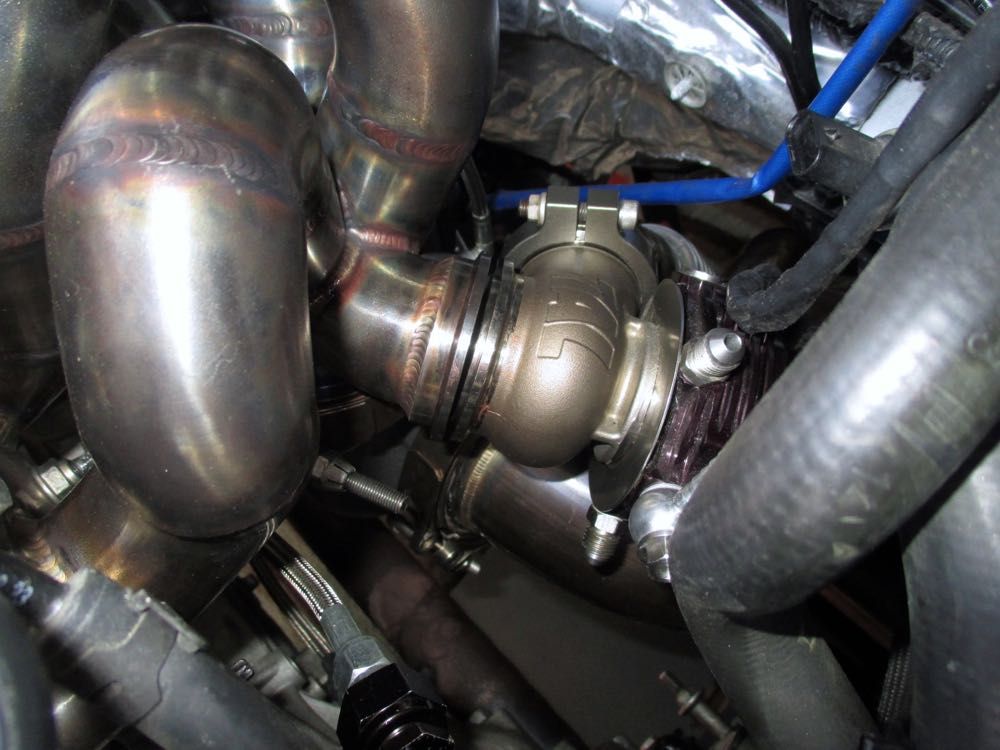
- Now tighten the v-band clamps for both manifold to wastegate and wastegate dump pipe.
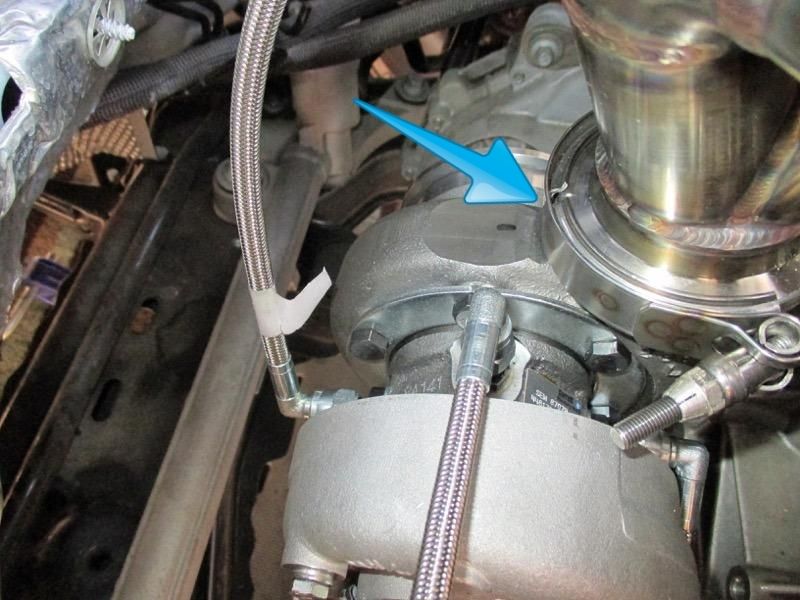
Ensure a leak free connection. You should just be able to squeeze a finger nail in between the gaps of the vband clamps.
- Tighten the turbo to manifold v-band clamp.
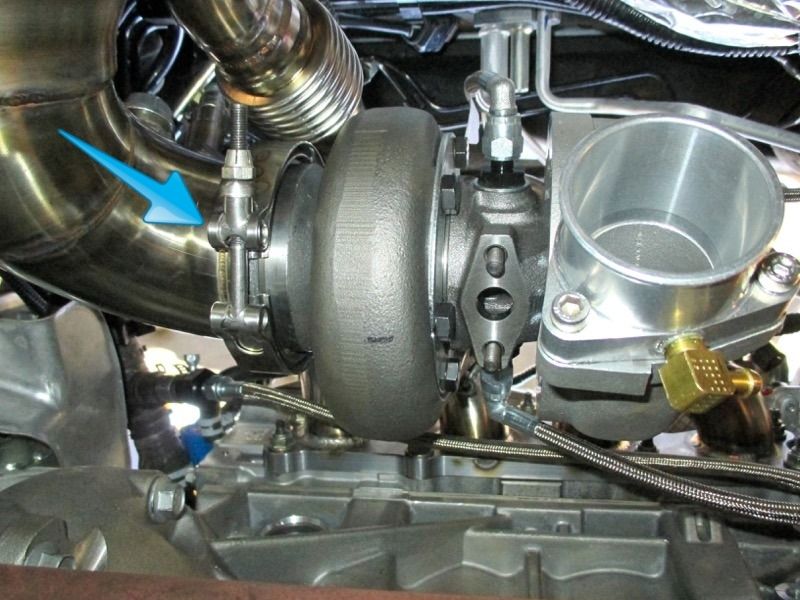
- Tighten the downpipe to turbo v-band clamp.
- Tighten the bolts for the downpipe to catback exhaust connection.
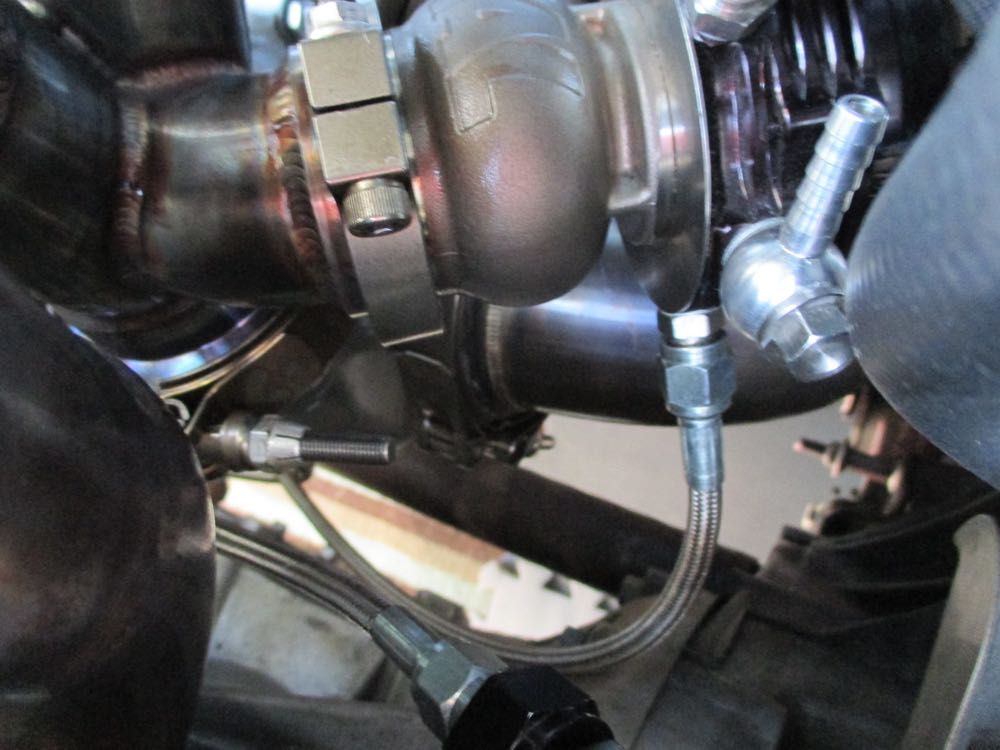
- Install the remaining passenger side coolant feed connection and tighten the DHM supplied worm gear clamp. Install and tighten the other end on the top coolant port on the wastegate with the line routed along the firewall.
- Install the DHM oil feed adapter to the oil feed port on the cylinder head.
- Install the oil feed line on to the turbo and tighten the connections on both ends.
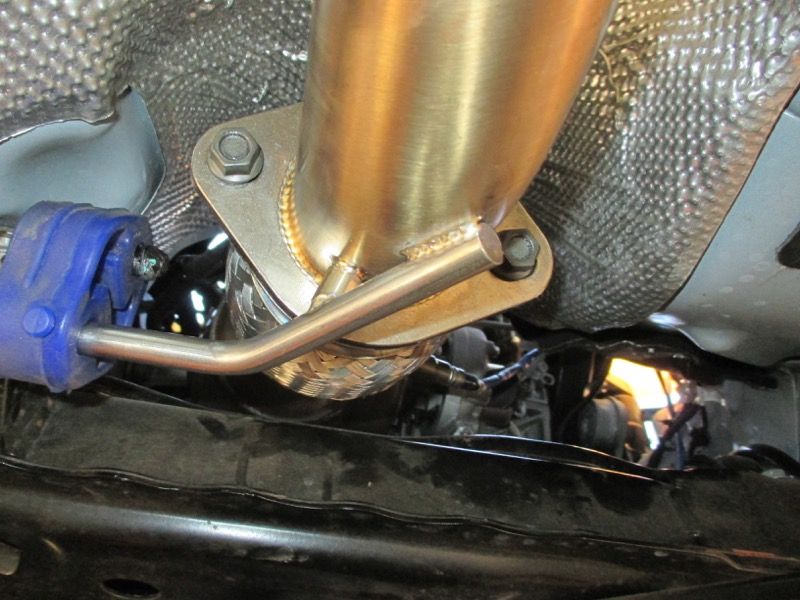
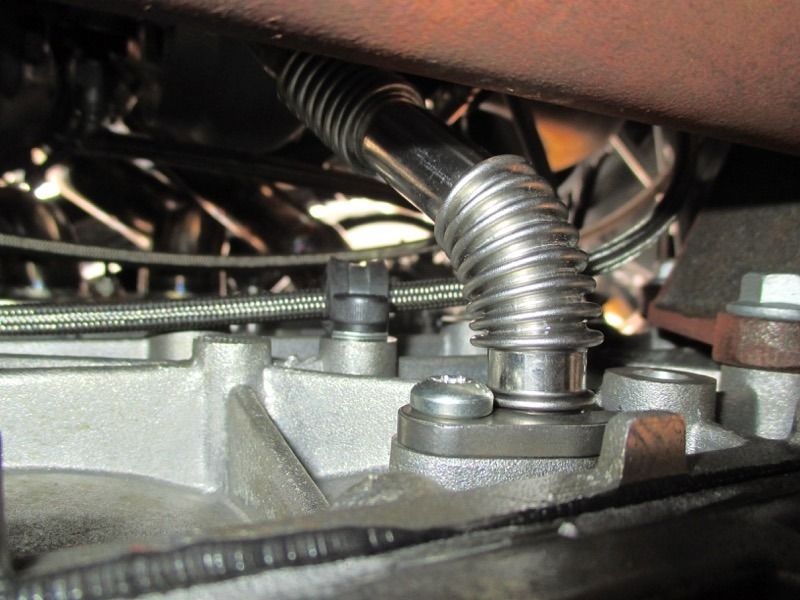
- Install and tighten the DHM oil drain pipe from the turbo to the oil return port on the engine block. Some bending of the flex bellows on the drain pipe may be necessary to coax it into position.
NOTE: bending and twisting is only with the original tube supplied by DHM. Improved DHM style tubes by me will not require any bending or twisting to get it on. Bending and twisting may lead to fractures and cracks with the tube.
Improved tube design. https://www.fiestastforum.com/forum/threads/3074-koozy-s-ST?p=295832&viewfull=1#post295832
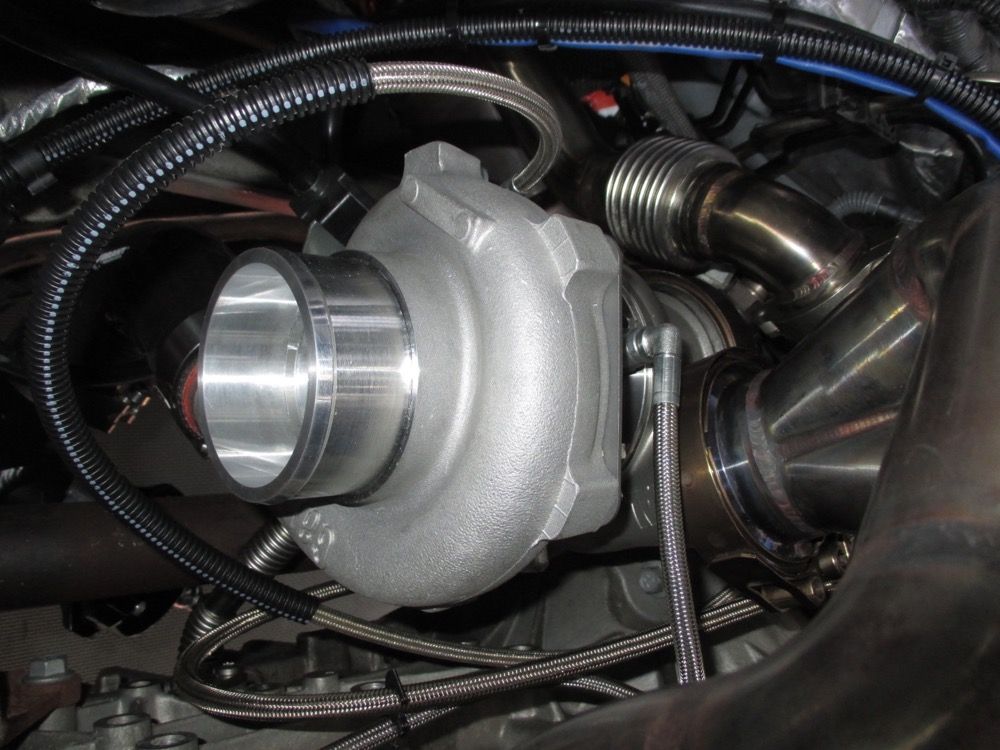
- Install the DHM charge pipe and BOV assembly.
- Install the boost control solenoid connector and associated vacuum lines to their designated ports. About ~10ft. of 5mm ID vacuum hose and a vacuum block adapter from ATP or Turbosmart are needed for boost reference.
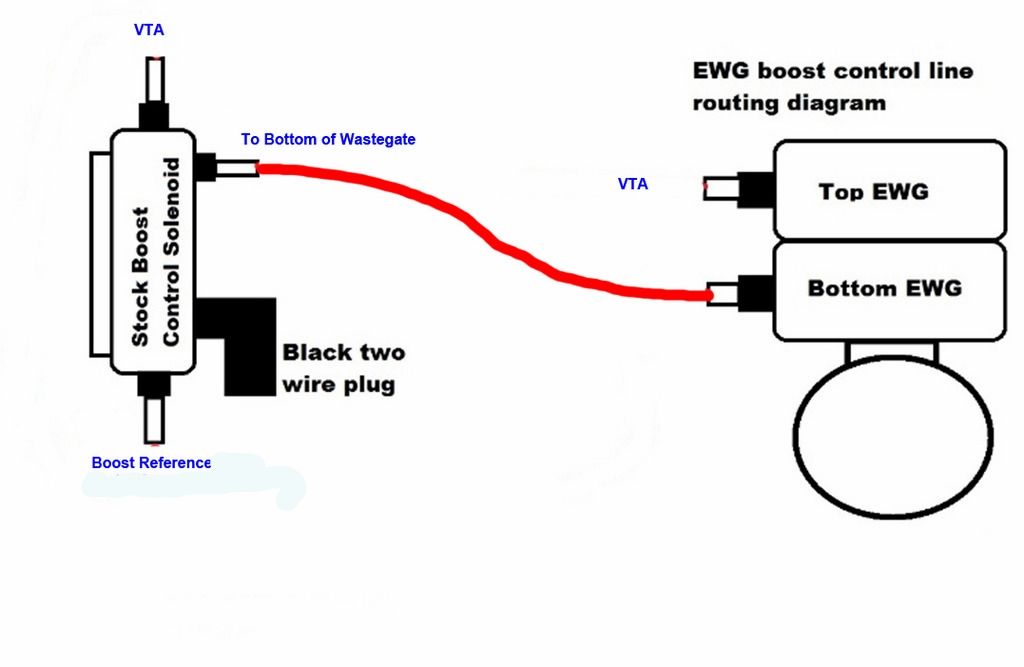
- Cover the contact pins on the OE BOV harness connector with electric tape to prevent dirt and grime entering the connector's cavity and zip tie the connector out of the way in a safe location, it is not being used with the DHM setup.
- Zip tie any vacuum, harness or fluid lines as necessary to keep them away from heat, interference and abrasion.
- Re-install the O2 sensor connectors, intake plumbing from the air filter to the turbo, lower cowl, upper cowl, headlights and wipers.


- Top off the coolant system and replace what came out (~1/2 gallon). There is a small bleeder cap on the top middle of the radiator on the engine side. Loosen or temporarily remove the cap, fill the coolant reservoir until coolant comes out of the bleeder port, then cap the bleeder and fill the reservoir to the 'Max' line.
- Re-connect the battery and flash the ECU with the new base tune map.
- **Prime the turbo with oil by pushing the gas and clutch pedals to the floor; and push the START button for about 10sec of it cranking. Make sure it's not in gear and never lift off the gas pedal. Do this 2-3 times and it will get oil where it needs to be without starting the car and running the turbo without oil in it.
- Once the turbo has been primed with oil, START the car and check for fluid leaks. Address any issues if there are any.
- Safely lower the car back down to the ground.
- Recheck the coolant level, once the car has reached operating temperature.
- Proceed on getting the car tuned with your tuner and enjoy your new DHM turbo kit.
Last edited:


OP
Thread Starter
#191
Thread Starter
#191
Added the CP-E intake and working on filling the OE mounts with 80A urethane because I'm experiencing violent wheel hop/engine movement with the bigger turbo, even with the Cobb RMM.
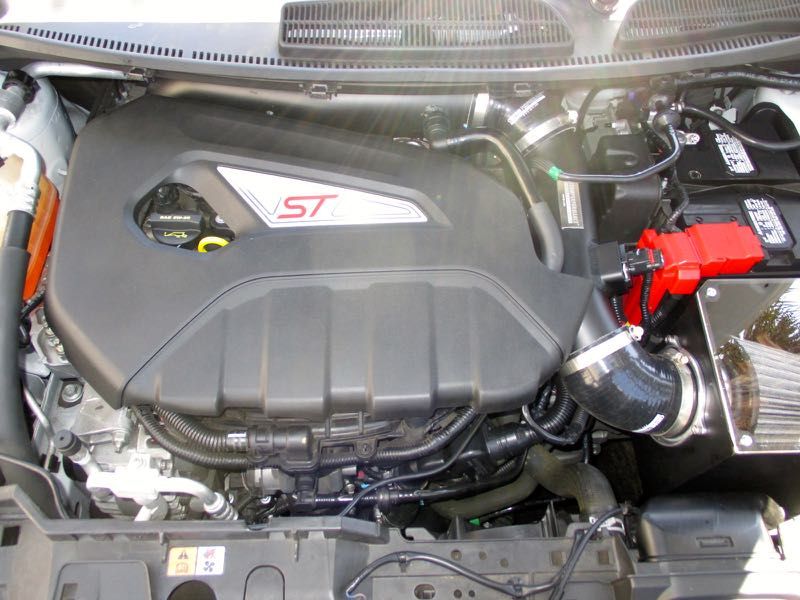
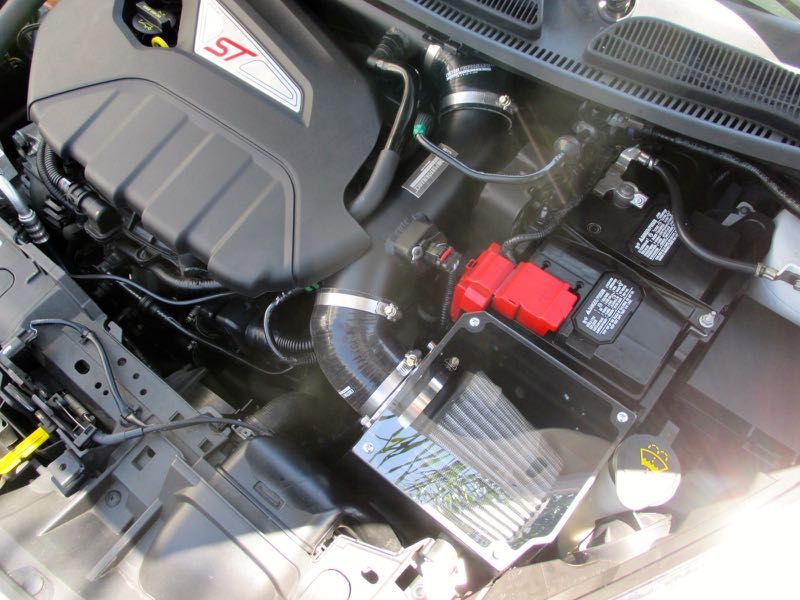
Here's the passenger side, the more involved one. The driver side mount is easy.
Here's the passenger side, the more involved one. The driver side mount is easy.
Added the CP-E intake and working on filling the OE mounts with 80A urethane because I'm experiencing violent wheel hop/engine movement with the bigger turbo, even with the Cobb RMM.
Here's the passenger side, the more involved one. The driver side mount is easy.
Here's the passenger side, the more involved one. The driver side mount is easy.
OP
Thread Starter
#193
Thread Starter
#193
I plan on just filling the bottom half of the passenger mount replacing the oil/fluid/strainers that was in there, I don't want it completely near solid. It was designed to be hydraulic, so I want it to still have some movement if any, I'm not sure how much that will be with 80A, so I'm starting with that first. I think with both driver and passenger side filled with 80A will be a significant change after seeing how much flop there is in both mounts. I can always drill and add later if needed.
I plan on just filling the bottom half of the passenger mount replacing the oil/fluid/strainers that was in there, I don't want it completely near solid. It was designed to be hydraulic, so I want it to still have some movement if any, I'm not sure how much that will be with 80A, so I'm starting with that first. I think with both driver and passenger side filled with 80A will be a significant change after seeing how much flop there is in both mounts. I can always drill and add later if needed.
OP
Thread Starter
#197
Thread Starter
#197
did a couple of things...
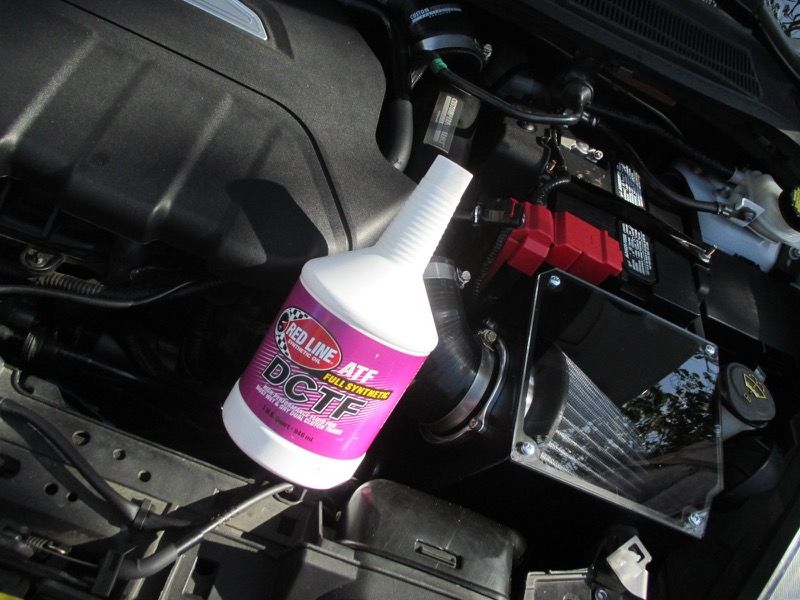
Changed out the OE gearbox oil with Redline DCTF. Noticeable amounts of metallic particles in the used oil at 16k miles .
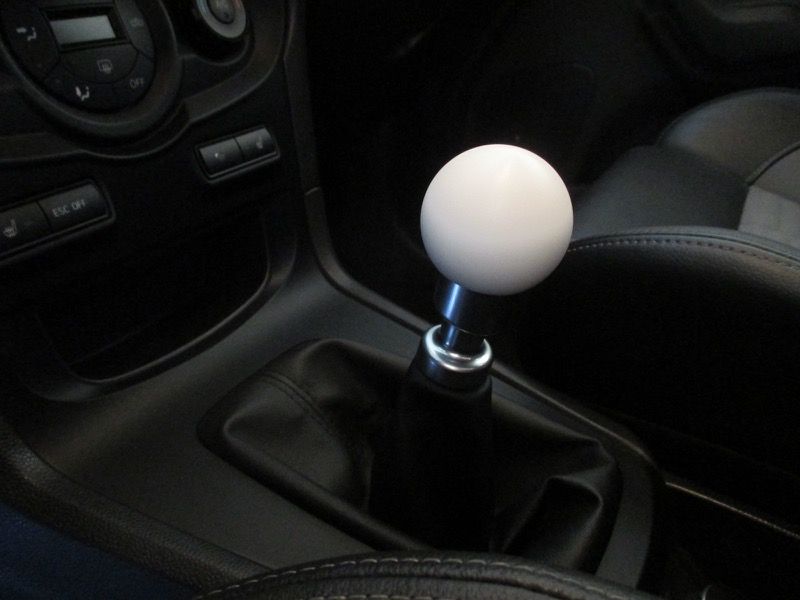
Boomba shift base and bracket bushings, didn't snap pics of the base bushing in the car, but here's the bracket bushings.
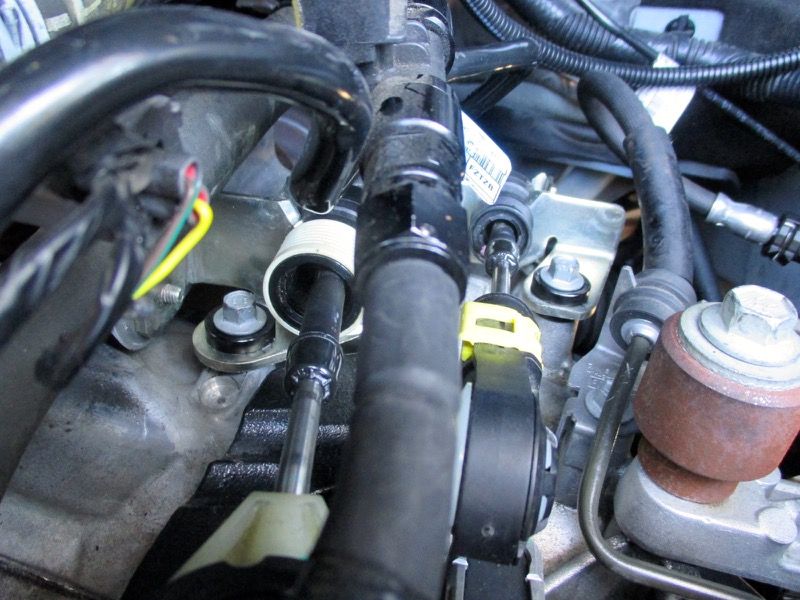
FSWerks short shift adapter.

WC Lathewerks copolymer knob.
Changed out the OE gearbox oil with Redline DCTF. Noticeable amounts of metallic particles in the used oil at 16k miles .
Boomba shift base and bracket bushings, didn't snap pics of the base bushing in the car, but here's the bracket bushings.
FSWerks short shift adapter.
WC Lathewerks copolymer knob.
Last edited:
OP
Thread Starter
#198
Thread Starter
#198
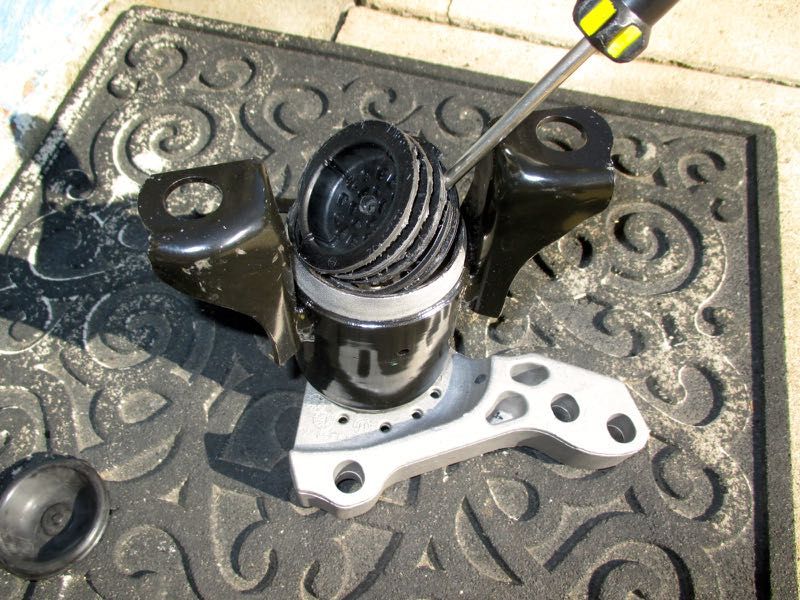
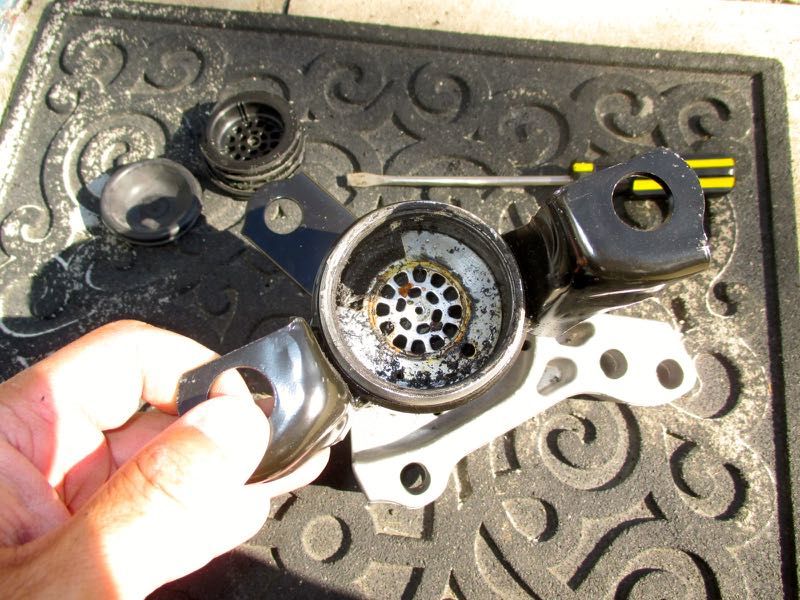
got around to installing the passenger side mount filled with 80A urethane.
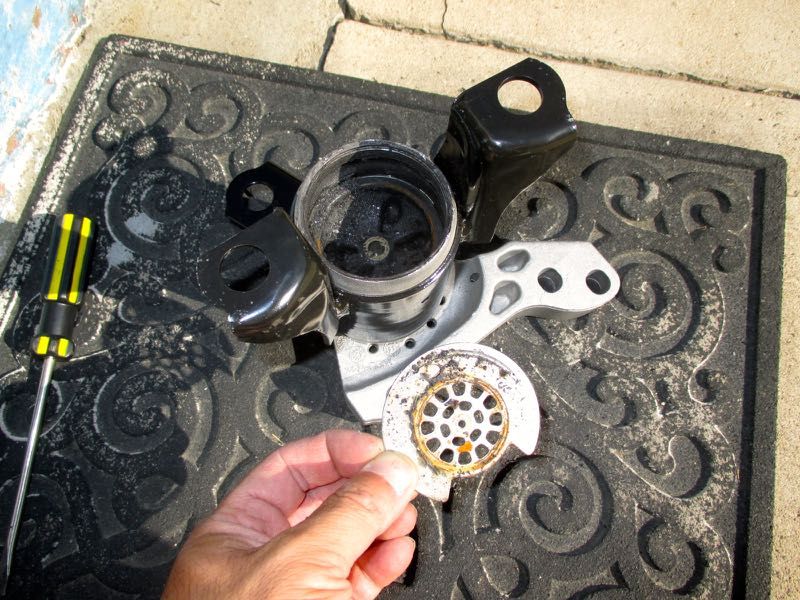
here's a new mount I gutted and drained the hydraulic oil out of that was in there.
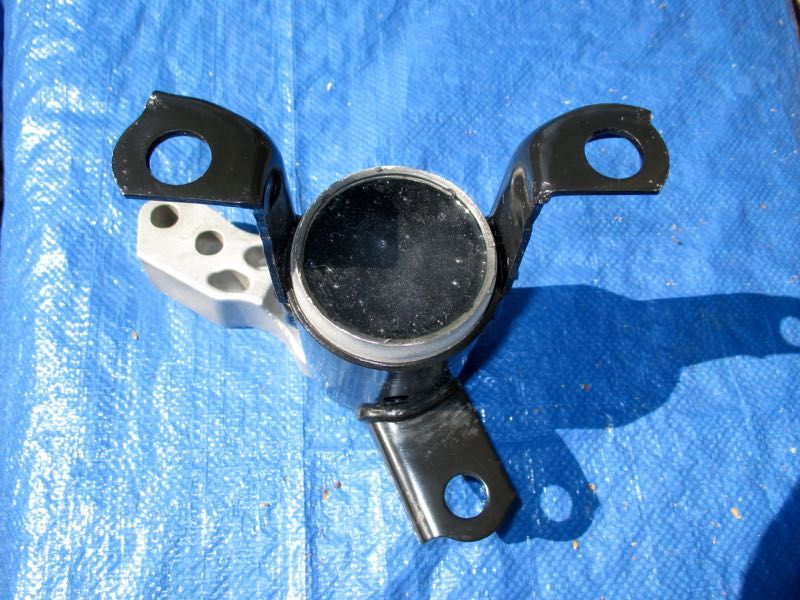
the mount filled with urethane.
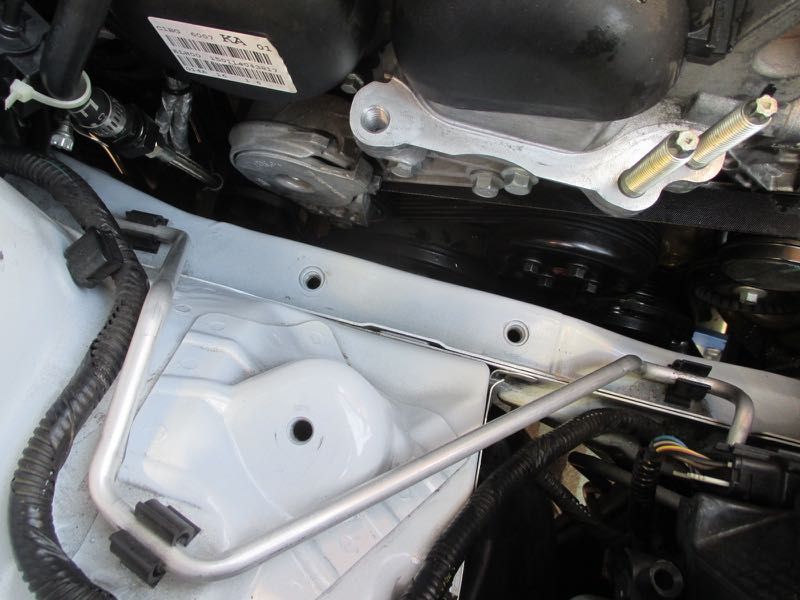
I siphoned out the coolant from the reservoir and put it into a container to put back in after the mount was swapped. Close to all of the coolant was saved in the container, negating the need to be wasteful. Once the reservoir was close to empty i removed the plastic overflow hoses and swung the reservoir out of the way giving me access to the mount's nuts and bolts.
once the nuts and bolts were loose I supported the motor from the bottom before completely removing the fasteners to allow the mount to come out without binding or the motor dropping down on that side once the mount was removed.

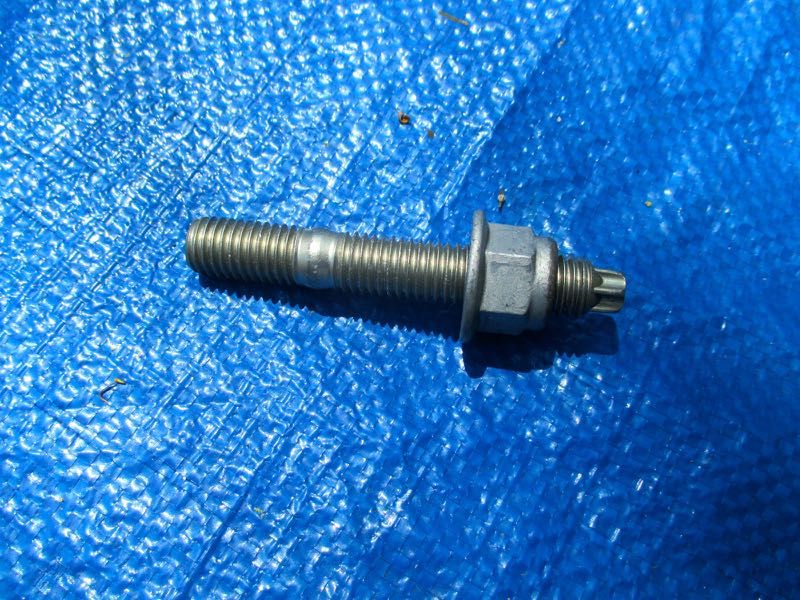
one of the studs came out with the nut. All of the fasteners had thread sealant on them.
I was able to separate them with an 18mm wrench and 7mm socket for the stud.
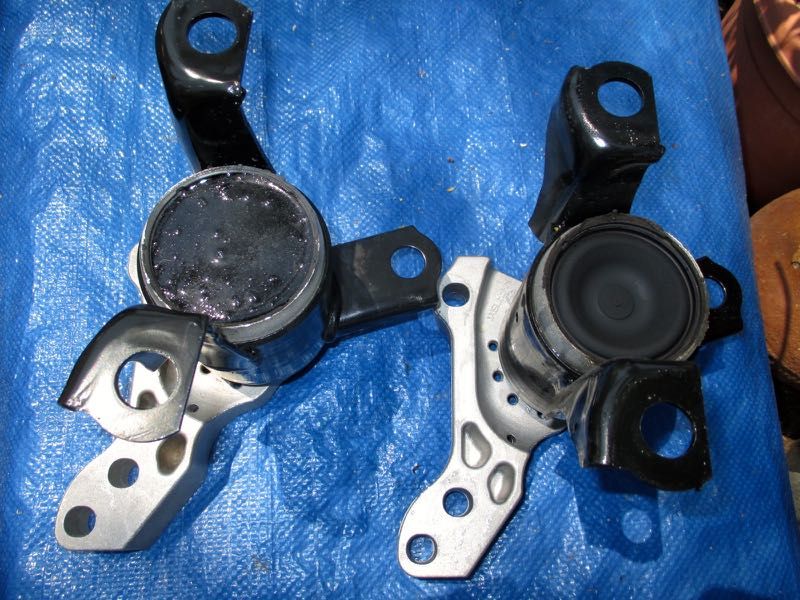
80A urethane filled mount next to the OE mount.
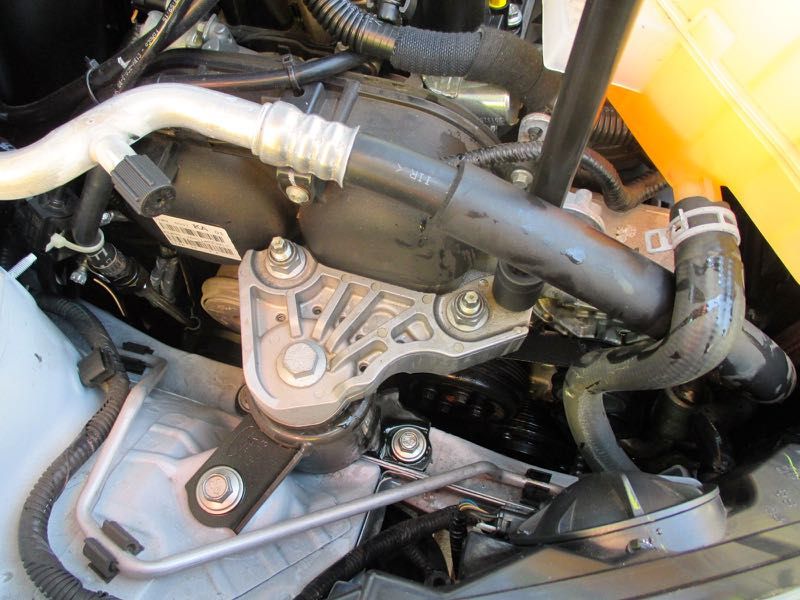
mount location cleaned out and prepped.
once the new mount was installed, I rinsed the area with water to clear out some coolant that spilled over when I swung the reservoir out of the way.
Looking stock just like a like it![[:)]](/images/smilies/smile.png "Smile [:)]")
here's a new mount I gutted and drained the hydraulic oil out of that was in there.
the mount filled with urethane.
I siphoned out the coolant from the reservoir and put it into a container to put back in after the mount was swapped. Close to all of the coolant was saved in the container, negating the need to be wasteful. Once the reservoir was close to empty i removed the plastic overflow hoses and swung the reservoir out of the way giving me access to the mount's nuts and bolts.
once the nuts and bolts were loose I supported the motor from the bottom before completely removing the fasteners to allow the mount to come out without binding or the motor dropping down on that side once the mount was removed.
one of the studs came out with the nut. All of the fasteners had thread sealant on them.
I was able to separate them with an 18mm wrench and 7mm socket for the stud.
80A urethane filled mount next to the OE mount.
mount location cleaned out and prepped.
once the new mount was installed, I rinsed the area with water to clear out some coolant that spilled over when I swung the reservoir out of the way.
Looking stock just like a like it
OP
Thread Starter
#200
Thread Starter
#200
Initial impressions with the mounts?