Thanks...
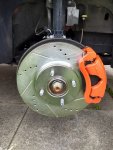
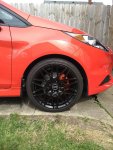
I ordered and should receive the Z23 setup today. Cost ~$280...
Also ordered SS brake lines, but they are coming from someone else (Carid). They should be here Wednesday. When I install I will take picture and report back to how well they are working.
Thanks again for everyone's help...
I ordered and should receive the Z23 setup today. Cost ~$280...
Also ordered SS brake lines, but they are coming from someone else (Carid). They should be here Wednesday. When I install I will take picture and report back to how well they are working.
Thanks again for everyone's help...
I ordered and should receive the Z23 setup today. Cost ~$280...
Also ordered SS brake lines, but they are coming from someone else (Carid). They should be here Wednesday. When I install I will take picture and report back to how well they are working.
Thanks again for everyone's help...