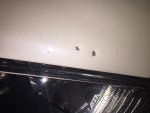
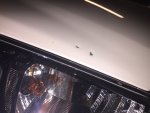
So those are very deep and contains metal damage (dented)... heres what I do for these things, it works for me, and me only as far as I know, others may share their opinions:
supplies needed (not optional in your case):
touch up: primer, color, clear
one of the following or all 4: micro q-tip, wooden tooth pick, plastic tooth pick, ultra fine smallest paint brush... one for each coat...
paint leveling solution... while not really necessary if you know how to use it this saves so much time...
shop towels (the blue one)
body putty
plastic squeegy
compound
polish
sealant
2-3 micro fiber cloth
water
isopropyl alchohol
some cleaning soap, citrus type with no other additives... or just use dish washing soap.
some 2000 grit sand paper
sanding block or small rectangular pencil eraser... for these i say the eraser is fine.
optional in all cases:
rotary or dual action buffer... optional, else prepare for maximum elbow grease!
compound, polishing, finishing pads (one of each, also optional, you can just elbow grease this with some microfiber applicators)
more sand paper :1500, 2000, 2500 and 3000 is what i would have on hand....
Ready to give up yet?
so first the steps:
1. wash with dish soap/water solution to "degrease" any thing you had on the car, this would strip the wax or any sealant you had on the car.
2. using some 1500 or 2000 grit sand paper, wet sanding technique or if you're comfortable, just do 2000+ grit dry sand, very carefully just rub the edges of the scratch until you see its a little smoother, try not to hit that much paint around it keep it to about 1/32 or less around the edges of the chip boarder. And be careful not to go too crazy on this step as you can damage the paint more, you want to feather the edges of the chip ever so slightly. It helps if you can use a hole puncher and punch a small piece of sand paper out and then glue it to the back of a pencil eraser and use that like a tiny sanding block, if you do this you have full control of the situation... This generally helps with the touch up and is optional.
3. clean again with a little dish/citrus soap + water mixture, and dry with MF towel so you dont scratch anything else.
4. quick wipe with isopropyl + shop towel (the disposable blue ones) to ensure it is REALLY clean there.
5. using the squeegy and body putty, scrape some on and use the edge of the squeegy to keep it level and flat. you are filling the dent here. If you have paint leveler solution, you can also use that with a blue shop towel wrapped on your squeegy to get a straight edge, and a dab of leveler you can clean it up pretty well without worry about sanding it later. This is ideal. Let this step dry and reapply putty as necessary to have it "smooth" with the surrounding, you have the option to wet sand a little on this stage.
6. applying the touch up paint! start with the primer (sorta optional) carefully dab the paint on. its literally like using your application tool (mini qtip, toothpicks, brush) get some paint on it and "poke" the area until the paint is transfered on and covering all of the putty. you can use the paint leveler between each layer of paint to make sure its "fairly" smooth. you may alternatively lightly sand it to get it smooth once it flash dries (dry to the touch) but becareful the paint is fresh and can just rip right off. if you do the paint right you probably wont have to worry about sanding it at all, but this is very rare. do this for all 3 layers of paint, the primer and color should still look like its "dipped in" ever so slightly and fill with the clear and it should ideally look like a "bubble of paint" that is every so slightly raised around the surrounding paint.
7. let it cure! probably around a day or so... keep it dry and dont touch it! this is critical for the sanding and compounding stage.
8. wet sand! soak the sand paper in water for about 1 hour so its fully saturated and substantially less aggressive... start with 1500, wrap it around the "block" and carefully sand it until it looks almost level with the paint, try not to touch any other painted surface, but if you do, no worries just dont dig! use plenty or water to keep the paper clean. repeat this until you got to 2-3000 grit, whatever highest you have, the area should look flat and matte, i would say a 1/2" spot that is matte'd should do for each chip remember very slowly and carefully, if you are not experienced with this just get the bump of paint as level as possible without hitting any other painted surface. the results.. obviously will reflect upon this. clean up any mess with dish/citrus solution, dry, and wipe with isopropyl.
9. using applicators or MF towels (ideally you have a polishing machine).. compound, just rub the compound on, then clean with MF towel, then rub the polish on, then clean, and repeat until glossy.
10. apply sealant and let it cure over night and then buff it. and you're done!
Disclaimer: this has worked for me fairly well, the results are around 80-90% unnoticeable your results may vary based on experience level.
It's hard to explain but yeah, if your rock chip didnt dent the hood, I think you have a good chance with just touch up paint. and some leveler and compound + polish.
Feel free to ask any questions, or PM me if you want. Unfortunately I am not local to you or I would meet up with you and help you out, maybe other members are able to help you. good luck!