
In need of a new transmission mount and having unused polyurethane resin, I decided to create a DIY transmission mount insert. Originally I planned to 3d print and make a 2 part mold to produce my own version of the PowerFlex mount...but then I realized I could just pour it straight in. Powerflex purple says it's 80a durometer and this is 72 so....should work? Soon I'll be posting about 3d printing a form, creating silicone mold, and then making my own inserts for the passenger side engine mount.
Will this work? I have no idea. FAFO is my motto but I'll update whenever I get around to installing the mount.
Steps
0) WEAR GLOVES, WEAR SAFETY GLASSES, READ THE INSTRUCTIONS OF THE EPOXY. Seriously...don't mess around with your health, especially when it's 100% easily preventable. Don't mean to preach but I do feel the need on behalf of my dum and unintentionally reckless younger self.
1) Seal the bottom of the engine mount with tape- the flat side is recommended. If theres tiny holes some will leak out but it's got a high enough viscosity and cures quick enough that it's not a big deal - just be prepared for leakage underneath.
2) Mix resin 1:1 - I used 1/2 cup of each, for 1 cup total.....and I wasted approximately half of it, including pouring a bit more due to leakage. My recommendation would be to use at least 1/4 cup of each or 3/8 cup if you are feeling generous. This stuff smells like rubber cement briefly until it cures but it's not overpowering.
3) Pour and wait for it to cure. It'll turn white and get somewhat warm although the metal will conduct most of it away. Give it at least 10 minutes before you do anything.
4) Put it in the car.
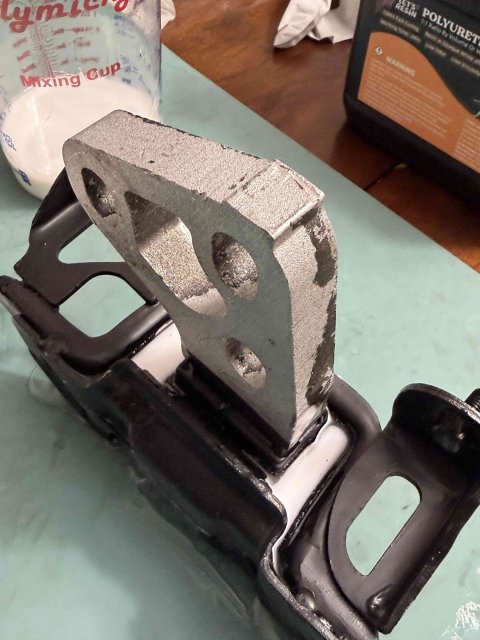
Top of the 'mold' / mount along with the epoxy I'm using that I believe is 72a durometer. Sorry for upside down picture.
View attachment IMG_2643.jpg
Bottom of the mold, taped up with whatever we had - clear tape and hockey stick tape. Some leaked out but not a big deal.
View attachment IMG_2642.jpeg
Final product once it cured (turns white)
Will this work? I have no idea. FAFO is my motto but I'll update whenever I get around to installing the mount.
Steps
0) WEAR GLOVES, WEAR SAFETY GLASSES, READ THE INSTRUCTIONS OF THE EPOXY. Seriously...don't mess around with your health, especially when it's 100% easily preventable. Don't mean to preach but I do feel the need on behalf of my dum and unintentionally reckless younger self.
1) Seal the bottom of the engine mount with tape- the flat side is recommended. If theres tiny holes some will leak out but it's got a high enough viscosity and cures quick enough that it's not a big deal - just be prepared for leakage underneath.
2) Mix resin 1:1 - I used 1/2 cup of each, for 1 cup total.....and I wasted approximately half of it, including pouring a bit more due to leakage. My recommendation would be to use at least 1/4 cup of each or 3/8 cup if you are feeling generous. This stuff smells like rubber cement briefly until it cures but it's not overpowering.
3) Pour and wait for it to cure. It'll turn white and get somewhat warm although the metal will conduct most of it away. Give it at least 10 minutes before you do anything.
4) Put it in the car.
Top of the 'mold' / mount along with the epoxy I'm using that I believe is 72a durometer. Sorry for upside down picture.
View attachment IMG_2643.jpg
Bottom of the mold, taped up with whatever we had - clear tape and hockey stick tape. Some leaked out but not a big deal.
View attachment IMG_2642.jpeg
Final product once it cured (turns white)