• Sign Up! To view all forums and unlock additional cool features

    Welcome to the #1 Fiesta ST Forum and Fiesta ST community dedicated to Fiesta ST owners and enthusiasts. Register for an account, it's free and it's easy, so don't hesitate to join the Fiesta ST Forum today!


Feisty the "Family Car"

Dialcaliper

Active member
Messages
756
Likes
1,262
Location
San Francisco Bay Area
#1
So I thought I’d finally get around to making a build post for my 2016 Fiesta ST that I picked up in 2022 after selling our Honda Fit to a friend. My goal is basically a “swiss army knife” build that will be adequate for use as a daily, but be ready to go for some canyon carving or an occasional “for fun” track day/autocross, yet be equipped to haul a family of 3 on ski trips and occasional dirt excursions (backpacking trips, etc.

I’ll accept in this kind of build that a lot of compromises will have to be made, like no built motors, passing emissions without a huge hassle, reasonable ride height, etc. Fortunately my wife and daughter like cars, and are willing to put up with a fair amount of my shenanigans. When we went to look at buying it, my wife, ever the voice of reason said to me, “Wait, you didn’t tell me it had Recaros…lets buy it.”

Mods are a mix of off the shelf bolt-on parts and custom DIY stuff, but with an emphasis on quality and reliability. It’s the family car after all…

_O4A9999 (2).JPG


Someday I’ll get a good picture of the car actually clean!

Street tires:

IMG_8231.JPG

Mud and Snow Tires!

IMG_8599.JPG

My daughter has affectionately nicknamed the car “Feisty”, and it has stuck, so I’ll roll with it.

I'll slowly make some catch-up posts for projects I've already completed and add new stuff as I go.


Last edited:
OP
Dialcaliper

Dialcaliper

Active member
Messages
756
Likes
1,262
Location
San Francisco Bay Area
Thread Starter #2
Bought the car back in June 2022 with 56k miles. A previous owner had done some very mild things to it already - Mountune springs, spoiler riser, Mountune intercooler, Flowmaster 2.5” catback and some tunes - the Accessport came with the car, and that combined with the few mild mods done to it already opened Pandora's box - bought my car with the understanding I would not be leaving it unchanged for long! The fact that the mods were fairly mild and the car was in great shape and well cared for made me less worried than I otherwise would be about buying a modified car

The look was not quite my style, so I've made some subtle changes to my own taste. Drove the car as is for a while and played with the tunes. I'm glad I was able to try them out as I discovered I prefer the Dizzy tunes to the Stratified stage 2 that I test drove the car with. The test drive was fun, but for me the Stratified kind of got old pretty quick. And that "Eco mode" with twitchy throttle and low power was irritating! Settled on the Dizzy Stage 1 the car came with after trying out all the Cobb tunes.

Once the Indy 500's wore out (which I did not like), the 17" Black Tarmacs had to go. Replaced them with 16" Dekagrams wrapped in 215/45R16 GeForce Rival S tires. My wife agrees that tires are an "entertainment expense", so commuting a couple days a week on 200TW tires was not a problem on the days I can't take the electric Fiat.

Car as delivered


Attachments

Last edited:
OP
Dialcaliper

Dialcaliper

Active member
Messages
756
Likes
1,262
Location
San Francisco Bay Area
Thread Starter #3
After an oil change, the next thing to go ended up being the Mountune springs. I never quite liked the bouncy ride with the stock struts the car basically on the front bumpstops all the time driving hard. The oversteer with terminal understeer was a bit frustrating, like the car *wants* to handle well, but can't quite get there.

While dreaming of custom suspension, I decided the easiest way was going back to stock. That turned out to be not so easy (to find 2014-2016 springs), so at the moment I have an awkward setup - used Bilstein B6 in the front that I found sold with 2014 springs installed, and stock struts + 2019 springs in the rear. Its a little funky, but temporary. Still on the lookout for some good used rear B6's and maybe some 2014-2016 rear springs.

Any suspension swap needs an alignment check, so out came the DIY toe box made of aluminum tubes, jackstands and fishing line! Also fitted some H&R Triple-C camber bolts. At first I used the regular style SPC bolts, but one of them felt weird going on and literally snapped off before even reaching 40 ft-lbs. Right on the package and online they list 65 ft-lbs as the correct torque. Never again. Installed the Triple-C's at 70 ft-lbs, which is recommended torque for Class 8.8 M12 bolts. the Triple-C's are marked 10.9, but it made me a little queasy torquing them to 90 ft-lbs since they're a bit funny shaped.

I was still waiting on tires at this point, so fit check of the Dekagrams and back the harsh riding Tarmacs for a while.'

Attached some photos of the toe box - pretty simple - loop the strings on the equal length marked tubes, just center the strings until you get equal measurements on both front and both rear wheel hubs. Then measure the toe on each side by measuring at the front and rear of the wheel. Do some math. It's no laser alignment system, but it makes it easy to do my own suspension work. I don't have turn plates, so it sometimes requires recentering the wheel by adjusting the tie rods another 1/8-1/4 turn in one direction.

IMG_8198.JPG IMG_8201 (2).JPG


Attachments

Last edited:
OP
Dialcaliper

Dialcaliper

Active member
Messages
756
Likes
1,262
Location
San Francisco Bay Area
Thread Starter #4
I started noticing a rattling noise closing the hatch coming from the spoiler. To my dismay I discovered that two of the upper mounting points had broken and detached! I was intending to set it back to stock, but the boy racer in me had come to like the little flippant rise. Fortunately for me, my wife called me on it, and then bought me a birthday present that I was on the fence about and couldn't quite justify shelling out for, especially in body color. My wife, ever the voice of reason convinced me that the gloss black actually looked really good with the Kona Blue, and I'm really happy with the result. Just flippant enough to raise a grin when I see it, but nowhere near as obvious as some modern hot hatches (looking at you, Type R, Veloster N...)

I had to first repair the current spoiler by carefully reassembling the pieces - fortunately they were not so far gone that I couldn't put humpty-dumpty back together with JB Plastic Bonder. While installing the Delta riser, I also used some VHB tape at the locations in the middle where none of the riser kits provide support like the stock one does.

Hatch now closes with a solid thunk.

IMG_8232.JPG


Attachments

OP
Dialcaliper

Dialcaliper

Active member
Messages
756
Likes
1,262
Location
San Francisco Bay Area
Thread Starter #5
Around November, I decided that I was tired of pushing the button to disable the rather invasive ESC every time I got in the car, and after poring over the wiring diagrams and the internet, by January I'd finally located all of the components to do a custom auto-button pusher! Since I'm running a tune and it doesn't matter as much, I configured it to turn on "Sport Mode" 30 seconds after starting the car to avoid the occupying the Sync with the progress-bar for "ESC-off"

At the same time, I took the opportunity to pull wires and correct some questionable wiring the previous owner did to install the little Kenwood Sub under the driver's seat, by installing terminals in the engine fuse box

I've done a full writeup on both.

Auto Sport Mode Module: https://www.fiestastforum.com/threads/diy-fun-mode-automatic-sport-mode-esc-off-circuit.30262/

Fusebox Guide: https://www.fiestastforum.com/threa...erminal-part-numbers-no-more-fuse-taps.30228/


Attachments

Last edited:
OP
Dialcaliper

Dialcaliper

Active member
Messages
756
Likes
1,262
Location
San Francisco Bay Area
Thread Starter #6
More custom work. Battery was getting old, so rather than just swap out for a new regular one, I got it in my head that I really wanted an AGM, and why not shave a 5-10 pounds with a 21lb Braille? Big enough to start a V8 it says, so no worries about cold starts or any of that. Could have gone lighter, but the 21lb had a convenient height close to the stock battery, and sat nicely in the stock battery tray with just a custom tie-down to keep it from dancing around. Compromises, remember?

Speaking of compromises, it just wouldn't do to have a battery holder for a lighter battery weigh more than the stock battery tie-down! Since I have a mill, and a day off work, I went to town! Speed holes make it go faster right? (Yes, it's two pieces that snap together, not milled out of a solid block...)


Attachments

OP
Dialcaliper

Dialcaliper

Active member
Messages
756
Likes
1,262
Location
San Francisco Bay Area
Thread Starter #7
Step one in the custom suspension journey. I decided on the sway bar setup I wanted - Hotchkiss in the rear was an easy install. Front sway bar on the other hand...

Off comes the subframe, in goes an Ultra Racing 22mm front bar (actual 7/8" dia) intended for a Mk6 Fiesta, but fits in fine. While the subframe was off, I took the opportunity to do the steering rack bushings in Delrin (AlextheMachinist), and pop in some VUDU lockdown locating pins on the reinstall. Nothing like a 6ft cheater bar for those torque-to-yield subframe bolts...

According to the math (which I'm still working on) The combo of 22mm front 22mm rear should put the chassis balance (oversteer/understeer) roughly similar to the 2014-2016 stock setup, but with less body roll, and a touch more oversteer than a 2016-2019 suspension setup (which oversteers less than the early cars). I initially installed the Hotchkiss alone and decided there was way too much snap oversteer

After putting everything back together, I poked my head under with the car running and discovered the Whoosh rear motor mount bushing was wobbling loose - it appears it wore so much that it enlarged the hole and the whole engine was loose - no wonder I had so much torquesteer! In went a replacement bushing set from Whoosh. Ron said the black "race" bushings should last longer with the heat, but that they are a service item that will wear out after a while


Attachments

Messages
363
Likes
478
Location
Indianapolis, IN, USA
#8
Great build - good to see a balanced approach for a family car that’s fun. And it sounds like your wife shares your whimsy for “Feisty.”

What’s next?


Messages
435
Likes
406
Location
Simi Valley, CA, USA
#10
So, scale of 1-10, honestly, how was dropping the subframe to get the front sway bar in? From your description of the results, that sounds pretty desirable.

I have Meister R Coilovers, the same 2-point trac bar as you and it seems like the front sway bar would be the only other thing I might want to do.


OP
Dialcaliper

Dialcaliper

Active member
Messages
756
Likes
1,262
Location
San Francisco Bay Area
Thread Starter #11
So, scale of 1-10, honestly, how was dropping the subframe to get the front sway bar in? From your description of the results, that sounds pretty desirable.

I have Meister R Coilovers, the same 2-point trac bar as you and it seems like the front sway bar would be the only other thing I might want to do.
I would call it a "6", where "1" is a rear sway bar install, 4 is a shock/strut/spring job and 8 is pulling a motor.

It was definitely a big job that you might do in a day but should plan a weekend for in case something goes awry - Like I had the subframe installed and the bolts inserted, and realized I left out the plastic boot that goes between the steering rack and the footwell so I had to drop it down again. Fortunately I caught it before actually torquing the bolts.

having either a transmission jack or a second person to help reinstall the subframe (and line up the steering column) was very helpful. Also, the 6 foot pipe cheater bar was incredibly helpful for the rear bolts, if a little awkward - it made it so I could do the 120deg torque and nudge to the final position using my foot :ROFLMAO:

If you have a 19mm front sway bar like I did, its worth it, and I'm really happy with how it turned out - the rear still steps out when I want it to, but it doesn't feel unruly like it did with just the rear sway bar installed.

On the other hand, if you've already got the later model 21mm bar, its kind of a tossup. The 22mm (7/8") bar is approximately 25% stiffer (compared with the 19mm bar, the 21mm is +50% and the 22mm is +85% - ballpark numbers). But don't install the 25mm Eibach bar, it is *wayy* too stiff (3x as stiff as the 19mm) and not even doubling up the rear bar (external sway bar + torsion beam stiffener) will not bring the oversteer back to stock behavior. It might be useful on a car that's going for serious underbody aero (full undertray front splitter + diffuser, not just a front lip and a wing)

I've got the 2-point track bar for now, but a Swave and Summit 4-point on the way once Ron gets his shipment, and some other projects in the works


Messages
435
Likes
406
Location
Simi Valley, CA, USA
#12
I would call it a "6", where "1" is a rear sway bar install, 4 is a shock/strut/spring job and 8 is pulling a motor.

It was definitely a big job that you might do in a day but should plan a weekend for in case something goes awry - Like I had the subframe installed and the bolts inserted, and realized I left out the plastic boot that goes between the steering rack and the footwell so I had to drop it down again. Fortunately I caught it before actually torquing the bolts.

having either a transmission jack or a second person to help reinstall the subframe (and line up the steering column) was very helpful. Also, the 6 foot pipe cheater bar was incredibly helpful for the rear bolts, if a little awkward - it made it so I could do the 120deg torque and nudge to the final position using my foot :ROFLMAO:

If you have a 19mm front sway bar like I did, its worth it, and I'm really happy with how it turned out - the rear still steps out when I want it to, but it doesn't feel unruly like it did with just the rear sway bar installed.

On the other hand, if you've already got the later model 21mm bar, its kind of a tossup. The 22mm (7/8") bar is approximately 25% stiffer (compared with the 19mm bar, the 21mm is +50% and the 22mm is +85% - ballpark numbers). But don't install the 25mm Eibach bar, it is *wayy* too stiff (3x as stiff as the 19mm) and not even doubling up the rear bar (external sway bar + torsion beam stiffener) will not bring the oversteer back to stock behavior. It might be useful on a car that's going for serious underbody aero (full undertray front splitter + diffuser, not just a front lip and a wing)

I've got the 2-point track bar for now, but a Swave and Summit 4-point on the way once Ron gets his shipment, and some other projects in the works
Interesting, ok, thanks or the input.

Doing full suspension was relatively straight forward (if not "easy") for me, just time consuming as I'm very particular about doing car jobs. And especially doing adjustable coilovers as I ended up doing the job multiple times to make the necessary adjustments and get it all where I wanted. It would just be sway bar for me, I don't have any desire to mess with the rack bushings.

Since I have a '17, I believe that gives me the later stock set up. I don't have the differences and sway bar sizes etc committed to memory. So I suppose I need to take your advice and weigh the actual potential benefits before I commit.

Thanks again


OP
Dialcaliper

Dialcaliper

Active member
Messages
756
Likes
1,262
Location
San Francisco Bay Area
Thread Starter #13
That's quite the "extension" you got there :sneaky:

I've always been happy with my powerflex bushings RMM. It has some extra shims to protect the polybush on the outside, it might be more resistant to wear than the whoosh ones?
https://www.powerflex.co.uk/product-details/Lower+Torque+Mount,+Fast+Road/13269.html
From my understanding, *any* urethane bushing is going to eventually wear out due to the heat in that location, right near the exhaust (and the cat). From what Ron could tell me (probably based on how many replacements he sells), the harder "race" bushings will last longer, but the only way to get one that will last more than 30-40k miles is to go with a rubber mount like the Vibratechnics


Messages
491
Likes
550
Location
Camden, NJ, USA
#14
From my understanding, *any* urethane bushing is going to eventually wear out due to the heat in that location, right near the exhaust (and the cat). From what Ron could tell me (probably based on how many replacements he sells), the harder "race" bushings will last longer, but the only way to get one that will last more than 30-40k miles is to go with a rubber mount like the Vibratechnics
can confirm that of all the research i did, the vibra-technics street RMM is really the only OEM (but better) replacement where you "set it and forget it". same goes for the tranny and passenger side engine mount with the exception of the turbo tech options (i don't think turbo tech makes a rear motor mount)


OP
Dialcaliper

Dialcaliper

Active member
Messages
756
Likes
1,262
Location
San Francisco Bay Area
Thread Starter #15
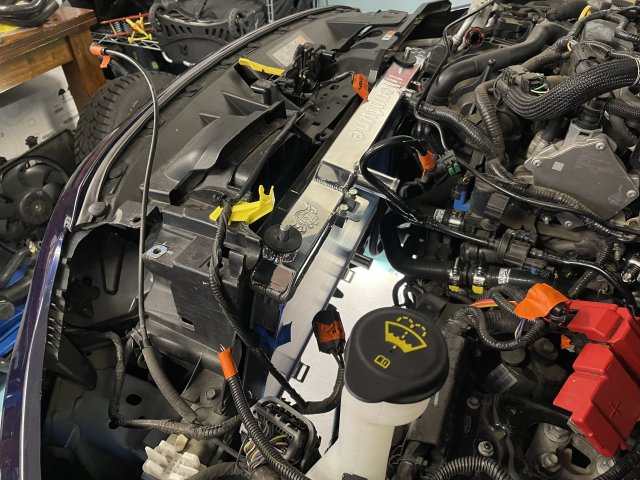
Another back-update: After a long backorder wait, my Mountune radiator finally came in (back in November/December)

First up, a coolant flush and rise, both with distilled water. Apparently the internet cannot agree whether its a good idea to use tap/hose water. I simply decided to do it this way, partly because the city water in our area is really hard and leaves deposits on everything.

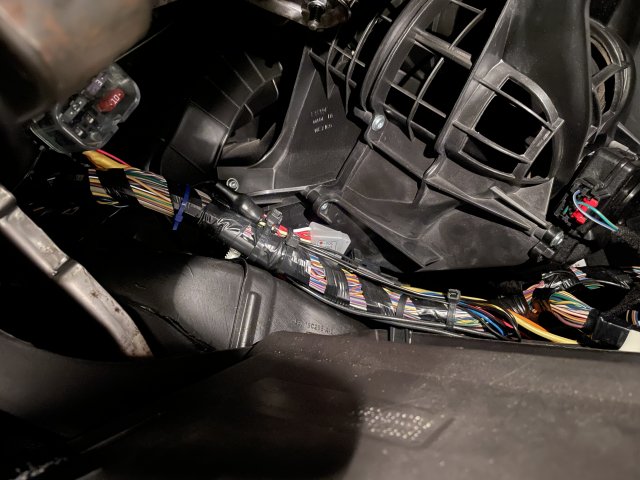
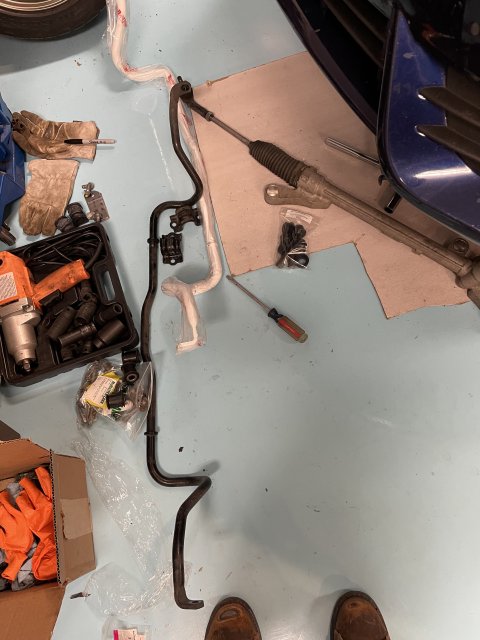
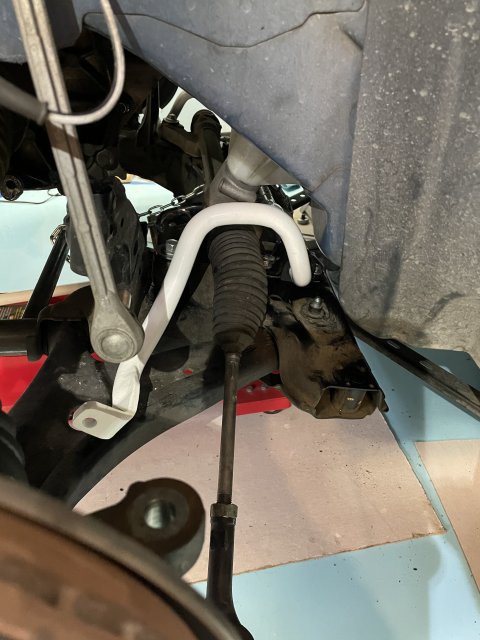
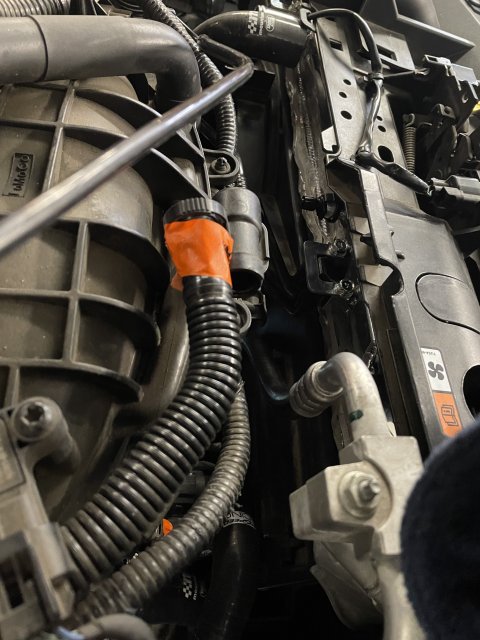
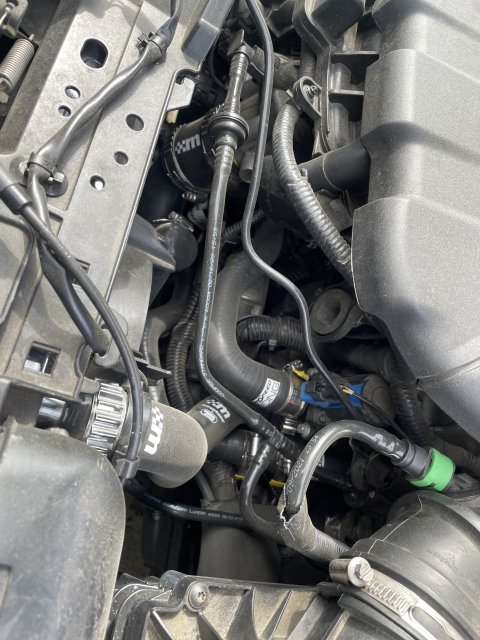
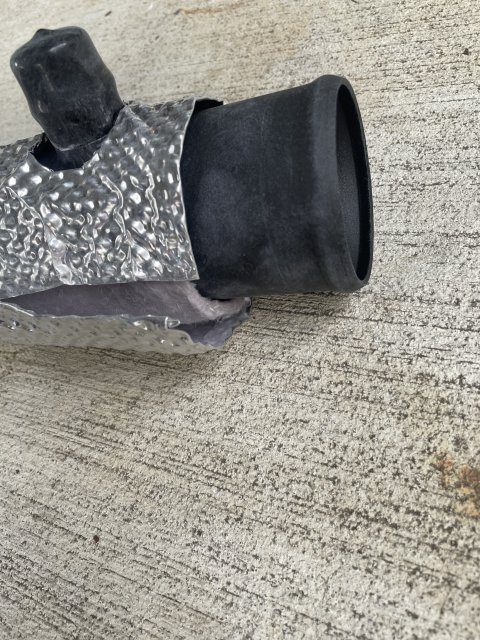
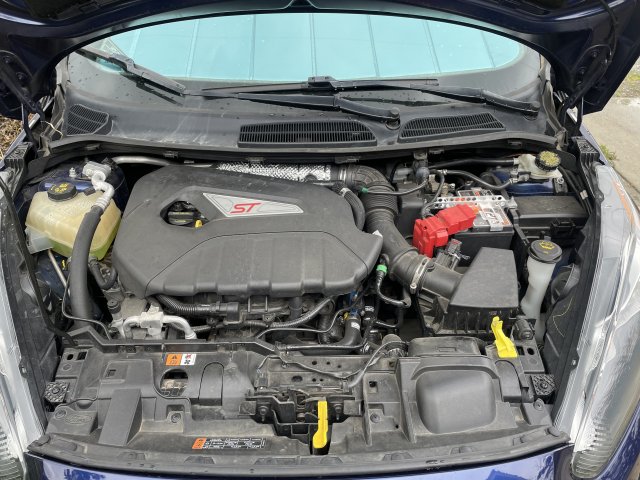
Next, because I like to make things more complicated, in addition to the radiator swap, I also decided to Silicone all the things! Mountune coolant hoses and a Pumaspeed "ancillary" hose kit that swaps out all the heater and oil cooler hoses. Don't have a ton of pictures, and most of it's not very visible from the top, which I actually don't mind.

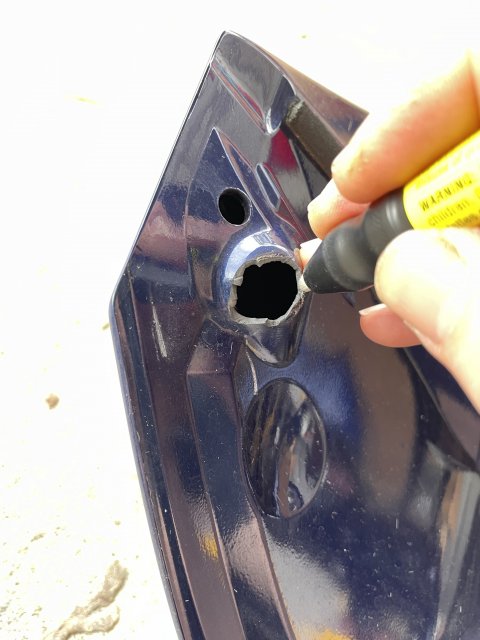
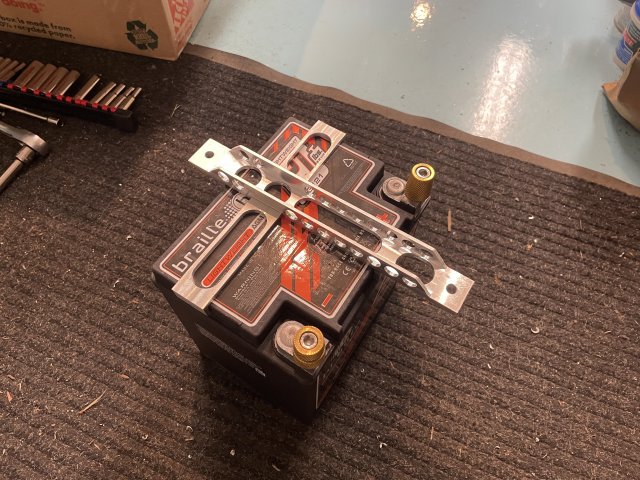
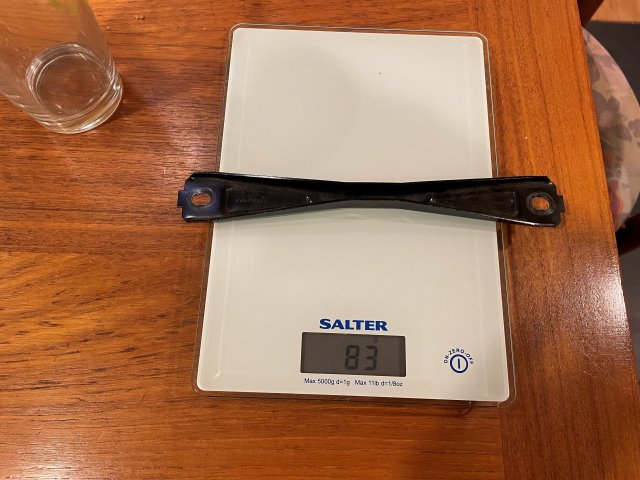
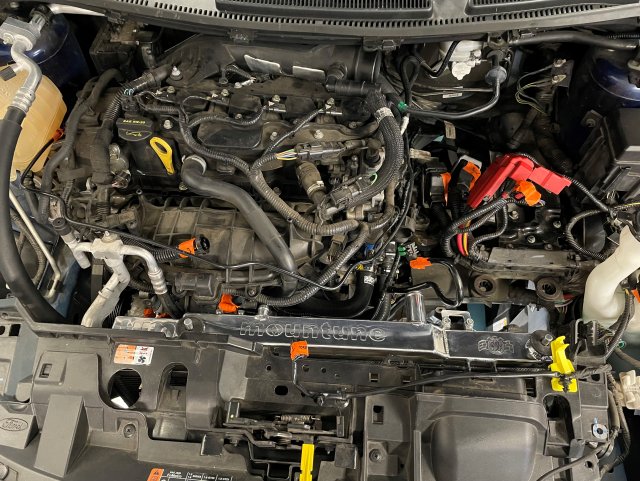
In the process, I discovered the Powerflex pineapple slice on the passenger side engine mount was toast, so while I had all the intake hoses and battery tray out, I took the opportunity to replace both the driver's side mount and transmission mount with the Powerflex "Black" race motor mounts, as well as Ron's ARP bolt replacement for the passenger side. At least with the raised idle on the Dizzy tunes, there is only a minor NVH increase at idle, which really doesn't bother me (or the family). I do need to stick down some trim pieces though. I thought about a fancier motor mount, but just decided to go with the Powerflex, at least for now.

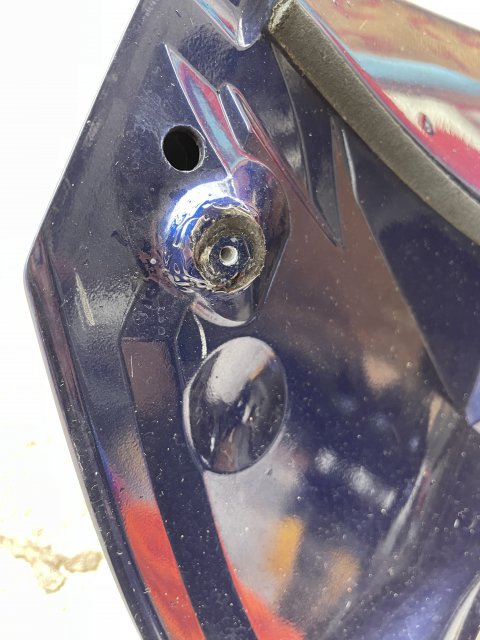
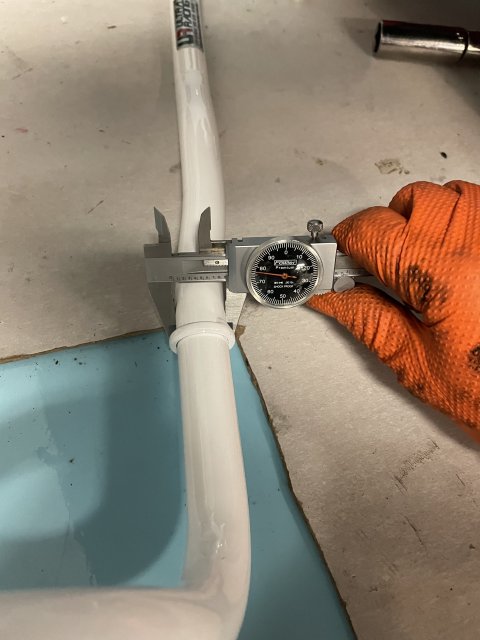
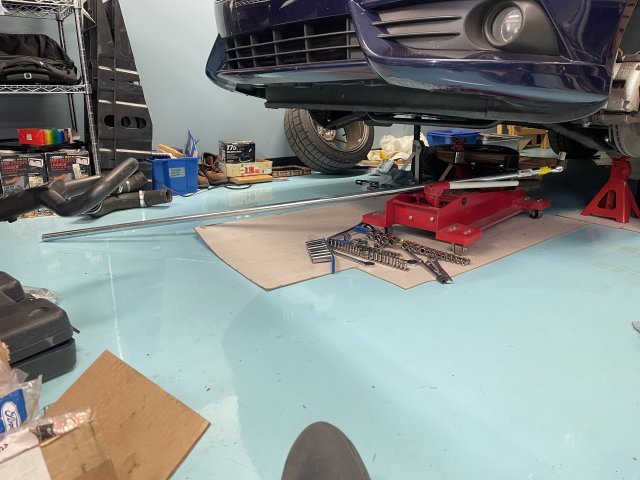
The Mountune radiator fit in great with one little annoyance. Fan out the bottom, radiator out the top. I first used the trick I found of cutting the blue plastic "cardboard", taping it back on with "buddy tabs" and waiting till the very last minute to pull the blue sheets out. By doing so, I managed to get the radiator in with nothing more than a tiny bump of bent fins on the condenser side. The one annoyance was that one of the lower tabs on my fan shroud wouldn't quite fit in the lower slot on the radiator no matter how much I cursed, so I did have to take a file and carefully open up the notch in the radiator tab a bit. Otherwise, everything was in the right place and fit well. Some of the fan bypass flaps don't open because of the A/C lines, but seems to be fine.

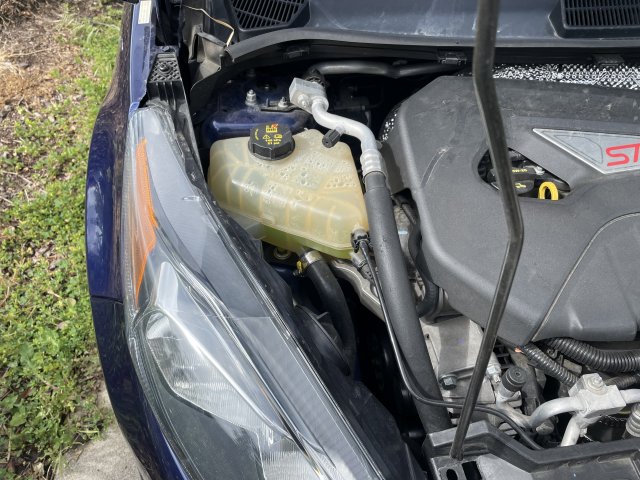
I used a Mishimoto vacuum purge/fill kit (rigged up to a vacuum pump instead of the compressed air venturi) to do both the flush and the coolant fill (both before and after the hose replacement), and I'm glad I did. First, it ensured that the system was sealed (held both vacuum and pressure), and also, after I started the car,even after purging the little valve on the radiator top, a bubble was left in the heater line, causing the heater solenoid not to open, and the car wouldn't make cabin heat. The solution turned out to be to first run the car to circulate the coolant, then once it cooled, go back and "burp" the system by pulling vacuum on the reservoir again until the coolant started to foam a bit. After a minute or so, a few tiny bubbles would make their way out. Did that a couple times, and then after I started the car, the heat came on perfectly.

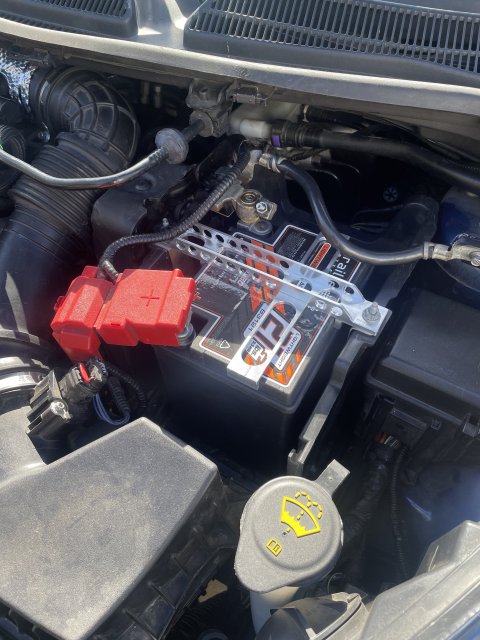
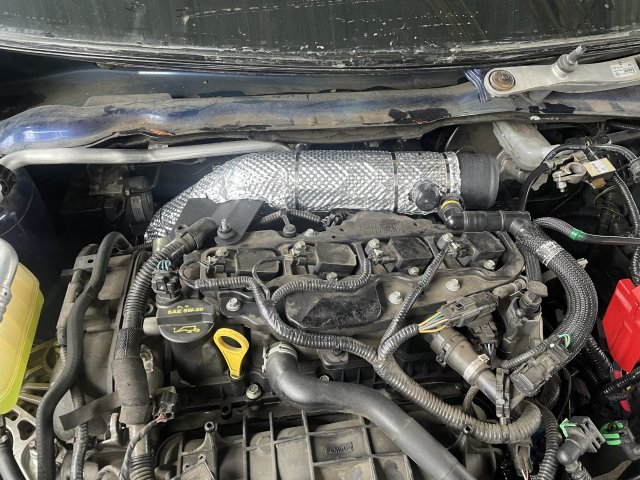
Once the radiator was in, the intake went back in, this time with an ST200 airbox I got used from the UK. I rigged up a flex duct and an ebay bellmouth then tucked it in over the intercooler hose with some foam tape to keep it snug with no rattling around. Goes well with the Mountune intercooler hoses I installed previously. I got ahold of 2014-2015 stock induction hose to go with the new Evap harness, which incidentally solved my idle stumble problem after fillup

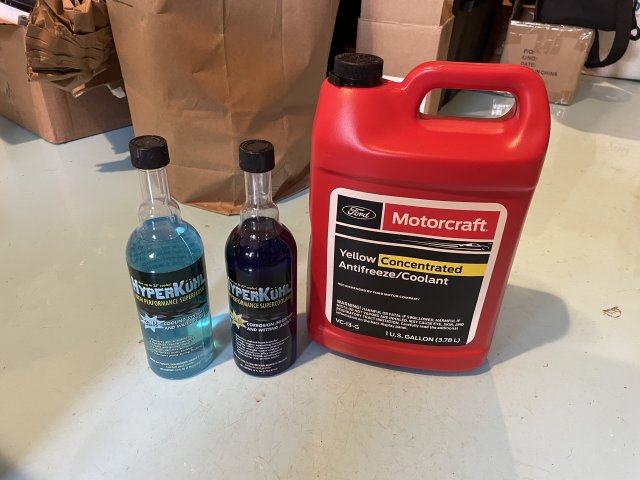
One last thing is that instead of water wetter, I found this stuff made by Applied Chemical Specialties called "Norosion". The version for Aluminum radiator systems has the catchy and slightly redivulous name "Hyperkuhl". At least according to the claims, its like Water Wetter, but with an additional anti-corrosion additive pack derived from industrial pure-water cooling systems. Having had some experience with said industrial systems as part of my work, I know that this kind of additive pack is a real thing (But I had not previously encountered this particular company), so I thought I'd try it out. Hard to say whether it really works to improve cooling, but it made me feel better about running a 25/75 coolant/water mix and still having adequate corrosion protection. It does also have a neat feature, which is a Ph indicator that starts out Blue and turns more red as the coolant goes acidic, telling you its time for a dose. Also, it turned my Motorcraft yellow coolant mix an interesting greenish-blue color. Neat, I guess.

The last thing that would be really worrying had I not done my research and vacuum/pressure tested the coolant system is that although silicone coolant hoses have advantages in heat resistance and rupture resistance, they are very slightly permeable to water and coolant vapor, so you should expect to occasionally have to top off your coolant, and you might notice a very slight coolant smell, even when the system is rock solid with no leaks. I've had to add about a cup of distilled water one or twice in the last 6 months (probably because I replaced *all* the hoses, not just the radiator hoses), but I don't mind since it has made me a bit better about checking fluids when I have the hood open.


Attachments

OP
Dialcaliper

Dialcaliper

Active member
Messages
756
Likes
1,262
Location
San Francisco Bay Area
Thread Starter #16
After the previous big job, a little custom one from January. I got a good deal on a new Ramair crossover tube, which according to Dizzy's intake testing, was one of the few mods he tested that actually had significant improvement. I chose keep the induction hose stock, partly because of Jason's test results, and partly to keep a bit of a more stock appearing engine bay. I chose all black coolant and intercooler hoses for the same reason. I don't really care for a lot of underhood bling. (Okay, yeah my battery tiedown is blatantly blingy, but I'm really proud if it, and I'll probably have it black anodized eventually). The heatshield is not stock if you're familiar and looking for it, but I like to think it's not obvious to the untrained eye.

One flaw in the data he took though is that he installed a Mishimoto induction hose before putting in the Ramair, so we'll never know if the results were because of both a little being restrictive, or just the crossover. Sticking with my choice for now.

https://dizzytuning.com/blogs/technical-documents/fiesta-st-stock-turbocharger-intake-testing

I also decided to do a custom heat shield on the Ramair crossover, partly to shield it theoretically from the hot exhaust manifold and partly to make it a little more OEM looking - I used corrugated aluminum heat shielding that looks very similar to the stuff lining the exhaust tunnel below the car. But I didn't stop there - Aluminum reflects heat because of its surface properties, but it conducts heat from convection just fine, so I bought some surplus fancypants insulation material to tuck inside it. Its called PyroGel XTE, and is basically mineral wool with imbedded silica Aerogel beads (the NASA invented stuff), and claims exceptional insulation properties. The 5mm layer I used is theoretically as effective as 3/4" black foam pipe insulation, but is apparently good to 1200F, which is hot enough to put in direct contact with a catalytic converter. The downside is its dusty as hell when cutting it, and will probably give you cancer if you breath it (not quite as bad as asbestos). It also dries out your skin if you touch it. P100 Respirator, safety googles and gloves are a must when cutting it.

You find cutoff sections on Ebay, or also buy it through http://www.buyaerogel.com/product/pyrogel-xte/ As far as I can tell, noone has made a serious effort to "fake" it, but I'd check where the vendor you're buying it from is.

Secured the whole thing with stainless steel zip ties. Basically I did it as a dry run to see if I can someday fabricate a shield for the exhaust manifold, turbo and/or cat (maybe using stainless shielding instead of aluminum)

Sadly, I didn't have time to run a really thorough test with and without the insulation layer to see if it actually made a difference in intake temperature. I definitely don't plan to take it off as it would be a pain to reinstall. But it was a neat project.


Attachments

Last edited:
OP
Dialcaliper

Dialcaliper

Active member
Messages
756
Likes
1,262
Location
San Francisco Bay Area
Thread Starter #18
What's with those clamps? Haven't seen them before.
Aha, If you are talking about the ones I used on the intercooler piping and radiator hoses (basically everywhere), I forgot to mention them. They are Murray Dual-Bead, and Murray "Turbo Seal" Constant-Tension clamps. They both have a wave-type inner double seal, and the constant tension types also have a ripple spring section that maintains tension under thermal expansion. They are (theoretically) a better seal than T-bolt clamps, and are rated for higher torque than regular worm clamps.

https://www.murraycorp.com/turbo-seal-constant-tension-clamps
https://www.turbosmart.com/product/murray-clamp-constant-tension-clamps-2-750-3-625/

They are not cheap, but can be had for <$10-15 each if you look around hard enough (ie Ebay and other sellers). Look them up by the Murray part numbers. They are also marketed (with a markup) by "Turbosmart", but they are the same clamps made by Murray. On the intercooler hoses, I have also backed them up with the clamps that came with the Mountune hoses. In some places where you see a yellow end, that's just me trimming the excess and adding some yellow heat shrink I had around so that I don't mutilate my arms trying to reach blindly down into the engine bay

The constant tension clamps don't go down below about 1-1/8" diameter, but the regular dual bead clamps go down much smaller (<3/4") and I used those throughout the coolant system where I couldn't get small enough constant tension clamps. I will not tolerate leaks!

From the Murray website:

1683140957642.png


Attachments

Last edited:
OP
Dialcaliper

Dialcaliper

Active member
Messages
756
Likes
1,262
Location
San Francisco Bay Area
Thread Starter #19
February is time for skiing! One flaw in running 200TW summer tires is that they really don't like cold. Since I just swap them in the driveway, I've kept a set of snow tires for every previous family car we've had (Two Honda Fits, and a Chevy Metro!). Feisty is no exception! For whatever reason, I decided I had my heart set on the newest Continental WinterContact TS870, which it turns out is hard to get ahold of outside of Europe. The one vendor I could find them from was in Germany, selling wheel/tire packages from Autech, so I paid far more than I should have for them, but I'm satisfied with my purchase. In Europe, they are categorized as "Central European" Winter Tires instead of "Nordic" Winter Tires. But here, at least on Tire Rack, they roughly map to the categories of "Performance Winter Tires" (CE) and "Regular Winter Tires" (N).

The main difference is really not just "performance" - that's actually a terrible descriptor dumbed down for us Americans. What it really means is that "Nordic/Regular Winter" tires are designed for "Scandinavian" winters and optimized for snow and ice traction at the expense of both dry and wet traction and stability. Central European or "Performance" Winter tires are instead designed for, you guessed it, winter in central Europe, which does require better snow/ice traction than an allseason or allweather tire, but more often also involves a lot of melting slush, rain, mud and intermittent dry roads. Now you know.

The reason I got my heart set on the Continentals, is that in all the european tire reviews, the TS 830-870 lines of tires consistently ranked near the top in the dry/wet/slush and handling manners, but through some sort of German faerie dust, somehow manage to hang with the average Nordic tire on ice, and outperform many of them on their own turf, snow! Because I live in California, and my snow tires age out in 6-10 years before actually hitting the winter wear bars, I wanted to get the best tires I could get my hands on. Also, the other people you encounter on ski trips here often don't know how to drive in snow, and are often driving overconfidently in blizzards in their SUVs and Subarus on crappy generic brand tire shop all-seasons. Someone should tell them that all-wheel-drive doesn't make your car steer or stop better on snow and ice! After having previously lived in the mountain west, and driven on real snow tires, there's really no substitute.

The other issue with the ST of course is ground clearance, and I wanted to make sure I had room for a brake upgrade, so I opted for 195/55R16 tires that are 1" larger than stock diameter. I did have to put low profile nuts and trim down the mudflap screws, but at least at stock ride height, I've had no rubbing issues at all.

I'm extremely satisfied with my choice. My only regret is not being able to get my hands on the SSR (runflat) version that exists in this size (which is a factory winter tire size in Europe for some BMW and MIni models). First, its a runflat tire that supposedly works on regular rims, which would be kind of nice not having to change a tire in the snow, but more importantly, being runflat tires, they have stiff sidewalls. Maybe not like true gravel tires, but stiffer than the typical wobbly snow tire. Because I also plan to use these tires for the infrequent road trips (usually backpacking) that involve dirt roads off the beaten path.

Because I ended up buying wheel and tire setup, I ended up with a set of bare extra wheels (16x6 OEM wheels from a Focus ZX3), so if anyone is interested in a cheap set of 16" winter wheels, let me know

Also, somewhere in March, I swapped out my Coilpacks for the Whoosh ones and regapped my plugs because some had either opened up a gap since the PO installed them, or they just weren't that close to spec in the first place


Attachments

Last edited:
Messages
435
Likes
406
Location
Simi Valley, CA, USA
#20
I know tons of people, especially here, run the Mountune rad, but something I noticed is the top most fan shroud flap was making contact with one of my coolant hoses, the one that comes from the bottom position on the expansion tank. It would get pushed into it by driving (incoming air) then stuck in that position and it managed to wear that hose a bit before I noticed it. I pulled the flap off and trimmed the corner to prevent the contact. Except then, even though it was easy to remove and replace, I must not have replaced it correctly because it fell off and is now gone :rolleyes:. Just something to look out for.


Similar threads


Top