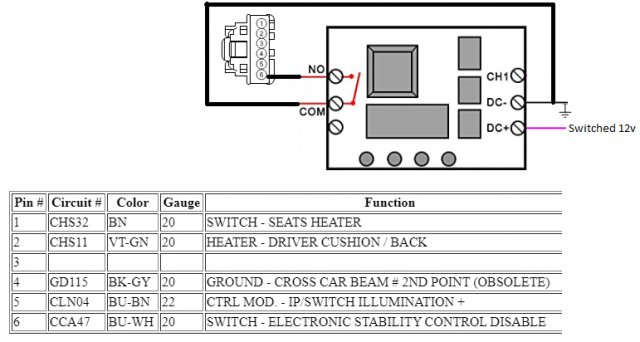
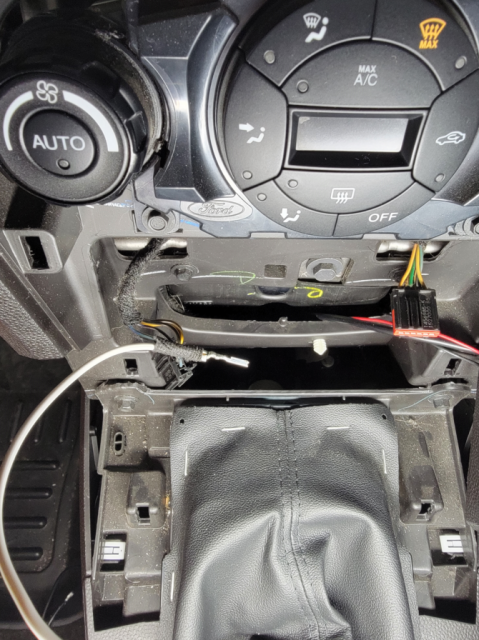
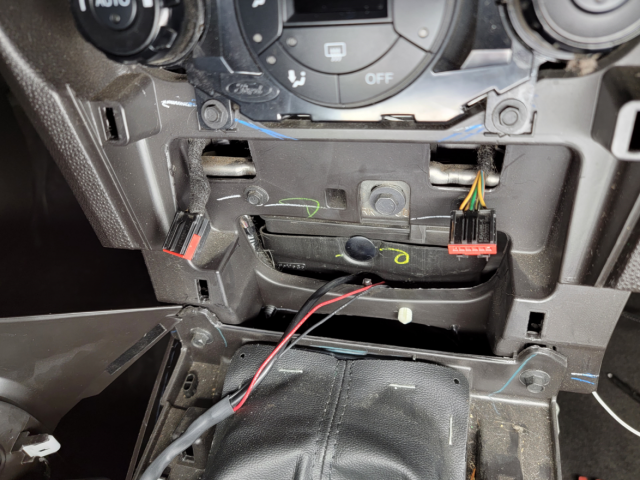
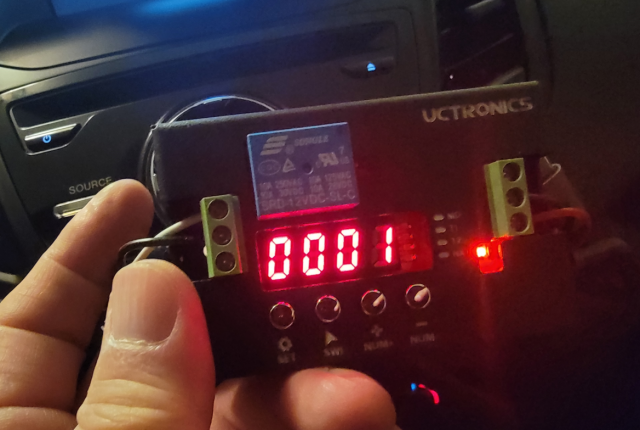
• Sign Up! To view all forums and unlock additional cool features

    Welcome to the #1 Fiesta ST Forum and Fiesta ST community dedicated to Fiesta ST owners and enthusiasts. Register for an account, it's free and it's easy, so don't hesitate to join the Fiesta ST Forum today!


Bull's street "go-kart" build

OP
Bull Run

Bull Run

Member
U.S. Army Veteran
Messages
244
Likes
398
Location
Chandler, AZ, USA
Thread Starter #61
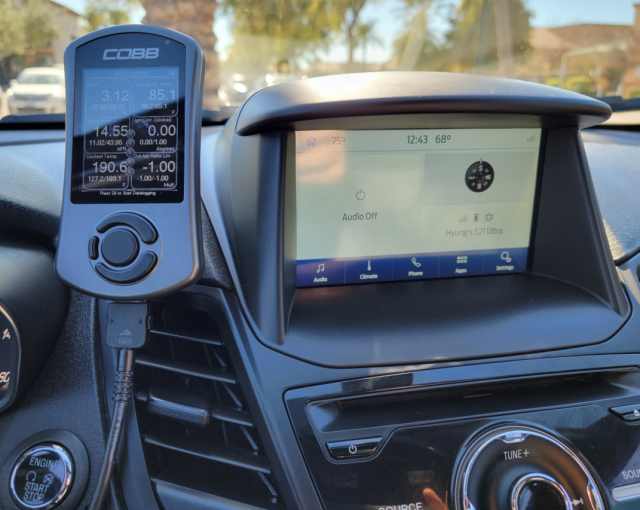
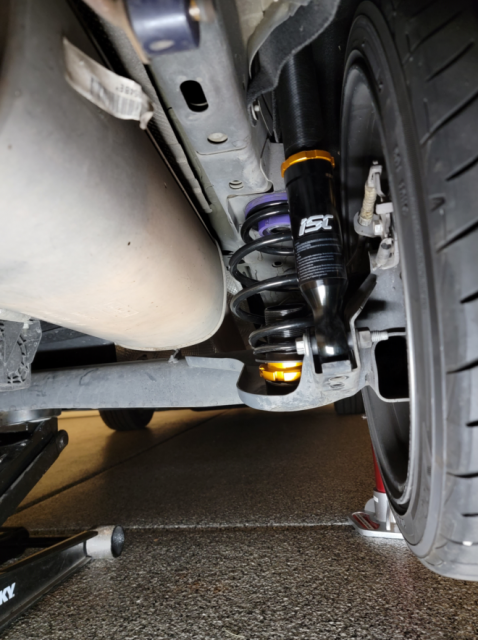
Ordered a set of aluminum steering rack bushings from "Alex The Machinist" to further improve the go-kart feel. Since I'll need to drop the subframe for the install and thus need an alignment, I ordered some chassis and suspension goodies (also added Whoosh ignition coils just because) to further improve handling.

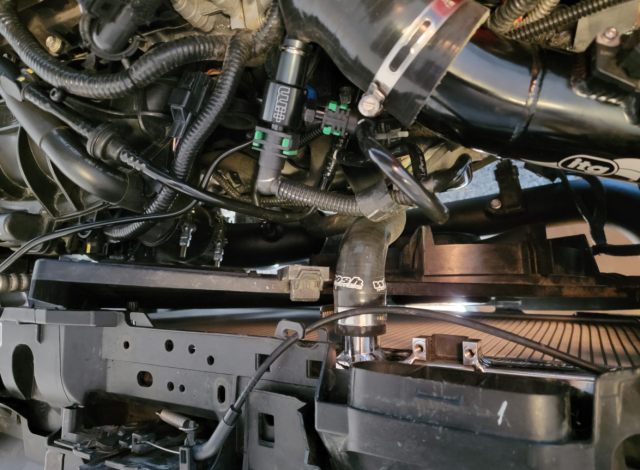
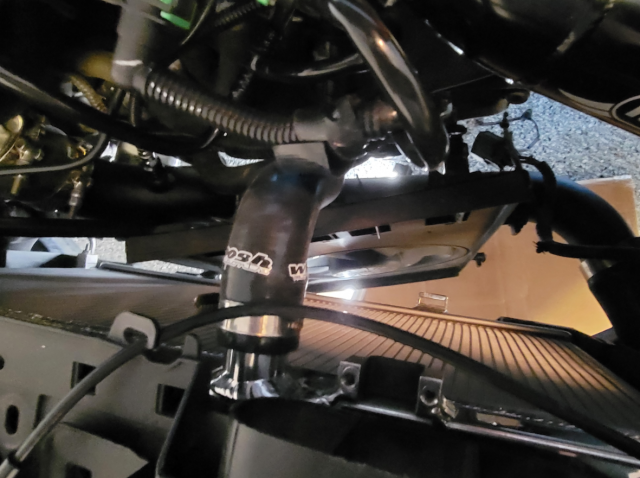
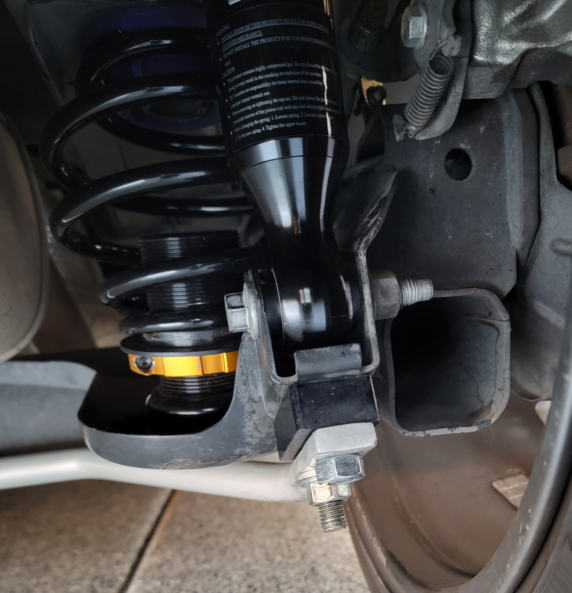
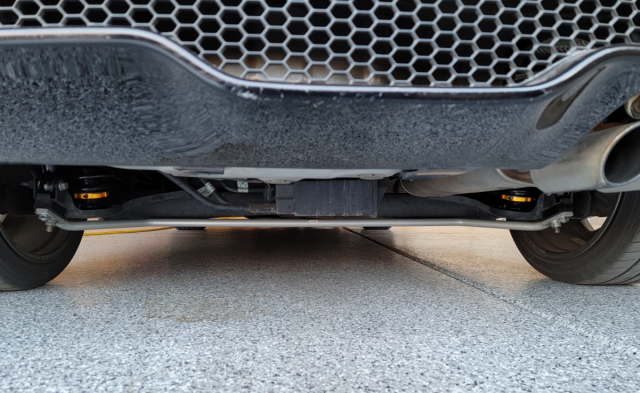
Whoosh 2-point trac bar and ignition coils were among the first items to arrive, so I went ahead and installed them as they don't require an alignment.

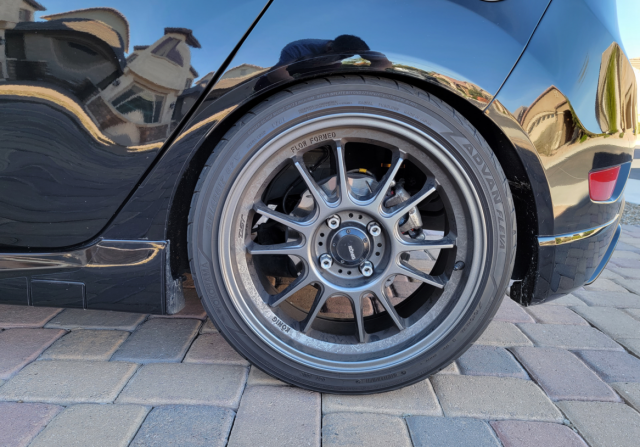
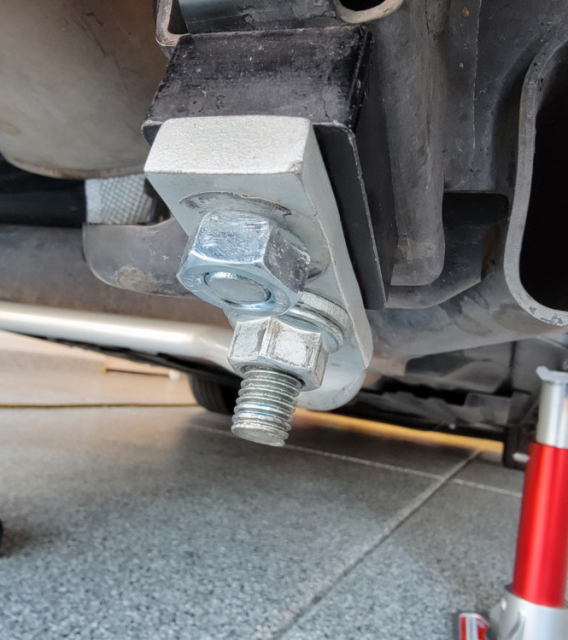
I went with the Whoosh 2-point trac bar because it clears the S280 hot-side pipe without issues and I don't have to worry about clearance for snow, etc. I'll have to say this is easily one of the best bang-per-buck upgrades as it significantly reduced torque steer on hard accelerations. Haven't had a chance to drive it on the highway yet, but I imagine it'll help with recovering from running over bridge expansion joints at a high speed by stiffening up the front end (had similar experiences with braces on the Mustang).

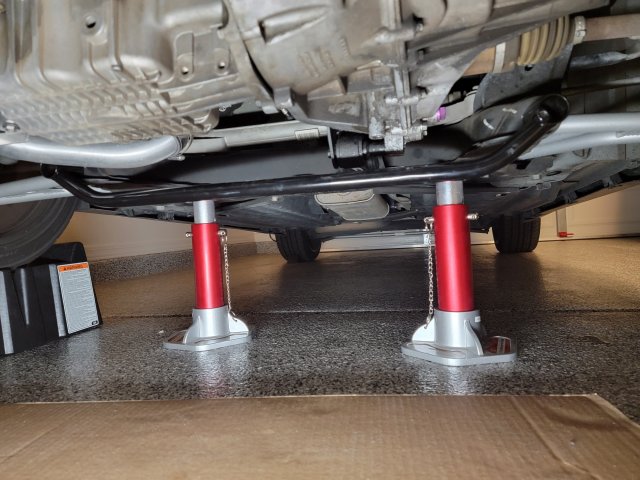
The install was easy with just two LCA bolts deal with. I forgot to order the new ones so I put some blue Loctite on them and torqued them to 115 ft/lb. I bought a set of Rhino car ramps in order to load the suspension before torqueing down the bolts. I placed a couple of jack stands just in case since this is the first time using these ramps, but they seem to be nice and solid.
1672156215735.jpeg
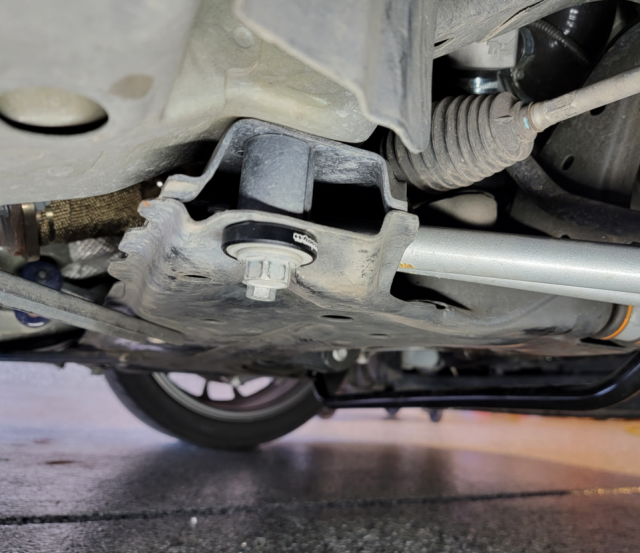
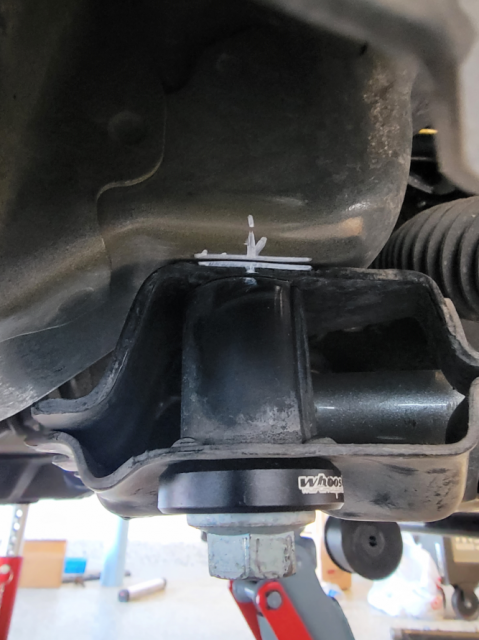
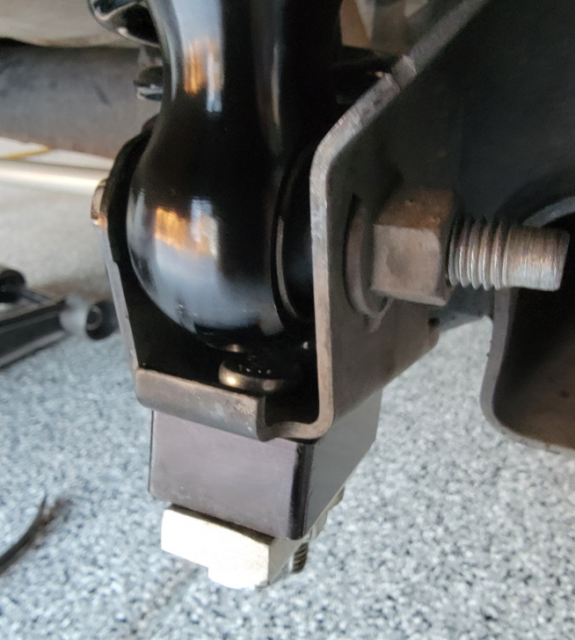
Took a picture of the front subframe bolts and you can see that they are not even close to being centered. I have a Whoosh subframe centering kit on hand to install later.
1672156665836.jpeg
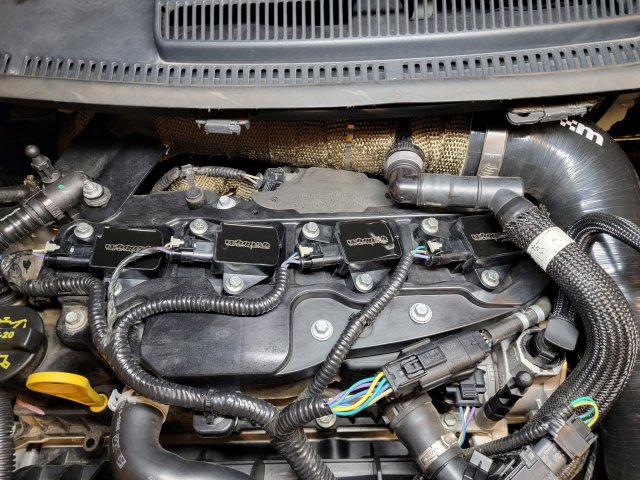
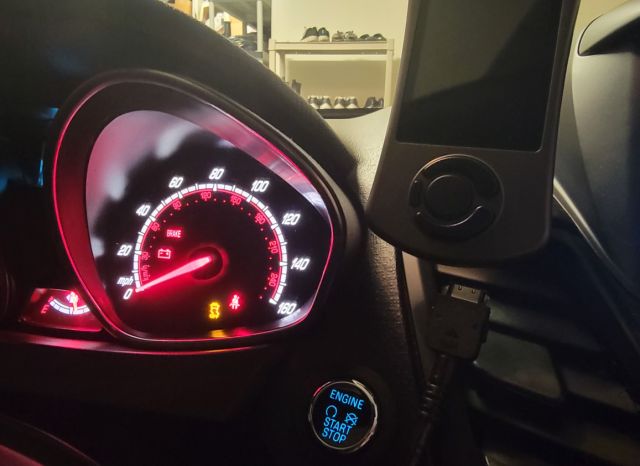
Installed Whoosh ignition coils without any issues.
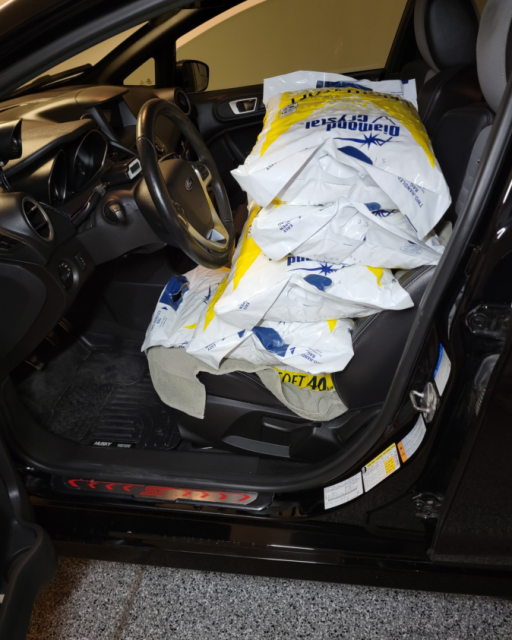
1672159129912.jpeg


OP
Bull Run

Bull Run

Member
U.S. Army Veteran
Messages
244
Likes
398
Location
Chandler, AZ, USA
Thread Starter #62
I've been happy with the Whoosh 2-point trac bar so far, so I added the 2-point trunk bar to go with it. Drove on the highway yesterday and the car feels more solid now, similar to what I experienced with braces on the Mustang.
1672642607293.jpeg
Reinstalled the plastic pieces after cutting the portion taken up by the bar. No issues with putting the trunk floor back on at the end.
1672642730517.jpeg


OP
Bull Run

Bull Run

Member
U.S. Army Veteran
Messages
244
Likes
398
Location
Chandler, AZ, USA
Thread Starter #63
After installing the Mountune radiator, OEM fan shroud pressed against Whoosh charge pipe, which then lightly pressed against the oil hose. I don’t want to revert to the OEM charge pipe for clearance since I’m using the upgraded one for the symposer delete and water/meth injection point.

I searched for aftermarket fans that’ll work with Fiesta ST and turned up empty. I found an article on Mishimoto’s Fiesta ST radiator R&D and saw that they initially tried their slim fan on a prototype but their fan wasn’t compatible with the fan controller. So this rules out using a Mishimoto branded fan.

I did additional research and saw that Pro Alloy Radiator comes with a Spal fan, with the label showing “VA08-AP10/C-23A 12V”, which is their model #30100385. I couldn’t find any posts from anyone using this radiator and fan combo, so I ordered the fan via Amazon and a connector off of eBay (1x Connector 2-way for Opel Radiator Fan 93803566) that’ll work with the fan controller (so it’ll be easy to revert to stock by leaving the OEM fan unmolested) on to test. I bench tested the fan by unplugging the OEM fan and plugging in the Spal unit and turning the AC, which kicked the fan on without any weird noises or smells.
1673660935239.png 1673660990584.png

I had less than 4K miles on the coolant since the radiator install so I opted to uninstall the OEM fan and shroud without disconnecting either of the radiator hoses. Removing the fan controller created enough room to wiggle the shroud by 90 degrees toward the driver’s side to be pulled straight down and out. Removing the charge pipe would’ve created more space if needed.
1673661031113.png 1673661059618.png

The Spal fan is light and not heavy enough to register on the bathroom scale, so my rough estimate is that it’s about a third or quarter of the weight of the OEM fan and shroud. I used a generic universal fan mounting kit to mount the fan, similar to how Mishimoto mounted their test fan. I’m not talented enough to fabricate my own radiator ducting so I used an expendable foam weatherseal to seal the gaps in front of the car to direct maximum amount of airflow through the condenser and radiator. This seal comes compressed and you can see in the pictures that it expends slowly to fill the gaps once installed.
1673661133242.png 1673661153692.png

With plenty of clearance, I repositioned the charge pipe so it’s no longer touching the oil hose and to avoid extra heat transfer. On the oil filter side, there’s about 3” of clearance between the oil filter to the radiator so a second fan can be installed on that if needed.
1673661364197.png 1673661212849.png

After the installation, I ran some test drives on the highway, residential roads (to simulate <25mph stop and go traffic), and extended idling with AC on and off while monitoring the coolant temp on the AP. As expected, saw no issues with the highway driving since fans are not needed at that speed anyways. Temperatures ranged between 186 to 190 degrees while driving around at 25mph or less. After the drive, I parked the car and let it idle for some time and it settled around 190 degrees as seen in the picture. Turning the AC on didn’t make any difference but the fan sped up and flowed more air, which confirmed that this fan can handle multiple speeds.
1673661255721.png

The ambient temperature ranged between 68-71 degrees during the test. The real test will be during the peak summer days with ambient temperatures in the high 110’s. I will report back when during the summer unless I experience some other issues sooner.


OP
Bull Run

Bull Run

Member
U.S. Army Veteran
Messages
244
Likes
398
Location
Chandler, AZ, USA
Thread Starter #64
Last couple of weeks were busy with installing various mods. The most significant one was the ISC Suspension N1 Street/Sport Coilovers along with Swave & Summit adjustable end links. I thought the stock suspension was decent enough but the coilovers improve the suspension like how a turbo upgrade improves the power curve. Even at the default damper settings, the car feels more planted without being harsh, corners flat, and greatly reduces the dive during braking. I'm looking forward to playing around with the adjustment to fit my driving style.

Install itself was easy but adjusting it to get the height I wanted took much longer.
1673661942893.png 1673661962648.png 1673661986563.png 1673662014999.png

I also installed a pair of rear adjustment extenders so I won't have to drop rear shocks or take the trunk trim off to make adjustments.
1673662091760.png

The sideview of the car as it sits now with around 1" of drop. It cleared nearby Home Depots parking lot speed bumps without issues but it's good knowing that I can raise it back up to or even a little higher than the stock height if needed.
1673662156503.png

1673662313035.png 1673662348151.png

Since I needed an alignment anyways, I also installed the Whoosh subframe centering kit. After supporting the subframe with a jack, I slightly loosened all the bolts and installed the centering kit one bolt at a time to center the subframe beforing taking it to the alignment shop.
1673662426186.png


Messages
435
Likes
406
Location
Simi Valley, CA, USA
#65
I’m finding the same with coilovers. Adjusting just right takes a while. I still haven’t gotten mine aligNed (tried this morning). But I finally got the height in the front set. I’ll probably go a tad lower in the rear but at least can get it aligned and not have to worry about that.


OP
Bull Run

Bull Run

Member
U.S. Army Veteran
Messages
244
Likes
398
Location
Chandler, AZ, USA
Thread Starter #66
Here are some minor mods:

We had some rain storms a few weeks ago and I never ended up not using the rear wiper during rear occasions when I do drive in the rain. So I installed a Whoosh rear wiper delete kit and the rear end looks much cleaner now. Added bonus is that it also removes the rear view obstruction from the wiper, which goes great with the wider upgraded rear view mirror. I debaged the car some time ago but added a "Fiesta" decal to see how it looks. I like the look and it doesn't hinder cleaning like a badge does, so I'm keeping it for now.
1673662650111.png

I also shaved the front grill while I had the bumper cover off for the Spal fan and weatherseal install, and Big Mouth clone uninstall, as I no longer need it with with the ITG intake. I may be a minority here but I really dig the "raw" look of the unpainted TB Performance Bar vs painted ones. I don't plan on tracking this car and I don't drive at crazy speeds so extra airflow shouldn't hurt, and I'll be installing the Seibon hood with TM style vents once it arrives to deal with the extra airflow.
1673663022988.png

I've been liking the front TB Performance bar so far, so I installed a rear version of it, although you can't really see it unless you drill holes in your rear bumper cover.
1673663313210.png
I checked the usual leak spots while the rear bumper cover was off. Sunroof drains looked OK but noticed that tapes covering various holes were starting to peel, with one of them partly uncovering one of the holes. I ripped them off and replaced them with some Gorilla tapes, which should last longer than the wimpy OEM ones.
1673663478557.png 1673663504402.png
I also took the opportunity to shave the rear grill, which makes it easier to clean.
1673663611883.png


OP
Bull Run

Bull Run

Member
U.S. Army Veteran
Messages
244
Likes
398
Location
Chandler, AZ, USA
Thread Starter #67
I’m finding the same with coilovers. Adjusting just right takes a while. I still haven’t gotten mine aligNed (tried this morning). But I finally got the height in the front set. I’ll probably go a tad lower in the rear but at least can get it aligned and not have to worry about that.
How much of a drop are you looking for? I have Powerflex rear coil pads on which is much firmer than the stock ones. The rear sits slighter higher (~1/4") but I'll keep the front as is now since I don't mind a little rake.


Messages
435
Likes
406
Location
Simi Valley, CA, USA
#68
How much of a drop are you looking for? I have Powerflex rear coil pads on which is much firmer than the stock ones. The rear sits slighter higher (~1/4") but I'll keep the front as is now since I don't mind a little rake.
Dunno specifically. In the range of where it was with my spec r springs but then maybe tailor a little to suit visual taste. I have the powerflex pads also. The coilovers came with them, I bought them here on the forums last year. I also had the powerflex pads with my springs.

The measurement I use to quantify height is just from the ground to the top of the fender well going through the center of the wheel (eye balling it).


M-Sport fan

9000 Post Club
Messages
14,122
Likes
6,762
Location
Princeton, N.J.
#69
After installing the Mountune radiator, OEM fan shroud pressed against Whoosh charge pipe, which then lightly pressed against the oil hose. I don’t want to revert to the OEM charge pipe for clearance since I’m using the upgraded one for the symposer delete and water/meth injection point.

I searched for aftermarket fans that’ll work with Fiesta ST and turned up empty. I found an article on Mishimoto’s Fiesta ST radiator R&D and saw that they initially tried their slim fan on a prototype but their fan wasn’t compatible with the fan controller. So this rules out using a Mishimoto branded fan.

I did additional research and saw that Pro Alloy Radiator comes with a Spal fan, with the label showing “VA08-AP10/C-23A 12V”, which is their model #30100385. I couldn’t find any posts from anyone using this radiator and fan combo, so I ordered the fan via Amazon and a connector off of eBay (1x Connector 2-way for Opel Radiator Fan 93803566) that’ll work with the fan controller (so it’ll be easy to revert to stock by leaving the OEM fan unmolested) on to test. I bench tested the fan by unplugging the OEM fan and plugging in the Spal unit and turning the AC, which kicked the fan on without any weird noises or smells.
View attachment 53408 View attachment 53409

I had less than 4K miles on the coolant since the radiator install so I opted to uninstall the OEM fan and shroud without disconnecting either of the radiator hoses. Removing the fan controller created enough room to wiggle the shroud by 90 degrees toward the driver’s side to be pulled straight down and out. Removing the charge pipe would’ve created more space if needed.
View attachment 53410 View attachment 53411

The Spal fan is light and not heavy enough to register on the bathroom scale, so my rough estimate is that it’s about a third or quarter of the weight of the OEM fan and shroud. I used a generic universal fan mounting kit to mount the fan, similar to how Mishimoto mounted their test fan. I’m not talented enough to fabricate my own radiator ducting so I used an expendable foam weatherseal to seal the gaps in front of the car to direct maximum amount of airflow through the condenser and radiator. This seal comes compressed and you can see in the pictures that it expends slowly to fill the gaps once installed.
View attachment 53412 View attachment 53413

With plenty of clearance, I repositioned the charge pipe so it’s no longer touching the oil hose and to avoid extra heat transfer. On the oil filter side, there’s about 3” of clearance between the oil filter to the radiator so a second fan can be installed on that if needed.
View attachment 53416 View attachment 53414

After the installation, I ran some test drives on the highway, residential roads (to simulate <25mph stop and go traffic), and extended idling with AC on and off while monitoring the coolant temp on the AP. As expected, saw no issues with the highway driving since fans are not needed at that speed anyways. Temperatures ranged between 186 to 190 degrees while driving around at 25mph or less. After the drive, I parked the car and let it idle for some time and it settled around 190 degrees as seen in the picture. Turning the AC on didn’t make any difference but the fan sped up and flowed more air, which confirmed that this fan can handle multiple speeds.
View attachment 53415

The ambient temperature ranged between 68-71 degrees during the test. The real test will be during the peak summer days with ambient temperatures in the high 110’s. I will report back when during the summer unless I experience some other issues sooner.
Spal makes some high quality cooling parts. [thumb]

I've always wondered why no one has never even tried higher CFM flowing fans for our rides. [dunno]


M-Sport fan

9000 Post Club
Messages
14,122
Likes
6,762
Location
Princeton, N.J.
#70
The sideview of the car as it sits now with around 1" of drop. It cleared nearby Home Depots parking lot speed bumps without issues but it's good knowing that I can raise it back up to or even a little higher than the stock height if needed.
View attachment 53422
Are you certain that the ISCs allow you to go to, or even above factory ride height??


the duke

Senior Member
Messages
935
Likes
887
Location
Cleveland
#71
Dunno specifically. In the range of where it was with my spec r springs but then maybe tailor a little to suit visual taste. I have the powerflex pads also. The coilovers came with them, I bought them here on the forums last year. I also had the powerflex pads with my springs.

The measurement I use to quantify height is just from the ground to the top of the fender well going through the center of the wheel (eye balling it).
Check control arm alignment to the floor. Do not exceed parallel.


OP
Bull Run

Bull Run

Member
U.S. Army Veteran
Messages
244
Likes
398
Location
Chandler, AZ, USA
Thread Starter #72
Spal makes some high quality cooling parts. [thumb]

I've always wondered why no one has never even tried higher CFM flowing fans for our rides. [dunno]
Do you have the CFM rating for the stock fan? 1038 CFM is the rating for this fan.


OP
Bull Run

Bull Run

Member
U.S. Army Veteran
Messages
244
Likes
398
Location
Chandler, AZ, USA
Thread Starter #73
Are you certain that the ISCs allow you to go to, or even above factory ride height??
I found out the hard when I initially set the front coilover length to be about 2" shorter than the OEM structs, since I was targeting around 1" drop. The car looked like a crossover afterwards. It took many turns to get the actual 1" drop. The rears are as low as they'll go (with PowerFlex spring pad rasising it about .5") so I suspect raising them to the max will set them higher than stock as well.


OP
Bull Run

Bull Run

Member
U.S. Army Veteran
Messages
244
Likes
398
Location
Chandler, AZ, USA
Thread Starter #76
I couldn’t find a way enable Sport or Track mode by default using Forscan. It doesn’t look like you can do it via a tune, either.

This leaves simulating a button press as an only option. While I found a couple of good write-ups for it, I found the simplest and cheapest way to achieve this.

Items needed:

· Programmable time delay relay module with case: $19.79 on Amazon. If you are tight on budget, you can get one without a case for $12.99.

· Wires, the length depends on where you want to store the module. The module only uses 5.5 milliamps while operating, so you can use thin wires to make routing easier.

· Common electrical tools to cut, strip, and crimp wires as needed.

· Optional but highly recommended is a multimeter or a test light to bench test the module and program before installing.
1674200613376.png
Procedure:

· Refer to the diagram. Pressing the button on the ESC button grounds pin #6 via pin #4, but any ground works.

· Splice a wire to the pin #6 wire and connect it to the NO (normally open) port of the relay module.

· Connect the DC- port to the ground.

· Connect the COM port to the DC-port to keep things simple.

· Connect DC+ to a switched 12V source.

· Power the module and program it. Use mode #3 (delay-on and delay-off) with a delay-on of 6 seconds and delay-off of 0.2 seconds. This simulates briefly pressing the ESC button 6 seconds after ignition-on that puts the car in the Sport mode. Set delay-off to around 4-5 seconds for the Track mode.

· Manually pressing the ESC button still works in case you want to turn off the Sport or Track mode while driving.

· Optional: enable power saving mode to automatically turn the display off and put the module into sleep mode after 10 seconds to save some precious milliamps. Pressing any button wakes it up.

Additional notes:
1674200664626.jpeg

· I bench tested the module by hooking it up to the car battery and used a multimeter to ensure that NO and COM ports only had continuity after delay-on, and no continuity after delay-off.

1674200720560.png 1674200917071.png
· Instead of splicing, I de-pinned pin #6, wrapped a thin wire at the back of the pin, re-pinned it, and taped up the added wire. I can quickly return to stock this way without needing “un-splice” the wire.
· While pin #6 was un-pinned, I tested that any ground works theory by turning on the ignition and briefing touching the pin to a nearby bare metal, which enabled the Sport mode and thus avoided the need to mess around with pin #4.
· I used enough wires to be able to program the module while sitting on the passenger seat. I coiled up the wires and stored the module above the passenger size footrest area afterwards.

The module counting down after turn on the ignition. A second left before the delay-on.
1674200815744.png
Afterwards, Sport mode!
1674200843974.png


OP
Bull Run

Bull Run

Member
U.S. Army Veteran
Messages
244
Likes
398
Location
Chandler, AZ, USA
Thread Starter #77
A shoutout for the Whoosh subframe centering kit. I installed it at the same time as when I was installing coilovers. Since I needed an alignment anyways, I loosened the subframe bolts and installed the collars one bolt at a time to let it center the subframe, similar to what I did it for the Mustang’s rear subframe.

I dropped the subframe yesterday to install steering rack and sway bar bushings. The plan was to lightly tighten the bolts first, then wiggle the subframe to line up with alignment marks drawn prior to the drop before torquing them down. Wiggling wasn’t needed as the subframe centered itself as I tightened the bolts.
1674347005819.png


OP
Bull Run

Bull Run

Member
U.S. Army Veteran
Messages
244
Likes
398
Location
Chandler, AZ, USA
Thread Starter #78
Recent updates

Regarding ISC Coilovers
  • It passed the speed bump test with about an inch drop.
  • However, front tires lightly rubbed during moderate to hard turns, probably due to them being wider than stock (215/40/17).
  • Raising the car by about ¼ inch resolved the tire rubbing issue.
  • Current height is ~23.5” from the ground to fender for the front, ~23.75” for the rear. Installing Powerflex rear spring pads raised the rear by ~1/4 in on stock springs so I replicated the same for the coilovers since I like a slight rake.
1675006956567.png 1675006974701.png
Regarding front sway bar end link adjustments
  • IMHO, adjustable end links are a must when lowering the car, nice to have even on a stock-height car if you want to maximize the handling.
  • Salt pallet bags for water softeners work great for simulating the driver weight when you are adjusting the end links for zero-preload by yourself. In my case, I used five 40 lbs bags since I weigh about 200 lbs.
1675007015298.png
Regarding ISC coilovers and Whiteline rear sway bar
  • I had to uninstall the sway bar as its rear mounting bolts interfered with the ISC coilovers’ rear dampers as they have a thicker bottom compared to stock. I suspect other sway bars that use the same mounting point will have same issues.
  • I really wanted to reinstall the sway bar, especially with having installed the Powerflex front sway bar bushings earlier.
  • Went to a local AutoZone and found a M12-1.50 wheel stud (Dorman 610-360.1) that looked like it’ll work.
  • Had to get matching nuts from Lowes as M12 fine-pitch nuts are apparently not common and neither AutoZone nor Home Depot carried them. Lowes has a much larger fastener section (at least the one by my house) compared to Home Depot, so I’ll start going there first for my fastener needs.
  • Dorman wheel studs are shorter than the existing sway bar mounting bolts. There was barely enough thread for the nuts without the washer. I used blue threadlocker on all bolts as a precaution and will keep an eye on them.
1675007045661.png
1675007064372.png
1675007084840.png
1675007143261.png
1675007161277.png


M-Sport fan

9000 Post Club
Messages
14,122
Likes
6,762
Location
Princeton, N.J.
#79
I have also found that Lowes beats Depot for small hardware selection, but, my local True Value and Ace stores beat them BOTH in that regard! [thumb]

IF all else fails, I am less than a half hour from the main McMaster-Carr store/headquarters where I currently reside (but they are difficult to deal with, IN PERSON [:(]). [wink]

What lug nuts are you using in those pics above where you were displaying the drop of the ISCs??


Top