• Sign Up! To view all forums and unlock additional cool features

    Welcome to the #1 Fiesta ST Forum and Fiesta ST community dedicated to Fiesta ST owners and enthusiasts. Register for an account, it's free and it's easy, so don't hesitate to join the Fiesta ST Forum today!


INSTALL GUIDE: European headlight installation with LED headlight bulbs and LED running light wiring

Messages
186
Likes
50
Location
Los Angeles
The only issue with the 90 degree plugs is that the wiring would have to come out the bottom of the headlight, so I'd stay away unless you want to drill into the light.
True, that sounds unnecessary. I'm thinking that maybe I'll order up a Morimoto D2H kit when the time comes. Truthfully, I've also been considering trying one of the newer style XenonDepot LED kits (the black housing ones). I know before you didn't have the best of luck with the 2strokes, but I'm wondering if maybe just the weight of the bulb base was the biggest issue with them. Also the LED assembly on each is different, and it's clockable on the XenonDepot bulbs, which might give a different overall output (for better or for worse). Not sure yet though. Maybe I'll order both lol, LEDs to experiment and contribute to the thread, and HID for the long term.

leveling knob on headlamp switch


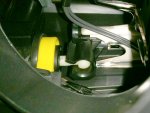
nice work on the d2s > h7 adaptation. It's probably earlier in this thread somewhere from when you first tried HIDs but where did you end up mounting the ballasts?
I was actually wondering about this. When I first heard that these used electric leveling, I was thinking along the lines of higher end headlights that auto adjust when you start/drive the car. Seems like all the leveling motors do in these (being European) are adjust to different presets based on the amount of load you have in the car.

Still very interested to see if any other progress is made with regard to utilizing the leveling motor. Awesome stuff you guys are doing. I wish I was electrically inclined so I could tinker and add to the information available :/.

-Matt


Messages
186
Likes
50
Location
Los Angeles
Decided to go ahead and order a set of the Xenondepot Xtreme H7 LEDs. Still need to order some retrofit boots for the back of the housings (we need 85mm boots for these housing correct?). I'll do a bunch of comparison pics of bulb figment, cutoffs and distance lighting once I receive everything and install. I'm cautiously optimistic, but we'll see in due time. Worst comes to worst, we'll know that these LEDs are no better than the 2Strokes in these housings lol.

-Matt


OP
OffTheWall503

OffTheWall503

1000 Post Club
Messages
1,991
Likes
456
Location
Memphis, TN
Thread Starter #424
Messages
186
Likes
50
Location
Los Angeles
What do those bulbs look like? My concern with the LED bulbs is with the 2Stroke bulbs the output was from the sides of the bulb rather than all around like halogen or HID bulbs.

And you need 75mm boots. I recommend these:

https://www.theretrofitsource.com/accessories/build-materials/rubber-housing-caps.html
Here's the link to the lights mentioned: http://www.xenondepot.com/H7-Xtreme-LED-kit-p/xt-led-h7.htm

These are the 'updated' version, or 2.0 if you will, of the Xenondepot lights. The original, or 1.0 version, looked like this: http://artoflightindustries.com/xd/images/design/camryreview/15camryled-4.jpg.

Since these LEDs utilize the copper heatsinks on the rear for cooling as opposed to fans, I'm hoping that the overall weigh will be less and distributed a bit more evenly. It's true that the the LEDs do still suffer from the side orientation of the chips as opposed to full 360 degree coverage of halogens or HIDs. The only difference I'm banking on with these are: the inclusion of of 4 chips side by side as opposed to single chips, or clustered chips in one specific spot, and the ability to clock the end of the bulb change which two directions the chips project towards To note, XenonDepot's LEDs have been used pretty regularly by other users here on the forums in the stock reflector housings (including myself, I have a set of H11 version 1.0 LEDs in my closet as I write this), and I will be the first to attest that they they did not overcome the traditional problems with drop in LED headlights. I've no doubt that they will still be less ideal than HIDs, but I figured I'd give them a shot none the less just to see how they work out hehe.

And thanks for the link for the boots, I'll be ordering some tomorrow!

-Matt


OP
OffTheWall503

OffTheWall503

1000 Post Club
Messages
1,991
Likes
456
Location
Memphis, TN
Thread Starter #426
That's how the 2Stroke bulbs look. The biggest issue with that the output was spotty and couldn't see a lot in the foreground. But maybe your bulbs will be different, I'm anxious to hear your opinion and impressions.


Messages
186
Likes
50
Location
Los Angeles
That's how the 2Stroke bulbs look. The biggest issue with that the output was spotty and couldn't see a lot in the foreground. But maybe your bulbs will be different, I'm anxious to hear your opinion and impressions.
Yea, I'm worried the same will be true. We shall see! I'm likely going to order the D2R kit from TRS, and the adapters you linked just so I'll have it on hand and ready to go. Your D2S bulbs working out well? Any problems with them becoming misaligned or the bulbs becoming loose after driving?

I'm not planning on trying any different bulbs until I have my aiming issue resolved first. Just drove ~150 miles tonight and I can tell my lights are aimed way too high. Given that I couldn't get the passenger side to aim any lower than it is right now when I first installed the lights, I might have to pull the headlight off and see if anything is broken/out of place inside the housing.

-Matt


brbauer2

Active member
Messages
766
Likes
530
Location
St. Charles
Given that I couldn't get the passenger side to aim any lower than it is right now when I first installed the lights, I might have to pull the headlight off and see if anything is broken/out of place inside the housing.

-Matt
Check my post up a little about getting the leveling motors to run. I'll try and get a picture to show the position when retracted.

Sent from my OnePlus 3


Messages
186
Likes
50
Location
Los Angeles
Check my post up a little about getting the leveling motors to run. I'll try and get a picture to show the position when retracted.

Sent from my OnePlus 3
Hmm, might have to check that out. How are you running power to the motor? Moving pins around in the harness, or are you powering it externally?

-Matt


brbauer2

Active member
Messages
766
Likes
530
Location
St. Charles
Hmm, might have to check that out. How are you running power to the motor? Moving pins around in the harness, or are you powering it externally?

-Matt
I don't have mine installed yet, just running power from a AC/DC converter. I'll figure out a wiring scheme if I can get them to extend.

Sent from my OnePlus 3


edit

Played around a little bit more and can't for the life of me figure out how to reverse the motor to get it to extend. The motor has 3 wires going to it and since the Euro switch has # positions I have to believe it is a stepper motor of some kind. Without tearing out the full wiring and having a working euro switch I don't think I can get it working.

Here's the fully retracted positioning.
2017-02-14 04.45.17cropped.jpg
The black mark on the white piston was about 1/2 in. extended before retracting.


Messages
186
Likes
50
Location
Los Angeles
Nice, In this case, does fully retracted mean the bulbs are aimed as high they can be, or as low as they can be? I'm thinking maybe I should use this method to bottom out both lights (if retracted means low aim) and the slowly raise them up manually to a correct height.

-Matt


brbauer2

Active member
Messages
766
Likes
530
Location
St. Charles
Retracted pulls the bottom of the projector towards the back of the housing and lowering the aim.

I would first check to see if yours are at the same extension/retraction before bottoming them out. Since I don't have mine installed I can't see if the aim is too low to properly adjust with from the back of the housing.


Messages
186
Likes
50
Location
Los Angeles
Gotcha, thanks for the input!

Edit: just ordered Morimoto D2H 35w kit w/ an H7 harness, as well as a few sets of boots and grommets from TRS. Also ordered a set of the H7 to D2S adapters from the eBay link posted previously. Lots of lighting stuff on the way! Lol

-Matt


OP
OffTheWall503

OffTheWall503

1000 Post Club
Messages
1,991
Likes
456
Location
Memphis, TN
Thread Starter #434
Yea, I'm worried the same will be true. We shall see! I'm likely going to order the D2R kit from TRS, and the adapters you linked just so I'll have it on hand and ready to go. Your D2S bulbs working out well? Any problems with them becoming misaligned or the bulbs becoming loose after driving?

I'm not planning on trying any different bulbs until I have my aiming issue resolved first. Just drove ~150 miles tonight and I can tell my lights are aimed way too high. Given that I couldn't get the passenger side to aim any lower than it is right now when I first installed the lights, I might have to pull the headlight off and see if anything is broken/out of place inside the housing.

-Matt
No issues so far, they are working well.

I'm curious to see what you guys figure out for the adjustment motors.


Messages
186
Likes
50
Location
Los Angeles
Alrighty, so I found my aiming problem.

Passenger side:


For comparison, driver side:


So the aiming mechanism isn't inserted into the wedge attached to the projector side. The good news: Both the white aiming mechanism and the black receptor pieces are intact and not broken. The bad news: It's a really tight fit and I'm afraid that puting too much pressure on any of the internal parts will break the plastic. Any thoughts/ideas? ;D

-Matt


brbauer2

Active member
Messages
766
Likes
530
Location
St. Charles
That looks to be about where mine were extended to before I got the motor to retract.

I would use a hair dryer to heat things up carefully and then a flat screwdriver to widen that opening carefully to get it back into place.


Messages
186
Likes
50
Location
Los Angeles
Aaaaand fixed:


I ended up using an elongated pair of curved needle nose plyers, pried the black piece apart ever so slightly, then used the aiming mechanism to extend the white piece forward until it slipped into the slot. Reinstalled and everything seems to be good. Was able to aim both of the lights down without issue. Going to wait until it is dark out, then I'm going to go drive to my local Target and use their parking lot/wall to do a proper aim.

-Matt


OP
OffTheWall503

OffTheWall503

1000 Post Club
Messages
1,991
Likes
456
Location
Memphis, TN
Thread Starter #438
That's what I was thinking. Seems like the best way to go.

Honestly it probably got popped out during transit. I'm curious now and want to know if mine are doing this, also.


Messages
186
Likes
50
Location
Los Angeles
XenonDepot LEDs arrived today. Not going to be installing them until my order from TRS arrives since I need the dust covers. Here's some comparison pics between the version 1 and version 2 of their LEDs.

Version 1 is the LED with the silver heatsink ribbon (Version 1 is an H7 since I used them in the stock reflector housings):


Close up of the chips themselves:


Still think that they will be less than stellar, but I'm curious to see how they turn out regardless.

-Matt


OP
OffTheWall503

OffTheWall503

1000 Post Club
Messages
1,991
Likes
456
Location
Memphis, TN
Thread Starter #440
If you could share comparisons and your opinions between the two types, I'd really like that. I do like the possibility of having LEDs due to longer service life and less wiring and sealing mumbo-jumbo.


Top