• Sign Up! To view all forums and unlock additional cool features

    Welcome to the #1 Fiesta ST Forum and Fiesta ST community dedicated to Fiesta ST owners and enthusiasts. Register for an account, it's free and it's easy, so don't hesitate to join the Fiesta ST Forum today!


Just ordered Depo Euro replica projectors and HID's: Ongoing info, discussion and results

OP
danbfree

danbfree

3000 Post Club
Messages
3,510
Likes
1,196
Location
Tigard, Oregon, USA
Thread Starter #41
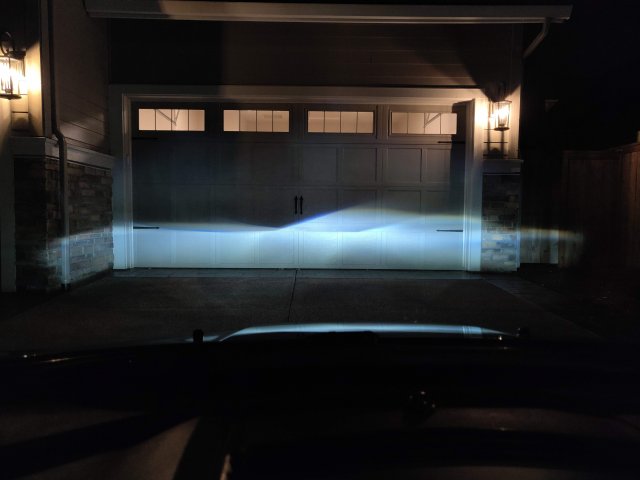
Haven't had the chance to get good night shots yet, but looking much better with less glare!

LED on left HID on right... Funny how the LED's rated for 6000k are obviously much whiter than the HID's rated at 5500k, and one good reason I swapped too.
IMG_20190427_152705.jpg

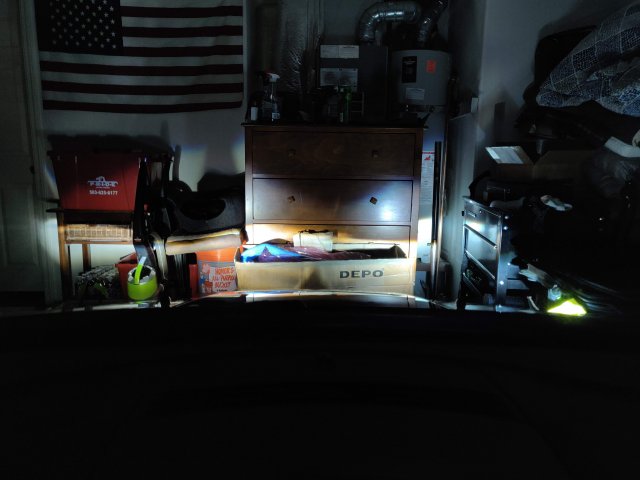
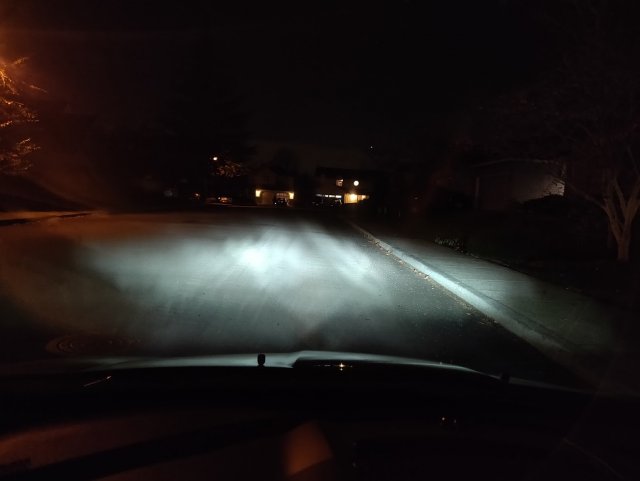
Again, hard to tell but LED's much more white and less glare than HID (on bottom)
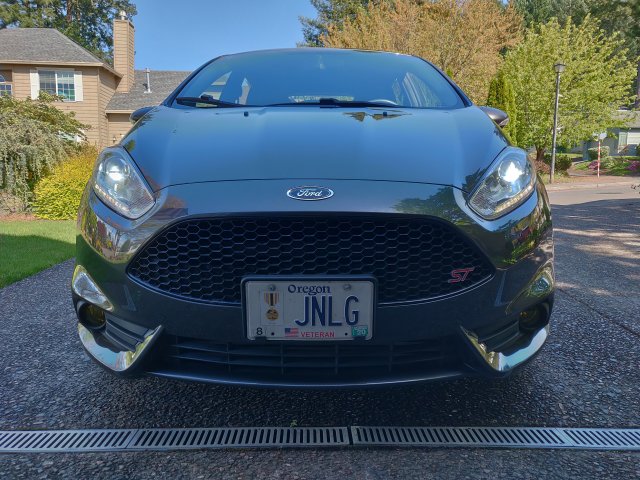
IMG_20190427_154811.jpg
IMG_20190425_072618.jpg


OP
danbfree

danbfree

3000 Post Club
Messages
3,510
Likes
1,196
Location
Tigard, Oregon, USA
Thread Starter #44
Those look pretty good πŸ‘πŸ»
They look to have a significant amount of blue...trick of the camera?
The Katana LED's are about 6250k, not ideal and indeed a little blue, but they were brand new and seem a little whiter now and also the cell camera could have added some of the blue look... but they are by FAR the best output available in terms of output and light spread under $95 and they cost HALF that!


OP
danbfree

danbfree

3000 Post Club
Messages
3,510
Likes
1,196
Location
Tigard, Oregon, USA
Thread Starter #46
And how are the led drls set up right now? You did not make/find a harness yet, correct (to have high/low options)?
I have the LED brow set as low with the single pin move, and yes, would have to do the full harness to get full DRL low/high automatically... As of now I can just switch to parking lights and it comes on low and also come on low with headlights, either in manual or auto headlights. Essentially it splits the combo turn signal/marker into turn signal bulb and marker as brow separately.


Messages
37
Likes
28
Location
Milwaukee, WI, USA
#47
I have the LED brow set as low with the single pin move, and yes, would have to do the full harness to get full DRL low/high automatically... As of now I can just switch to parking lights and it comes on low and also come on low with headlights, either in manual or auto headlights. Essentially it splits the combo turn signal/marker into turn signal bulb and marker as brow separately.
Thats not a bad setup as is πŸ€”


OP
danbfree

danbfree

3000 Post Club
Messages
3,510
Likes
1,196
Location
Tigard, Oregon, USA
Thread Starter #48
Thats not a bad setup as is πŸ€”
Yeah, exactly, but moving even that one pin can be a pain too, you need some good hand coordination and some patience to know how the connectors work as far as the wire locks, etc. I totally screwed up my driver side, now I have no outer connector and it's jerry-rigged with tape and glue and has a bad ground that makes both LED brows and tail lights flicker with the engine on, I'm having to have a more electrical oriented friend take a look at it tomorrow... Keep in mind that I'm only an average mechanic overall, it took me 12 hours to complete some mods that most could do in 4 or less most likely, so it's likely just me, LOL. Sucks that I now, after finally doing it all, I could do it much faster and better now, but quite often it seems doing anything the first time can be a painful learning process.


VirtualRonin

Active member
Active Military
Messages
557
Likes
452
Location
Spring Lake Park, MN
#49
Yeah, exactly, but moving even that one pin can be a pain too, you need some good hand coordination and some patience to know how the connectors work as far as the wire locks, etc. I totally screwed up my driver side, now I have no outer connector and it's jerry-rigged with tape and glue and has a bad ground that makes both LED brows and tail lights flicker with the engine on, I'm having to have a more electrical oriented friend take a look at it tomorrow... Keep in mind that I'm only an average mechanic overall, it took me 12 hours to complete some mods that most could do in 4 or less most likely, so it's likely just me, LOL. Sucks that I now, after finally doing it all, I could do it much faster and better now, but quite often it seems doing anything the first time can be a painful learning process.
You can replace those headlight connectors if need be. Order them from Waytek. I'm attaching a screenshot of the connector, terminals, cavity plugs and even the Molex tool if you want (it's expensive though).


Attachments

OP
danbfree

danbfree

3000 Post Club
Messages
3,510
Likes
1,196
Location
Tigard, Oregon, USA
Thread Starter #51
You can replace those headlight connectors if need be. Order them from Waytek. I'm attaching a screenshot of the connector, terminals, cavity plugs and even the Molex tool if you want (it's expensive though).
Thank you! Maybe I'll just order them now and wait to mess with the lights until it comes! Also, is that Molex tool THAT much better than just using a small screwdriver with pick tip to unlock each wire?


VirtualRonin

Active member
Active Military
Messages
557
Likes
452
Location
Spring Lake Park, MN
#53
Thank you! Maybe I'll just order them now and wait to mess with the lights until it comes! Also, is that Molex tool THAT much better than just using a small screwdriver with pick tip to unlock each wire?
Yes, the actual Molex tool is pretty slick and works great but it's expensive. I would recommend against using a pick tip unless you have worked with these connectors a lot. Instead, you can use a large paper clip.

I know I made a video at one point using a pick, which works if you don't have the Molex tool but using a large paper clip was something I discovered later, after I made the video, and is much easier and safer to use on your connector. That older video has been taken down.

The key with using a large paper clip is to mimic the Molex tool; if you look closely at the Molex tool, the end of it is rounded off. A large paper clip is the right size and works even better if you use a file and round off the end. When using the tool, you push in to release terminal from the connector. Watch this video I made;
View: https://youtu.be/cABPHMYEYa0

That will help explain how to use the tool/large paper clip.


Sent from my iPhone using Tapatalk


Last edited:

VirtualRonin

Active member
Active Military
Messages
557
Likes
452
Location
Spring Lake Park, MN
#54
Thank you! Maybe I'll just order them now and wait to mess with the lights until it comes! Also, is that Molex tool THAT much better than just using a small screwdriver with pick tip to unlock each wire?
If Waytek is out of MX150 female terminals for the connector or they are on backorder, then you can order from Mouser Electronics https://www.mouser.com/ProductDeta...=sGAEpiMZZMs7eK6h2EBtKrDPZUGUvv8S8IHOS2wXsec=

Or just order everything from Mouser using the part numbers, whichever works best.


Sent from my iPhone using Tapatalk


OP
danbfree

danbfree

3000 Post Club
Messages
3,510
Likes
1,196
Location
Tigard, Oregon, USA
Thread Starter #55
Yes, the actual Molex tool is pretty slick and works great but it's expensive. I would recommend against using a pick tip unless you have worked with these connectors a lot. Instead, you can use a large paper clip.

I know I made a video at one point using a pick, which works if you don't have the Molex tool but using a large paper clip was something I discovered later, after I made the video, and is much easier and safer to use on your connector. That older video has been taken down.

The key with using a large paper clip is to mimic the Molex tool; if you look closely at the Molex tool, the end of it is rounded off. A large paper clip is the right size and works even better if you use a file and round off the end. When using the tool, you push in to release terminal from the connector. Watch this video I made;
View: https://youtu.be/cABPHMYEYa0

That will help explain how to use the tool/large paper clip.
Then "pick" is the wrong word, I have a small screwdriver set that has the equivalent of a paper clip tip. Thanks for the part # of the Molex, I've seen it listed a number of places.


Messages
340
Likes
183
Location
San Francisco Bay Area
#56
Here are my Depos with Hikari bulbs for comparison. I feel like they are overpowering the projectors and I get some Kaleidoscope effect.


OP
danbfree

danbfree

3000 Post Club
Messages
3,510
Likes
1,196
Location
Tigard, Oregon, USA
Thread Starter #57
Here are my Depos with Hikari bulbs for comparison. I feel like they are overpowering the projectors and I get some Kaleidoscope effect.
Wow, that's unfortunate, I'm even more impressed with my Katana's now, they have even better light spread down low for only $47...But this is what I call Kaleidoscope effect:

IMG_20181115_202657.jpg

That's from using top of the line super bright DeAuto LED's in a reflector housing, with yours it's almost like the HID rainbow effect from poor light spread.

For only a little more than the Hikari's there are the DDM Tuning 50w Saber that tested REALLY well for $95, but they might have that too, maybe the Katana's have the perfect amount of brightness and light spread for the factory Euro projector? Hmmm


OP
danbfree

danbfree

3000 Post Club
Messages
3,510
Likes
1,196
Location
Tigard, Oregon, USA
Thread Starter #58
Added H1 LED's for the high beams last night, they work surprisingly well for $10 plus $4 bulb holders. They come across as mostly super fog lights, TBH, but DO get enough of that extra light up ability up ahead that I'm happy as-is now! And surprisingly very white and not blue at all, prob like 5500k if my Katana low beams are 6250k.

$4 bulb holders... you take the mounting ring off the LED and use these to hold the mounting ring in place and then put the bulb into place through the ring and twist to adjust. I hear having the chips at the 12/6 position is best for brights in the reflectors but I could only get them to about 2/8 and that works well enough.

1560526538400.png

And the cheap H1's the easily fit with rear cover in place, you kind of just jam the wires into the old combined holding/power harness for the H1 halogen. I link to this specific seller as they were very cheap and shipped very fast, just have to get over the ridiculous wattage claims, LOL.

1560526919304.png
1560526938236.png


Top