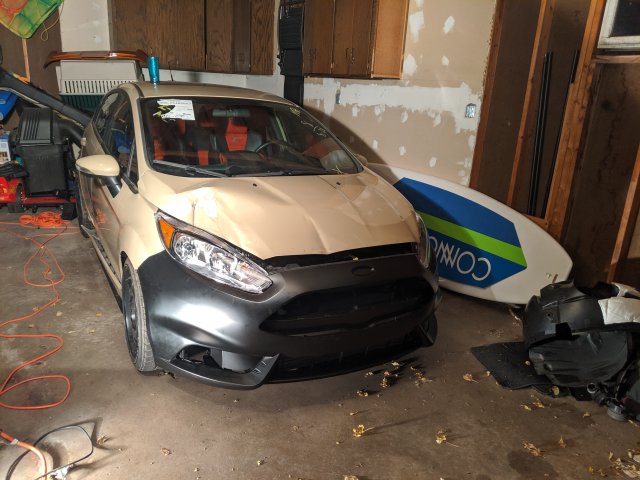
I wanted to introduce myself and present my current build. To some of you, this car is very well-known.
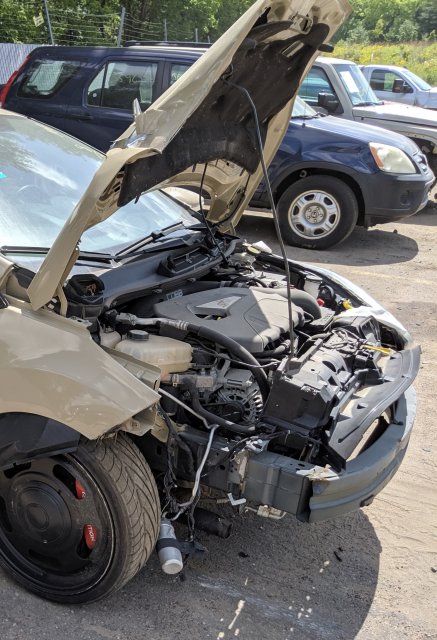
I purchased TJIN's car. It had been wrecked and had light front end damage. The price was very good and it was only 30m away from me so I took the plunge. I rented a uhaul and brought it home. I was actually able to load it on the trailer by myself since the car drives and runs even though it can't be running for long since it will overheat.
What's the damage?
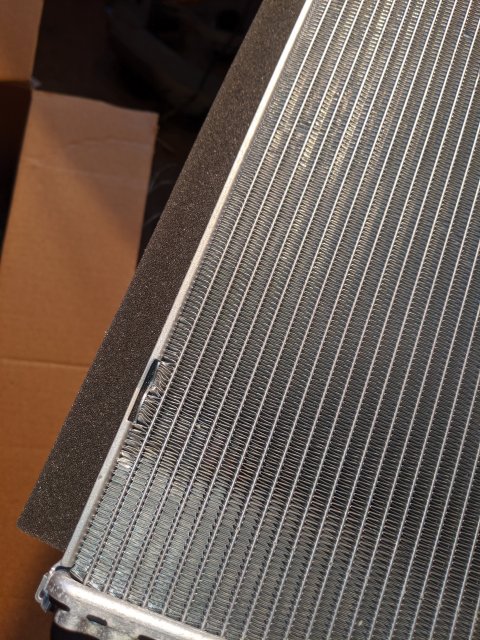
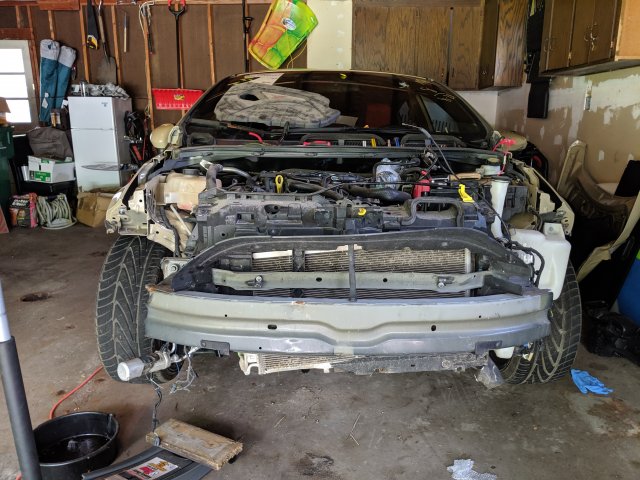
Luckily, the engine, transmission and chassis are straight and not damaged. The intercooler took the majority of the hit and it bent in a shape of a perfect arch. Thankfully, it was hit at such an angle that the impact did not affect the crash bar or frame rails. Whatever the guy hit, it impacted the intercooler from underneath and it pushed the radiator and all the parts behind them up towards the driver's side so no frame damage happened.
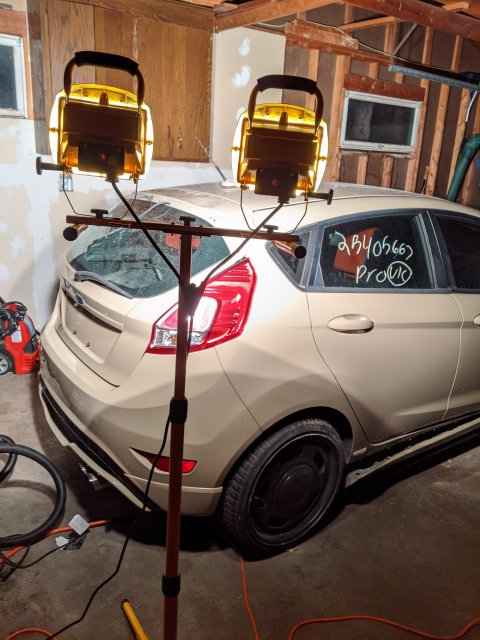
Somehow, the rear also got damaged. The spoiler was split in half and the rear window shuttered but no damage to the lift gate or quarter panels.
The progress so far:
1. Cleaned interior and exterior -- I spent a full day taking apart the trunk and rear seats and cleaning every piece of glass I could find. It's crazy how many little pieces of glass I found and I'm still 100% sure I did not get 3/4s of them. The glass pieces made it all the way to the front of the car.
2. Removed damaged parts and kept what was reusable -- Only a fog light cover, and one of the fender liners are reusable. Front bumper cover, spoiler, intercooler, piping and hood were bent or are too far gone to even consider fixing.
3. Started to take broken pipes off the car -- The worst damaged were the intercooler ones, all cracked and bent. Thankfully, the clips holding them in place broke before any damage reached where the pipes actually connect to the engine.
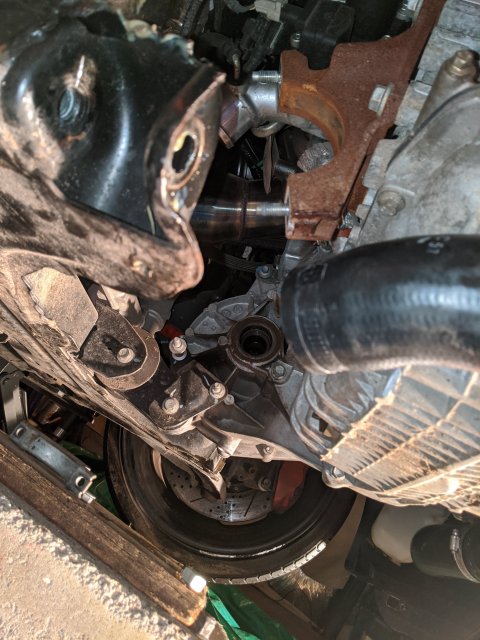
4. Took the crash bar off the car along with the radiator support, radiator, condenser, and fan -- This is where most of the damage happened. None of those parts are usable (maybe the fan). I checked the front of the engine after taking the front end off and I did not see any further damage other than some bent pipes and lines that I may be able to put back in place but nothing seriously damaged or cracked. The only thing I may replace was the oil cooler as one of the metal fittings (driver's side, the one that goes towards the cabin) was bent but not cracked. I may need to do some further inspection to make sure I didn't miss anything else but it looked pretty good to me.
What is next?
So far, I just have the radiator coming. I'm also trying to track down a new crash bar, condenser, fan, pipes and lines, radiator support, dehydrator, hood, horn and a bumper cover (looking at getting the RS one). I may need more parts but that should cover most of the big stuff for now.
What happens after the car is put together and ready to hit the road?
This car is going to be my winter car. So I plan on driving it from November/December through March/April. Air suspension is coming off at some point and so are the wheels/tires. I will be getting a set of winter tires / wheels just for the Winter. I'll worry about summer tires / wheels next year. I'm also thinking of upgrading a few parts next year such as the intercooler etc. For now, I just want to make sure the car runs and can be put together within the next month or two before cold weather makes an appearance.
Lastly, if you disagree with anything I said or it just doesn't make sense, just let me know! This is my first rebuild project and I want to use it as an opportunity to learn as much as possible")
September 10th Update
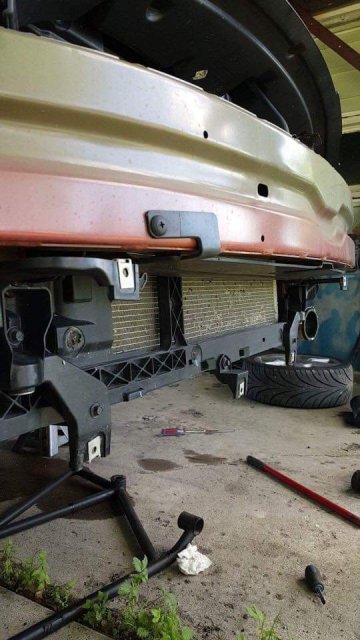
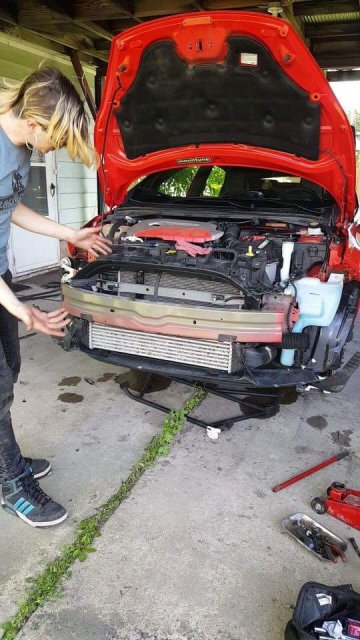
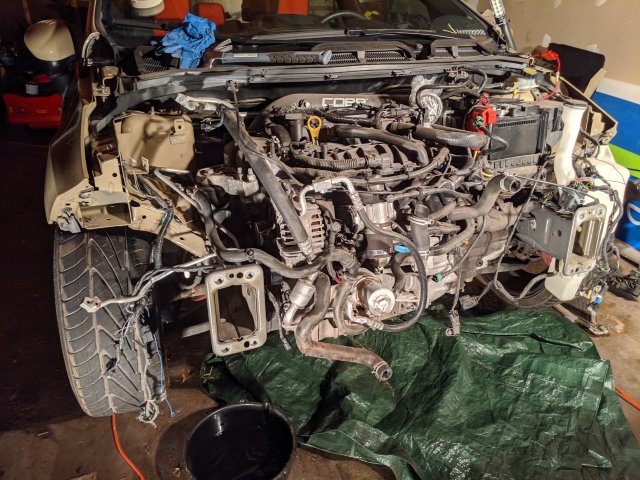
As you can see, I have disassembled all the damaged parts and it's now stripped down to the parts that are good, with the exception of that lower radiator hose and the fuel feed line.
I placed a huge order of parts that should be here by Thursday / Friday and will include most of the lines, hoses, radiator support, purge valve line, plastic trim pieces, condenser, AC dryer etc. I still need to get the crash bar, hood, front bumper cover and intercooler but those are not a priority at the moment
After I get the parts this week, I plan on starting plugging hoses and lines back in and make my way to the front end so I can start adding the radiator, condenser, crash bar and finally front bumper cover.
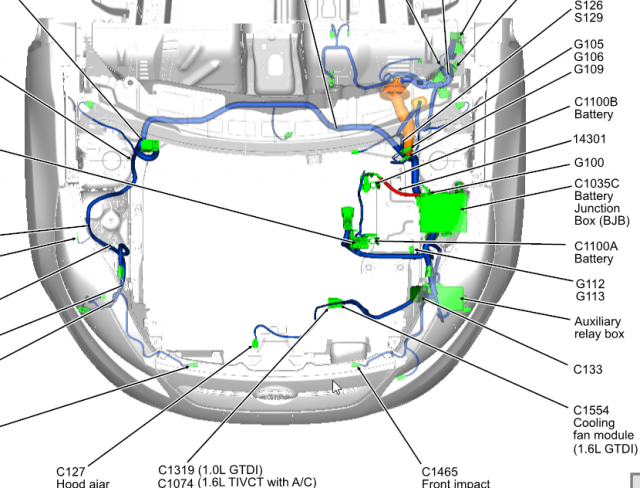
Also, I'm going to need some advice about the wiring harness. This is the engine compartment harness so replacing the whole thing would be a WHOLE LOT of work and time that I don't think I have.
Most of the connectors that go to the AC dryer, headlights and fog lights are also damaged so I was thinking of buying a new engine compartment harness, take the section of the harness that I need and solder it to the harness on the car. Would that work?
September 30th Update
Things done since the last update:
- Replaced engine compartment wiring harness
- Stock Intercooler piping installed
- Lower radiator hose and oil cooler replaced
- Oil and filter changed
- Sound symposer delete installed and removed all the piping in the engine bay and inside the cabin
- Mounted the condenser to the radiator
- Intercooler mounted on the lower deflector
If you want more details, keep reading.
I finally got the correct wiring harness for the engine compartment and got to install it this Saturday (see my rant below for more details). I briefly connected the battery back in and while I didn't start the car, I was able to hear many things go off (interior lights, brake lights, fuel pump, screens etc.). I will wait until the cooling system, intercooler, and air intake are on the car before I start the engine but so far so good.
(rant starting about installing the wiring harness)
For anyone looking to replace this harness, just know that plugging everything back in inside the cabin was a HUGE pain in the ***. I really don't know how anyone with bigger hands than mine would be able to do this without having to take way more things apart than I did. There is very little to no room to maneuver and guide the two big red connectors that plug to the other two wiring harnesses inside the car. I knocked off the top sensor for the clutch pedal by mistake in the process which thankfully gave me a whole lot more room and yet, it was almost impossible (good luck putting that sensor back on the clutch pedal with adult-sized hands). You'll also have to lie down on your back, with half your body resting in the car and the other half body just hanging outside the car with your hips resting right above the rocker panel plus your head will most likely have to rest upside down for some time so you can see what you are doing. Do yourself a favor and wear gloves unless you want to chop your hands open. It almost felt like I was dealing with Freddy Krueger's razors in there instead of plastic and metal parts with rounded ends.
Thankfully, after the inside portion was done, everything else went okay with the exception of me not wanting to unplug all the brake lines in the back to pass through the connector that plugs into the ABS module.
Pro tip: Use fairly thick and sticky tape (such as gorilla or heavy duty duct tape) to tape any sharp edges of metal parts inside the cabin, the firewall pass-through hole, and any areas that wires may come in contact with and also tape as many exposed wires in the wiring harness as you can to make sure they will not get caught up anywhere. They are going to come in contact with something sharp and you will damage the wires fairly easy.
(rant over)
While I'm glad I replaced the wiring harness, if I had to do it all over again, I would try fixing the damaged portion first before I replace it all. It is a lot of work and you need to disassemble so many things in order to make things go smoothly.
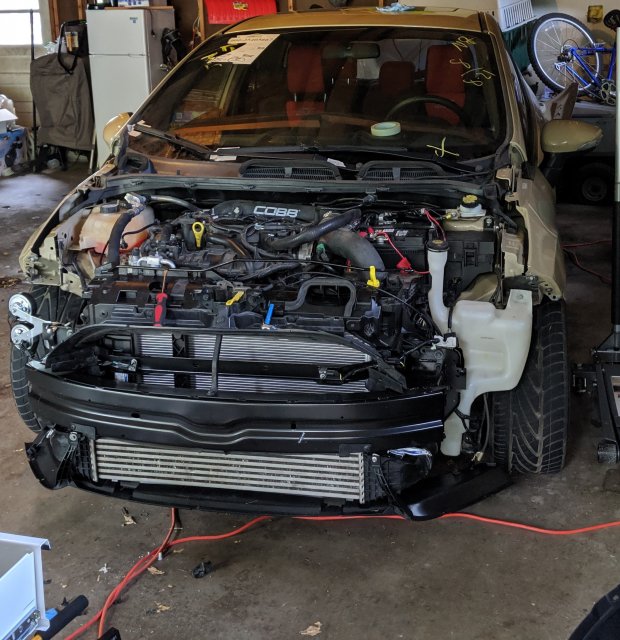
After I got done with the wiring harness, I started working on attaching the intercooler (and brackets) to the lower deflector and got the condenser attached to the radiator as well.
What's next? I need to seal the control module for the fan as it is slightly cracked at the bottom and they don't just sell the module by itself so I will seal it up with some epoxy hoping it still works. Once that is done, I will install everything back on the radiator support and then the crash bar.
I know there are a bunch of "air shields" and brackets which I have no idea where they really go yet so if anyone has good pictures that show where everything gets mounted, please, send them over or post them here. I've been collecting images and video screenshots from people installing or removing radiators and bumpers and that has helped me tremendously.
October 6th Update
Things replaced / done since the last update
Serpentine belt replaced (did not have to remove the engine mount so that made it easier!)
Cooling system plugged in
Intercooler mounted and plugged in
Mounted the horn and AC dryer along with the lines and connectors
Connected the air suspension and sound system
Airbox installed
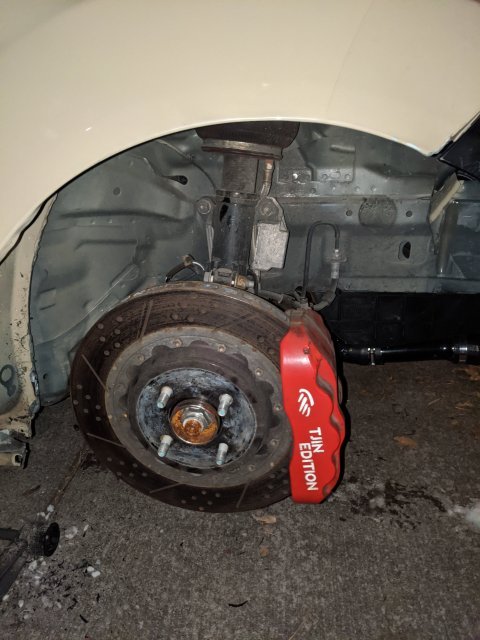
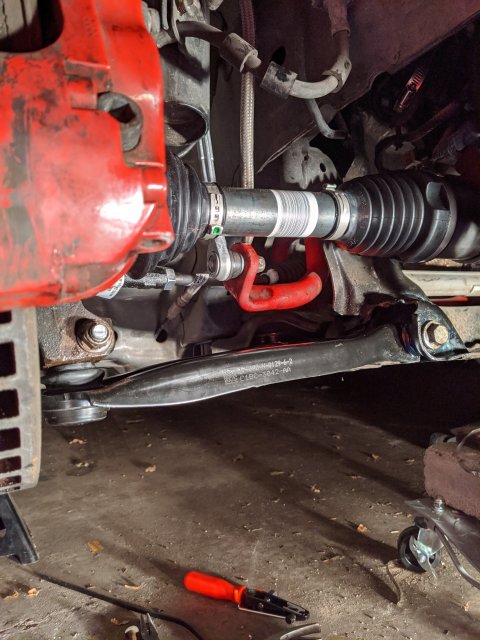
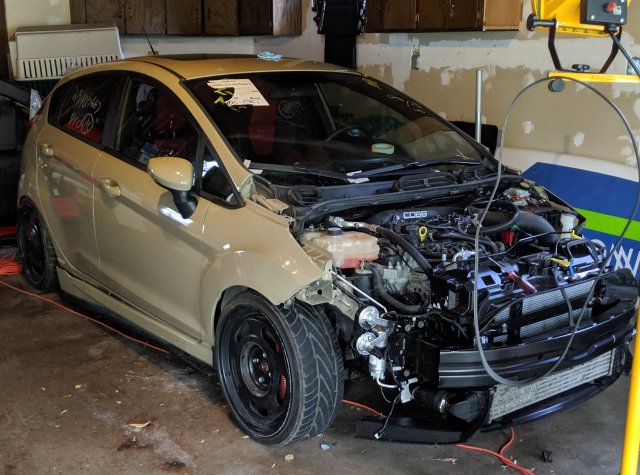
So, the car is finally put together with the exception of the bodywork (front bumper cover, wheel well covers etc.). After I got around to plug everything back together I decided to start her up and she did! She started right up and sounded very healthy. I also took her off the jack stands and plan to drive it around the neighborhood for a quick test drive. I know I'll be replacing the control arms but I want to make sure there is nothing else wrong with it.
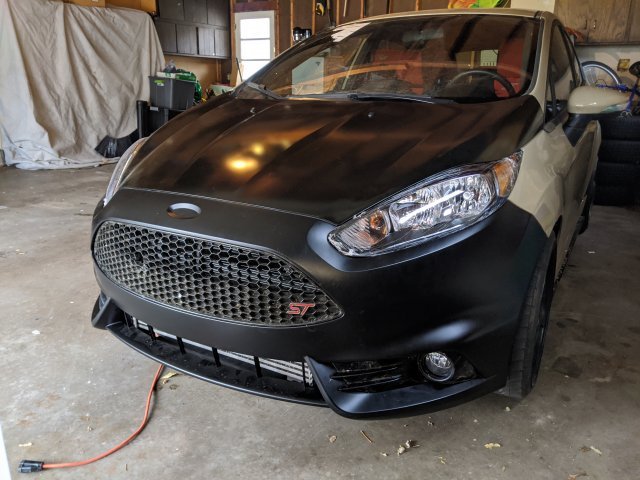
Beyond excited to have her at this stage so quickly! Now I need to source a hood and a front bumper cover and she should be looking very good very soon.
However, there are a few lights that came up in the dash and I may need some help with:
ABS and traction control light - not sure if this is related to me switching the wiring harness? Does the ABS module need to be reprogrammed after putting a new wiring harness in? Or should it go away after a bit?
Door ajar light - the red light with the car showing both doors open keeps popping up... Could this be because of the hood?
October 11th Update
Alright so I took it for the first quick test drive today and here is what happened:
Dash lit up like a disco showing the following lights:
- Check engine light (wheel speed sensor) - speedometer doesn't work code P1934
- ABS & Traction control (I'm assuming these are related to the wheel speed sensor mentioned above). In addition the PCM reads these two codes: P1934 and U0121
- Airbag light (no idea about this one...)
- Tire pressure
- Door ajar due to the fact I don't have the hood attached yet
- Brake (no idea why this is on?)
While the lights seem to be relatively easy to fix, what got me very worried was the fact that the "power steering fault" message came up on the screen after going above 10-15 mph and the outside temp sensor would just go away as well but car would keep driving just rougher
Any thoughts? I have one of those Bluedriver OBD2 readers so not sure if I could troubleshoot some of these things that way, it'd be awesome.
October 21st Update
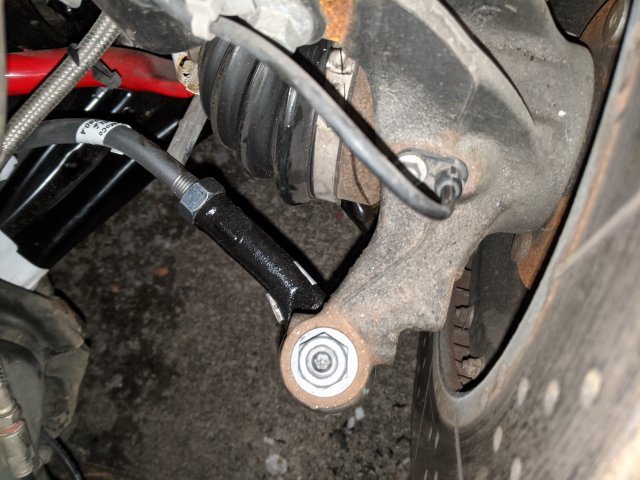
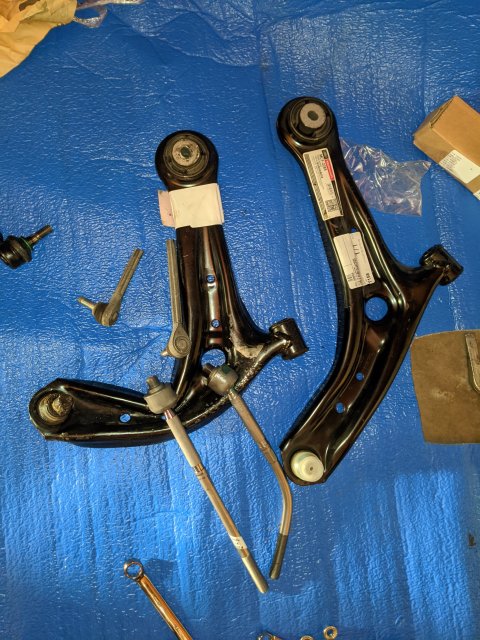
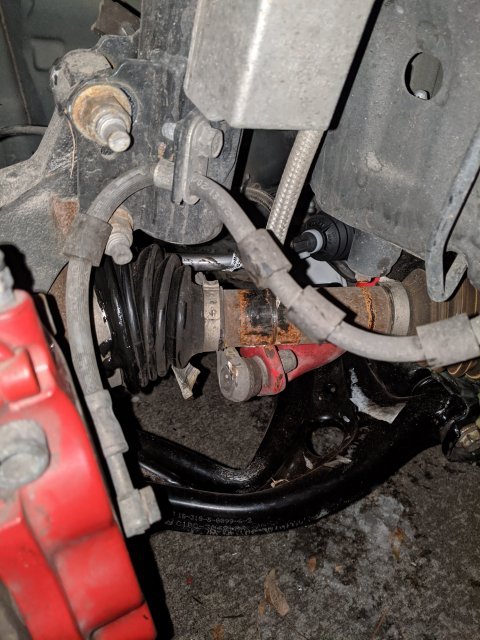
I got the control arm off the car... and I all can say is that the ball joint was a huge PITA to get off! It has been the biggest struggle I've had with this car so far.... I got this ball joint separator and it still took me a couple of hours of hammering.
I had to battle so hard with the ball joint that I'm afraid I forced the front axle more than it was supposed to. I hear like a buzzing sound some times if I move it a bit (like depressurization) and I've seen some grease leak (light yellow, almost creamy looking) from one end of the protective boot. Hopefully I didn't mess anything up, otherwise, I'll have to end up buying a new one
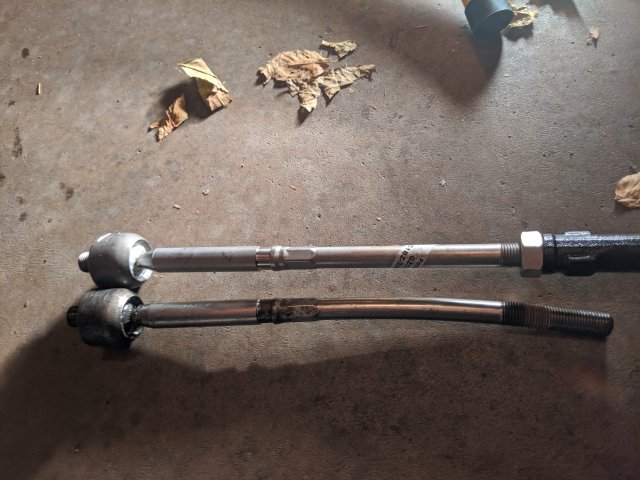
I also got the outer tie rod disconnected and just waiting on a new boot for the inner tie rod before I took the one on the car off (the boot and clamps aren't reusable).
A few more updates:
1. I called Airlift and they told me the remote that I'm going to need to finally be able to operate the air suspension!
2. I was able to locate a rear spoiler locally for very cheap
3. Currently looking for a new set of tires as I verified that the front right wheel is bent.
I'm going to be ordering the front bumper cover and hood this week. I also hope to have the rear glass replaced by late this week or next week.
I purchased TJIN's car. It had been wrecked and had light front end damage. The price was very good and it was only 30m away from me so I took the plunge. I rented a uhaul and brought it home. I was actually able to load it on the trailer by myself since the car drives and runs even though it can't be running for long since it will overheat.
What's the damage?
Luckily, the engine, transmission and chassis are straight and not damaged. The intercooler took the majority of the hit and it bent in a shape of a perfect arch. Thankfully, it was hit at such an angle that the impact did not affect the crash bar or frame rails. Whatever the guy hit, it impacted the intercooler from underneath and it pushed the radiator and all the parts behind them up towards the driver's side so no frame damage happened.
Somehow, the rear also got damaged. The spoiler was split in half and the rear window shuttered but no damage to the lift gate or quarter panels.
The progress so far:
1. Cleaned interior and exterior -- I spent a full day taking apart the trunk and rear seats and cleaning every piece of glass I could find. It's crazy how many little pieces of glass I found and I'm still 100% sure I did not get 3/4s of them. The glass pieces made it all the way to the front of the car.
2. Removed damaged parts and kept what was reusable -- Only a fog light cover, and one of the fender liners are reusable. Front bumper cover, spoiler, intercooler, piping and hood were bent or are too far gone to even consider fixing.
3. Started to take broken pipes off the car -- The worst damaged were the intercooler ones, all cracked and bent. Thankfully, the clips holding them in place broke before any damage reached where the pipes actually connect to the engine.
4. Took the crash bar off the car along with the radiator support, radiator, condenser, and fan -- This is where most of the damage happened. None of those parts are usable (maybe the fan). I checked the front of the engine after taking the front end off and I did not see any further damage other than some bent pipes and lines that I may be able to put back in place but nothing seriously damaged or cracked. The only thing I may replace was the oil cooler as one of the metal fittings (driver's side, the one that goes towards the cabin) was bent but not cracked. I may need to do some further inspection to make sure I didn't miss anything else but it looked pretty good to me.
What is next?
So far, I just have the radiator coming. I'm also trying to track down a new crash bar, condenser, fan, pipes and lines, radiator support, dehydrator, hood, horn and a bumper cover (looking at getting the RS one). I may need more parts but that should cover most of the big stuff for now.
What happens after the car is put together and ready to hit the road?
This car is going to be my winter car. So I plan on driving it from November/December through March/April. Air suspension is coming off at some point and so are the wheels/tires. I will be getting a set of winter tires / wheels just for the Winter. I'll worry about summer tires / wheels next year. I'm also thinking of upgrading a few parts next year such as the intercooler etc. For now, I just want to make sure the car runs and can be put together within the next month or two before cold weather makes an appearance.
Lastly, if you disagree with anything I said or it just doesn't make sense, just let me know! This is my first rebuild project and I want to use it as an opportunity to learn as much as possible
September 10th Update
As you can see, I have disassembled all the damaged parts and it's now stripped down to the parts that are good, with the exception of that lower radiator hose and the fuel feed line.
I placed a huge order of parts that should be here by Thursday / Friday and will include most of the lines, hoses, radiator support, purge valve line, plastic trim pieces, condenser, AC dryer etc. I still need to get the crash bar, hood, front bumper cover and intercooler but those are not a priority at the moment
After I get the parts this week, I plan on starting plugging hoses and lines back in and make my way to the front end so I can start adding the radiator, condenser, crash bar and finally front bumper cover.
Also, I'm going to need some advice about the wiring harness. This is the engine compartment harness so replacing the whole thing would be a WHOLE LOT of work and time that I don't think I have.
Most of the connectors that go to the AC dryer, headlights and fog lights are also damaged so I was thinking of buying a new engine compartment harness, take the section of the harness that I need and solder it to the harness on the car. Would that work?
September 30th Update
Things done since the last update:
- Replaced engine compartment wiring harness
- Stock Intercooler piping installed
- Lower radiator hose and oil cooler replaced
- Oil and filter changed
- Sound symposer delete installed and removed all the piping in the engine bay and inside the cabin
- Mounted the condenser to the radiator
- Intercooler mounted on the lower deflector
If you want more details, keep reading.
I finally got the correct wiring harness for the engine compartment and got to install it this Saturday (see my rant below for more details). I briefly connected the battery back in and while I didn't start the car, I was able to hear many things go off (interior lights, brake lights, fuel pump, screens etc.). I will wait until the cooling system, intercooler, and air intake are on the car before I start the engine but so far so good.
(rant starting about installing the wiring harness)
For anyone looking to replace this harness, just know that plugging everything back in inside the cabin was a HUGE pain in the ***. I really don't know how anyone with bigger hands than mine would be able to do this without having to take way more things apart than I did. There is very little to no room to maneuver and guide the two big red connectors that plug to the other two wiring harnesses inside the car. I knocked off the top sensor for the clutch pedal by mistake in the process which thankfully gave me a whole lot more room and yet, it was almost impossible (good luck putting that sensor back on the clutch pedal with adult-sized hands). You'll also have to lie down on your back, with half your body resting in the car and the other half body just hanging outside the car with your hips resting right above the rocker panel plus your head will most likely have to rest upside down for some time so you can see what you are doing. Do yourself a favor and wear gloves unless you want to chop your hands open. It almost felt like I was dealing with Freddy Krueger's razors in there instead of plastic and metal parts with rounded ends.
Thankfully, after the inside portion was done, everything else went okay with the exception of me not wanting to unplug all the brake lines in the back to pass through the connector that plugs into the ABS module.
Pro tip: Use fairly thick and sticky tape (such as gorilla or heavy duty duct tape) to tape any sharp edges of metal parts inside the cabin, the firewall pass-through hole, and any areas that wires may come in contact with and also tape as many exposed wires in the wiring harness as you can to make sure they will not get caught up anywhere. They are going to come in contact with something sharp and you will damage the wires fairly easy.
(rant over)
While I'm glad I replaced the wiring harness, if I had to do it all over again, I would try fixing the damaged portion first before I replace it all. It is a lot of work and you need to disassemble so many things in order to make things go smoothly.
After I got done with the wiring harness, I started working on attaching the intercooler (and brackets) to the lower deflector and got the condenser attached to the radiator as well.
What's next? I need to seal the control module for the fan as it is slightly cracked at the bottom and they don't just sell the module by itself so I will seal it up with some epoxy hoping it still works. Once that is done, I will install everything back on the radiator support and then the crash bar.
I know there are a bunch of "air shields" and brackets which I have no idea where they really go yet so if anyone has good pictures that show where everything gets mounted, please, send them over or post them here. I've been collecting images and video screenshots from people installing or removing radiators and bumpers and that has helped me tremendously.
October 6th Update
Things replaced / done since the last update
Serpentine belt replaced (did not have to remove the engine mount so that made it easier!)
Cooling system plugged in
Intercooler mounted and plugged in
Mounted the horn and AC dryer along with the lines and connectors
Connected the air suspension and sound system
Airbox installed
So, the car is finally put together with the exception of the bodywork (front bumper cover, wheel well covers etc.). After I got around to plug everything back together I decided to start her up and she did! She started right up and sounded very healthy. I also took her off the jack stands and plan to drive it around the neighborhood for a quick test drive. I know I'll be replacing the control arms but I want to make sure there is nothing else wrong with it.
Beyond excited to have her at this stage so quickly! Now I need to source a hood and a front bumper cover and she should be looking very good very soon.
However, there are a few lights that came up in the dash and I may need some help with:
ABS and traction control light - not sure if this is related to me switching the wiring harness? Does the ABS module need to be reprogrammed after putting a new wiring harness in? Or should it go away after a bit?
Door ajar light - the red light with the car showing both doors open keeps popping up... Could this be because of the hood?
October 11th Update
Alright so I took it for the first quick test drive today and here is what happened:
Dash lit up like a disco showing the following lights:
- Check engine light (wheel speed sensor) - speedometer doesn't work code P1934
- ABS & Traction control (I'm assuming these are related to the wheel speed sensor mentioned above). In addition the PCM reads these two codes: P1934 and U0121
- Airbag light (no idea about this one...)
- Tire pressure
- Door ajar due to the fact I don't have the hood attached yet
- Brake (no idea why this is on?)
While the lights seem to be relatively easy to fix, what got me very worried was the fact that the "power steering fault" message came up on the screen after going above 10-15 mph and the outside temp sensor would just go away as well but car would keep driving just rougher
Any thoughts? I have one of those Bluedriver OBD2 readers so not sure if I could troubleshoot some of these things that way, it'd be awesome.
October 21st Update
I got the control arm off the car... and I all can say is that the ball joint was a huge PITA to get off! It has been the biggest struggle I've had with this car so far.... I got this ball joint separator and it still took me a couple of hours of hammering.
I had to battle so hard with the ball joint that I'm afraid I forced the front axle more than it was supposed to. I hear like a buzzing sound some times if I move it a bit (like depressurization) and I've seen some grease leak (light yellow, almost creamy looking) from one end of the protective boot. Hopefully I didn't mess anything up, otherwise, I'll have to end up buying a new one
I also got the outer tie rod disconnected and just waiting on a new boot for the inner tie rod before I took the one on the car off (the boot and clamps aren't reusable).
A few more updates:
1. I called Airlift and they told me the remote that I'm going to need to finally be able to operate the air suspension!
2. I was able to locate a rear spoiler locally for very cheap
3. Currently looking for a new set of tires as I verified that the front right wheel is bent.
I'm going to be ordering the front bumper cover and hood this week. I also hope to have the rear glass replaced by late this week or next week.
Attachments
-
 3.7 MB Views: 12
 -
 3.4 MB Views: 15
 -
 1.9 MB Views: 14
 -
 2.3 MB Views: 13
 -
 67.7 KB Views: 12
 -
 77 KB Views: 13
 -
 67.2 KB Views: 15
 -
 58.9 KB Views: 15
Last edited: