• Sign Up! To view all forums and unlock additional cool features

    Welcome to the #1 Fiesta ST Forum and Fiesta ST community dedicated to Fiesta ST owners and enthusiasts. Register for an account, it's free and it's easy, so don't hesitate to join the Fiesta ST Forum today!


Review: Gold Coast BBK (the “Taz” BBK)

jayrod1980

Active member
Messages
776
Likes
189
Location
Viva Las Vegas!
#1
So, a couple of months ago, shortly after getting back from deployment, my brake light started to come on intermittently. I had about 53K miles on my ‘16, and planned on Replacing my pads at the least anyway. I’m pretty easy on the car, but have been able to stretch the brakes this far because most of my driving is at 80mph on the freeway to work, with very little braking.

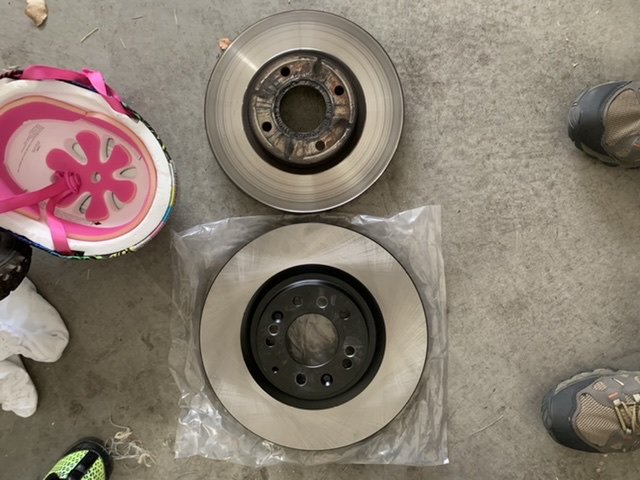
Once the light started to come on more often than not I was forced to look into getting the job done. Since I had to replace brakes anyway, I figured it would be a good time to upgrade from stock. However, I’m pretty broke, and have been interested in the bigger rotor solution Taz has been talking about for the past couple years. I’m happy that the kit was finally released to the public by Mark at Gold Coast Auto, out of California. I purchased the front and rear kits, and both come with custom brackets and hardware.

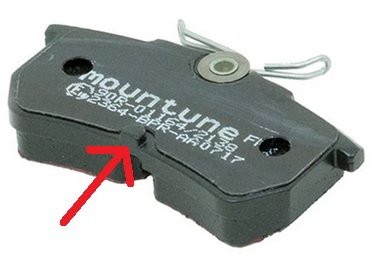
After concerns about initial bite and my lack of track driving, I settled on OEM fiesta performance brake pads. I think I paid less than $950 for pads, rotors, and hardware.
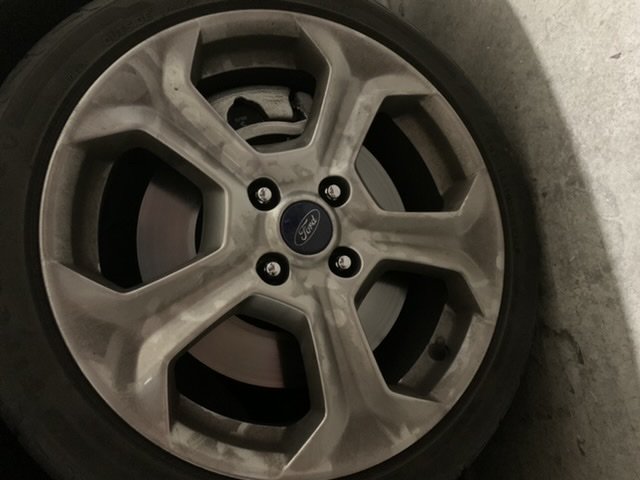
The Centric 323mm front rotors and 302mm rotors look great (painted centers and edges) and the installation was relatively simple. This is my first brake job so it took me forever however. I already removed my front brake dust shields years ago to install boomba brake ducts, but realized the rear shields need removal as well.

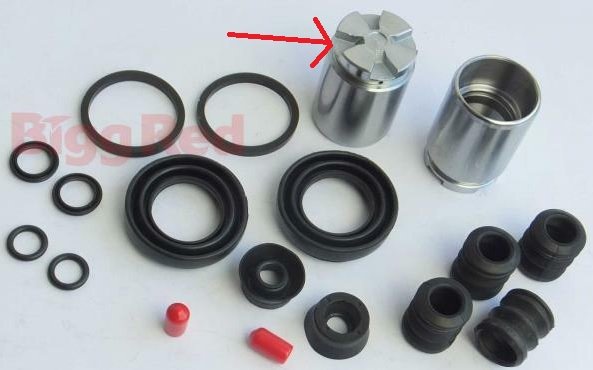
The kit came with instructions, and about the only thing I can fault is that the instructions don’t specify that rear dust shields require removal to clear the rotors. The hardest part of the install was contorting myself under the car with the ratchet extension removing/reinstalling the 5 bolts (including ABS sensor bolt) to take the rear hubs off the car for the dust shield removal. Anyway, once the calipers were cleaned and greased, everything went together fairly simply. The rear calipers are tight. I had to bend a bracket a bit forward to give some slack to get them back on.

I only have taken the car out once to bed the brakes in, but they already feel stronger than stock. I don’t feel any issues with the slightly increased rear brake bias, and the rears are far less bedded in, judging by the marks on the rotors. They really fill the wheel wells of my stock 17” wheels. I still need to change fluid, but I think I’ll pay to have that done rather than badger my wife for help or pay for a speed bleeder. 9F1680B8-139B-4AB0-A0F9-FC77FD4CDEDF.jpeg 1DD263CD-EA56-4925-A3FB-C4A59086FC35.jpeg 
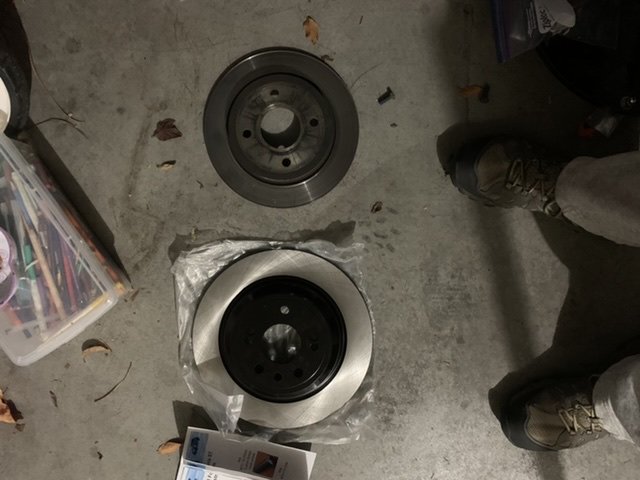
I’ll report back once the brakes are bedded in, but I’m really happy with them so far!
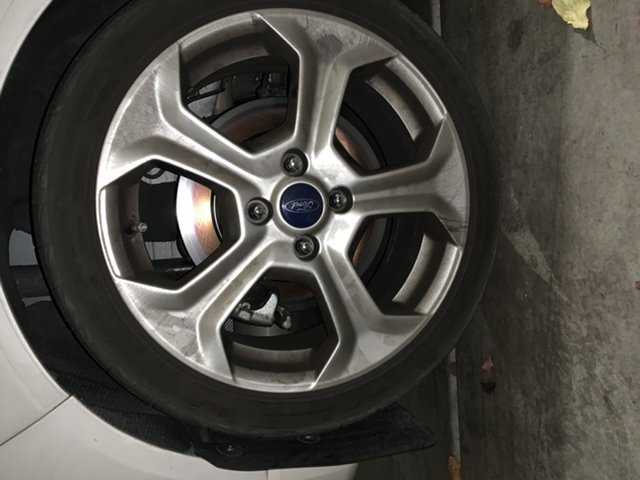


Fusion Works

Active member
Messages
640
Likes
811
Location
Huntsville, AL, USA
#6
The stock "summer tire" brake pad compound from Ford is one of the best street pads I have driven in years. They have fantastic bite, don't make any noise, work well for 5-7 laps at most tracks and inspire confidence in all driving situations. The only drawback is the dust, but who wouldn't want the bite the stock pads give? Plus they are easier on rotors than most more aftermarket aggressive stock based pads. Had a friend with the Hawk Street Race pads and it chewed through the rotor and pads in less than 2000 miles because those pads are meant to run at a much higher temperature.

You made the right choice sticking with those pads.

The rear brakes are fully bedded, its just a slight discrepency in the machining of the caliper mounts on the beam. My setup does the same thing. But it only does it on one side. Did yours do it on both?


OP
J

jayrod1980

Active member
Messages
776
Likes
189
Location
Viva Las Vegas!
Thread Starter #8
Make certain the nub on the rear pads sits within the X of the caliper piston. If not you will get wear just like in the photo.
Which nub are you referring to? My issue is I don’t have much play to get the caliper on and the slide pins lined up to install the bolts.

I just returned the piston pusher... could I fix this without repressing in the piston?


kivnul

1000 Post Club
U.S. Army Veteran
Messages
1,193
Likes
711
Location
Deer Park, WA
#10
Which nub are you referring to? My issue is I don’t have much play to get the caliper on and the slide pins lined up to install the bolts.

I just returned the piston pusher... could I fix this without repressing in the piston?
You can turn the piston with a set of needle-nose pliers. Attached are pictures of the nub and similar piston.


brake pad.jpg brake piston.jpg


OP
J

jayrod1980

Active member
Messages
776
Likes
189
Location
Viva Las Vegas!
Thread Starter #11
Thanks for the tip. The red lines are rust marks and where the caliper doesn’t touch.

I’ll try to reseat the caliper. I have full contact on both backsides but I think it was just the strain of getting the calipers on the brakes. I can’t do anything about the bracket position though.
As I understand it, you place the pads in the brackets first, with the clips up, and then place the caliper on over them, correct?


Fusion Works

Active member
Messages
640
Likes
811
Location
Huntsville, AL, USA
#12
Depends on if you installed bracket before you installed the pads. In theory, yes if you installed the pads in the bracket after you bolted it to the adapter then tried to slip the caliper over the pads, you could get the nub misaligned. Although it should be pretty hard to even get the caliper on the pads if that were they case.


kivnul

1000 Post Club
U.S. Army Veteran
Messages
1,193
Likes
711
Location
Deer Park, WA
#14
..you could get the nub misaligned. Although it should be pretty hard to even get the caliper on the pads if that were they case.
My sons used car came with the nub not seated right. I also did mine the first time with the nub not seated. The piston goes in far enough that it is easy to do. Now I know better ;)


Sent from my iPhone using Tapatalk


OP
J

jayrod1980

Active member
Messages
776
Likes
189
Location
Viva Las Vegas!
Thread Starter #15
Im stupid and forgot to unbolt the brake line brakes. I was able to stretch the caliper to get a better alignment over the front of pad. I think I fixed it. I can see some marks in line with the edge of the outer pad. It’s still a tight fit, and I had to put some pressure on the top of the caliper as I tightened the pin nuts down, but we will see.

I figured the red on the rotors where the pads don’t touch were just rust, but don’t notice any on the fronts. Hard to believe I could have overheated the rotors just bedding them in, it was cold out (45 degrees) and I did only a few moderate stops from 34-45 down to about 10 mph along with some gentle stops and let the brakes cool by driving around about 10 mins afterward. I also did not engage the parking brake (parked in first gear) and did my best not to hold the pedal down at lights/stops.


OP
J

jayrod1980

Active member
Messages
776
Likes
189
Location
Viva Las Vegas!
Thread Starter #16
So if anyone’s reading this thread... after adjusting the rear brakes and attempting to re-bed them, I’m seeing a more full pattern of transfer film, but it’s not uniform yet with the one rear in the previous picture.

Also, I have some white residue on the edges of the rotors. I cleaned the rotors with brake cleaner before installing, but I think I might have not cleaned the black painted edges. Could this be the anti rust coating flashing?

Lastly, I felt a little grinding when coming off the pedal after bedding in the front brakes. Both times doing some successive moderate 45-10mph runs (to bed the rear passenger brake) I felt the grinding only shortly after finishing the runs. They seemed fine after but I think the pistons may be slightly sticking? I’m a newbie with brakes but I really cleaned and greased the slide pins well.


kivnul

1000 Post Club
U.S. Army Veteran
Messages
1,193
Likes
711
Location
Deer Park, WA
#17
Personally I would give them some time to see how they look/feel after a week or so. Also look into the original post about this kit and the grinding issue I was having. The calipers themselves were touching the rotor at times.


OP
J

jayrod1980

Active member
Messages
776
Likes
189
Location
Viva Las Vegas!
Thread Starter #18
Personally I would give them some time to see how they look/feel after a week or so. Also look into the original post about this kit and the grinding issue I was having. The calipers themselves were touching the rotor at times.
Thanks for the advice. I bought the stock performance pads again based on your review over the Hawks. Was it the caliper bracket rubbing?


kivnul

1000 Post Club
U.S. Army Veteran
Messages
1,193
Likes
711
Location
Deer Park, WA
#19
Thanks for the advice. I bought the stock performance pads again based on your review over the Hawks. Was it the caliper bracket rubbing?
Yes, the front caliper brackets, they were not perfectly centered over the rotors with very little clearance. With hard cornering and braking everything would flex just enough for them to touch.


OP
J

jayrod1980

Active member
Messages
776
Likes
189
Location
Viva Las Vegas!
Thread Starter #20
Last question here about the rear brake pad nub, how do you ensure it sits in the channel between the blades of the X on the rear piston?


Similar threads


Top