-
Sign Up! To view all forums and unlock additional cool features
Welcome to the #1 Fiesta ST Forum and Fiesta ST community dedicated to Fiesta ST owners and enthusiasts. Register for an account, it's free and it's easy, so don't hesitate to join the Fiesta ST Forum today!
What did you do to your Fiesta ST today ?
D
Installed this Gem today and got rid of the Vacuum pump. Got optioned harness too...Excellent idea!
View attachment 66207
where did you buy this?
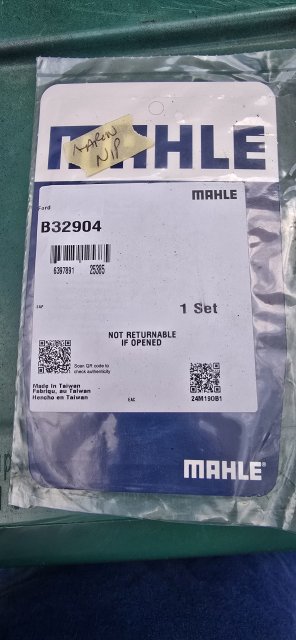
Here is the gasket Part by Mahle

https://svtdesignfab.com/products/vacuum-pump-delete-for-1-6l-ecoboost-2014-2019-fiesta-st
Last edited:
D
Here you go my guy! I used a new gasket and RTV to seal mine FYI* Had it leak the first try ...so i got a new gasket by Mahle and used some RTV compatible with engine oil.
https://svtdesignfab.com/products/vacuum-pump-delete-for-1-6l-ecoboost-2014-2019-fiesta-st
https://svtdesignfab.com/products/vacuum-pump-delete-for-1-6l-ecoboost-2014-2019-fiesta-st
Finally installed the Detroit axle brake kit. All 4 rotors and pads look good. Only issue is now my pedal is soft. The car brakes and stops okay I guess but not as hard. Is there a time period for it to break in? My pedal just feels way softer than before and I've bled the brakes using a power bleeder and pumping the pedals with car on and off. Not sure what to do. I also bled the clutch
Finally installed the Detroit axle brake kit. All 4 rotors and pads look good. Only issue is now my pedal is soft. The car brakes and stops okay I guess but not as hard. Is there a time period for it to break in? My pedal just feels way softer than before and I've bled the brakes using a power bleeder and pumping the pedals with car on and off. Not sure what to do. I also bled the clutch
WARNING: Before beginning any service procedure in this section, refer to Safety Warnings in section 100-00 General Information. Failure to follow this instruction may result in serious personal injury.
Refer to: Health and Safety Precautions (100-00 General Information, Description and Operation).
Clean all the dirt from around the brake fluid reservoir cap and remove the cap. Fill the brake master cylinder reservoir with clean, specified brake fluid.
Material : Motorcraft® DOT 4 LV High Performance Motor Vehicle Brake Fluid / PM-20 (WSS-M6C65-A2) (ISO 4925 Class 6)
NOTE: Master cylinder pressure bleeder adapter tools are available from various manufacturers of pressure bleeding equipment. Follow the instructions of the manufacturer when installing the adapter.
Install the bleeder adapter to the brake master cylinder reservoir and attach the bleeder tank hose to the fitting on the adapter.
General Equipment : Brake/Clutch System Pressure Bleeder/Filler
NOTE: Make sure the bleeder tank contains enough clean specified brake fluid to complete the bleeding operation.
Open the valve on the bleeder tank and apply 207-345 kPa (30-50 psi) to the brake system.
NOTE: Due to the complexity of the fluid path within the rear integral parking brake calipers, it is necessary to apply and release the parking brake during the bleed procedure.
Remove the RH rear bleeder cap and place a box-end wrench on the bleeder screw. Attach a rubber drain tube to the RH rear bleeder screw and submerge the free end of the tube in a container partially filled with clean, specified brake fluid.
Loosen the RH rear bleeder screw. Leave open until clear, bubble-free brake fluid flows, then tighten the RH rear bleeder screw.
For vehicles with rear integral parking brake calipers, apply and release the parking brake 5 times. Repeat until clear, bubble-free fluid comes out.
Tighten the RH rear bleeder screw to specification.
Refer to: Specifications (206-00 Brake System - General Information, Specifications).
Remove the rubber hose and install the bleeder screw cap.
Repeat Steps 5 and 6 for the LH rear bleeder screw.
Continue bleeding the front of the system, going from the RH front brake caliper and then to the LH front brake caliper.
Tighten the front brake caliper bleeder screws to specification.
Refer to: Specifications (206-00 Brake System - General Information, Specifications).
NOTE: The HCU bleeding procedure is necessary if the HCU or any components upstream of the HCU are installed new. The brake system pressure bleed procedure must be repeated after the HCU bleeding procedure is completed.
If necessary, follow the diagnostic scan tool instructions and carry out the ABS HCU bleeding procedure and then repeat brake system pressure bleeding steps 5-10.
Close the bleeder tank valve and release the pressure. Remove the tank hose from the adapter and remove the adapter. Fill the reservoir with clean, specified brake fluid and install the reservoir cap.
Is it possible I didn't bleed with enough pressure? I used 15 -20 psi on my motive power bleeder. I just found this saying 30-50 psi.
Is it possible I didn't bleed with enough pressure? I used 15 -20 psi on my motive power bleeder. I just found this saying 30-50 psi.
Seconding what dc said above. 15-20 psi is fine but you need to use forscan to activate the ABS. I bleed, trigger ABS module, bleed, then repeat. If you email the forscan team they’ll get you the program to bleed entirely via forscan although I like using the pressure bleeder better.
Took it to Ford and they said the lines are air free and told me that it's probably the Detroit axle kit that's just not that good at braking compared to the Ford ST parts. I'll be returning that kit and getting something off whoosh.
Honestly I disagree that the Velossa Tech Big Mouth is difficult to install!
Once I realized that I couldn't get an open end wrench on the nut on the backside, I used a medium sized pair of channel lock pliers and a 10mm socket gripped in the pliers to hold the nut while you tighten the bolt. It literally took me 2mins to install it once I had the cowl cut open properly.
Once I realized that I couldn't get an open end wrench on the nut on the backside, I used a medium sized pair of channel lock pliers and a 10mm socket gripped in the pliers to hold the nut while you tighten the bolt. It literally took me 2mins to install it once I had the cowl cut open properly.

That bolt was the hardest part. I’ll get the bumper back on tomorrow.
The stock pads are pretty decent all things considered. Not nearly as cheap as that Detroit axle kit, but I went with stock Motorcraft BRF1494 front summer pads and Centric rotors off Rockauto and they’ve been doing nicely
Attachments
-
712.5 KB Views: 10
-
192.4 KB Views: 9
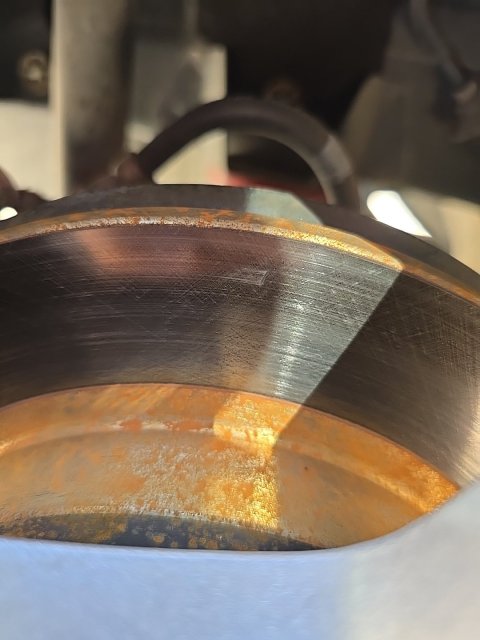
I ordered centric rear rotors, r1 fronts and ebc redstuff pads. Relatively cheap and hopefully the pads are as good as stock or better and have lower dust. I went with r1 rotors upfront cuz I couldn't find centric on RockAuto and they were only 50$ a piece. That being said my Detroit axle already has these spots on them. Is that normal or signs of overheating or sum?
Adapter rings and connectors were successful. I want to do them in the rear doors it worked so well. I put the sound deadening on the doors and installed silicone baffles behind some JBL speakers with magnets the size of hockey pucks. Muy bueno. Turns out the PO didn’t disable the tweeters, but I’m not convinced that’s good or bad. I’ll probably do the shifter bushings next before I peel off the bumpers for the next work. Front for the air scoop and intercooler, rear for the water leaks that soak my rear passenger footwell.
Link to adapter rings? Im trying to get some JL audios in but the surface mount face of speaker to the inside of the door panel may be too small. (according to Crutchfield)
https://a.co/d/fYWsbWX
And ordered these but haven’t installed in the Rear:
https://a.co/d/e90yBoC
I think they’re interchangeable but haven’t confirmed
Similar threads
-
I did a Fiesta ST Timing Belt, Here are my observations (and problems)
- Started by rallyrabbit
- Replies: 40
-
-
What did you do instead of working on your Fiesta ST today?
- Started by Chaski
- Replies: 257
-
2018 Fiesta ST possible rally build candidate
- Started by Northwest
- Replies: 10
-
Did you know your Fiesta ST could.....("secret" features thread)
- Started by jeff
- Replies: 173
-
-
-
-
Which Fiesta ST Intercooler did you choose?
- Started by rooSTer
- Replies: 522
-
Which Fiesta ST Exhaust System did you purchase?
- Started by ATXFiST
- Replies: 398
Ford Community Posts
-
-
My First ST with Mods 97K and I'm learning what I bought... The drive home was amazing!
- Latest: Stubborn Approach
-
-


