• Sign Up! To view all forums and unlock additional cool features

    Welcome to the #1 Fiesta ST Forum and Fiesta ST community dedicated to Fiesta ST owners and enthusiasts. Register for an account, it's free and it's easy, so don't hesitate to join the Fiesta ST Forum today!


Really Should Stop Modifying my Daily Driver into a Track Car

M-Sport fan

9000 Post Club
Messages
14,122
Likes
6,762
Location
Princeton, N.J.
Because I am a dork, have a machine shop at hand, and have 200lbs of titanium bar in the corner, its time to make some splitter rub blocks so I can shoot sparks on corner entry. These are 2.5in of 6AL 4V titanium .750in thick. That will get them within 2.25in of the track at ride height and once the car rolls into the corner and settles on the springs, hopefully sparking away. HAHA.
View attachment 57351 View attachment 57352 View attachment 57353

Also got the last coat of paint on the splitter today. It should be dry tomorrow. Also got a shipment notice from Send Cut Send on the splitter brackets. Hope those show up next week. Now to play with where I want to mount these blocks on the splitter.
View attachment 57354
Do any tracks have rules on the types of materials used for those blocks, out of fear for the surface?

6AL 4V is harder than 3AL 2.5V titanium, correct?


Last edited:
OP
Fusion Works

Fusion Works

Active member
Messages
674
Likes
888
Location
Huntsville, AL, USA
Thread Starter #123
Never heard of any rules on the rub blocks. I don't think they are that common in club racing and other types of events. They seem to be a Time attack thing on some of those cars with massive aero. I did it because I am a dork.

Yeah 6AL-4V is stronger, but its probably a toss up as far as impact on track surface though. I bought a huge bar of this a few years ago to build some titanium pistons for a brake caliper application. Also made my wedding rings out of Titanium a decade ago.


Dialcaliper

Active member
Messages
756
Likes
1,262
Location
San Francisco Bay Area
Titanium rub blocks are okay because Ti is still pretty soft and won’t damage the track. Tracks usually ban using steel or stainless, because it can chunk and scrape the tarmac. Aluminum is also okay, but won’t last as long (and won’t spark). Just don’t go lightweight and make them out of magnesium…🔥

You might want to shift the blocks out towards the edges a bit. The main place they usually make contact is on the inside when cutting onto kerbs, not just on the outside corner (that’s usually when they hit the outside as well)


OP
Fusion Works

Fusion Works

Active member
Messages
674
Likes
888
Location
Huntsville, AL, USA
Thread Starter #125
I laid them on the splitter and was trying to decide where I wanted to put them. Was debating how far out on the edges to put them? In line with the wheels but not on the "wing tip" side of the splitter or more towards the front edge corners. Not totally sure where they should live. May have to install them and monitor their usage and see if they should move.

I have a huge hunk of magnesium. HAHA. Lets get to cutting.


OP
Fusion Works

Fusion Works

Active member
Messages
674
Likes
888
Location
Huntsville, AL, USA
Thread Starter #126
Directly from the Horse's Mouth:
As for the mounting pad, This is normal and has been done on all of our wheels. It increases clamping force / stress of the wheel. By doing this, the edge of the mounting pad touches the hub perfectly. When we apply the force by securing the wheel via the fasteners to the vehicle, the center area will go down and slightly deform (because it doesn't touch the other surface), thus creating additional force as it pushes back in the area where it touches the mounting pad. Hope this helps!


OP
Fusion Works

Fusion Works

Active member
Messages
674
Likes
888
Location
Huntsville, AL, USA
Thread Starter #127
Got the first round of Splitter brackets from Send Cut Send. They are really nice. Someone didn't size the pin holes the right size. HAHA. Good thing I went smaller than the pins I am using. I am going to right size them for this set and I already made the changes in my drawing so I don't have to fix them next time.
71392629994__BEA99416-1C7F-45FD-B662-D607D2DBE677.JPEG 71392632770__A010BEEF-4CE9-40A8-A2CA-33540BE4AB55.JPEG

Also skeletonized my wing mounting plates/end plates/ Originally I built them out of .187 aluminum plate. They were obviously HEAVY. So I grabbed me new face mill and thinned them down. The finish it leaves is phenomenal. The end mill section at the bottom looks like ass comparatively. I cut the weight in half. That is fantastic. All my WANG parts are off to powder coat tomorrow. Semi Gloss black will make them look so much better on the car. 71382781136__18EB00C0-5159-4099-B197-9D501DDBD772.JPEG
71382782242__1312B62F-331E-45A6-9D3B-064FF21DA737.JPEG
Also a new set of Maxxis VR1s in 215/40-17 showed up to go with the Hypergrams. Those should be some good track tires for now.


Attachments

OP
Fusion Works

Fusion Works

Active member
Messages
674
Likes
888
Location
Huntsville, AL, USA
Thread Starter #130
Got to working on more splitter business today.
Set the blade in place and mocked up the mounts. Then got the mounts attached and hung it on the chassis. She is low. Gonna have to trim my mounts a little to get the upper portion to clear the charge pipes better.
71397898421__5B3771A6-81E7-40F6-8F27-9AB96BF76072.JPEG
71397899429__3EDEBDC4-8328-4556-997E-BF90BF173E73.JPEG 71401143923__3D8C09F0-6FB6-4CA3-BC25-52496B62CE23.JPEG


Attachments

dhminer

2000 Post Club
Messages
2,206
Likes
2,644
Location
Burlington, NC, USA
Got to working on more splitter business today.
Set the blade in place and mocked up the mounts. Then got the mounts attached and hung it on the chassis. She is low. Gonna have to trim my mounts a little to get the upper portion to clear the charge pipes better.
View attachment 57434
View attachment 57435 View attachment 57437
Looking good! Is the splitter wood? Also what will you use to fill the gap between splitter and bumper cover?


OP
Fusion Works

Fusion Works

Active member
Messages
674
Likes
888
Location
Huntsville, AL, USA
Thread Starter #132
Yes, just some marine grade plywood from Lowes Motorsports division. Its light, cheap, and when I destroy it, I can build another one. In my opinion, for amateurs a better option than carbon.

I will use some ABS plastic like I use for all of my air dams. The filler material will get done over the weekend.

Need to get the rocker covers glued back on. The wheels and new tires should be mounted and the parting tool should be here for the wheel spacers. I ordered those hubcentric rings that Dialcaliper listed. Will post pics of the quality or not when they come in.

Still have to change the rear springs and decide if I am gonna change front springs or add spring rubbers. Doing a 450 in the rear and need 350ish worth of rate up front.


Messages
369
Likes
417
Location
Riverside,CA
Are there any actually 'aero functional' rocker covers out there to replace our cosmetic factory ones??
If you wanted a very simple aero functional setup. You could just throw a flat sheet of aluminum or abs to avoid air going where you don't want it to and that will be pretty aero efficient.


OP
Fusion Works

Fusion Works

Active member
Messages
674
Likes
888
Location
Huntsville, AL, USA
Thread Starter #135
I haven't seen anything that really does provide an aero benefit. WST is right, just making an aluminum slab side type arrangement would be beneficial from a control stand point. They would need to be closer the ground.

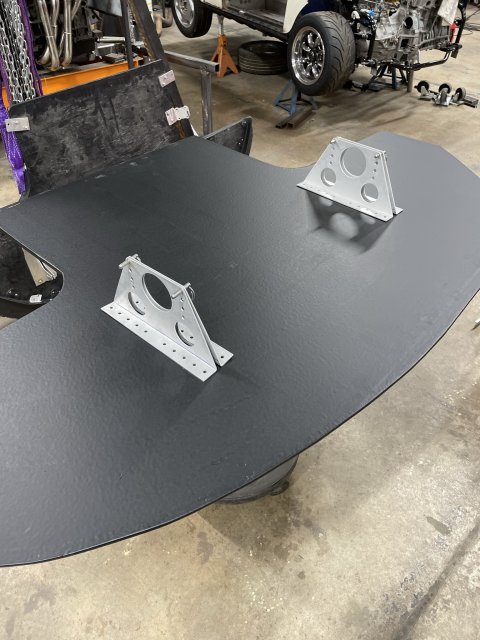
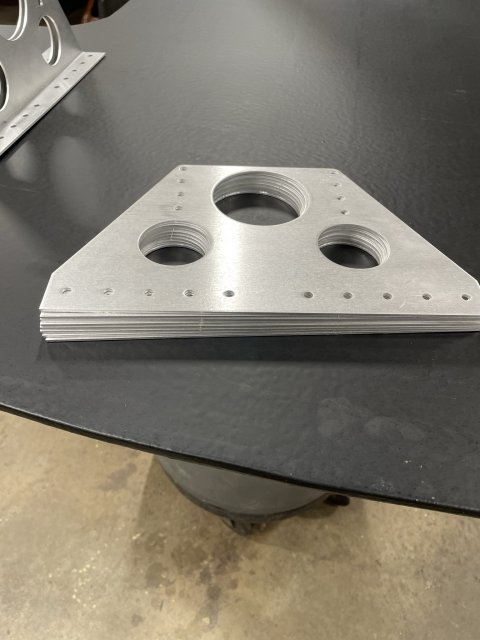
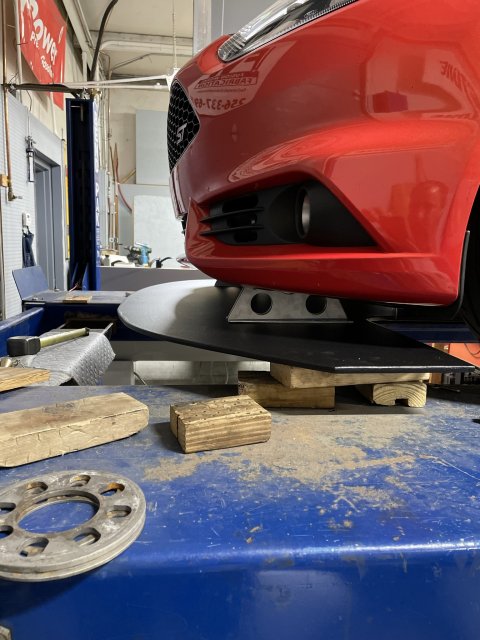
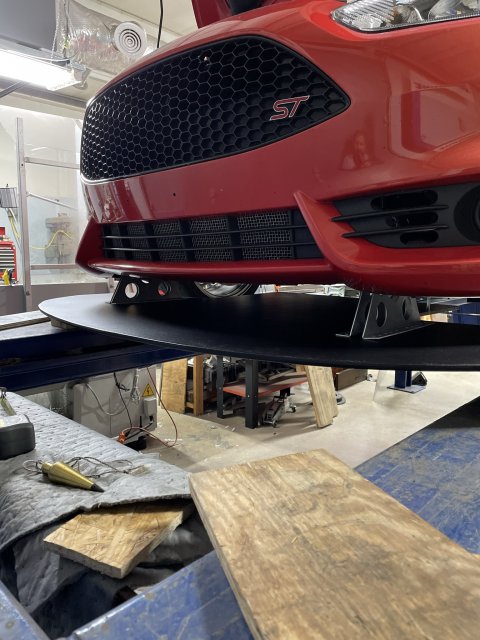
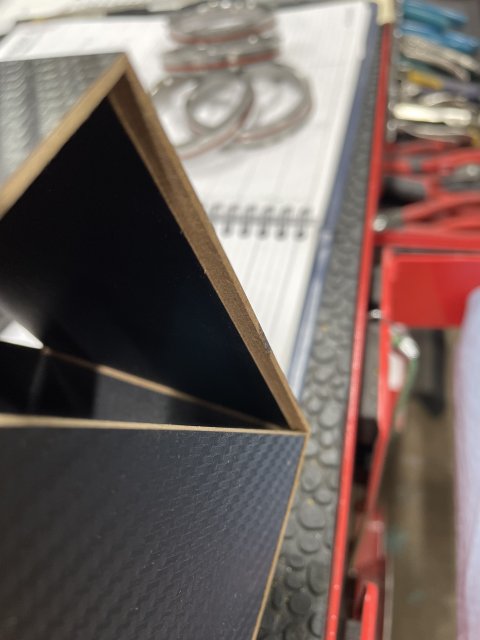
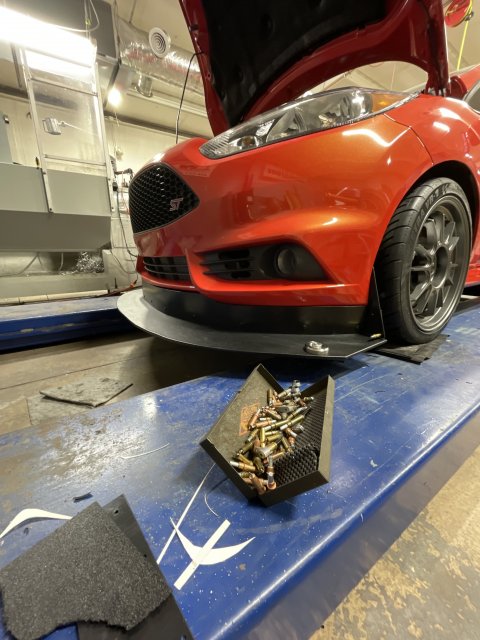
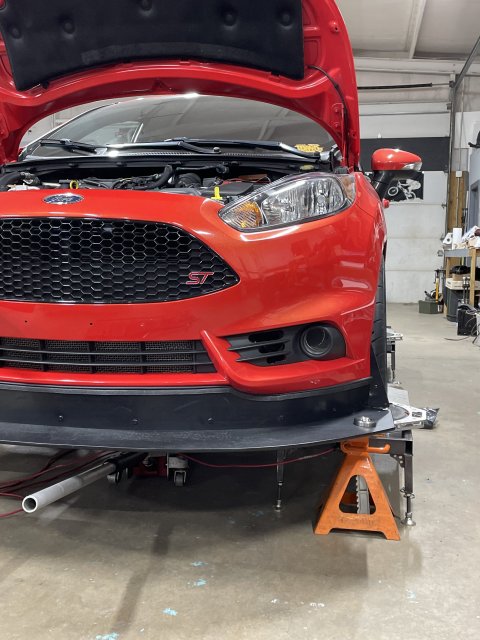
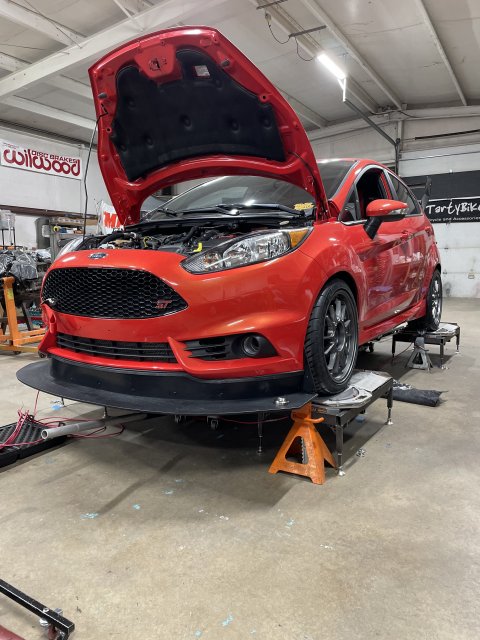
Good progress this weekend. Almost finished the splitter and trimming it out.
71409926425__5E492154-C3D3-4790-BA7F-CD1882A463B8.JPEG 71415942439__B39A4EEE-8EB5-4276-8C02-7E677C426278.JPEG
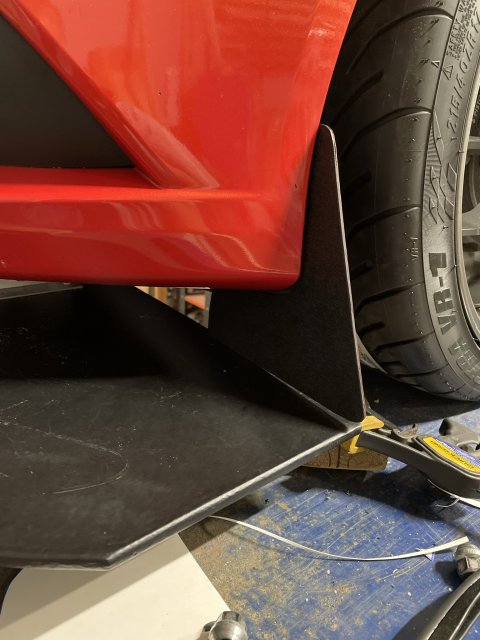
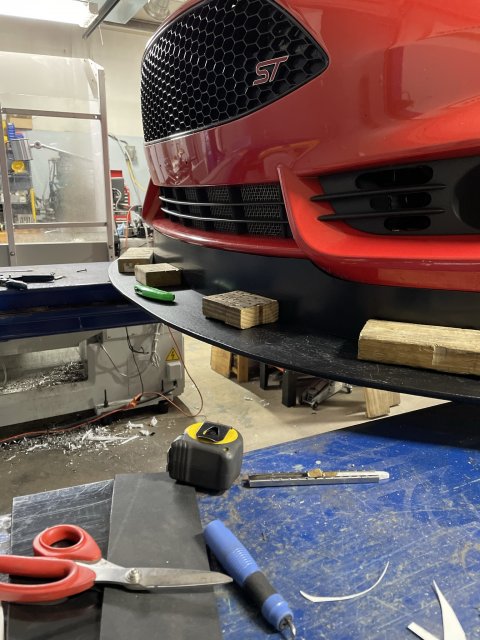
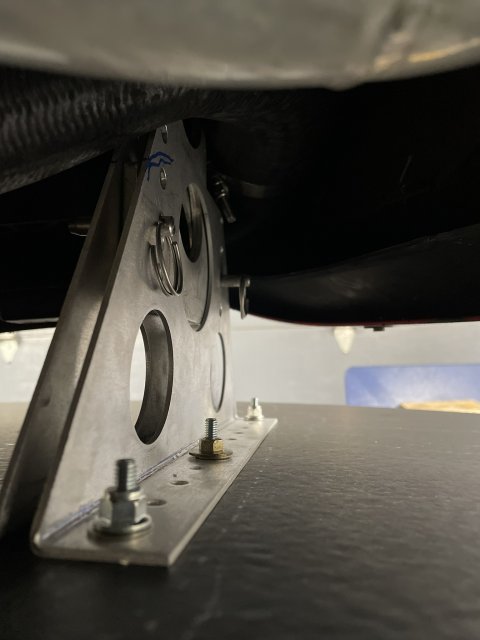
New splitter is 4in longer and a bit wider than my "street"/Grid Life splitter, however it only weighs 1lb more. 23lbs. Not unhappy with that. Its got a slight angle to it when installed. My rear mounting points can tip the whole thing about 2deg. I am going to bend the remainder of my splitter brackets with a 1/deg angle and the new design will also have that angle.
71406804151__6F36D054-F1E2-4128-A323-CA0C328C7229.JPEG 71406805584__D5FDFF86-8F91-4035-BC0C-76A1470598B0.JPEG
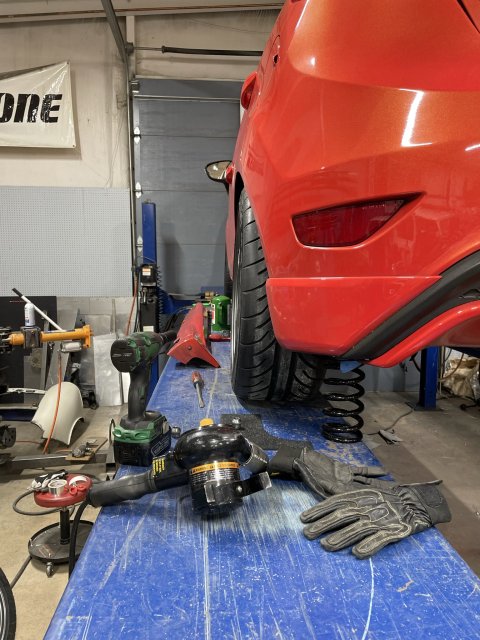
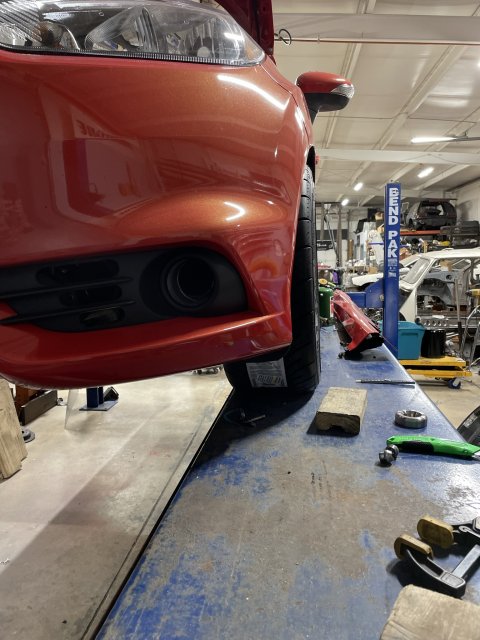
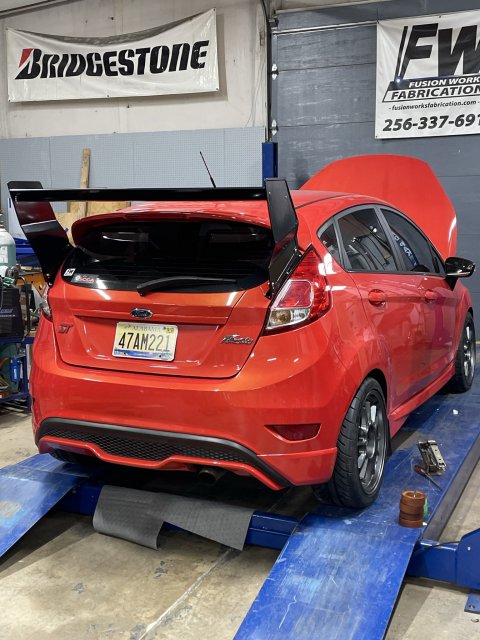
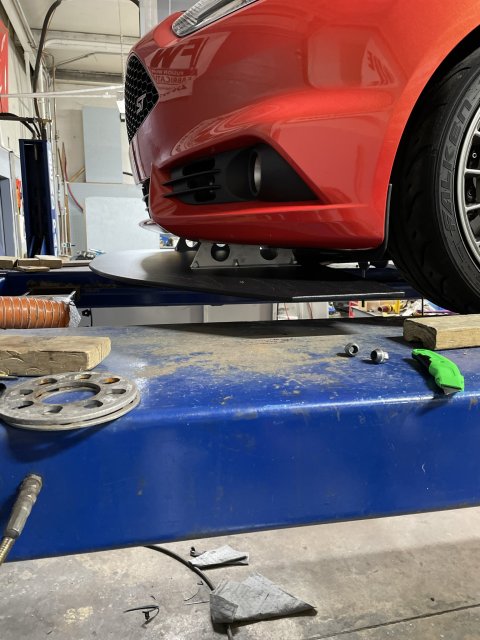
Mounted the new 17x8in Hypergrams with a Maxxis VR1 215/40-17. They look meaty as hell. Car looks good.

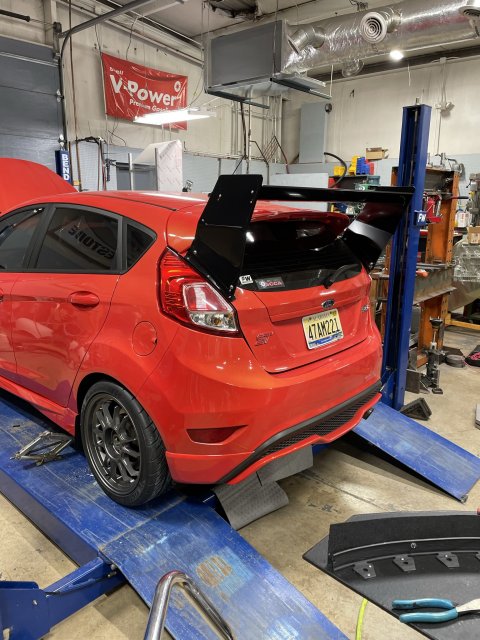
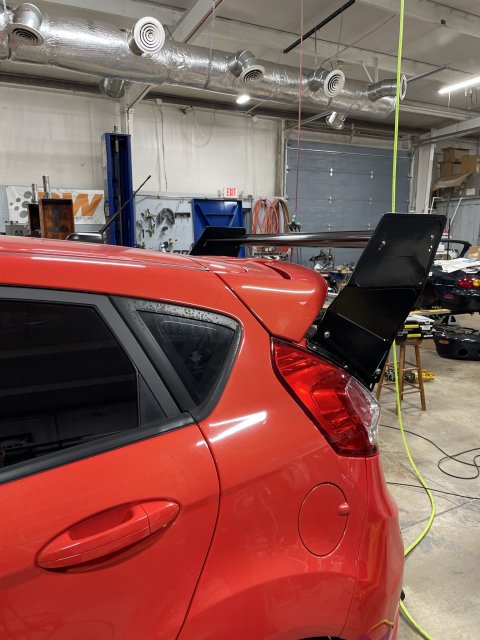
Picked up the Big Wang parts from the powder coater. They look phenomenol. The black really looks sharp on the car. Started off at a 5deg angle on the Wang, no wicker. I have .250, .500, and .750 wicker so I can basically leave the wing trimmed out and just add wicker to get more effect.
71427546806__3B6B4243-8C55-4350-9DC7-548756414D15.JPEG 71427548057__7DBE63C2-C9DF-40F6-8729-2774EDD61E88.JPEG 71427556689__72D28FF1-BD46-43BB-B62C-055994A1E037.JPEG

I re-attached the rocker covers today. Installed all new plastic clips for the body side, new foam tape, and the 3M body adhesive. They seem strong now, time will tell how well they remain. Should be good though. Only one glue joint seem really bonded properly on the original setup.

I tested and swapped my rear springs and am gonna up my front springs this week. Should also have my other spring rubbers to tweak the front springs. I am going to a 350/550 setup, but will probably have the three or four rubbers in the front springs so that rate will be closer to 450 when its said and done. I am trying to get a spring setup that is "streetable" but track able with the addition of some spring rubbers. Rear springs are easy to swap out, so those could be swapped before and after an event.

Hopefully I can get the shifter modified before I go, but may not get to it. Goal for the week is to actually sleep and peacefully load the car in the trailer so I can leave on time and not be rushed, unlike every other time I go to the track.


OP
Fusion Works

Fusion Works

Active member
Messages
674
Likes
888
Location
Huntsville, AL, USA
Thread Starter #136
I decided to man up an slap the 450s on the front. Yeehaw.
The centering rings showed up today. They are very nicely made. Was well worth the money. Damn the box was super nice. 71433709540__455F8B68-9CCE-49B5-81A7-67D955F6C14A.jpeg 71433712448__CE150AE6-6360-4C35-969F-60B4DB50012B.jpeg 71433699237__2E6364C5-90B5-4F24-8EC9-F3D22302A8BC.jpeg Have to finish the two front wheel spacers tomorrow and the spats for the front splitter and she is ready for the setup and alignment. 71436029896__A6B11BA2-6A06-4122-865C-EE07DFBF714E.jpeg


dhminer

2000 Post Club
Messages
2,206
Likes
2,644
Location
Burlington, NC, USA
I decided to man up an slap the 450s on the front. Yeehaw.
The centering rings showed up today. They are very nicely made. Was well worth the money. Damn the box was super nice. View attachment 57493 View attachment 57494 View attachment 57495 Have to finish the two front wheel spacers tomorrow and the spats for the front splitter and she is ready for the setup and alignment. View attachment 57496
My centering rings showed up yesterday too. They appear to be well made


OP
Fusion Works

Fusion Works

Active member
Messages
674
Likes
888
Location
Huntsville, AL, USA
Thread Starter #138
The box is super nice, I couldn't bring myself to throw it away. I am pretty sure these are made in Asia somewhere, material alone, if truely 7075, is 2-3$ per piece and they sell them for roughly 7$ shipped from CA? I have a hard time believing any American shop is making these on spare machine time. The o-rings have to be $.75-1.00 ea, add in anodizing and laser etching, maybe another $2? While not super complicated, the slot they machined is a second op on a mill or a REALLY expensive CNC machine with live tooling.


OP
Fusion Works

Fusion Works

Active member
Messages
674
Likes
888
Location
Huntsville, AL, USA
Thread Starter #140
So the wickers are attached to the single screw and the original front tire spats. I riveted them to the remains of the rubber pieces. They are not very stiff. i am not thrilled with them.
On the way home tonight I was thinking about a way to attach them to a bracket on the splitter without requing more than a pin to remove the splitter. 71444476262__12633459-7F8F-431A-AB7B-0EFBAC927831.jpeg 71444474874__D204BB5B-C980-4D7E-9E74-DFA7E7161A5B.jpeg
Preliminary scale numbers. I am fairly happy with it. May lower the rear a little or not. Final tweaking and then some some driving tomorrow.
71444437101__36766336-F9FA-410F-9C2D-BE2747B9E030.jpeg


Top