• Sign Up! To view all forums and unlock additional cool features

    Welcome to the #1 Fiesta ST Forum and Fiesta ST community dedicated to Fiesta ST owners and enthusiasts. Register for an account, it's free and it's easy, so don't hesitate to join the Fiesta ST Forum today!


What did you do to your Fiesta ST today ?

Intuit

3000 Post Club
Messages
3,659
Likes
2,262
Location
South West Ohio
I would say that the name was based on that similarity but then it occurs to me that the developer probably can't use the Ford name without threat of paying some royalty or other. So they just cut a letter off.


Messages
65
Likes
85
Location
Rural
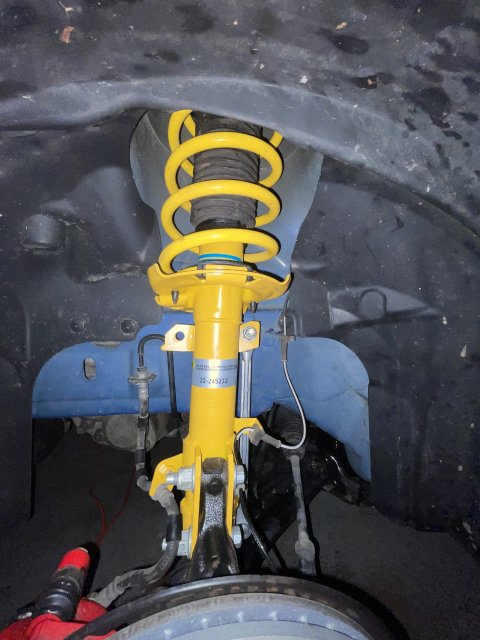
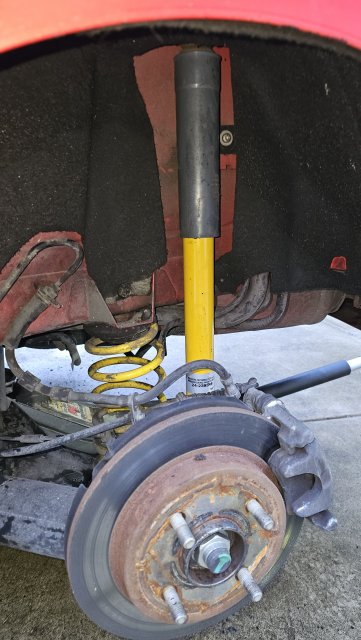
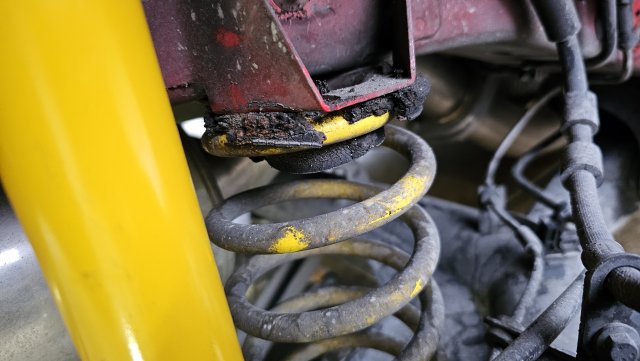
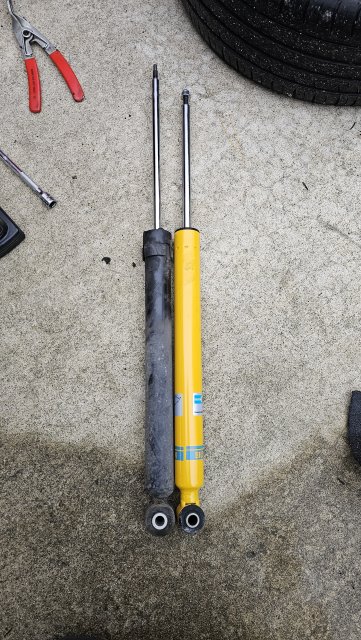
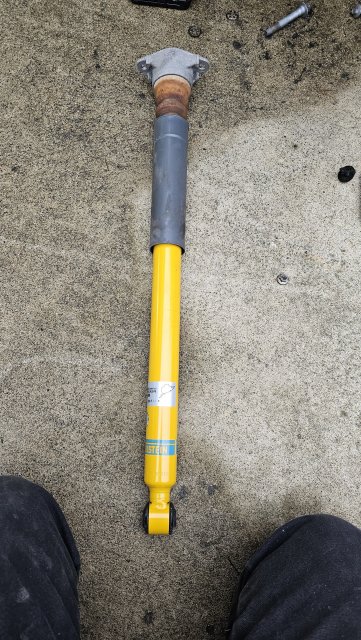
Suspension Saturday! B8s, fresh endlinks, and KYB mounts all around.

IMG_9349.jpeg

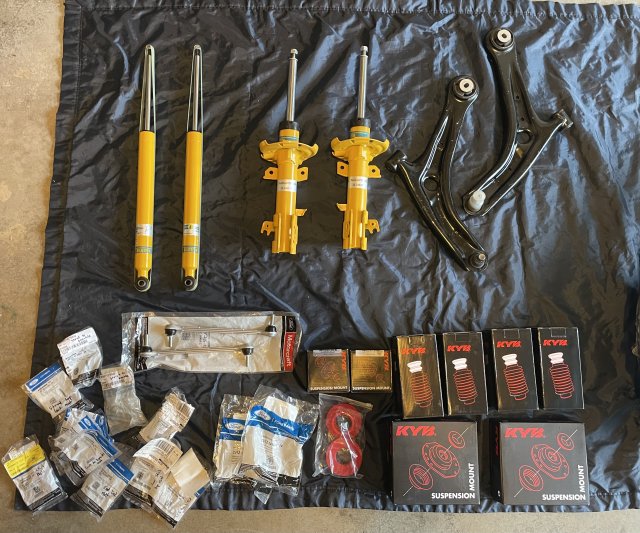
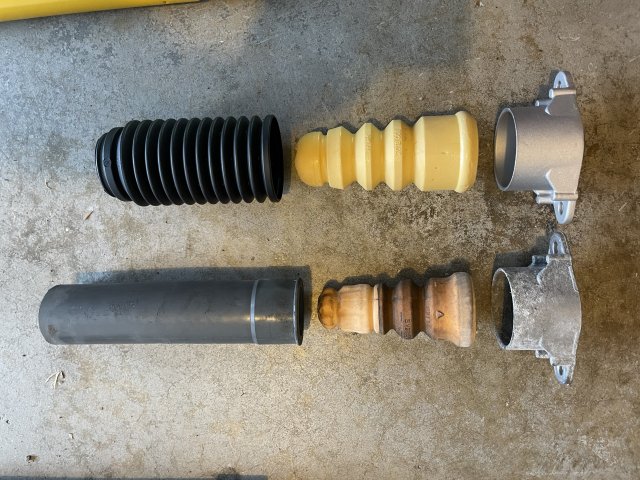
Rock Auto lists the bump stops and shock sleeves as compatible with the FiST, but they aren't even close. The rear bumps don't even fit into KYB's own mounts! Those will be returned, and I just reused the old ones.

IMG_9351.jpeg

I bit off a bit more than I could chew thinking I could handle swapping the LCAs. Those pinch bolts were not budging, and I don't have an impact gun. Tasca's part diagram listing W703432-S900 as the bolt for the LCA front was also wrong. I couldn't fit my spring compressor onto the rear springs on jack stands, so the Whoosh pads will have to wait as well. I don't like the idea of standing on the rear arm to get the spring off by myself. The stock pads on there now aren't completely toast yet, at least.

IMG_9354.jpeg
IMG_9353.jpeg
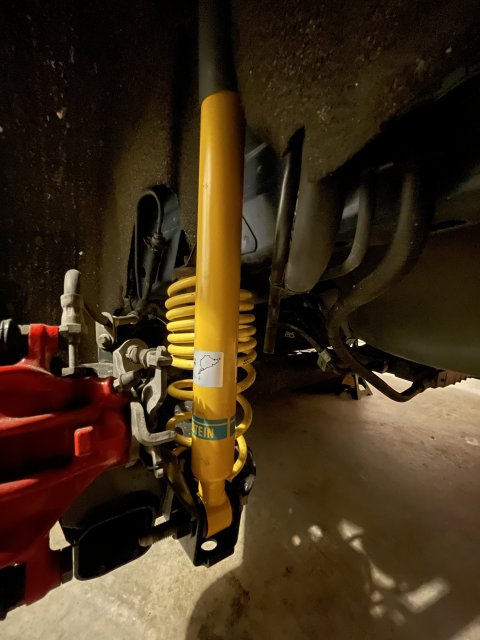
I must not have gotten the top nut on the left rear shock mount all the way seated, because it was clunking on the test drive before I went to bed. That'll get resolved today.


Last edited:
Messages
122
Likes
55
Location
Reynoldsburg
Did you reuse the original top nut for the shocks or did you use the nut that came with the new shocks? Supposedly the new nut is larger and sometimes knocks against the edges of the hole.


Intuit

3000 Post Club
Messages
3,659
Likes
2,262
Location
South West Ohio
I must not have gotten the bolt on the left rear shock mount all the way seated, because it was clunking on the test drive before I went to bed. That'll get resolved today.
Doesn't look like you're in salt country, but any rust points for the upper rear suspension mount points?
On a prior vehicle, (salt) water would sit on top of the mount and rust the body.
To mitigate that problem I put gasket maker on top of the mount.

1710084832235.png


Messages
65
Likes
85
Location
Rural
Did you reuse the original top nut for the shocks or did you use the nut that came with the new shocks? Supposedly the new nut is larger and sometimes knocks against the edges of the hole.
I actually bought a 4-pack of Ford W520102-S439 to avoid using the included Bilstein nylock nut that I read on here somewhere can cause a squeak. I nevertheless have a new squeak coming from back there now, so I guess I'll pull them again and slather them in silicone grease to see if that helps. Not right this minute though, I've had enough crawling around under my car for one weekend.

Doesn't look like you're in salt country, but any rust points for the upper rear suspension mount points?
On a prior vehicle, (salt) water would sit on top of the mount and rust the body.
To mitigate that problem I put gasket maker on top of the mount.
I actually do live in salt country (Maryland), but the car is exclusively garage-kept and I peeked up at where the mounts sit in the wheel well and it was clean and dry. Despite the winters here, my FiST is remarkably rust-free save for some parts of the factory exhaust and the patina on the axle-shafts in the front (totally normal, right?).


SteveS

1000 Post Club
Messages
1,300
Likes
1,578
Location
Osage Beach, MO, USA
Took advantage of the later daylight and the warm temperature to swap out the snow tires for the Indy 500s. Found that the inner shoulder of only the right front snow tire is excessively worn. I'll be calling to schedule an alignment today I guess. First one since the car was new in 2019!
For some reason I have a piece of paper I must have written down settings for the Fiesta ST. It says -1.18 degrees camber, 4.08 degrees caster .20 degrees toe, and rear camber at -.64 degrees. Is that right?


Messages
65
Likes
85
Location
Rural
Took advantage of the later daylight and the warm temperature to swap out the snow tires for the Indy 500s. Found that the inner shoulder of only the right front snow tire is excessively worn. I'll be calling to schedule an alignment today I guess. First one since the car was new in 2019!
For some reason I have a piece of paper I must have written down settings for the Fiesta ST. It says -1.18 degrees camber, 4.08 degrees caster .20 degrees toe, and rear camber at -.64 degrees. Is that right?
alignmentSpecs.png


FiestaSTdude

1000 Post Club
Premium Account
Messages
1,421
Likes
1,722
Location
Cary, NC
I actually bought a 4-pack of Ford W520102-S439 to avoid using the included Bilstein nylock nut that I read on here somewhere can cause a squeak. I nevertheless have a new squeak coming from back there now, so I guess I'll pull them again and slather them in silicone grease to see if that helps. Not right this minute though, I've had enough crawling around under my car for one weekend.


I actually do live in salt country (Maryland), but the car is exclusively garage-kept and I peeked up at where the mounts sit in the wheel well and it was clean and dry. Despite the winters here, my FiST is remarkably rust-free save for some parts of the factory exhaust and the patina on the axle-shafts in the front (totally normal, right?).
Yes, it’s normal as far as I’m concerned. I don’t live in salt country and mine have a patina as well


Messages
65
Likes
85
Location
Rural
I finally finished the wiring for my new Euro projector headlights (TYC, because DEPO was listed as discontinued when I ordered, and now they're back in stock...). I found some cheap Philips Ultinon H7s and H1s to install, only $57 for all four. These TYCs had very standard looking bulb sockets that did not require any special additional clips or adapters to install the LEDs. Just slip off the collar, snap them into the housing, and slide the bulb back in. The H7s needed a deep dust cap to fit the integrated fan. I also got Osram Diadem Chome PY21W bulbs to blend into the chrome of the housing. The fit leaves quite a gap between the lamp assembly and the bumper cover. I triple checked they were seated and all the mounting holes lines up square and true. Hmm.
newEuros.jpg
I also upgraded the fogs to Diode Dynamics Elite LEDs (note the accent amber). I wanted to be able to switch back to USDM stock without repinning the car's wiring, so I built some wiring harness adapters out of kits I found for only a couple bucks per connector on AliExpress. I ran a double 18 AWG wire to each side off a fuse tap at F26 and used the other lead to power the accent light of the fogs. Here's the crude schematic I used to make my adapter harnesses:
FiSTeuroHarness.png
I'm so grateful for the copius notes and info this forum has gathered together. I would not have attempted this project without the info this community has posted about these.


Intuit

3000 Post Club
Messages
3,659
Likes
2,262
Location
South West Ohio
1710266601193.png

Those notches should be tucked underneath the bumper.
Regarding the plastic retainer below, slide it all the way back and set the light on it.
Then you should be able to lock it down while tucking those latches underneath the bumper cover.


Messages
65
Likes
85
Location
Rural
View attachment 60625

Those notches should be tucked underneath the bumper.
Regarding the plastic retainer below, slide it all the way back and set the light on it.
Then you should be able to lock it down while tucking those latches underneath the bumper cover.
They’re tucked behind and seated in that sliding white clip in that photo, but the fit is so short you can see the stuff you’re describing through the gap. I took a longer look at them today and found there was enough give in the plastic tabs up by the A-pillar to afford me some forward movement that I could then lock down with the torx screws. I also found the bumper cover could afford to be snugged up closer to the radiator shroud, so I jerry-rigged some zip ties into the pretty useless trim tab holes to close the gap a little from the other direction.
IMG_9361.jpeg
Still a slight gap, but much better and about even with the panel gaps nearby. It’s really the tabs up by the A-pillar limiting how far forward the housing can be seated, and I considered trimming the plastic a bit to give me more maneuverability, but I settled on just muscling them forward as far as they’d flex and slide and then securing them like that.


akiraproject24

1000 Post Club
U.S. Marine Veteran
Messages
1,056
Likes
1,233
Location
Pennsylvania
It's possible someone may have backed into the front bumper in a parking space. Doesn't take much to tweak the alignments.
That plastic piece behind the bumper may not be sitting right or be broken. I have read other members speak of it before.


Top